Jeep Wrangler JK: Why is My Battery Not Charging?
A frequent dead battery is a worrisome problem that can be extremely inconvenient. A properly functioning battery and charging system are crucial to the start-up and subsequent operation of any vehicle. By ensuring your battery is charging as it should, you can guarantee your Wrangler will be ready to go each time you turn the key.
This article applies to the Jeep Wrangler JK (2007-present).
A battery that is not properly charging will inevitably lead to a dead battery and a car that will not start. The battery stores a charge that is used to initially crank the engine and start the vehicle. Once the car is running, the alternator begins to produce power to not only charge the battery, but to also allow for operation of all the vehicle's electrical accessories. The alternator will maintain the charge in the battery until the car is shut off, then the process will begin again the next time the car is started. If you are continuously experiencing a dead or low battery, chances are something is not quite right in the vehicle's charging system or battery itself. This article will outline the steps Wrangler owners should take to determine why their battery may not be charging.

Materials Needed
- Digital multi-meter or battery tester
- Battery charger
- Metric wrench and socket set
- 3/8" drive ratchet and extensions
- Replacement battery (optional)
Step 1 – Check the belt
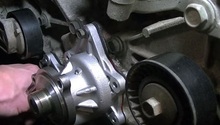
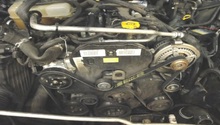
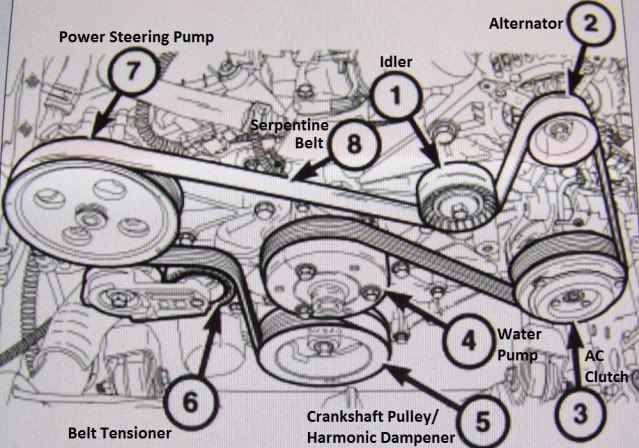
Whenever a battery charging issue arises, the first and simplest step is to check the tension of the serpentine belt. The serpentine belt drives all engine accessories including the alternator. While modern serpentine belts rarely break, they can begin to slip for a variety of reasons and prevent the belt-driven accessories from operating as they should. A slipping belt may not spin the alternator fast enough to provide the necessary voltage to keep the battery fully charged. Owners who regularly drive their JKs off-road are more susceptible to experiencing belt damage from embedded debris or other belt contamination. Inspect the condition of the belt, pulleys and tensioner and replace any worn components to ensure the alternator and all other belt-driven accessories are operating as they should.
Pro Tip
Belt noises are an indication that the belt may have lost proper tension or has debris embedded in it. Do not ignore a belt noise as it can quickly overheat and cause damage to the belt-driven accessories.
If the belt, pulleys and tensioner are in good condition, proceed with checking the battery.
Step 2 – Check the battery
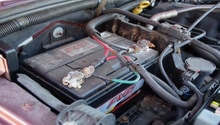
Many battery charging issues are often caused by a bad or failing battery. Batteries naturally age and have a typical lifespan of between 2-5 years. A battery that sees harsh weather, heavy jarring or vibrations (as experienced when off-roading), or long periods without fully charging are more susceptible to failure than a battery that is regularly charged and lives an easy life in a mild environment. The most common cause of battery failure is sulfation build-up; however, batteries can also experience a shorted cell, physical damage/loss of electrolyte, or a high rate of discharge. In any case, it is imperative that the battery be tested to ensure it is not the culprit behind your charging issues.
With the engine off, connect a digital multi-meter or battery tester to the battery terminals to measure its available voltage. A fully charged battery will have a voltage reading of 12.6 volts or higher. If the battery is low, attempt to charge it to a full state before load-testing it. Load-testing a battery with a digital multi-meter or battery tester is a good way to monitor how the battery performs under stress and can quickly indicate if it needs to be replaced.
Featured Video: How to Test a Vehicle's Battery
Pro Tip
Be sure to inspect all battery cables and ground straps. Loose, broken, or corroded cables can prevent the battery from charging.
Step 3 – Test the charging system
After inspecting the battery, the charging system can be tested. With a digital multi-meter or battery tester connected to the battery terminals, proceed with starting the car. Measuring voltage at the battery will give an indication if the voltage output of the alternator is properly charging the battery. A properly functioning alternator should produce a voltage reading of approximately 14.0 volts. A significantly lower reading of 12.5 volts or less indicates that the alternator is not sufficiently charging the battery while driving. If the car is driven with a low alternator output, the battery's state of charge will slowly diminish and eventually not have enough of a charge to start the car.
Various components inside of the alternator can wear and cause charging issues; however, the voltage regulator that is typically located on the backside of many vehicle's alternators is instead controlled by the Powertrain Control Module (PCM) on the JK Wrangler. If your alternator is producing a low voltage output, local auto parts stores will often bench test alternators for free and confirm if the alternator is in need of replacing. If the alternator tests good, then the problem may lie in the PCM.

Step 4 – Test for parasitic draw
In some cases, the charging system is fully functional, but a parasitic draw is causing the battery to lose its charge while the vehicle is parked. Inspect the vehicle for any interior lights that may be staying on and using battery voltage when the car is off. In the case of the JK, many aftermarket components such as a winch, CB radio, or light bar have the potential to eat away at battery voltage as well. If the source that is draining the battery cannot be easily found, the use of a digital multimeter can be hooked in-line with the battery to measure the current draw when the car is off.
- Disconnect the negative ( - ) battery cable.
- Set your digital multi-meter to measure amperage. It is important that you start with the highest amperage setting available and work your way down to lower settings to prevent damage to your meter.
- Connect one lead of the multi-meter to the negative battery cable and the other lead to the negative battery post. The draw on the battery will now be displayed on your meter. (A smaller draw may require you to switch to a lower amp reading on your multi-meter).
- You can begin removing fuses from the fuse box. Remove one fuse at a time and monitor if there are any changes to the amperage reading on the multi-meter. Once you have found the circuit associated with the parasitic draw, you can inspect and repair the component responsible for the excessive draw.
Featured Video: How to Perform a Parasitic Draw Test
Pro Tip
The JK should normally draw around 50 milli-amps (mAh) when parked.
Related Discussions
- Testing for parasitic draw on battery - JK-Forum.com
- Stock battery life? - JK-Forum.com
- Amperage on stock alternator? - JK-Forum.com

