Jeep Wrangler JK: Suspension Performance Diagnostic Guide
Don't pay for quick fixes that don't solve your problem. Learn how to properly diagnose many common suspension problems before taking your JK to the shop.
This article applies to the Jeep Wrangler JK (2007-Present).
Suspension problems are some of the most difficult to pinpoint because they can appear as many different issues and emanate from virtually anywhere under your hood or under your Jeep itself. From an annoying squeaking sound to a vibration or the infamous death wobble, the suspension in your Jeep can be relatively easy to fix to a real pain that may require some professional help. The first step is to try and identify the cause of the problem so you know where to start or to help the professional get to the problem quickly and as efficiently as possible. Here are some of the more common symptoms of suspension issues and what you can do to fix them. Working these issues yourself will save you a lot of your hard earned cash, but if you are at all unsure of how to fix them, at least you will know what the problem is and how to guide your mechanic to fix it.

Materials Needed
- Dial indicator or tape measure
- Pry bar
- Breaker bar
- Vice grips, pliers
- 3/4" drive ratchet and socket set
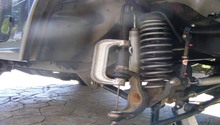
Step 1 – Check and measure ball joints
If you have a vibration at higher speeds, it could mean that your ball joints are worn.
- Lift the front end, one tire at a time, and place a jack stand under the axle near the floor jack.
- Lower the jack a little to put some pressure and weight onto the jack stand.
- You will need a second person as well as a pry bar to pry up and down under the tire while you watch the play in the lower ball joint.
- Have your helper also grab the top and bottom of the tire and wiggle it in and out while you watch the side to side play in the upper ball joint.
- The lower ball joint up and down play should not exceed 0.050".
- The upper ball joint side to side play should not exceed 0.060".
If the lowers are good and the uppers are bad, you can get by with just replacing the upper ball joints. If the lower ball joints are bad, you should replace both sets, and you should replace on both sides even if only one side is showing out of range. Replacement ball joints costs can vary a great deal and there are many brands available to choose from; however, Synergy and Dynatrac are very popular choices among JK owners. They will set you back a little over $100 for a kit and both have very good warranties. Professional installation will likely charge upwards of $400 to do this work that should take a complete novice about three to four hours tops.
Pro Tip
Many professionals will not measure the play in a ball joint and suggest you replace them in hopes that this solves your vibration problem. Make sure to have them measured because they may not actually be the cause of your suspension issues.
If your ball joints are good, make sure they are properly lubed and check on your CV boots next.
(Related Article: How to Replace Ball Joints - JK-Forum.com)
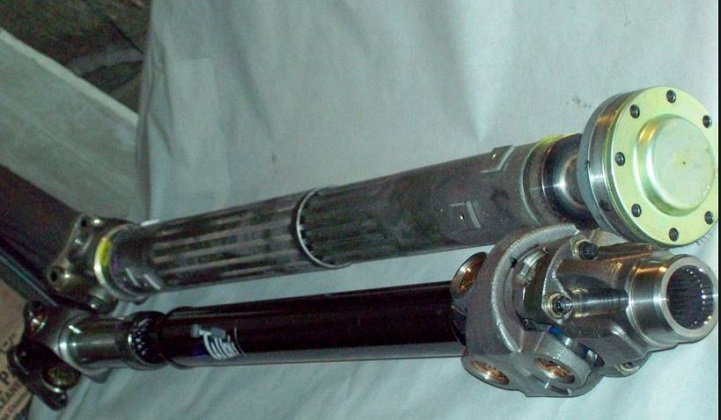
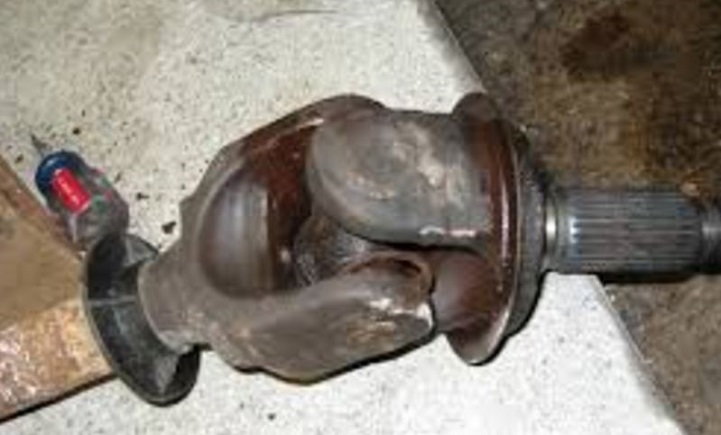
Step 2 – Check CV boots for wear or damage
A bad CV boot can't be repaired in the JK, so the drive shaft will need to be replaced.
Symptoms of a bad CV boot involves more of a noise and a clicking sound rather than a bad vibration. If the boot is damaged, the drive shaft will need to be replaced. This isn't a difficult job and can be done in just a couple of hours in your own garage. This will save a lot of money over having a professional do it for you. It does take significant hammering with a large mallet to free up the shaft from the flanges, but no special tools are required, and very few bolts as well as no extra parts need to be removed to do the job. If you get an aftermarket shaft, be sure to get one that has grease points built in to it; this will save you from doing another replacement in the future.
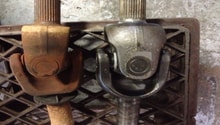
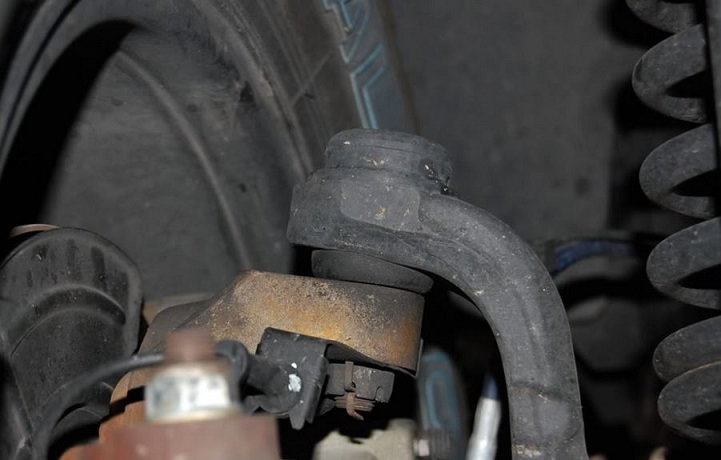
If the noise isn't a clicking so much as a popping noise, it could be the U-joints at the sway bar connection.
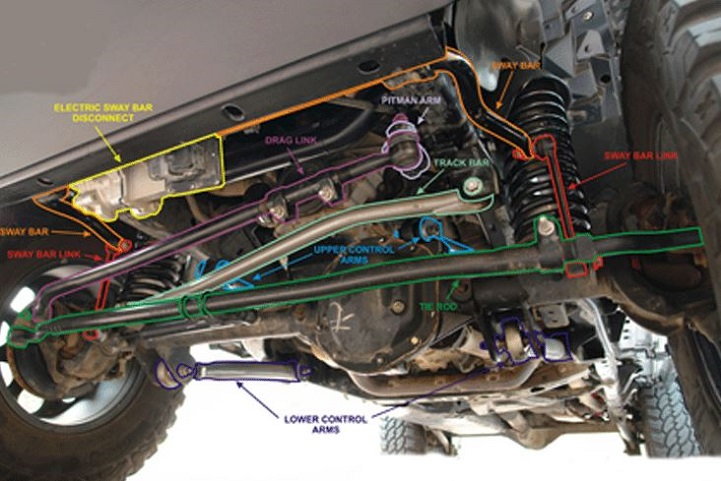
Step 3 – Disconnect sway bar
If the popping noise stops with the sway bar disconnected, then the U-joints should be replaced.
Some JK owners will disconnected the sway bar and leave it at that to stop the popping noise. The argument is that they never drive at highway speeds or take it off-road. While this may put an end to your symptoms, it is not exactly the safest practice and doesn't really solve the inherent problem. The problem with replacing the U-joints on your JK Wrangler is that this isn't that easy of a job. You will need a helper and a little mechanical know-how to get the job done.
- Raise the Jeep and place on jack stands.
- Remove the wheel and pull off the hub nut. Your helper will have to apply the brakes to break the hub nut free.
- Remove the calipers, rotors and the hub sensor.
- Remove the hub from the knuckle, which is a real bear, and then the axle shaft will pull right out.
- With the shaft out, the hub should come off of the end; however, you may need some spray lubricant to facilitate this.
- When the hub comes off the shaft, the U-joints will be accessible and can be replaced.
If your vibration still persists, ensure proper tire inflation and look for uneven wear from a bad alignment.
Step 4 – Check tires' pressure and alignment
Improper wear on your tires can cause excessive noise and vibration, which is usually caused by an alignment issue.
An alignment would normally be one of the first things to look at, but in many cases, the JK being slightly out of alignment may cause the mechanic to immediately point to the ball joints or the U-joints. Since these are very costly to have repaired, we looked at those components first to ensure that the proper remedy is taken without taking you to the bank. Be sure to learn what the proper settings are for the toe, caster and camber for your alignment. Make sure your tires are properly inflated, rotated and balanced. Again, this would normally be the easiest thing to start off-checking, but to be sure, arm yourself with the proper working knowledge of your joints so they don't get arbitrarily replaced.
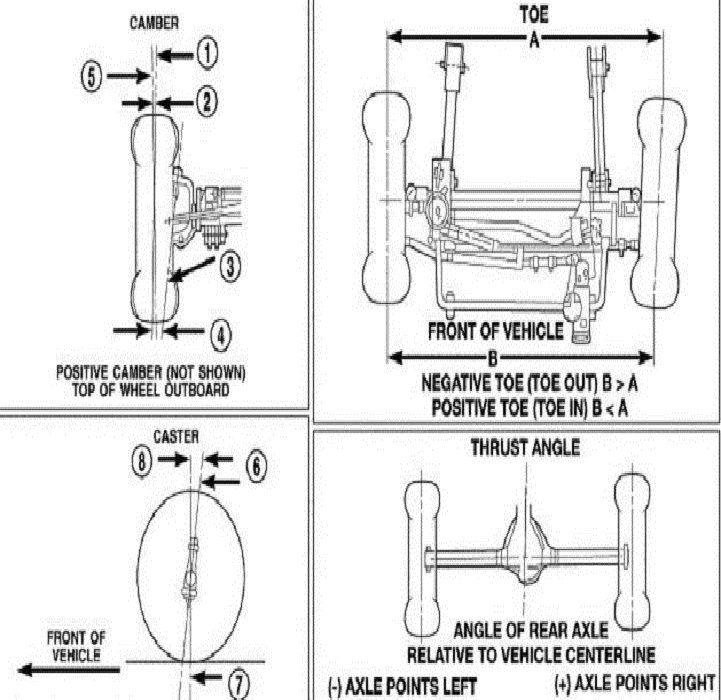
Figure 4. The adjusting mechanisms of an alignment. 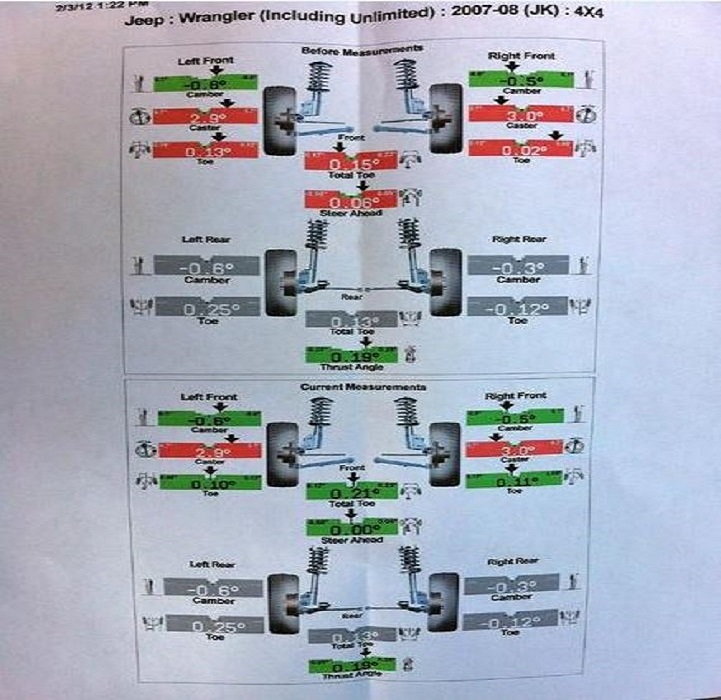
Figure 5. An example of before and after alignment specifications.
If your vibration is really horrific at higher speeds, you most likely have the dreaded death wobble.
Step 5 – Check suspension components for death wobble
At highway speeds, if your steering wheel takes on a life of its own, you likely have the serious issue of death wobble.
Various suspension components will contribute to the death wobble. The most common issues can be evaluated and remedied on your own, but with such a condition, you may opt to take your JK in to a professional to make sure that you get this correctly resolved. Driving with a death wobble can cause other serious problems with many components of your vehicle.
- Remove the steering stabilizer and have someone turn the steering wheel from full left to full right slowly, and then make quick sudden movements back and forth.
- Look for any play in any of the following: rod ends, drag link ends, trackbar ends and welds. There should be nothing moving out of play at all.
- If nothing looks out of the ordinary, remove the trackbars and look at the bolts and the mounting holes. They may be worn and show movement there.
- Check the trackbar bushings for cracking or splitting. If these are good, replace the trackbar and make sure they are torqued to 125 pounds.
- Inspect the drag link ends and make sure there is no up and down play. Replace with heavy duty end links and make sure they are torqued properly.
- Inspect the tie rod ends. There should be no up and down play, but only rotational movement.
- Inspect the control arm bolts, holes and bushings for similar conditions with the tie rods and rod ends. The bolts can wear or become out of round with heavy use and off-road driving. Replace these if necessary.
- Inspect the sector shaft from the steering box for any rotational warpage or other signs of breakage. Replace this if needed.
- Replace the steering stabilizer with a heavy duty one for preventative measure.
Featured Video: Common Source of Death Wobble on Jeep Wrangler JK
Related Discussions
- Ball Joints Wearing Out? - JK-Forum.com
- Write-Up Diagnosing Death Wobble - JK-Forum.com
- Highway Vibration - JK-Forum.com
- Vibration Problems, Help - JK-Forum.com