Jeep Wrangler JK: How to Replace Clutch Slave Cylinder
The slave cylinder is mounted on the exterior of the transmission. The rod inside the cylinder moves with the clutch pedal to engage/disengage the clutch. A faulty slave cylinder can disengage the clutch inadequately, creating transmission grinds and damage.
This article applies to the Jeep Wrangler JK (2007-Present).
The slave cylinder moves the throw out bearing against the clutch pressure plate. This removes pressure from the clutch disc, keeping engine torque from traveling through the transmission. If the clutch disc was unable to depressurize, smooth shifting would not be possible. Brake fluid from the master cylinder reservoir travels through the hydraulic lines connected to the clutch master cylinder and slave cylinder. Brake fluid is not compressible, which allows the clutch pedals movement to act as a force against the rod in the slave cylinder.

Materials Needed
- Floor jack
- Jack stands (x2)
- 3/8" ratchet
- 10mm-14mm sockets
- Flat head screwdriver or pick
- Rubber gloves
- Safety glasses
- Slave cylinder
- DOT 3 brake fluid
Step 1 – Raise and support the front end
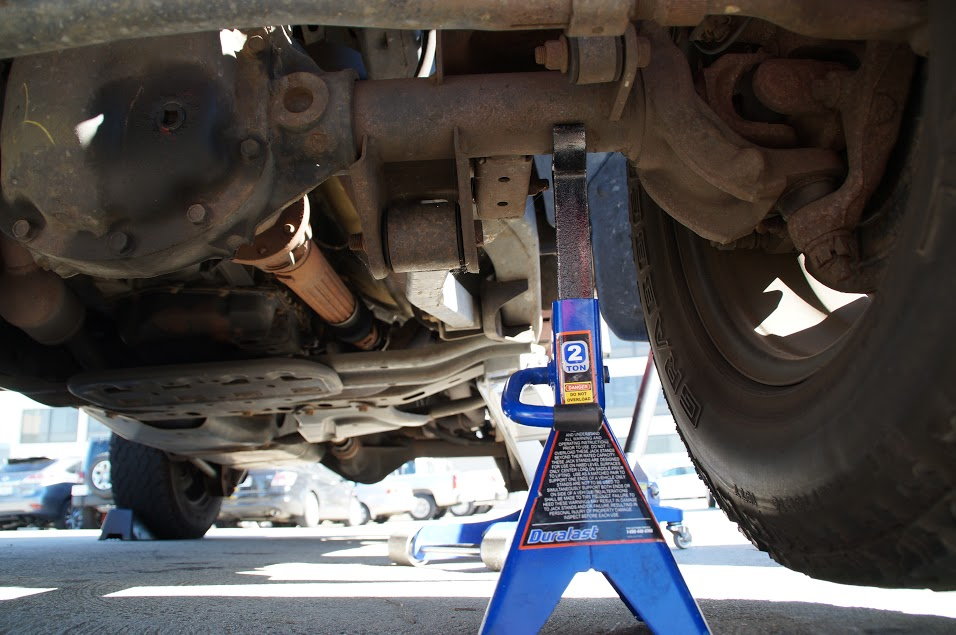
Engage your parking brake. Place your floor jack below one of the front jacking points and raise it until you can fit a jack stand beside it. Lower your Jeep's weight onto the jack stand and repeat the process for the other side.
Step 2 – Remove mounting nuts from slave cylinder
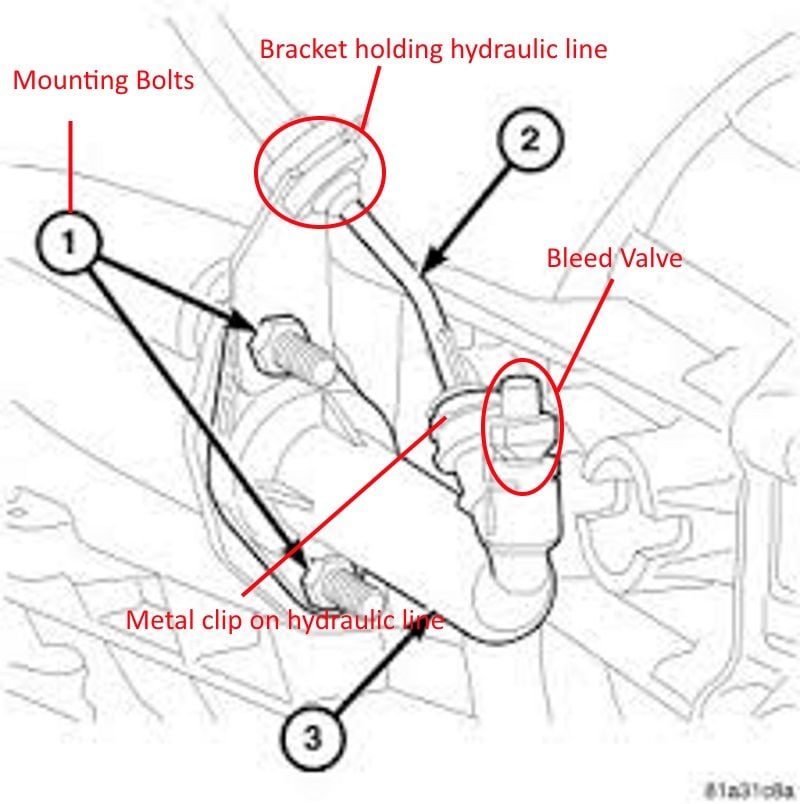
The slave cylinder is located on the driver's side of the transmission, near the front. Two mounting nuts hold it to the transmission.
Step 3 – Remove hydraulic line from slave cylinder
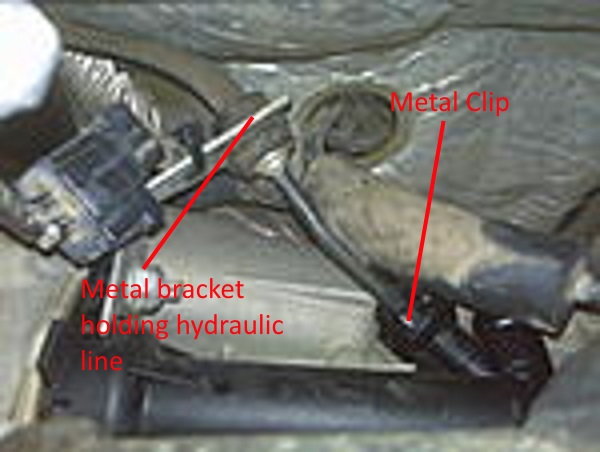
Use a pick or flat head screwdriver to move the metal clip to the unlocked position. Place your pick or screwdriver between the exposed portion of the clip and hydraulic line. Pull the metal clip away from the line until it clicks into the unlock position. Slide the hydraulic line out of the metal bracket. Remove the line from the slave cylinder with a pull/twist. There is a rubber O-ring at the bottom of this line. Make sure this O-ring is not damaged prior to install, otherwise the line will leak.
Step 4 – Install new slave cylinder
Slide the slave cylinder onto the transmission studs, and then slide the hydraulic line bracket onto the top stud. Push the hydraulic line into the slave cylinder, making sure the rubber O-ring is installed. Begin tightening the mounting nuts, and then position the hydraulic line bracket upwards to connect the the line. Slide the line into the bracket and torque the mounting nuts to 17 ft/lbs.
Step 5 – Bleed slave cylinder
You will need a second person to bleed the slave cylinder. Fill the brake master cylinder fluid reservoir to the "max" level. You will see where it says min/max on the side. Use DOT 3 brake fluid. Remove the rubber dust cap from the bleed screw (see Figure 2). Turn the bleed screw half a turn while another person has the clutch pedal depressed. Make sure you're wearing rubber gloves and safety glasses. Brake fluid will come out of the screw at a high velocity. Once the pressure is gone (a couple seconds), close the screw and have the other person pump the clutch pedal about ten times. Repeat the bleeding process several times to achieve a responsive clutch pedal.
Related Discussions and Video
- JK 6-Speed Owners - JK-Forum.com
- Clutch Slave Cylinder Replacement - JK-Forum.com
- Jeep JK Slave Cylinder (Not a Closed System) - YouTube.com

