Jeep Wrangler JK: How to Make Center Caps
Here's an inexpensive modification you can add to your Jeep Wrangler's wheels.
This article applies to the Jeep Wrangler JK (2007-present).
If you own a Jeep Wrangler, you know you want it to be different. Fortunately, when it comes to modifying the Wrangler, there are no rules. This modification is designed to add a bit of a flavor to your wheels without spending too much money, or spending any money at all. This guide will show you how to make center caps for the wheels. The other alternative for the owners who want to change the looks of their wheels is to either buy new wheels, which will cost close to a fortune, or paint the wheels, which is not for amateurs. Read on to learn how you can install center caps to your wheels and have fun doing it.


Materials Needed
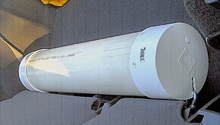
- Sterno cooking fuel cans
- Spray paint
- Can opener
- Tin snips
- Tape and plastic bags
- Goo-Gone
- Rubber mallet
- Wooden block
This guide works with ProComp 97s; it could also work for the Cragar Soft 8s. It iwll work for anything equivalent in size and shape.
Step 1 – Prepare can
Remove the top of the sterno can using a can opener. Use Goo-Gone to remove all the labeling on it. This part could take a while, but be patient so you can make it nice and smooth.
Tape your can, leaving 1/2" away from the bottom of the can, then use your tin snips to create flaps around the can. Make sure the flaps are small, even, and close to one another. Finally, bend them outwards as shown in Figures 4 and 5 below.

Figure 2. Sterno can. 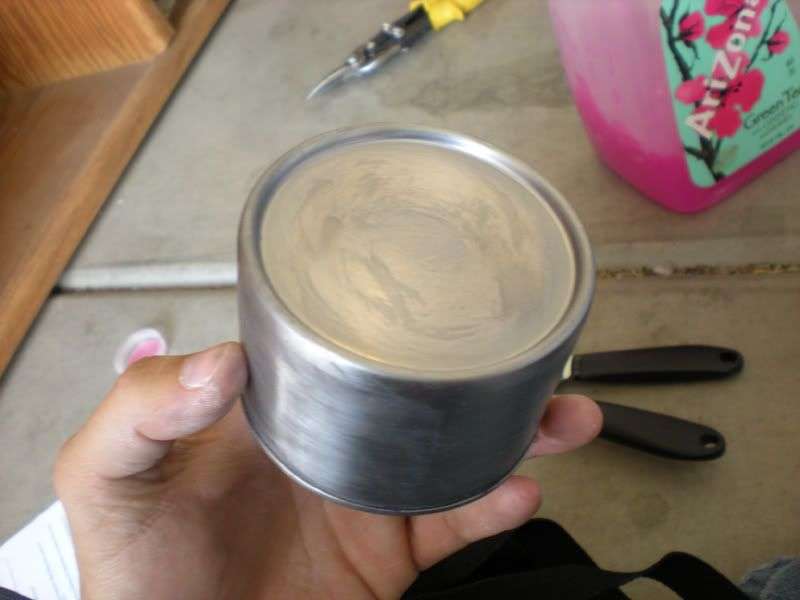
Figure 3. Remove labels. 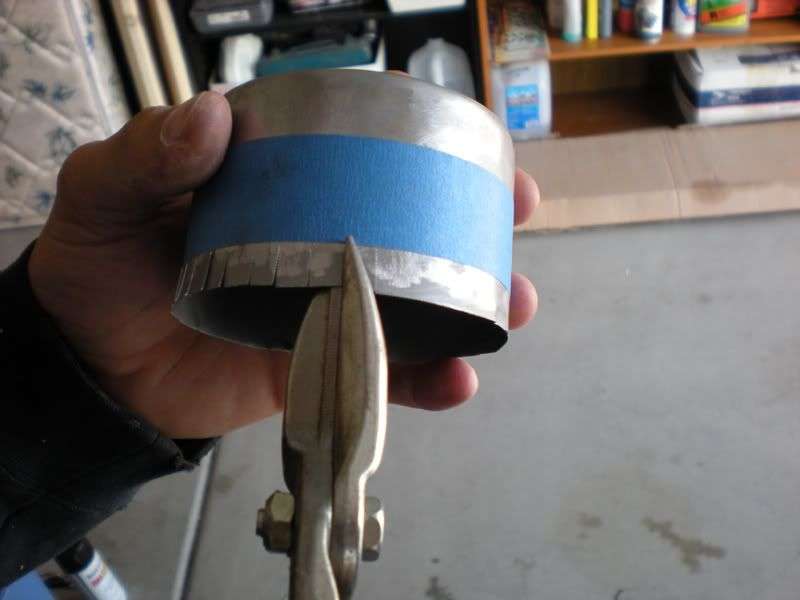
Figure 4. Cut flaps. 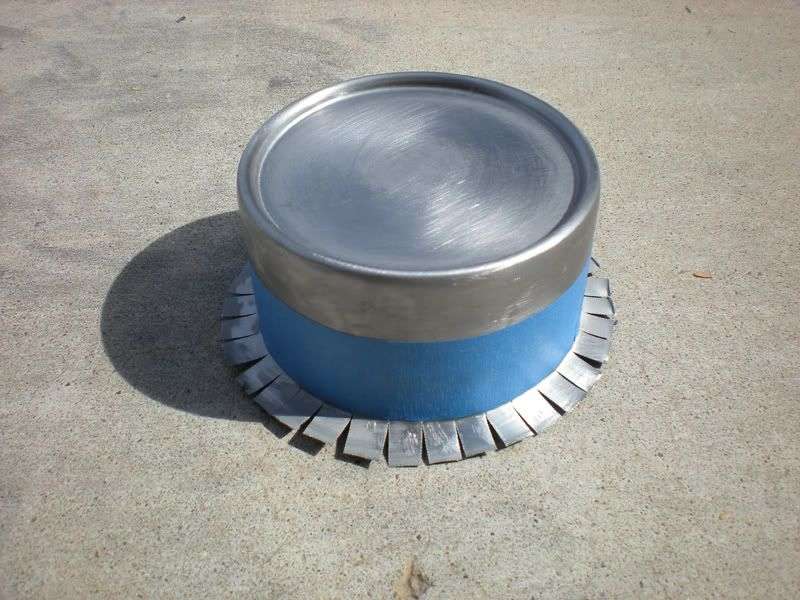
Figure 5. Bend flaps out.
Step 2 – Install can on wheel
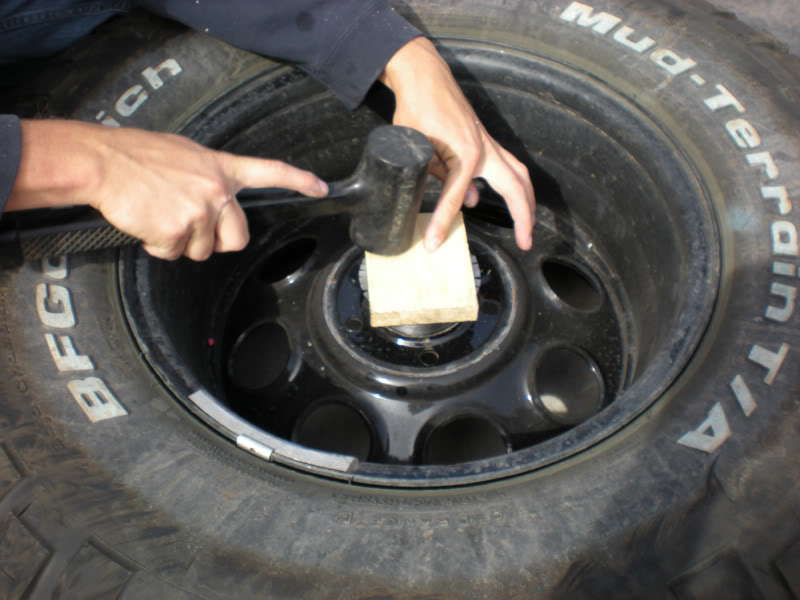
Place the can on the back of the wheel, in the center. Put the wooden block on top of it and hammer it in, straight and gentle. Continue to do so until it is flush with the back of the wheel.
Step 3 – Paint the cap
Use your plastic bag to cover the wheel, and create a small hole the size of the can in the center. Feed the can through the hole and tape around it to avoid paint going through to the can. Use spray paint (color of your choice) to paint the can. Spray roughly eight inches away from the can, and keep your hand moving as you spray. Wait 15 minutes between coats, and do three coats total. You can repeat the procedure on the other wheels as you wait for the other ones to dry. The reason you paint the can after you install it is because if you paint it first, you'll end up scratching the paint when you hammer it in.
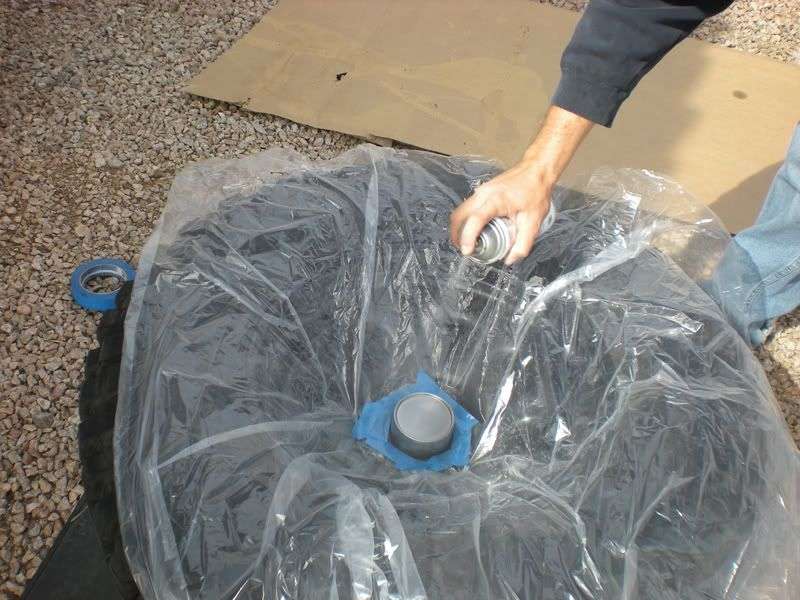
Figure 7. Spray painting the cap. 
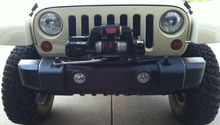
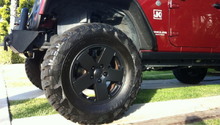
Figure 8. Final product on front wheel.
Related Discussion
- How to Make Center Caps - Jk-Forum.com