Jeep Wrangler JK: How to Install PCV Valve
The PCV valve is attached to the engine valve cover. It moves air throughout the engine to clean the engine oil. A faulty valve can create a number of engine problems, such as a rough idle, oil leaks, and sludge buildup.
This article applies to the Jeep Wrangler JK (2007-Present).
Standing for "positive crankcase ventilation" valve, the PCV valve allows airflow through the engine at a regulated rate. Air is drawn from the intake through the PCV valve and into the engine where it's routed into the intake manifold. This circulation of air creates a negative pressure inside the engine crankcase, which draws moisture and oil vapors out. The PCV valve must adjust to the intake manifold vacuum to maintain smooth engine operation. A valve that's stuck open will allow too much airflow into the intake manifold at idle, leading to an engine misfire. A stuck closed valve will keep negative pressure from developing inside the engine, leading to sludge buildup and engine oil leaks as positive pressure develops. Because this valve has so many critical functions, correct operation is crucial to a long lived, reliable engine.

Materials Needed
- 1/4" ratchet
- 3" extension
- 8mm-12mm sockets
- Needle nose pliers
- Hose clamp pliers (optional)
- Zip ties
- Hammer
- PCV valve
- Safety glasses
- Rubber gloves
- Spark plug wire pliers (optional)
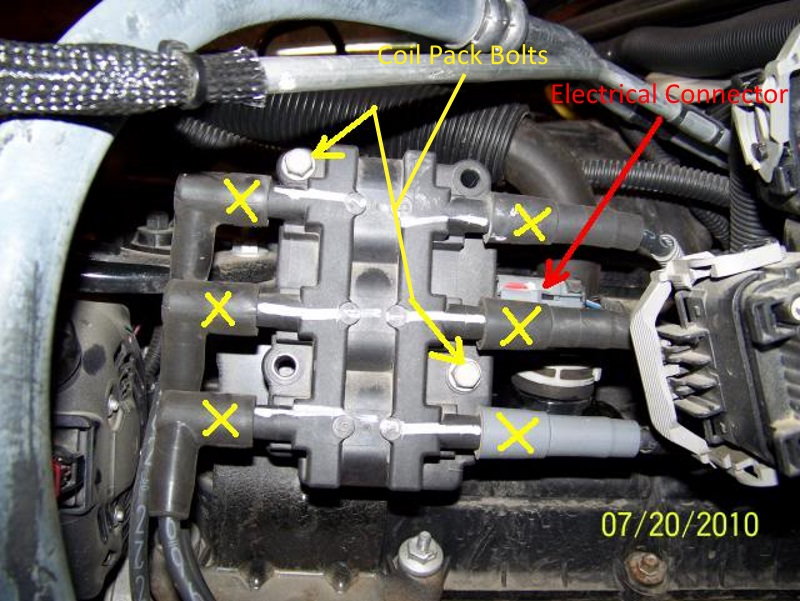
Step 1 – Remove the coil pack
Remove the six coil wires from the coil pack. Pull them away from the coil pack with a moderate amount of force. You can probably do this by hand, but spark plug wire pliers can be used as well. The wires are numbered from the factory for easy re-assembly. Remove the two bolts at the corner of the coil pack. Leave the electrical connector plugged in. Rotate the coil pack away from the PCV valve.
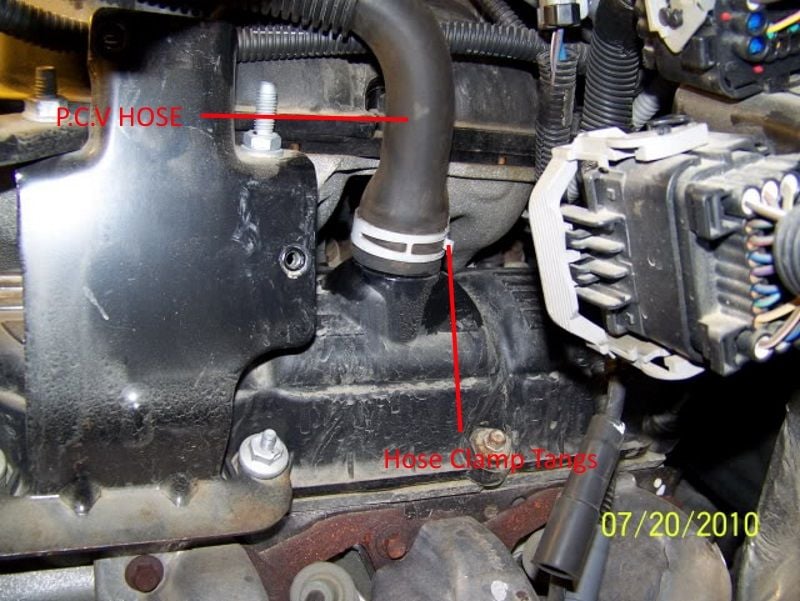
Step 2 – Remove the PCV hose
The hose is connected to the PCV valve by a squeeze clamp. Squeeze the tangs on the clamp with pliers and move the clamp from where the hose connects to the valve. Hose clamp pliers made specifically for these clamps will reduce the difficulty. Pull and twist the hose off the valve.
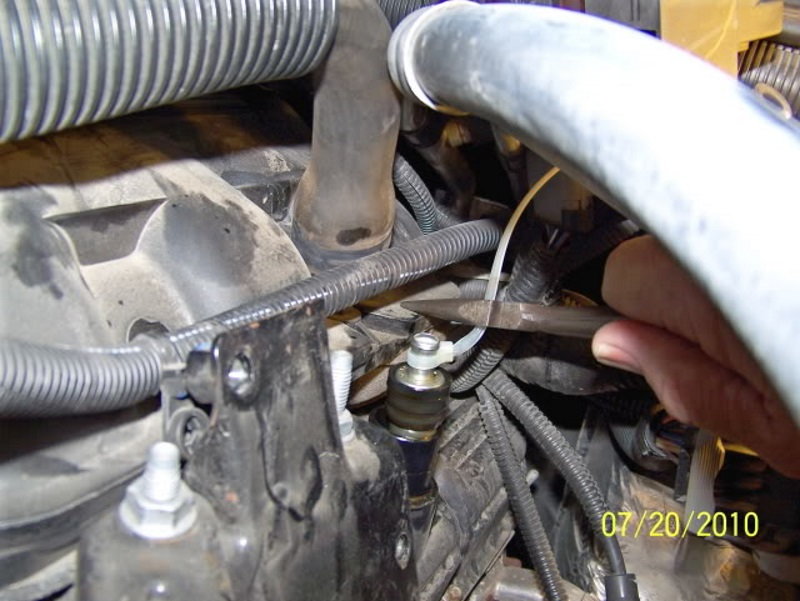
Step 3 – Remove the PCV valve
Tie a zip tie around the metal tip of the valve. This zip tie will be used as a puller to remove it from the valve cover. Grab the end of the zip tie with needle nose pliers. Lay the end of the pliers against the intake manifold and use the pliers as leverage to pull the valve out of the valve cover.
Step 4 – Install the new PCV valve
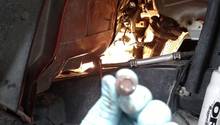
Slide the valve into the port on the valve cover. The valve uses a rubber seal, so you may not be able to fully press it into the valve cover by hand. Grab a socket slightly smaller in diameter than the valve cover port. Attach an extension to the socket and use the combination with a hammer to tap the valve into its fully installed position.
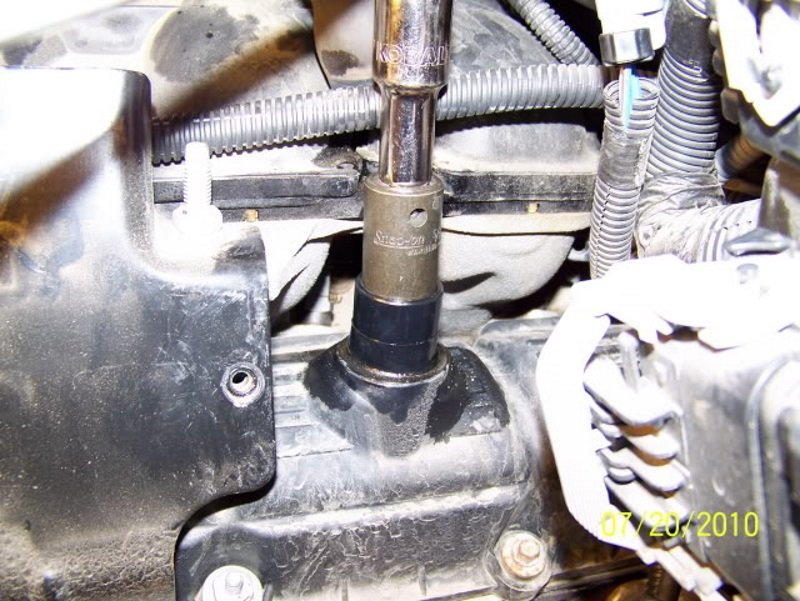
Figure 4. Use a socket and extension to tap the valve into place. 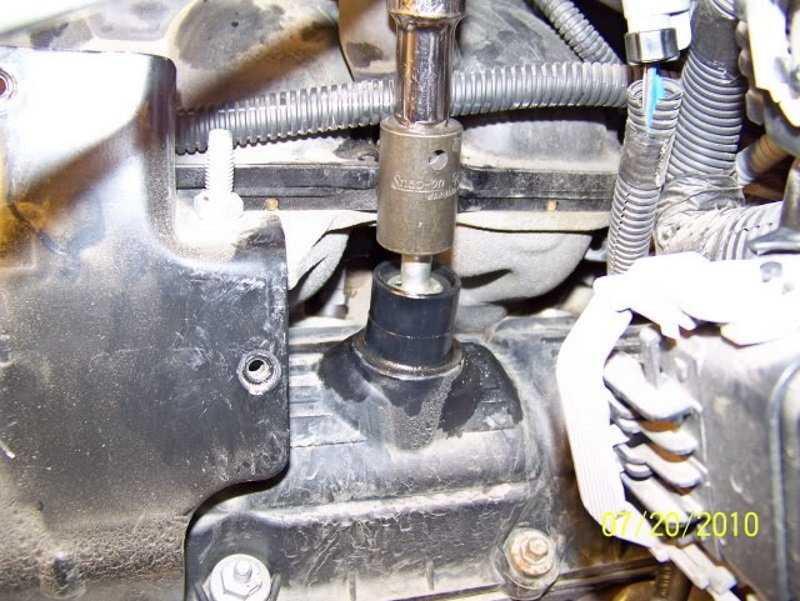
Figure 5. The PCV valve fully installed.
Related Discussions
- Removing/Installing PCV Valve - JK-Forum.com
- OEM PCV Valve Study - JK-Forum.com
- How Do You Remove PCV Valve - JK-Forum.com