Jeep Wrangler JK: How to Install Control Arms and Review
Control arms are a very popular addition to any Jeep. A set of aftermarket ones can provide a bigger, stronger, and longer replacement for those stock units.
This article applies to the Jeep Wrangler JK (2007-Present).
Lifting a Jeep Wrangler is probably one of the most common and popular modifications done to these versatile vehicles. Lifts range in complexity from simple coil spacer lifts to full on long arm lifts where you pretty much change out most of the stock components for beefed up aftermarket pieces so that you can gain the maximum from your Jeep's suspension. The most common of lifts is to replace the stock springs with some lift springs. But for most people who are into modifying their Jeep, it doesn't stop there. Once they get the lift installed, they are immediately looking for the next way to go. The next step after installing a lift would be to look at the control arms. This will become the weakest link in a Jeep's suspension once lifted. One of the reasons for this is because the stock control arms were designed for the stock ride height and because of the design of the Jeep's suspension, these arms aren't optimized for the change in suspension geometry that comes with a change in ride height. The stock arms are also not made to withstand serious off-roading and can tend to show their physical limits.
But don't worry because there are solutions out there for all of these problems. Aftermarket control arms are offered by many different companies and just like with every other aftermarket part on offer, there is a range from mild to wild. Most will be stronger, bigger, longer and a few will even offer adjustability.
So, to make things a bit easier and give you an idea of what is on offer, here is a quick how-to and review.
Table of Contents
How to Replace Your Control Arms

Note
The DIY Cost will depend on the brand you buy.
- Rock Krawler: $250-295
- Rough Country: $180
- Teraflex: $180-290
- JKS: $225-605
Materials Needed
- Jack
- 21mm socket
- Ratchet
- 21mm wrench
- Torque wrench capable of 125 lb-ft
- Mallet (if needed)
Step 1 – Loosen the bolt at the axle end
Each control arm is held in by (2) 21mm bolts. One bolt attaches the control arm to the frame and the other attaches the control arm to the axle. Locate and loosen the bolt at the axle end first. Once you have it loosened, go ahead and remove the bolt. There might be some tension on the bolt due to the fact that the frame end is still connected. You can use a jack to push on the frame, which will make it a bit easier to remove the bolt.

Step 2 – Loosen the bolt at the frame end
Next go ahead and loosen the bolt that connects the control arm to the frame. Once you have it loosened, you can remove it. It will be much easier to remove this one because the axle end bolt has already been removed.
Step 3 – Remove the control arm
After both bolts have been removed, you can then remove the control arm from the vehicle.
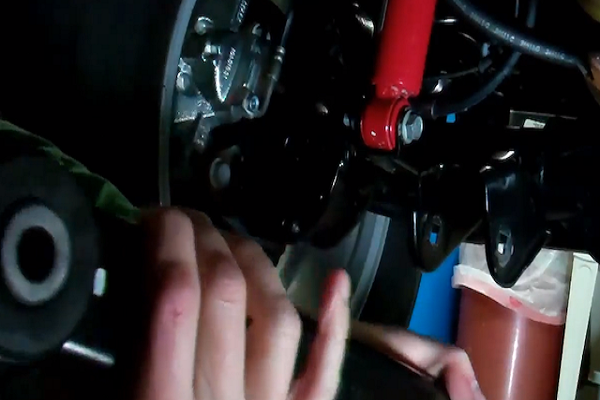
Figure 3. Pull down the control arm. 
Figure 4. Control arm out.
Step 4 – Place frame end of new control arm into frame bracket
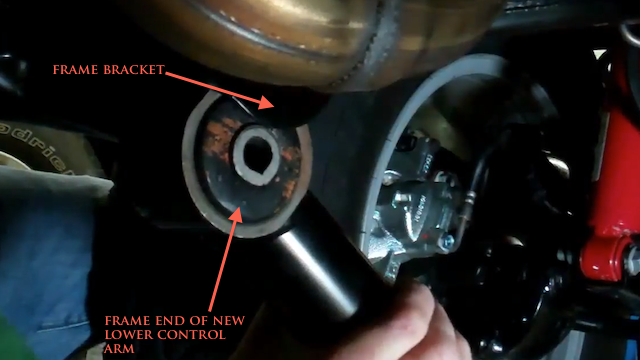
Starting with the frame end of the new control arm, go ahead and insert it into the frame bracket and slide the bolt through the bolt hole. It might be a tight squeeze for the new bushing, so you might have to use a mallet to get the end of the control arm into the bracket. Once you have the bolt installed, thread the nut onto the bolt but don't tighten yet.
Step 5 – Place axle end of the new control arm into axle bracket
Once you have the frame end of the control arm into place in the frame bracket and the bolt installed, you can then place the axle end in the axle bracket. You will notice that once you get it installed, the bolt hole will be misaligned. That is okay. To align the bolt holes, place a jack under the frame near the frame end of the control arm. Lift up on the frame until you see the bolt holes align and then slide the bolt through the hole to install the nut. Do not tighten the bolt and nut yet.
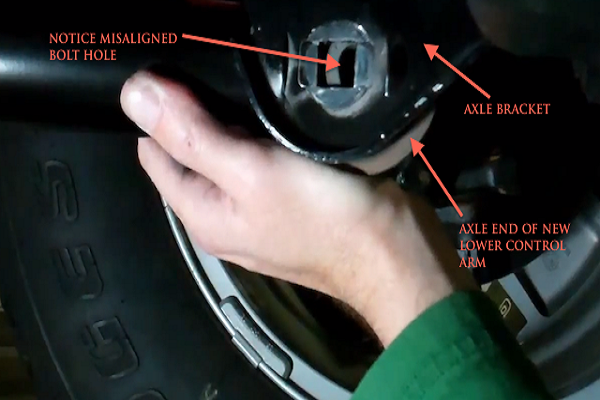
Figure 6. Align control arm and frame holes. 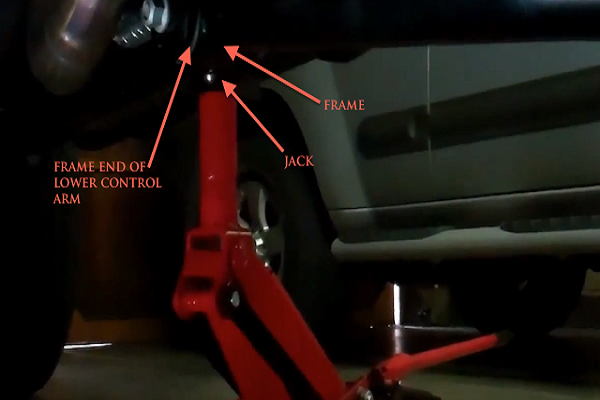
Figure 7. Jack up control arm to align. 
Figure 8. Bolt hole lining up.
Step 6 – Lift the tire off the ground
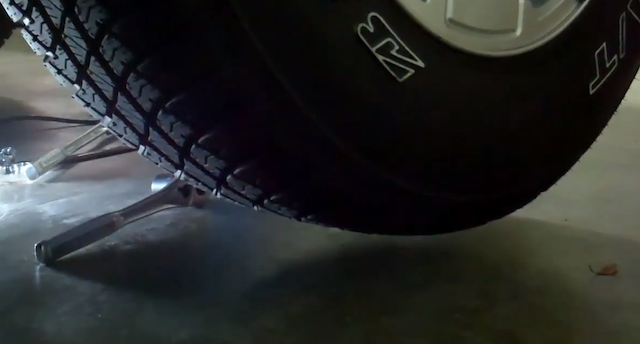
Now what you want to do before you tighten the bolt is to lift the tire of the corner you are working on off the ground and then lower it back down. This will make sure that the bushings find their way into place inside the brackets and cure any binding that might be present.
Step 7 – Tighten the bolts
Now that you have seated the bushings, go ahead and tighten the bolts. You just want to snug them up, so don't apply the final torque value yet. You will do that after you jounce the suspension.
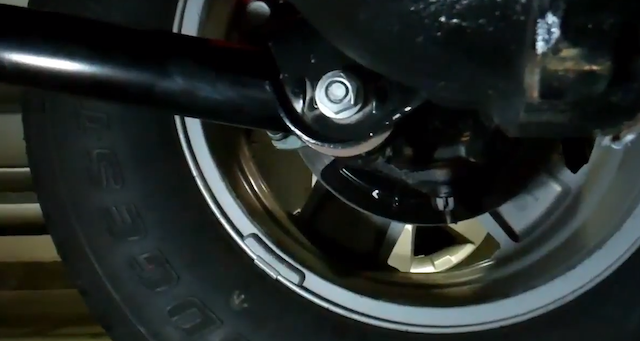
Step 8 – Jounce the vehicle
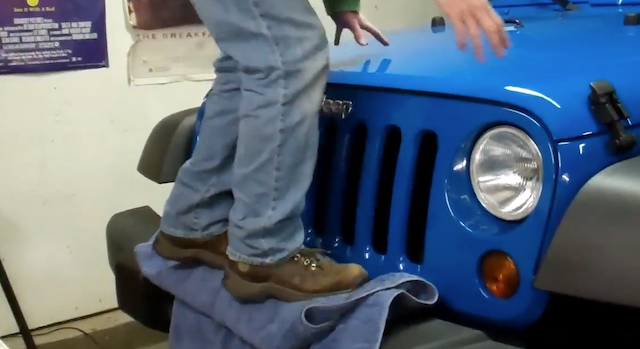
After the bolts are nice and snug, the next step will be to jounce the vehicle. This is again to make sure that the arms are seated properly in the brackets now that the bolts are tighter. To jounce the suspension, the easiest way to do this will be to stand on the front bumper and bounce up and down. You might want to place a blanket or something to protect the bumper that you can stand on, as you can see in the picture below. I know this seems somewhat ridiculous, but it is necessary to make sure that the bushings find themselves into the correct place inside the bracket and they don't bind.
Step 9 – Torque the bolts to 125 lb-ft
The final step will be to torque the bolts to 125 lb-ft. It is very important that you torque them to the correct value because if they get over-tightened, this could cause the bushing to bind and eventually cause damage. If they are not tightened enough, this could cause the bushing to be loose inside the bracket and cause the control arm to not work properly. Torque is important.
Featured Video: How to Install JKS Control Arms
Control Arms Review
Control arms come in many different forms from many different manufacturers. For the most part, they are all trying to accomplish the same things. The differences between them will mainly be between price and how they are manufactured. There are lift kits out there that come with control arms as part of the kit, but this review will focus on ones that you can buy separately. You might have a lift installed already and want to now do the control arms, or you might be one of those people that want to piece together your own lift kit with specific components that you prefer. Here are some options that you may consider.
Rock Krawler |
Rough Country |
Teraflex |
JKS | |
|---|---|---|---|---|
Price |
$250-$295 | $180-700 | $180-$290 | $225-$605 |
Arms w/ Adjustability |
Yes |
Yes |
Yes |
Yes |
Arms w/out Adjustability |
No | No | Yes | Yes, Only offered on Lower Arms |
Greasable |
Yes, But Only on Lower Arms | Yes, on both Upper and Lower | Yes, with FlexArm Kit Arms for both Upper and Lower | Yes |
Arm Material |
Alloy Steel | Alloy Steel | DOM | DOM Body, Adjustable Arms Feature Solid Steel Shafts |
Bushing Type |
Ball in Joint and Polyurethane | Adjustable and Rebuildable Ball in Joint and Polyurethane | Rubber, Ball in joint for Adjustable Arms | Rubber and Ball in Joint |
Warranty |
Abuse Proof Lifetime Warranty | Lifetime Replacement Warranty | Lifetime Warranty Against Defects | Lifetime Limited Warranty |
Rock Krawler

Price – Upper Control Arms: Front and Rear - $250
Lower Control Arms: Front and Rear - $295
Adjustability – The front uppers are adjustable only on one end. The rear uppers are adjustable on both. The front and rear lowers are only adjustable on one side.
Bushings – The upper arms feature non-greasable ball in joint bushings, while the lowers feature greasable ball in joint bushings on one end and polyurethane on the other.
Rock Krawler has a limited selection of control arms, but what they do have on offer looks to be of good quality and value. The provide adjustability to fix any caster problems you might be experiencing, so that you can get that alignment dialed in.
Rough Country

Price – Upper Control Arms: Front and Rear - $180
Lower Control Arms: Front and Rear - $180
Complete Set: $700
Adjustability – All arms are only adjustable on one end.
Bushings – Arms feature re-buildable and adjustable bushings.
Rough Country has been in the Jeep aftermarket industry for a while now. One of the unique things about their arms is that they provide an adjustable bushing where you can set the preload of the bushing, allowing to increase the life of the bushing and making them always feel new. When the bushing finally does wear out, it can be rebuilt, which is an added bonus.
Teraflex

Price – Upper Control Arms: Front (Non-Adj) - $180
Upper Control Arms: Rear (Non-Adj) - $200
Lower Control Arms: Front and Rear (Non-Adj) - $200
Upper Control Arms: Front (Adj) $280
Upper Control Arms: Rear (Adj) $290
Lower Control Arms: Front and Rear (Adj) $280
Adjustability – Teraflex offers two levels of arms with adjustability. The Alpine Flexarm offers the dependability of the sport flex arm with the adjustability of the monster flex arm, so it is essentially the middle of the road when it comes to adjustability. The adjustability is focused on re-centering the axle after installing a lift.
Bushings – While the non-adjustable arms and Alpine arms feature rubber bushings, the complete flex arm kit features a ball in joint style bushing.
Teraflex takes their selection of arms up a notch compared to the other two previous companies. They offer what is essentially a tiered selection of arms. Starting with a non-adjustable selection, then moving onto a factory style bushing with adjustability, and then finishing it off with a more durable and rebuildable ball in joint bushing with full adjustability. It all depends on how serious you are trying to get. I would say these are probably the way to go if you are looking for maximum value with trying to keep the price on the lower end of the spectrum.
JKS

Price – Upper Control Arms: Front and Rear (Adj) - $300-$395
Lower Control Arms: Front and Rear (Non-Adj) - $225
Lower Control Arms: Front and Rear (Adj) - $350-$605
Adjustablity – JKS offers two different types of adjustable arms. Some use the standard threaded type of adjuster, and they also offer a variable length arm that uses a solid shaft and tube style adjuster. Both are designed with the focus of correcting suspension geometry caused by adding a lift and changing the ride height.
Bushings – Most of the JKS arms feature rubber bushings to help in absorbing any road noise and harshness. They do offer a ball in joint style bushing on the threaded adjustable arms. This bushing is also re-buildable and greasable.
JKS has a great selection of arms on offer and seems to be quite focused on the engineering side of things. Their arms are slightly higher in price compared to the other companies, but I believe that this reflects in the design and manufacture of the arms. They also come with a fairly nice coating to keep them looking fresh.
Related Discussions
- Control Arms for 2.5" Lift - JK-Forum.com
- Rough Country Adjustable Control Arms - JK-Forum.com
- Lift Kits and Control Arms - JK-Forum.com
- Lifts and Adjustable Control Arms - JK-Forum.com

