Jeep Wrangler JK: How to Install Canoe/Kayak Rack on Soft Top
Are you looking to install a canoe or kayak rack on your Jeep Wrangler so you can do a little fishing, or just because you want to get more in touch with nature? This article will walk you through the process.
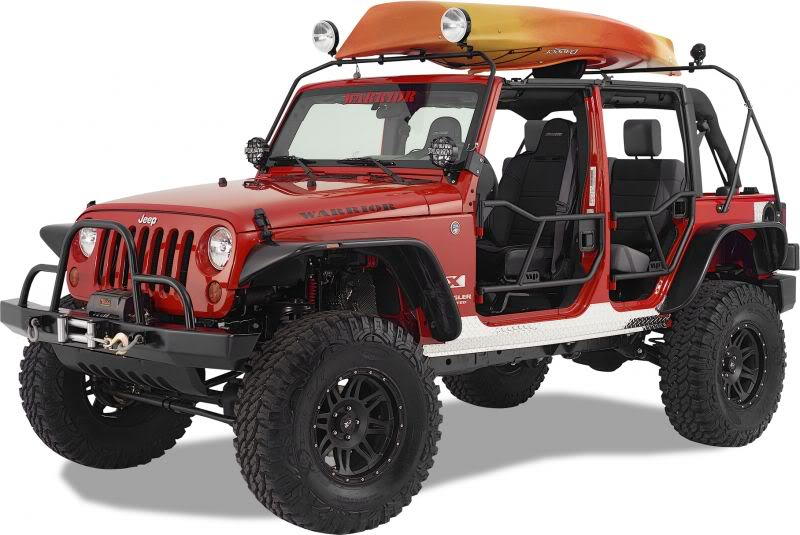
This article applies to the Jeep Wrangler JK (2007-Present).
You're out there, getting involved with nature every weekend. That's great, but what's not great is the fact that your trusty canoe or kayak doesn't really fit in your Jeep. Sure, you can try to strap it to the roof with ratchet straps, but it's not advised, as it could become a flying canoe in no time if you hit a big enough bump. Fortunately for us, there are ready made aftermarket kits available that make transporting your kayak or canoe a piece of cake. Let's learn how to install a kayak/canoe rack on the Jeep Wrangler.

Materials Needed
- Drill
- 3/8" drill bit
- Warrior Safari watercraft kit
Step 1 – Install front light bar
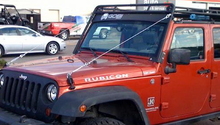
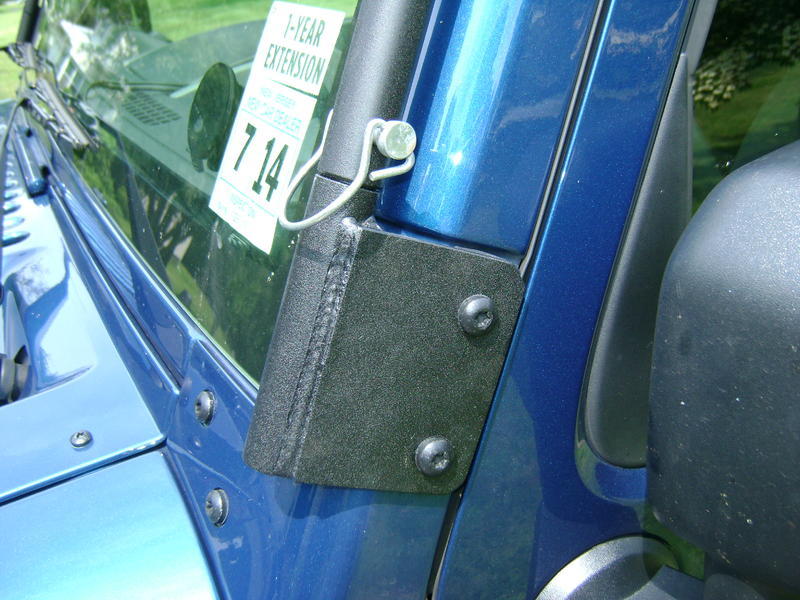
Remove the two screws on each side of the upper outboard side of the windshield hinges (shown in Figure 1). Assemble the front light bar by first inserting the windshield mounting brackets into the short light bar hoop, then install the snapper pins to hold them in place. Make sure that the light tabs are facing forward, and that the windshield mounting brackets are facing the rear of the vehicle. Set the assembled light bar in place onto the windshield. Then install and tighten the included screws through the light bar mounting brackets.
Step 2 – Install rear light bar
Assemble the rear light bar by inserting the lower mounting brackets into the light bar hoop, and then insert the snapper pins to hold the assembly in place. Make sure that the light tabs are facing rearward and that both mounting brackets are even with the top of the body tub, and the rear edge of the rear bracket is roughly 3/4" from the vertical body seam. At this point, the four holes should straddle the seam and the rear reinforcing plates should fit next to the seams. Mark the holes and remove the assembly. Drill out the holes using a 3/8" drill bit, and then reinstall the rear light bar assembly using the included bolts.
Related Discussions
- Soft Top Canoe/Kayak Rack Installation - JK-Forum.com
- Kayak Mounting on Four Door - JK-Forum.com
- Kayak Rack - JK-Forum.com
- Kayak Rack for Soft Top - JK-Forum.com