
Front Bumper Build
 05-01-2009, 05:04 AM
#1
JK Enthusiast
Thread Starter
Join Date: Jul 2007
Location: Ocala
Posts: 434
Likes: 0
Received 0 Likes
on
0 Posts
Well, since I need a new bumper anyways, I decided to fab one up. I've been working on it for about 2 hours each day, since Tuesday. Oh, I have 6 hours of fabrication experience.
OK, I'm trying to put together a build along, so here goes it.
I copied the below outline from page 3 to my first post. This is the one I'll update with pics/text/etc.
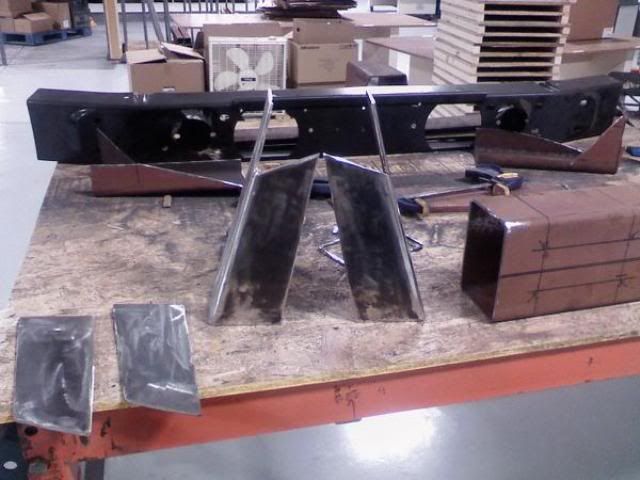
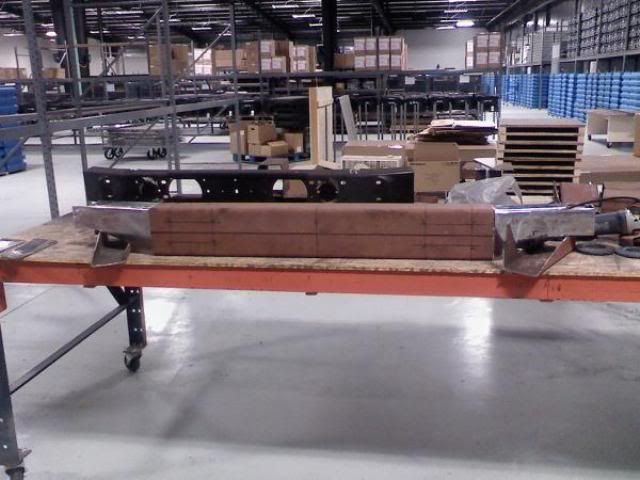
Step One (which should probably be step two in most cases): Look at the available material to make the bumper out of. In this case, I have an abundance of 4x6" 3/16" stock; but, it's not quite as long as the entire bumper, so I'll have to make separate wings.
Step Two: Design the bumper.
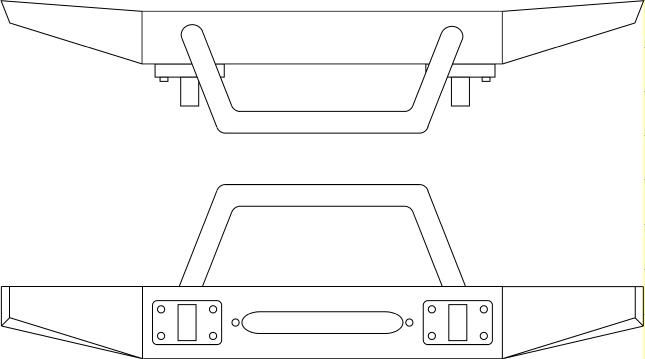
This is my quick rendering of what I want it to look like. Since this is a quick rendering, it's not to scale, with no measurements provided.
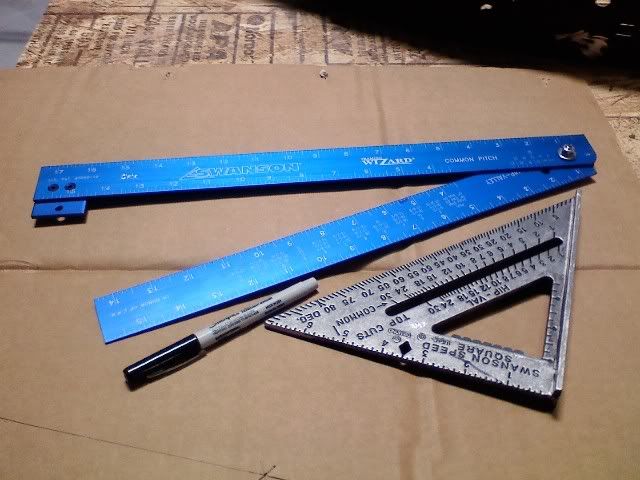
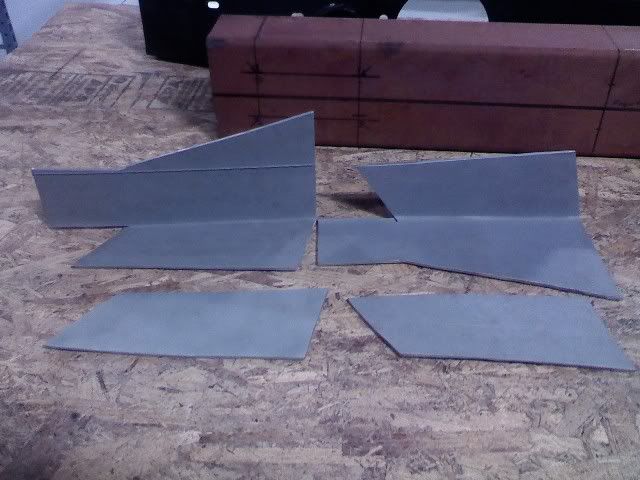
Step Three: Assuming there are measurements from the designing of the bumper, start making templates of the various shapes out of cardboard. Mock up the cardboard shapes by taping them together. Then trace out the templates on the steel stock with a Sharpie.
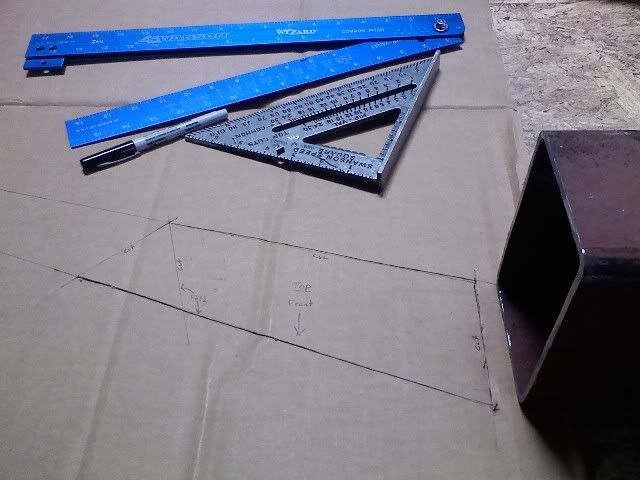
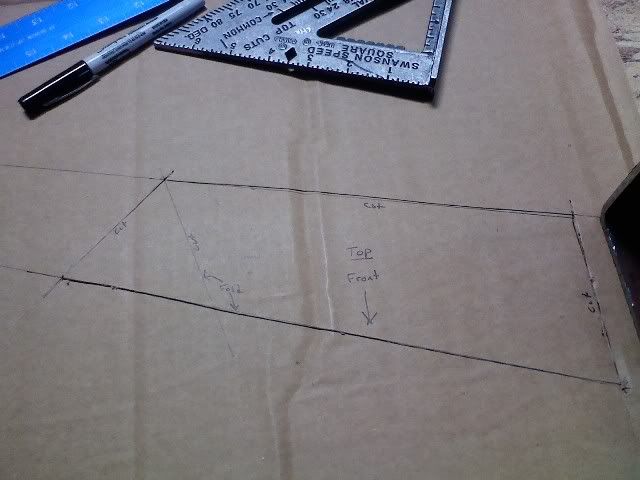
These are what I'm using to make my templates.
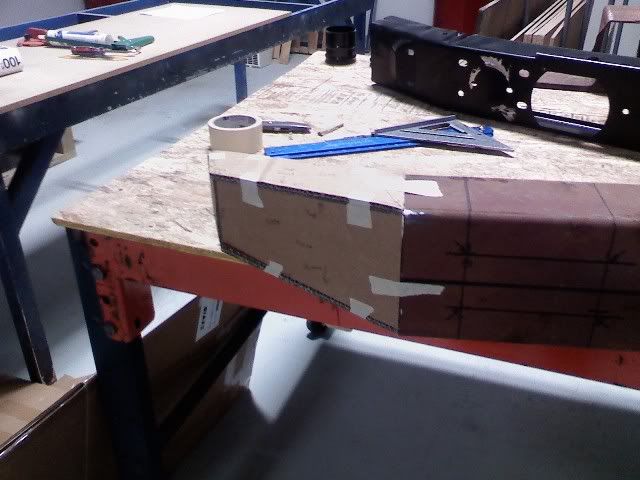

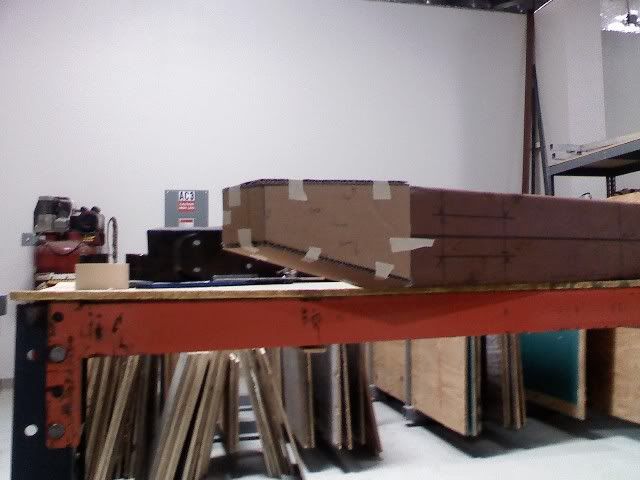
You can see in my rendering, I have angled the bottom of the wings up and out. My templates are not quite like that; I may fix it or leave it.
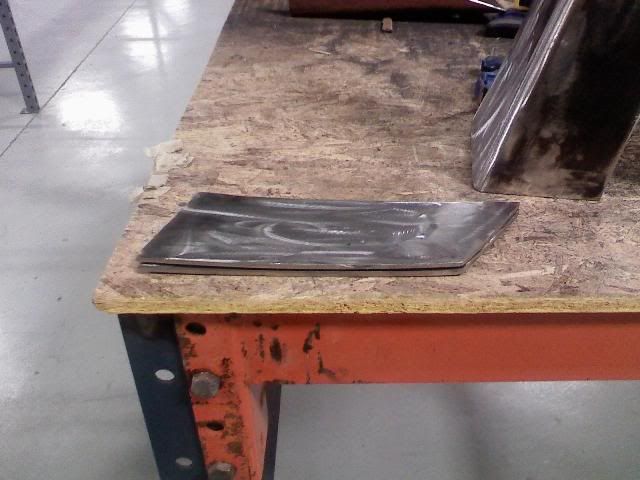
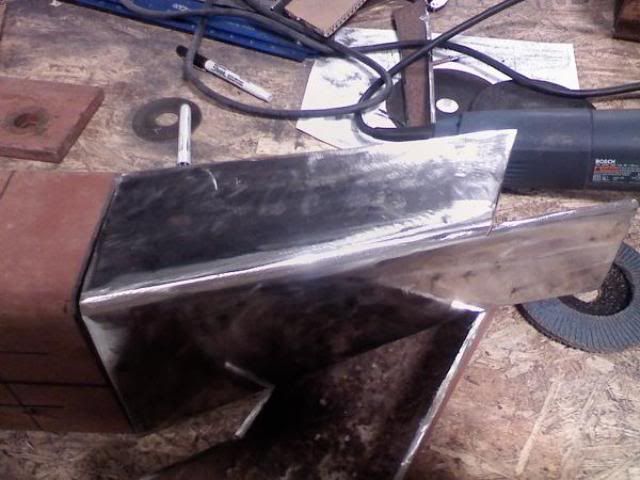
Step Four: Cut the shapes out of the steel. I'm using an angle-grinder. The angle grinder works pretty good; it's also the only method I have of cutting thick steel.
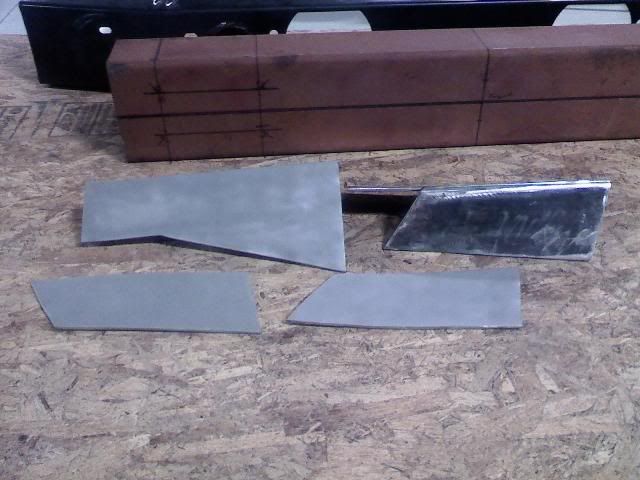
Step Five: Clean up the cuts. Make sure all pieces are equal to their opposite side counter part, and that all corresponding pieces fit together. Even though I used cardboard templates, my wings were not quite exactly matching each other. To make them match, I clamped the corresponding sides together and ground them together until each side matched each other, if that makes any sense.
Step Six: Clean up the steel. My stock is pretty rough, with surface rust on the inside and a heavy primer on the outside. I want to make sure all the rust and primer is off. Additionally, I want the inside to be primed, or have some kind of rust inhibitor applied to it. The sanding wheels worked great on the painted, outside surface. On the inside, where all the rust is, the sanding wheels were useless. The rust killed them, making them pretty much useless. I'm going to buy a few wire wheels and see if that works.
More. The rust was killing my flap wheels, so I bought this little sandblaster from Harbor Freight.

It works fine for what I'm doing. I had to stop because water made its way into the sandblaster from the compressor, which isn't filtered. Here's the progress:
Step Seven: Drill holes.
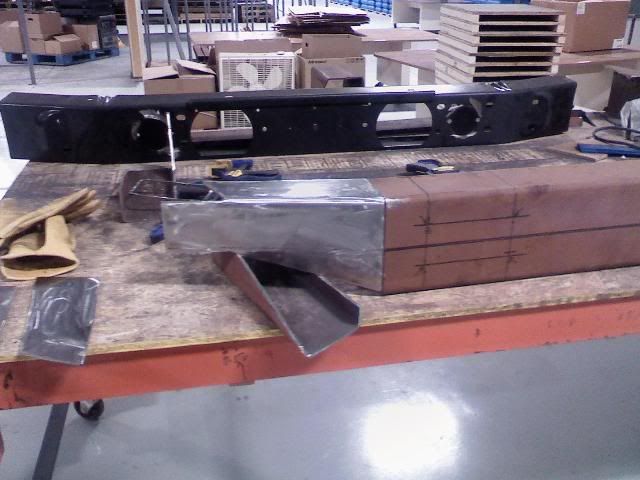
Step Eight: Test-fit the center piece.
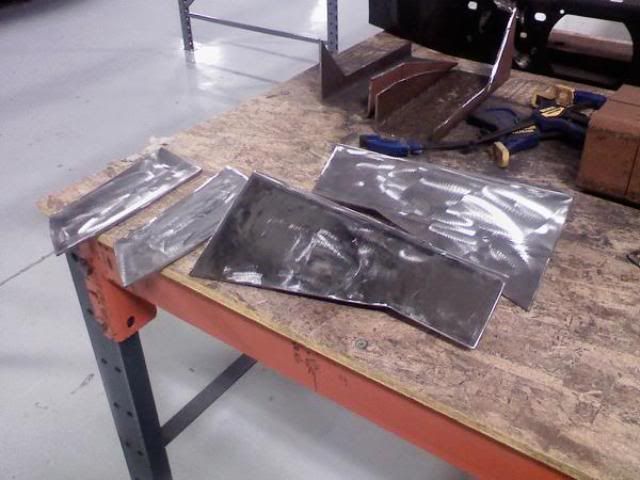
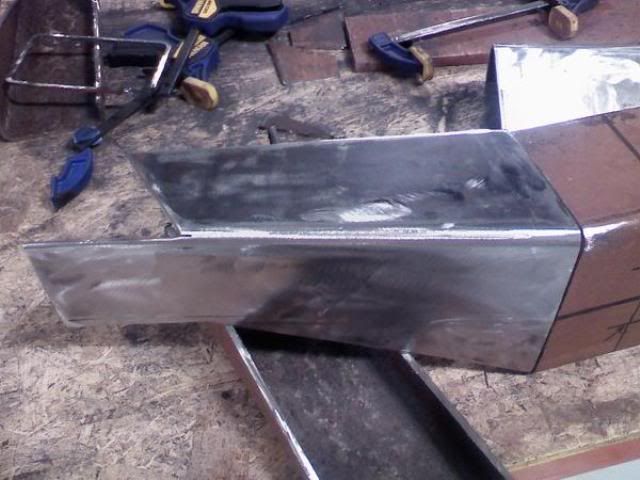
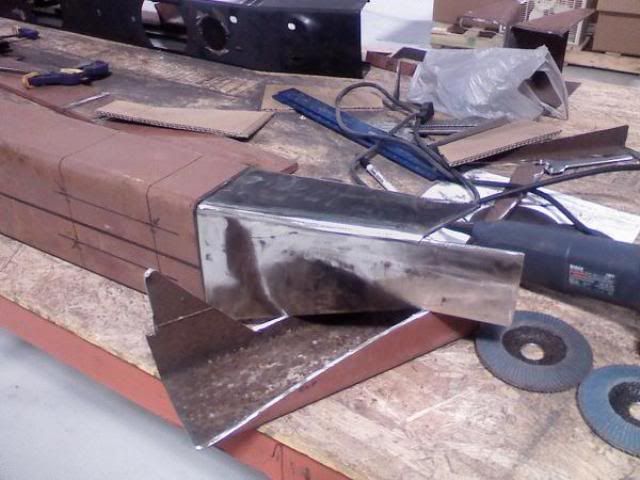
Step Nine: Weld up the shapes.
Step Ten: Clean up the welds. My welds will not be pretty, so I'm going to have to hit them with the angle grinder to make everything look nice.
Step Eleven: Apply primer/finish coat to bumper. I'm not sure what I'm going to do yet. I'm thinking I'll rattle-can it first. Once I get a winch, then I'll probably have it powder coated to match the Expedition One rear bumper.
OK, I just made up all these steps as I've been typing, and as I said before, I've never done this before. The steps will probably change; but, for now, this is my outline.
OK, I'm trying to put together a build along, so here goes it.
I copied the below outline from page 3 to my first post. This is the one I'll update with pics/text/etc.
Step One (which should probably be step two in most cases): Look at the available material to make the bumper out of. In this case, I have an abundance of 4x6" 3/16" stock; but, it's not quite as long as the entire bumper, so I'll have to make separate wings.
Step Two: Design the bumper.
This is my quick rendering of what I want it to look like. Since this is a quick rendering, it's not to scale, with no measurements provided.
Step Three: Assuming there are measurements from the designing of the bumper, start making templates of the various shapes out of cardboard. Mock up the cardboard shapes by taping them together. Then trace out the templates on the steel stock with a Sharpie.
These are what I'm using to make my templates.
You can see in my rendering, I have angled the bottom of the wings up and out. My templates are not quite like that; I may fix it or leave it.
Step Four: Cut the shapes out of the steel. I'm using an angle-grinder. The angle grinder works pretty good; it's also the only method I have of cutting thick steel.
Step Five: Clean up the cuts. Make sure all pieces are equal to their opposite side counter part, and that all corresponding pieces fit together. Even though I used cardboard templates, my wings were not quite exactly matching each other. To make them match, I clamped the corresponding sides together and ground them together until each side matched each other, if that makes any sense.
Step Six: Clean up the steel. My stock is pretty rough, with surface rust on the inside and a heavy primer on the outside. I want to make sure all the rust and primer is off. Additionally, I want the inside to be primed, or have some kind of rust inhibitor applied to it. The sanding wheels worked great on the painted, outside surface. On the inside, where all the rust is, the sanding wheels were useless. The rust killed them, making them pretty much useless. I'm going to buy a few wire wheels and see if that works.
More. The rust was killing my flap wheels, so I bought this little sandblaster from Harbor Freight.
It works fine for what I'm doing. I had to stop because water made its way into the sandblaster from the compressor, which isn't filtered. Here's the progress:
Step Seven: Drill holes.
Step Eight: Test-fit the center piece.
Step Nine: Weld up the shapes.
Step Ten: Clean up the welds. My welds will not be pretty, so I'm going to have to hit them with the angle grinder to make everything look nice.
Step Eleven: Apply primer/finish coat to bumper. I'm not sure what I'm going to do yet. I'm thinking I'll rattle-can it first. Once I get a winch, then I'll probably have it powder coated to match the Expedition One rear bumper.
OK, I just made up all these steps as I've been typing, and as I said before, I've never done this before. The steps will probably change; but, for now, this is my outline.
Last edited by C_Kyle; 05-14-2009 at 09:04 AM.

 05-01-2009, 05:38 AM
#3
JK Enthusiast
Thread Starter
Join Date: Jul 2007
Location: Ocala
Posts: 434
Likes: 0
Received 0 Likes
on
0 Posts
Thanks. I'm pleased with my effort so far, seeing as how I've never done anything like this before.
I'm horrible at taking progress pics. I'll see what I can do to put together some sort of progress time line. I haven't drawn anything out; it's all in my head.
I'm horrible at taking progress pics. I'll see what I can do to put together some sort of progress time line. I haven't drawn anything out; it's all in my head.
05-01-2009, 06:18 AM
#6
JK Enthusiast
Thread Starter
Join Date: Jul 2007
Location: Ocala
Posts: 434
Likes: 0
Received 0 Likes
on
0 Posts
Anyone have a winch bumper where the winch sits down, in between the frame rails? I'm not sure how big to make the opening in the front, where the fairlead mounts.
I'm either looking at the Warn M8000 or Ramsey Patriot 9500.
The Warn seems to have the center of the spool at 2.5", and the Patriot has the center of the spool at 3.5" tall. So, should my fairlead hole also be centered at 2.5" or 3.5" or an average of 3"?
I'm either looking at the Warn M8000 or Ramsey Patriot 9500.
The Warn seems to have the center of the spool at 2.5", and the Patriot has the center of the spool at 3.5" tall. So, should my fairlead hole also be centered at 2.5" or 3.5" or an average of 3"?

Trending Topics
05-01-2009, 06:54 AM
#8
JK Enthusiast
Thread Starter
Join Date: Jul 2007
Location: Ocala
Posts: 434
Likes: 0
Received 0 Likes
on
0 Posts
 My buddy at work welds. Training will start next week sometime. I'll practice making beads until they're OK, then practice welding some scrap together, then hit the bumper.
I don't expect my welds to look good for the bumper; that's what the angle grinder is for. Actually, I take that back. I'm pretty confident they'll be OK.
05-01-2009, 07:05 AM
#9
JK Freak
Join Date: Oct 2007
Location: Hangin in the sunshine state....staging forum..
Posts: 943
Likes: 0
Received 2 Likes
on
2 Posts
None. My buddy at work welds. Training will start next week sometime. I'll practice making beads until they're OK, then practice welding some scrap together, then hit the bumper.
I don't expect my welds to look good for the bumper; that's what the angle grinder is for. Actually, I take that back. I'm pretty confident they'll be OK.
My buddy at work welds. Training will start next week sometime. I'll practice making beads until they're OK, then practice welding some scrap together, then hit the bumper.I don't expect my welds to look good for the bumper; that's what the angle grinder is for. Actually, I take that back. I'm pretty confident they'll be OK.


 05-01-2009, 01:41 PM
#10
JK Freak
Join Date: Apr 2007
Location: Clermont, FL
Posts: 829
Likes: 0
Received 0 Likes
on
0 Posts
I know its a little late but to give you a tip on making that curve if you were to cut a pie out of the ends on the top and bottom part of it then heat up the front side with a torch then hammer it into place you would only have two welds to do and be alittle bit stronger
doing it the way you did you have to be carefull of pulling the metal out of alignment with all the welding in the tight surface area
doing it the way you did you have to be carefull of pulling the metal out of alignment with all the welding in the tight surface area