
Rancho tire carrier
 10-27-2009, 08:09 AM
#11
JK Junkie
Join Date: Oct 2008
Location: Fort St John B.C.
Posts: 2,008
Likes: 0
Received 0 Likes
on
0 Posts
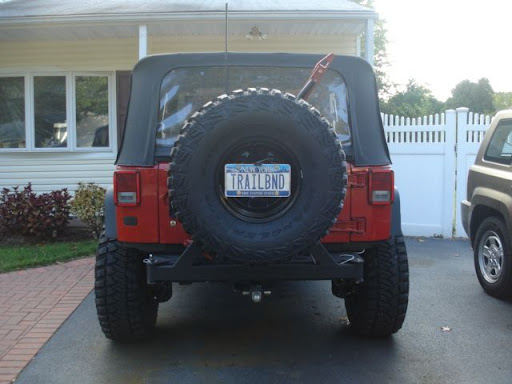
Here are a few shots of my Rancho rear bumper. This is the old style and I love the way it looks from the back. I had some rattling issues with it until I dinged the pin side of the carrier on a rock in Moab and amazingly no more rattle and still no issues closing it. Install took about 1 1/2 hours including the receiver. 


Do you have any pics from the side to see how far out the tire is from the body?
 10-27-2009, 08:13 AM
#12
JK Enthusiast
Join Date: Mar 2009
Location: Twin Falls Idaho
Posts: 328
Likes: 0
Received 0 Likes
on
0 Posts
I have the hi lift mounted to where if I open the carrier all the way the tail gate will open 90 degrees and the foot of the jack hits the plastic on the hinge so it doesn't damage the tail gate. Wish it opened more but its not a big deal at 90.


 10-27-2009, 12:46 PM
#17
JK Enthusiast
Where have you seen the XRC for ~$100 more than the Rancho? I've been looking at that one for a while and ahven't seen anything less than $799. If it truly is only $100 more I'll pull the trigger.
10-27-2009, 01:14 PM
#18
JK Newbie
Thread Starter

Join Date: Jul 2009
Location: suffolk,ny
Posts: 70
Likes: 0
Received 0 Likes
on
0 Posts
Nothing is close to Rancho in price that includes a bumper and tire carrier.
Most have just the bumper OR tire carrier for $450+ each.
I did A LOT of research on all of the tire carriers and this was by far the cheapest.
Just surprised the quality was still A+ even though the price was cheap.
 11-02-2009, 07:56 AM
#19
JK Newbie
Thread Starter
Join Date: Jul 2009
Location: suffolk,ny
Posts: 70
Likes: 0
Received 0 Likes
on
0 Posts
UPDATE:
I installed the bumper saturday.
Surprisingly EVERYTHING cooperated.
The old bumper came off easily.
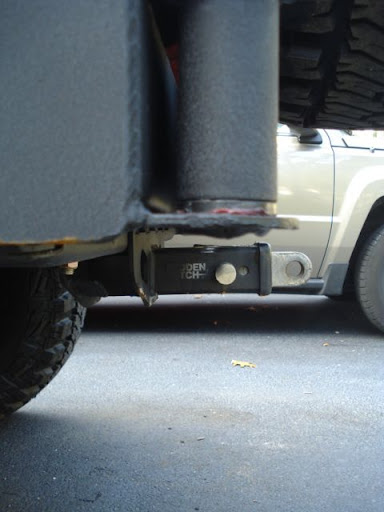
The new bumper lined up PERFECTLY even with the factory trailer hitch in place.
No washers need at all.
Drilled out the two holes in the frame for the crush sleeves without issues.
Everything lined back up to install the bumper.
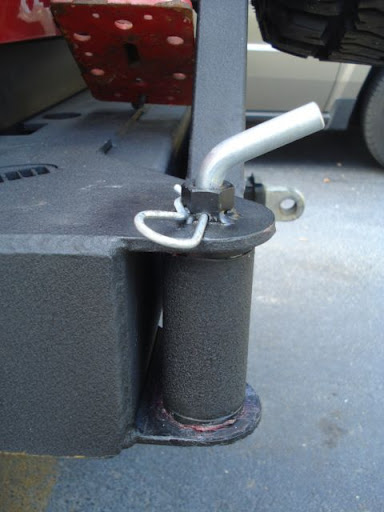
The tire carrier required some "adjustment" with a 4x4 in order for the bushings to fit inside the tabs.
After beating it up (without messing up the powdercoat), everything fit nicely with no rattles or play.
The only tricky and pain in the ass part of the install is the latch.
It is TERRIBLE!!!
I couldn't get the pin to align properly, so it took the use of a 1/2" drill bit, mini-sledge hammer, and a lot of trial and error.
It still doesn't work the way I'd like, but it's 100% better and will definitely get better over time as it wears in.
I chopped the endcaps off the old stock bumper and got them to fit pretty well.
I kept the brackets attached to the bumper and used a straight edge to find where I was chopping.
Put some electrical tape where the cut needed to be and used a sawsall with an 8" demo blade.
Cut through it like butter. Cleaned it up a little bit and they bolted right on with no gap.
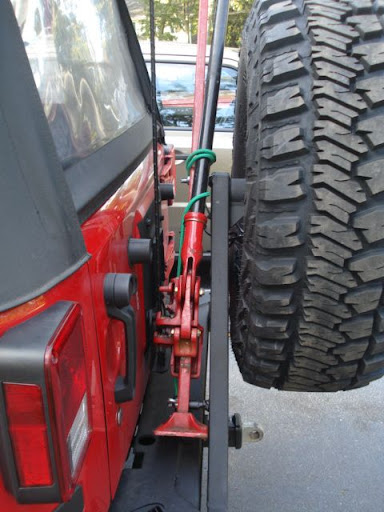
The hi-lift bolted on with no issues at all. Everything lined up perfectly.
You need to open the tire carrier all the way in order to open the tailgate to 90 degrees.
The plastic hinge cover contacts the base of the hi-lift when open fully.
Without the hi-lift installed. Both will open fully, but the bolt that holds the hilift will hit the metal part of the hatch, causing a small dent and chipped paint. (don't ask me how I know)..
I'll upload pix later tonight.
I took a bunch from all different angles.
The 285/75r16's on Mickey Thompson Classic Lock rims (5 on 4.5 bolt pattern) fit perfectly without the need for longer hardware or the spacer.
I will be taking this to my fabricator to see if he can design a better latching system, and create a mount for my 5lb CO2 tank and bracket. Maybe another bracket for a water tank.
I installed the bumper saturday.
Surprisingly EVERYTHING cooperated.
The old bumper came off easily.
The new bumper lined up PERFECTLY even with the factory trailer hitch in place.
No washers need at all.
Drilled out the two holes in the frame for the crush sleeves without issues.
Everything lined back up to install the bumper.
The tire carrier required some "adjustment" with a 4x4 in order for the bushings to fit inside the tabs.
After beating it up (without messing up the powdercoat), everything fit nicely with no rattles or play.
The only tricky and pain in the ass part of the install is the latch.
It is TERRIBLE!!!
I couldn't get the pin to align properly, so it took the use of a 1/2" drill bit, mini-sledge hammer, and a lot of trial and error.
It still doesn't work the way I'd like, but it's 100% better and will definitely get better over time as it wears in.
I chopped the endcaps off the old stock bumper and got them to fit pretty well.
I kept the brackets attached to the bumper and used a straight edge to find where I was chopping.
Put some electrical tape where the cut needed to be and used a sawsall with an 8" demo blade.
Cut through it like butter. Cleaned it up a little bit and they bolted right on with no gap.
The hi-lift bolted on with no issues at all. Everything lined up perfectly.
You need to open the tire carrier all the way in order to open the tailgate to 90 degrees.
The plastic hinge cover contacts the base of the hi-lift when open fully.
Without the hi-lift installed. Both will open fully, but the bolt that holds the hilift will hit the metal part of the hatch, causing a small dent and chipped paint. (don't ask me how I know)..
I'll upload pix later tonight.
I took a bunch from all different angles.
The 285/75r16's on Mickey Thompson Classic Lock rims (5 on 4.5 bolt pattern) fit perfectly without the need for longer hardware or the spacer.
I will be taking this to my fabricator to see if he can design a better latching system, and create a mount for my 5lb CO2 tank and bracket. Maybe another bracket for a water tank.
11-02-2009, 08:12 AM
#20
JK Junkie

Join Date: Jan 2008
Location: Long Island, NY
Posts: 2,319
Likes: 0
Received 0 Likes
on
0 Posts
I had my friend redesign the latch. If you do any type of wheeling, you will land on the latch pin when you decend off a rock/boulder. First wheeling trip I did with the carrier, I had to stop 7 times, get out, and pick up the pin. Had my friend weld a cotter pin style nut upside down, drilled through the latch, and used the same pin through the latch itself. Welded a washer below to add some meat to the hinged part. Plus, the 14mm bolts that are for the Hi-Lift suck. You can't find a wingnut at that size anywhere. So, cut them off and welded on standard grade-8 1/2" bolts. Welded at an angle because it doesn't matter which side you mount the Hi-Lift, it will hit the rear door. Now, it doesn't at all. Plus, looks better.
BTW, Suffolk County, NY or Suffolk is the name of your city?