
Pro Comp 2.5" CRT Coil Lift Install & Review
 10-06-2008, 11:57 AM
#1
JK Freak
Thread Starter
Join Date: Jun 2007
Location: Vancouver, B.C., Canada
Posts: 676
Likes: 0
Received 2 Likes
on
2 Posts
Hey Group,
I just picked up the Pro Comp Comfort Ride Tuned 2.5" Coil Lift with 6-way adjustable monotube design MX6 shocks. I am documenting the kit and install on this thread to provide others with facts. I have done many searches for this kit with no information as of yet. I thought it would help to give photos and thoughts for the general community. I realize ther are other 2.5" coil lifts on the market, but I wanted to see how this performes... "Don't knock it till you try it". Please Stay Tuned for more. . . . .
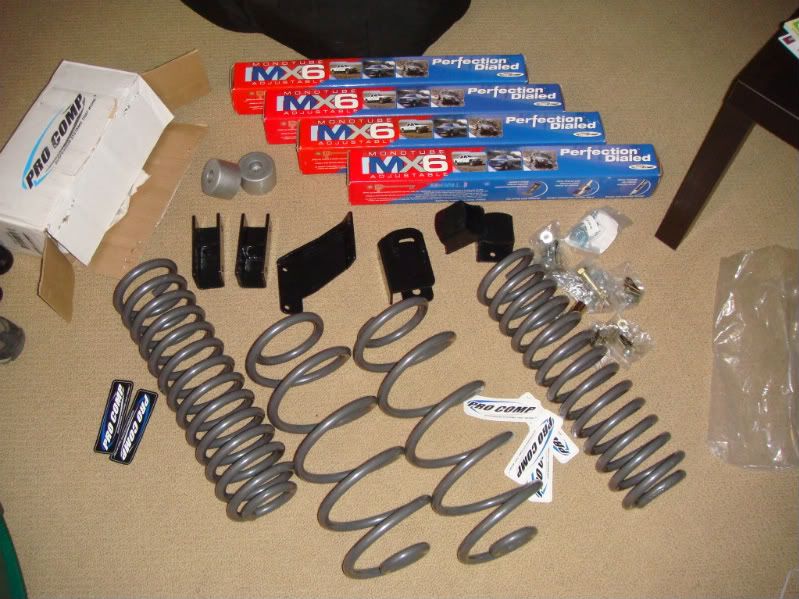
Here is the Kit:
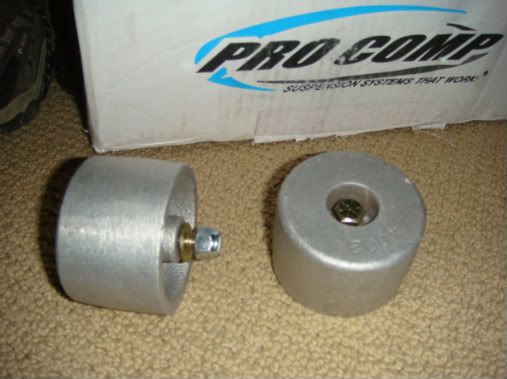
- Aluminum front bumpstop spacers
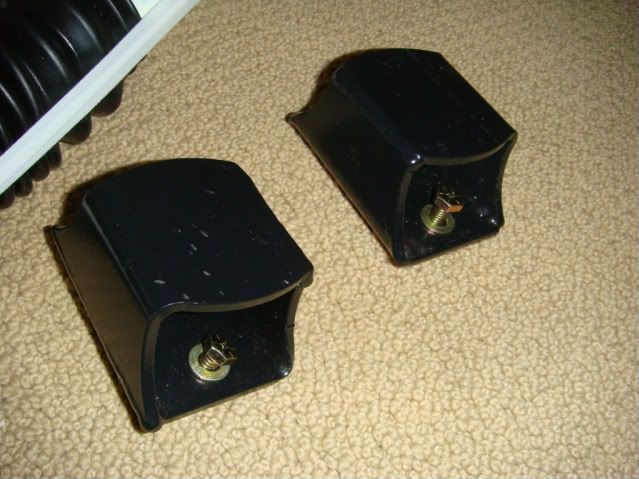
- rear bumpstop spacers
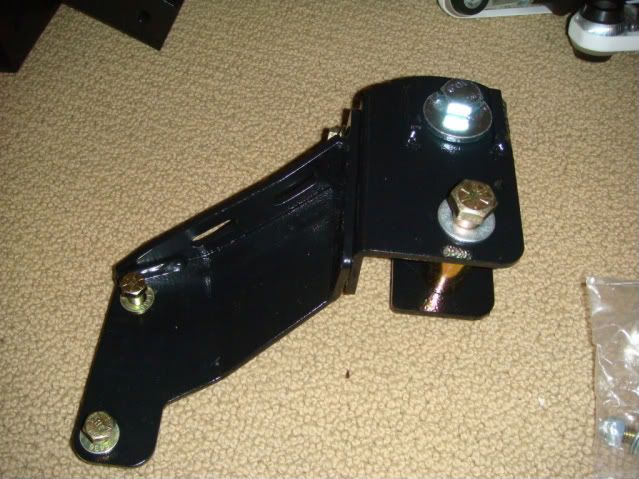
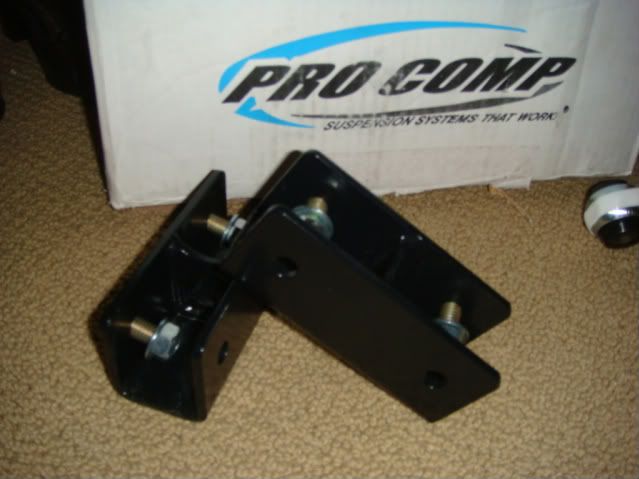
- Rear trackbar relocation bracket & re-enforcement brace
- Front sway bar drop brackets
- lift springs
- adjustable monotube shocks
- Required Hardware pack
- Full instructions & many stickers
ADDED ON OCTOBER 15TH, 2008:
I am about to install this kit this Saturday, October the 18th. I will be sure to upload some more info and pics at that time.
As an overview, the kit is shipped in 4 separate boxes. One box each for the rear springs, front springs, 4 shocks and the last box contains all the brackets, bumpstops, hardware and instructions; he kit is packaged well. There are more than enough stickers and decals included for every toolbox you have.
All 4 springs arrive with light grey paint without a blemish. The MX6 shocks are shipped in the compressed state and include a black rubber boot with strap. The brackets are all painted black and the front bumpstops were simple cast aluminum. The only blemish I found was a small paint chip missing on one of the corners of a bracket, not a problem at all. The kit comes with multiple pouches of hardware with contents dedicated to each part of the install. There was no missing hardware. Lastly 1 print copy of install instructions are included along with the usual end-user disclaimer notice.
The instructions remain quite basic with only a few schematic diagrams, however, I do not forsee any problems as everything seems very strait forward. If you would like a PDF copy of the installation intructions please PM me and I will send you the link.
A few things you will need before you complete the install on your own:
1 - Small tube of Loctite
2 - Drill Bits including at minimum a 3/8" metal-purpose bit.
3 - Electric drill (corded or cordless)
4 - Floor Jack
5 - Torque Wrench
Stay tuned for more!
I just picked up the Pro Comp Comfort Ride Tuned 2.5" Coil Lift with 6-way adjustable monotube design MX6 shocks. I am documenting the kit and install on this thread to provide others with facts. I have done many searches for this kit with no information as of yet. I thought it would help to give photos and thoughts for the general community. I realize ther are other 2.5" coil lifts on the market, but I wanted to see how this performes... "Don't knock it till you try it". Please Stay Tuned for more. . . . .
Here is the Kit:
- Aluminum front bumpstop spacers
- rear bumpstop spacers
- Rear trackbar relocation bracket & re-enforcement brace
- Front sway bar drop brackets
- lift springs
- adjustable monotube shocks
- Required Hardware pack
- Full instructions & many stickers
ADDED ON OCTOBER 15TH, 2008:
I am about to install this kit this Saturday, October the 18th. I will be sure to upload some more info and pics at that time.
As an overview, the kit is shipped in 4 separate boxes. One box each for the rear springs, front springs, 4 shocks and the last box contains all the brackets, bumpstops, hardware and instructions; he kit is packaged well. There are more than enough stickers and decals included for every toolbox you have.
All 4 springs arrive with light grey paint without a blemish. The MX6 shocks are shipped in the compressed state and include a black rubber boot with strap. The brackets are all painted black and the front bumpstops were simple cast aluminum. The only blemish I found was a small paint chip missing on one of the corners of a bracket, not a problem at all. The kit comes with multiple pouches of hardware with contents dedicated to each part of the install. There was no missing hardware. Lastly 1 print copy of install instructions are included along with the usual end-user disclaimer notice.
The instructions remain quite basic with only a few schematic diagrams, however, I do not forsee any problems as everything seems very strait forward. If you would like a PDF copy of the installation intructions please PM me and I will send you the link.
A few things you will need before you complete the install on your own:
1 - Small tube of Loctite
2 - Drill Bits including at minimum a 3/8" metal-purpose bit.
3 - Electric drill (corded or cordless)
4 - Floor Jack
5 - Torque Wrench
Stay tuned for more!
Last edited by Matt08jk; 10-15-2008 at 02:25 PM.


 10-06-2008, 05:43 PM
#3
JK Newbie

Join Date: May 2008
Location: Vancouver BC
Posts: 14
Likes: 0
Received 0 Likes
on
0 Posts
Looks good. I am also in Vancouver and very interested in this lift. Where did you buy it from and what was the cost? What was the actual lift you got from it and did it level your stance?
Thanks,
M
Thanks,
M

 10-06-2008, 07:14 PM
#6
JK Enthusiast

Join Date: Jun 2008
Location: Banning ,Ca
Posts: 298
Likes: 0
Received 0 Likes
on
0 Posts
I have a 3" installed on mine, all is nice.. I must advise you to pay close attention to the bushings on the shocks. I went through about 3 sets of shocks and then 2 sets of bushings before they had a "silent" recall. Maybe your kit is new enough to have updated bushings but be aware. I really like the ability to adjust the ride for on and off road.
Good luck,
Steve
Good luck,
Steve
10-06-2008, 08:28 PM
#7
JK Newbie

Join Date: Aug 2007
Location: Huntington Beach
Posts: 19
Likes: 0
Received 0 Likes
on
0 Posts
I have the Pro Comp kit on my JK with the MX6 Shocks. Works great. Be prepared to replace the front driveshaft if you have an automatic. Read enough of the posts on line and when your driveshaft boot tears don't feel special. If it tears on the trail don't worry, you have plenty of time to replace it unless you wash all of the grease away. When my shaft boot tore on the trail, I was concerned about making it home, but I later learned from this forum what it was and why.
