
Low-cost / Free mods that should be done?
 05-04-2013, 08:42 PM
#3071
JK Super Freak
 05-05-2013, 07:21 AM
#3073
JK Junkie
05-05-2013, 09:19 AM
#3074
JK Newbie
Join Date: Jun 2009
Location: St. Louis/Columbia, MO
Posts: 38
Likes: 0
Received 0 Likes
on
0 Posts
05-05-2013, 09:45 AM
#3075
JK Newbie
Join Date: Mar 2012
Location: Beaverton, Oregon
Posts: 42
Likes: 0
Received 0 Likes
on
0 Posts
05-05-2013, 01:46 PM
#3076
JK Newbie
Join Date: Jul 2012
Location: Quebec
Posts: 38
Likes: 0
Received 0 Likes
on
0 Posts
Today I decided to find a way to put on my "No doors" Mirrors. Can anyone tell me if this is a bad idea? I took out the screw along the windshield and screwed in my mirrors. I actually see very well, except for the passenger side. I have to pull the passenger side in and towards the back of the jeep but it works!
After placing them I realized I had enough clearance to put the doors on and keep the mirrors on as well. I then ripped off the factory mirrors from the door with the intensions to see how they were built and try to figure out why they leak/gather water. after seeing how they are put together i decided I'm not putting them back on. But my mind was determined to solve the leaky problem without drilling. So, I stuck a feed hose into the base of the mirror and sprayed it full of expanding foam. The foam will expand and should close all possible passeges that water usually gets in and gives it no room to gather water. I have no clue if this will work and i was worried the foam would screw up the mirror. I'll only know once I wash her. I don't plan to put the mirrors back on so if they break or get messed up it will be no big deal. But i thought I'd pass the idea along...
There was a lot of white stuff built up on the pegs that extend into the door. I tried to get it off with CLR but it won't come off! I sprayed just enough foam to allow it to expand without coming out of the chassis and set the mirrors aside till the morning.
I'll let ya'll know the results.
05-05-2013, 06:43 PM
#3079
JK Newbie
Join Date: Jun 2010
Location: Stanford, Ky.
Posts: 8
Likes: 0
Received 0 Likes
on
0 Posts
I made a paracord wheel cover, I made rock rails front bumper with stinger. Painted factory wheels with spray bed liner. I also painted the trim around bottom of doors with bed liner. This is great stuff.
05-06-2013, 12:50 AM
#3080
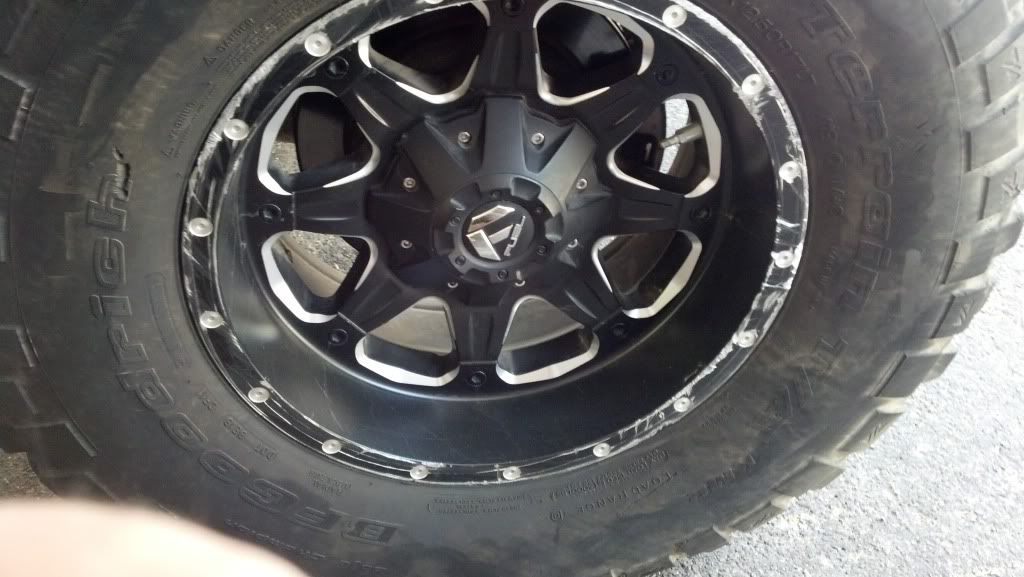
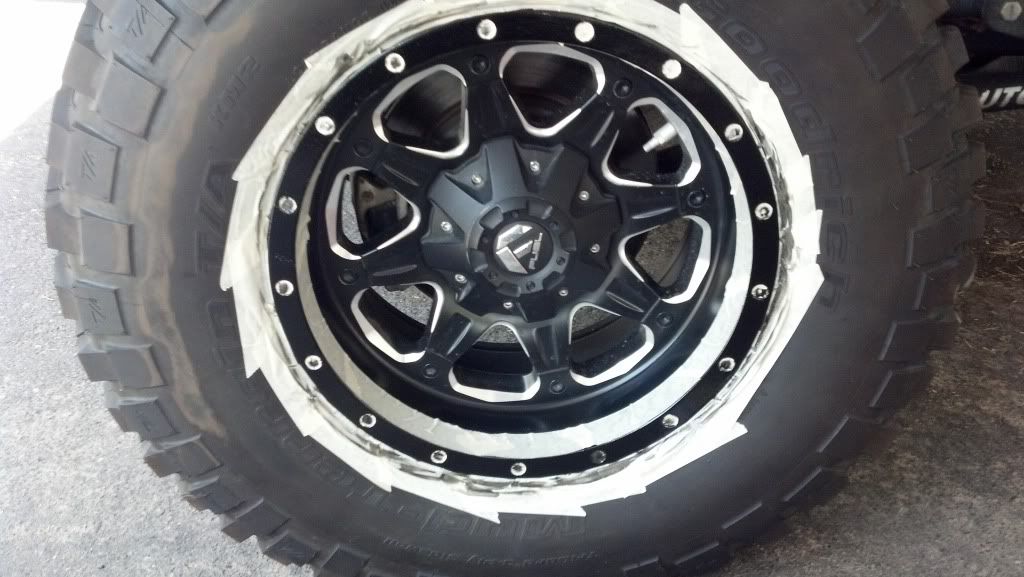
Well, as promised earlier in this thread I took some time to "Rhino Line" the beauty ring part of my wheels as they have taken considerable abuse from the rocks. I just recently rotated my spare on, which has never seen any rocks, so we have a baseline of what they looked like new. The first few shots are of the current state...
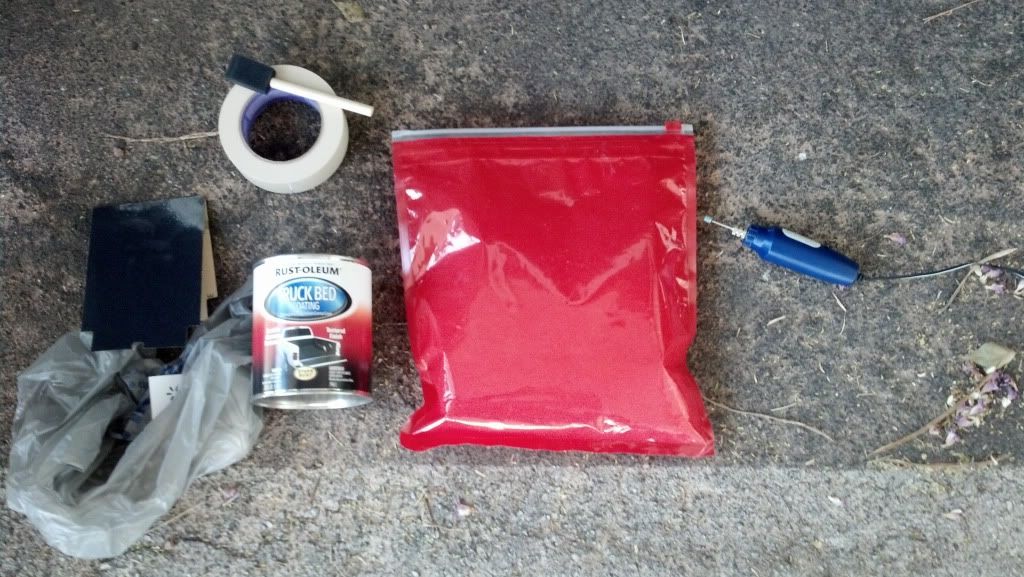
This is all the materials used in this little adventure of my wife. The red bag is 100% IPA that we used to get them clean, the Dremel was used to smooth out the rough parts where I'd torn chunks out so that we got a slightly smoother finished product. The sand paper we used to rough it all up to give the "Rhino Line" somewhere to grip.
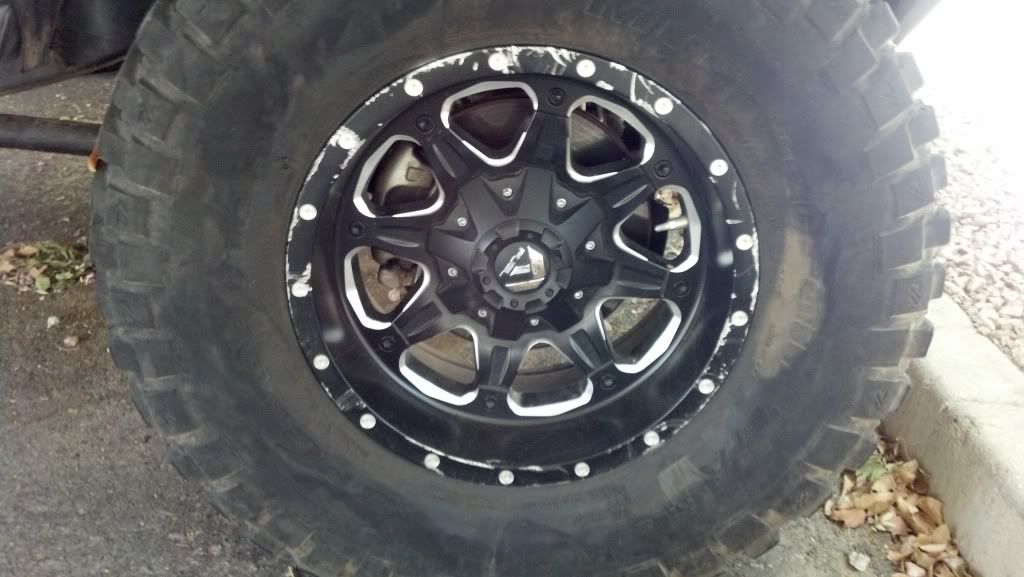
Here's what they looked like new; the wife had already started taping it off though. Thankfully this was her project which gave me time to put the new motor in my winch and mount my fairlead.
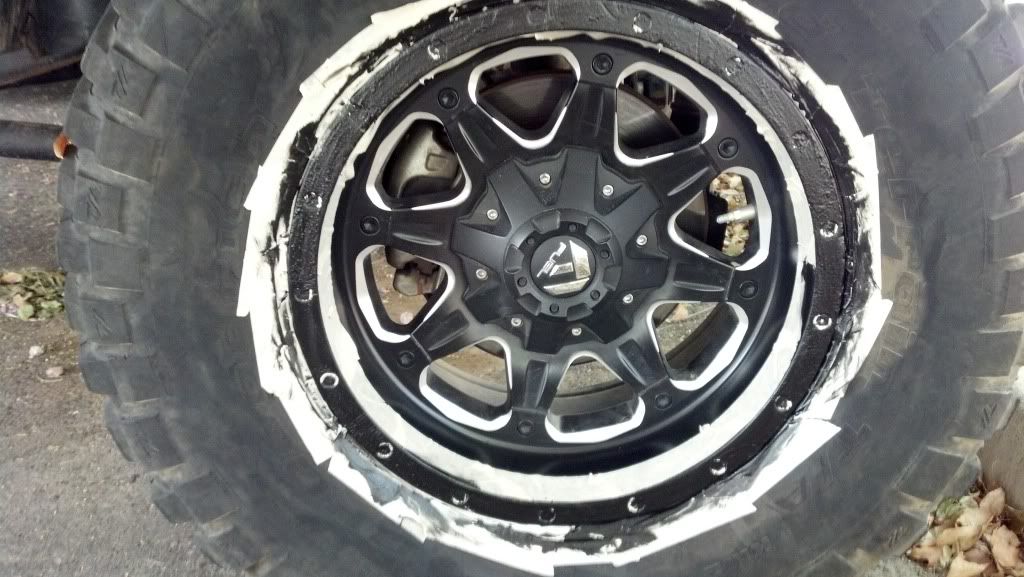
Masking and painting shots; the first one was her first coat on the former spare
She's much better at this stuff, but I had to try... I wasn't near as good at it.
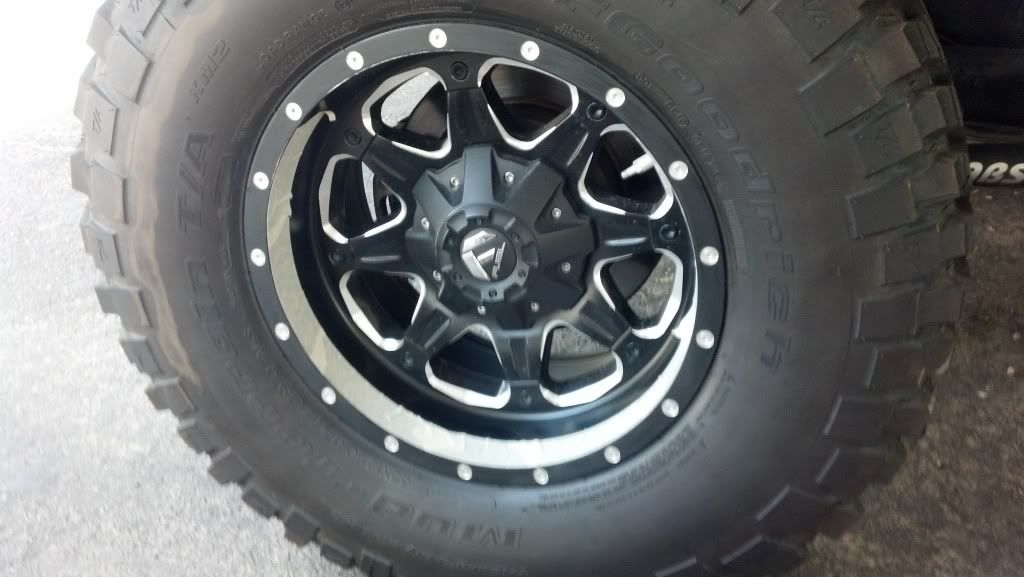
And here is the finished product. From a distance they look brand new again. Up close you can still see the chunks and rough parts but... Bah! That proves that it gets wheeled.
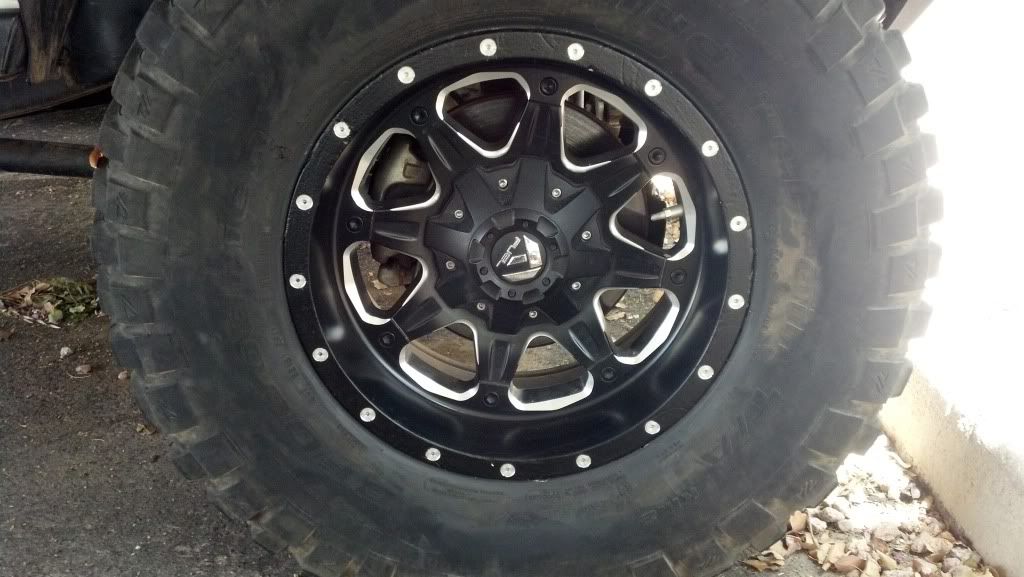
And yes... Those little milled out spots to simulate the bead lock sucked to mask off, I actually had to bring the wife a few while she was doing those... Usually she's bringing em to me.


This is all the materials used in this little adventure of my wife. The red bag is 100% IPA that we used to get them clean, the Dremel was used to smooth out the rough parts where I'd torn chunks out so that we got a slightly smoother finished product. The sand paper we used to rough it all up to give the "Rhino Line" somewhere to grip.

Here's what they looked like new; the wife had already started taping it off though. Thankfully this was her project which gave me time to put the new motor in my winch and mount my fairlead.

Masking and painting shots; the first one was her first coat on the former spare

She's much better at this stuff, but I had to try... I wasn't near as good at it.

And here is the finished product. From a distance they look brand new again. Up close you can still see the chunks and rough parts but... Bah! That proves that it gets wheeled.

And yes... Those little milled out spots to simulate the bead lock sucked to mask off, I actually had to bring the wife a few
while she was doing those... Usually she's bringing em to me.