LOD mid- width rear install not going well!


 02-27-2012, 10:06 AM
#12
JK Enthusiast
Thread Starter
Join Date: Nov 2011
Location: Richmond Virginia
Posts: 190
Likes: 0
Received 0 Likes
on
0 Posts
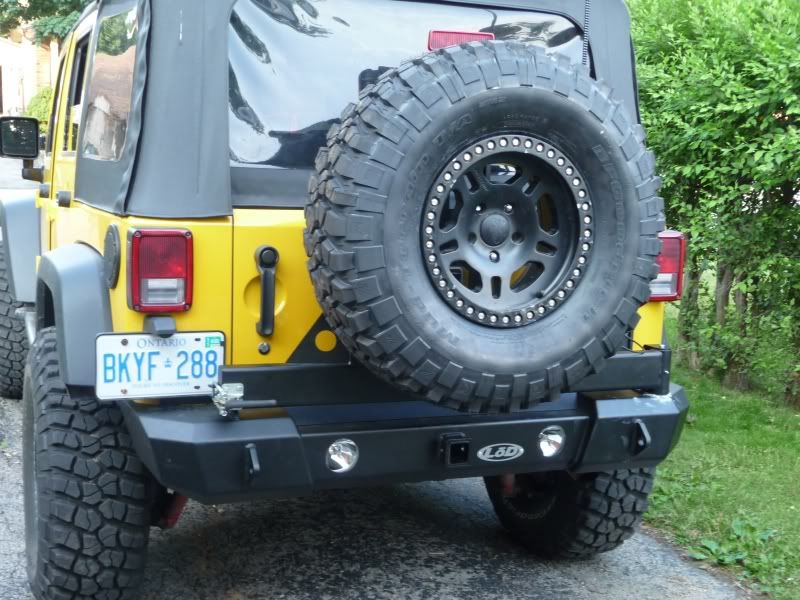
Well its on! (ain't right but IDGAS)
Here's the poop IMHO
It's kinda like building a deck once you've built one the next one is easier (maybe)
Read the instruction and read them again
Do not get the lite kit (can't replace bulbs without removing bumper) this is stupid
Try greasing the bumper first, I had to do a little grinding and greasing
List of shit needed
Multiple jacks and/or people that like pushing/ pulling on larger metal things
Wood blocks/big Fing hammer
Drill bits of proper size and length (you have to drill thru both frame rails)
For me I would have rather put my own suspension kit in than do this!
Trying to get this adjusted right was a huge PIA, it's still not right and I doubt it ever will be.
LOD is most likely a good product, but what I'm finding out about this industry is all instructions are written as if you have done it before. I have nothing to compare it to and they are probably all the same.
Go with what you like/need/ cheapest
The hole for the lock to hold the tire out of the way is off enough that it doesn't lock.
More drilling yippie!
Over all disappointed but I will be the first to admit my expectations may exceed the reality of the situation!
Your results may vary
02-27-2012, 11:26 AM
#13
JK Enthusiast
Join Date: Jan 2011
Location: Omaha, NE
Posts: 333
Likes: 0
Received 0 Likes
on
0 Posts
Mine was also VERY tight. Had to go 1/16 of an inch at a time on each side, hammering as hard as I could using a block of wood to protect the bumper finish. Went on in time and to this day I think it was worth it because the bumper is solid as hell with absolutely zero rattles. Hang in there bud. And get a BFH! 
Block(s) of wood and a BFH. Sturdy heavy duty stuff though; worth it once the install is over. I'd hammer it a few times on one side, then the other side, rinse and repeat.
My bumpers saw a helluva workout this weekend ... in addition to the front meeting a tree I opened my rear swing away on a hard leaning slope (to the passenger side) and the damn thing got away from me. They make that swing pivot stud very stout, that was a lot of torque and it's still all square. Nice little dimple above my taillight though from it going all the way around and the fuel tank tray making contact.
Aww man,,,, caught up to your post above. Hopefully it works out for you. I did find that the third time I put one on was a LOT easier then the first two. Had it on my first JK, took it off put on my second, then took it off again to get my lights working.

Last edited by BigMAK1; 02-27-2012 at 11:28 AM.
02-27-2012, 11:32 AM
#14
JK-Forum Founder

Join Date: Jul 2006
Location: Laguna Niguel, CA
Posts: 36,534
Likes: 0
Received 16 Likes
on
15 Posts
well, i'm sorry that i didn't see this thread sooner. the easiest way to install this bumper is to take a 3 lb hammer and hit the outside of your frame rails. you don't want to hit it so much as to cause obvious deformaties but, just enough to tapper the outside surface in - from about the ends to maybe 4"-6" in. if you do it right, you shouldn't even be able to tell that you hit it at all. from there, you can apply some white lithium grease to the outside surface of the frame rails and or to the inside of the bumper flanges. by doing this, you can easily install and remove the bumper with ease. trust me, i have installed about half a dozen of these bumpers and all by myself and the fastest time in about an hour.