
Install time for Rugged Ridge bumper
 11-09-2010, 01:22 PM
#21
JK Enthusiast
Join Date: Jul 2009
Location: Nassau County, NY
Posts: 289
Likes: 0
Received 0 Likes
on
0 Posts
Installed my RR winch bumper in my garage... had a little mishap with the utility knife  while cutting one of the zip ties for the fog lights and ended up at Pottstown Memorial Hospital (know anyone that works there
  ) I ended up getting a dozen stitches in my finger but once I got home all bandaged up I finished the install in no time !!! Start to finish about 4 hours... (less the time at the hospital
  ). I would say let me know if you need any help but I'm sure you don't want a pool of blood on your garage floor... and neither do I.
Good Luck.
while cutting one of the zip ties for the fog lights and ended up at Pottstown Memorial Hospital (know anyone that works there ) I ended up getting a dozen stitches in my finger but once I got home all bandaged up I finished the install in no time !!! Start to finish about 4 hours... (less the time at the hospital ). I would say let me know if you need any help but I'm sure you don't want a pool of blood on your garage floor... and neither do I. Good Luck.
 .
.Can't wait to see the pictures. When you were taking the old bumper off, did you just go in there ripping stuff off the Jeep or did you have a game plan?
That's why I would like to know what to do first. It's one thing to see how it goes on with the instructions, it's another looking at the Jeep and saying where do I begin.

Thanks
 11-09-2010, 04:03 PM
#22
JK Enthusiast
Join Date: May 2010
Location: Sugar Hill, GA
Posts: 357
Likes: 0
Received 0 Likes
on
0 Posts
Installed my RR winch bumper in my garage... had a little mishap with the utility knife while cutting one of the zip ties for the fog lights and ended up at Pottstown Memorial Hospital (know anyone that works there ) I ended up getting a dozen stitches in my finger but once I got home all bandaged up I finished the install in no time !!! Start to finish about 4 hours... (less the time at the hospital ). I would say let me know if you need any help but I'm sure you don't want a pool of blood on your garage floor... and neither do I.
Good Luck.
while cutting one of the zip ties for the fog lights and ended up at Pottstown Memorial Hospital (know anyone that works there ) I ended up getting a dozen stitches in my finger but once I got home all bandaged up I finished the install in no time !!! Start to finish about 4 hours... (less the time at the hospital ). I would say let me know if you need any help but I'm sure you don't want a pool of blood on your garage floor... and neither do I. Good Luck.
 Thanks..
11-09-2010, 04:31 PM
Thanks..
11-09-2010, 04:31 PM
#23
JK Junkie
Join Date: Oct 2006
Location: Pottstown, PA
Posts: 2,466
Likes: 0
Received 0 Likes
on
0 Posts
 11-09-2010, 04:34 PM
#24
JK Junkie
Join Date: Oct 2006
Location: Pottstown, PA
Posts: 2,466
Likes: 0
Received 0 Likes
on
0 Posts
WOW, thats too bad about your finger. And to think you finnished the install with stitches.
Can't wait to see the pictures. When you were taking the old bumper off, did you just go in there ripping stuff off the Jeep or did you have a game plan?
That's why I would like to know what to do first. It's one thing to see how it goes on with the instructions, it's another looking at the Jeep and saying where do I begin.
Thanks
.Can't wait to see the pictures. When you were taking the old bumper off, did you just go in there ripping stuff off the Jeep or did you have a game plan?
That's why I would like to know what to do first. It's one thing to see how it goes on with the instructions, it's another looking at the Jeep and saying where do I begin.
Thanks
 11-09-2010, 04:56 PM
#26
JK Junkie
Join Date: Oct 2006
Location: Pottstown, PA
Posts: 2,466
Likes: 0
Received 0 Likes
on
0 Posts
http://www.quadratec.com/Assets/Installation/93750.pdf
11-09-2010, 05:57 PM
#27
I just installed my front and rear bumpers this weekend. I had the stock front and rear bumpers off within a half hour. Use wire dikes to cut the zip ties on the wiring for the fog lights. Use a wire brush on the studs for the fog lights on the RR bumper before you try to install the tiny nuts. And have a friend help you. A second set of hands made it very easy. The back bumper was tricky to get all the bolts to thread into the holes. Not that big of a deal though. Two guys can do front and back in an hour, at most an hour and a half. The tire carrier will add about a half hour also. Two hours tops for all this with an impact, a couple extentions and a swivel.
11-09-2010, 06:45 PM
#28
JK Enthusiast
Thread Starter
Join Date: Oct 2010
Location: Chester County, PA
Posts: 374
Likes: 0
Received 0 Likes
on
0 Posts
11-09-2010, 06:52 PM
#29
JK Enthusiast
Thread Starter
Join Date: Oct 2010
Location: Chester County, PA
Posts: 374
Likes: 0
Received 0 Likes
on
0 Posts
To remove factory bumper.....
1. Start with the plastic air dam underneath the bumper. There are six plastic set screws that secure the plastic air dam undereath the bumper. Four in the front. Two in the back. Don't use a Phillips screwdriver. Useless. Just pry and pop them out. I used the back of a small hammer. Don't worry if you break them. You won't need them. They don't come off easy. Very frustrating.
2. Remove fog light bulbs. Squeeze the housing and them pop out. Very easy.
3. Detach the bumper from the frame rails. There are a total of 8 bolts. 4 on each frame. You'll need socket wrench w/extension and a friend. It's heavy.
4. Remove plastic cover in front of the grille. There are two plastic set screws on top. Phillips screwdriver worked here. Just unscrew and take off.
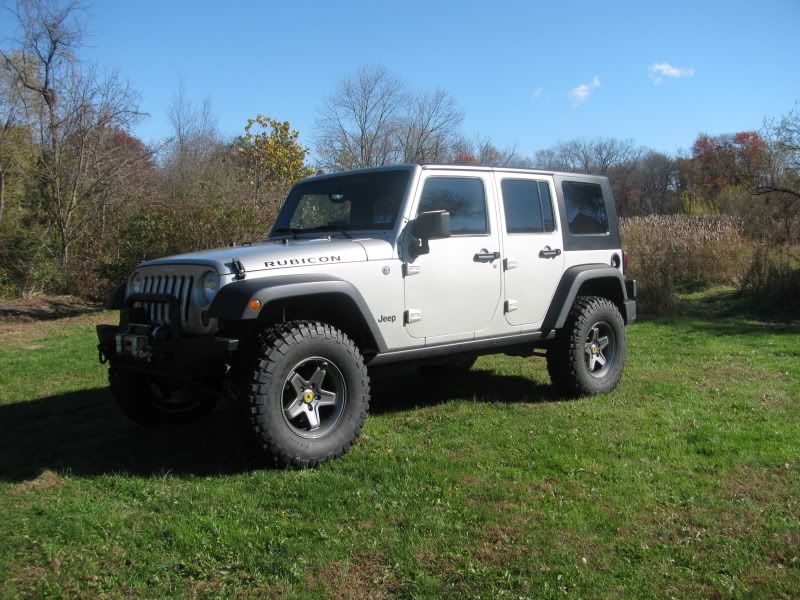
That's it. Onto RR install....pics soon.

1. Start with the plastic air dam underneath the bumper. There are six plastic set screws that secure the plastic air dam undereath the bumper. Four in the front. Two in the back. Don't use a Phillips screwdriver. Useless. Just pry and pop them out. I used the back of a small hammer. Don't worry if you break them. You won't need them. They don't come off easy. Very frustrating.
2. Remove fog light bulbs. Squeeze the housing and them pop out. Very easy.
3. Detach the bumper from the frame rails. There are a total of 8 bolts. 4 on each frame. You'll need socket wrench w/extension and a friend. It's heavy.
4. Remove plastic cover in front of the grille. There are two plastic set screws on top. Phillips screwdriver worked here. Just unscrew and take off.
That's it. Onto RR install....pics soon.
11-09-2010, 07:15 PM
#30

To remove factory bumper.....
1. Start with the plastic air dam underneath the bumper. There are six plastic set screws that secure the plastic air dam undereath the bumper. Four in the front. Two in the back. Don't use a Phillips screwdriver. Useless. Just pry and pop them out. I used the back of a small hammer. Don't worry if you break them. You won't need them. They don't come off easy. Very frustrating.
2. Remove fog light bulbs. Squeeze the housing and them pop out. Very easy.
3. Detach the bumper from the frame rails. There are a total of 8 bolts. 4 on each frame. You'll need socket wrench w/extension and a friend. It's heavy.
4. Remove plastic cover in front of the grille. There are two plastic set screws on top. Phillips screwdriver worked here. Just unscrew and take off.
That's it. Onto RR install....pics soon.