
OR Fab Tire carrier tips
 07-05-2011, 09:41 AM
#1
JK Freak
Thread Starter
Join Date: Aug 2009
Location: wisconsin
Posts: 899
Likes: 0
Received 0 Likes
on
0 Posts
I installed my tire carrier yesterday. I will have to admit it took a little longer than i thought. I wanted to post my findings that would be helpful. Also BONEDOCs opinions as well because they were helpful to me
If you are taking off any part of your jeep EVER, pre-buy the spray can touch up paint for your jeep color and I also used truck bed liner. This will save you when you take off the hinges and flip out that there is rust already Also the 2x4 they ask for is really a 2x4 and 1x2 on top of eachother.
[IMG]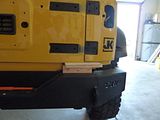 [/IMG]
print off the color instructions online. Also check that they included the TEMPLATE cause mine wasn't in there and when we followed the measurements they say...it was 1/4" off
[IMG]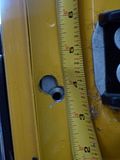 [/IMG]
[IMG]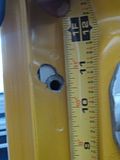 [/IMG]
[IMG]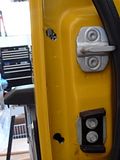 [/IMG]
You will need a long breaker bar or T-50 wrench for the hinges. Also a plastic hammer will also help!
The wavy washers are not fun to compress to put the washers in place this is what we ended up doing
[IMG]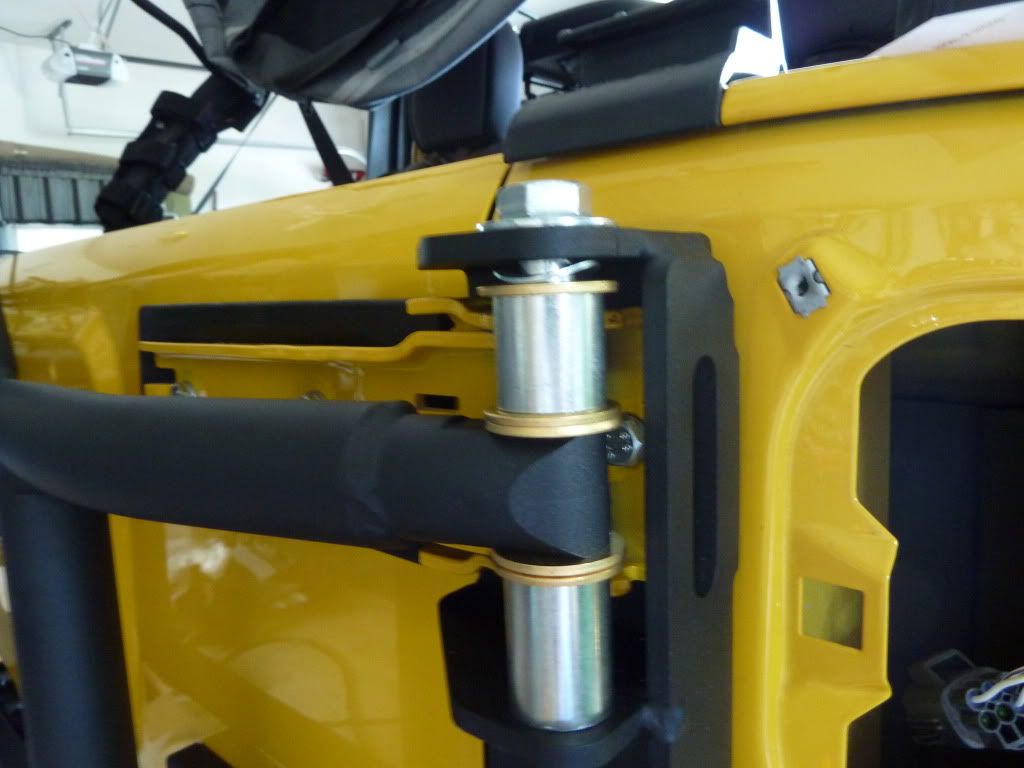 [/IMG]
[IMG]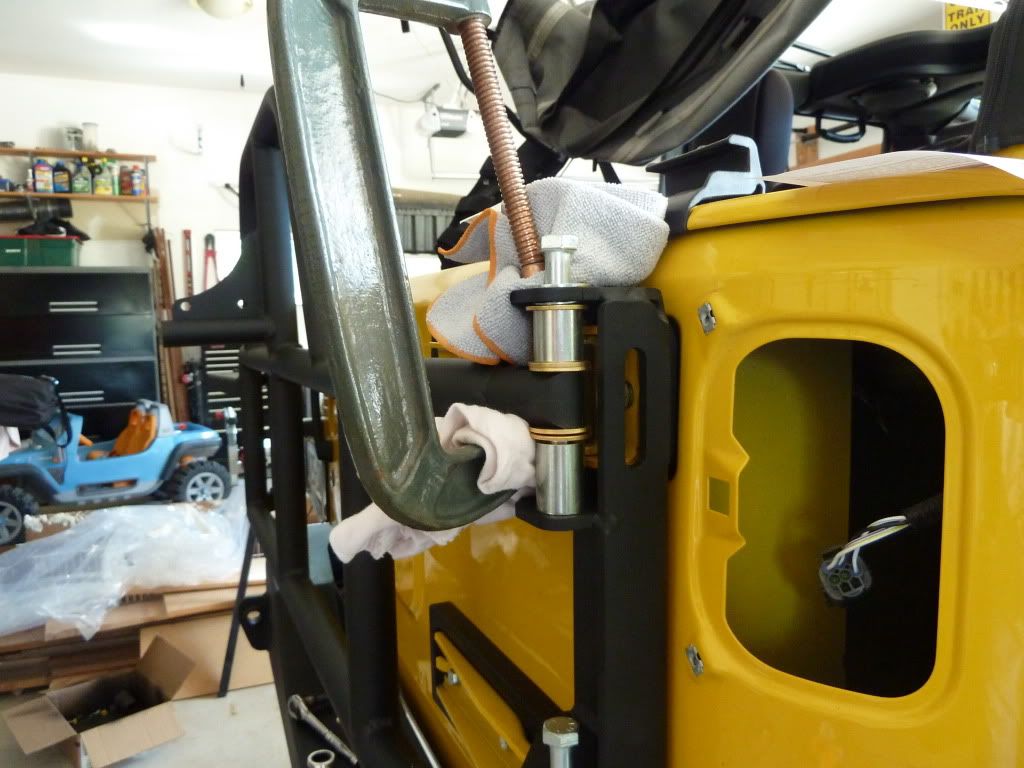 [/IMG]
Not pretty, but we were able to get one washer under the bottom spacer on the top part.
Getting the passenger tail light on was a challenge...it was pretty tight. Might have hubby talked into different taillights after this
[IMG]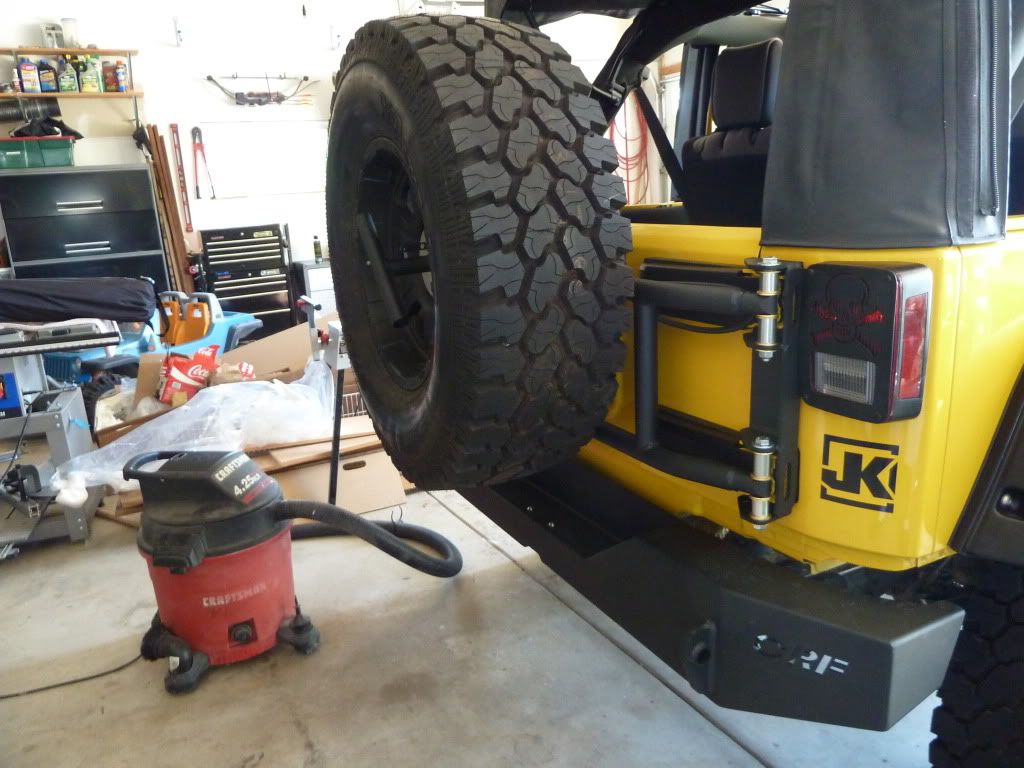 [/IMG]
[IMG] [/IMG]
[IMG]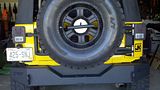 [/IMG]
If you are taking off any part of your jeep EVER, pre-buy the spray can touch up paint for your jeep color and I also used truck bed liner. This will save you when you take off the hinges and flip out that there is rust already
Also the 2x4 they ask for is really a 2x4 and 1x2 on top of eachother. [IMG]
 [/IMG]
print off the color instructions online. Also check that they included the TEMPLATE cause mine wasn't in there and when we followed the measurements they say...it was 1/4" off
[IMG]
 [/IMG]
[IMG]
 [/IMG]
[IMG]
 [/IMG]
You will need a long breaker bar or T-50 wrench for the hinges. Also a plastic hammer will also help!
The wavy washers are not fun to compress to put the washers in place this is what we ended up doing
[IMG]
[/IMG][IMG]
[/IMG]Not pretty, but we were able to get one washer under the bottom spacer on the top part.
Getting the passenger tail light on was a challenge...it was pretty tight. Might have hubby talked into different taillights after this
[IMG]
[/IMG][IMG]
 [/IMG]
[IMG]
 [/IMG]
 07-05-2011, 09:43 AM
#2
JK Freak
Thread Starter
Join Date: Aug 2009
Location: wisconsin
Posts: 899
Likes: 0
Received 0 Likes
on
0 Posts
BONEDOCs advice to me......
The installation is very straight forward but time consuming. You don't want to rush this. All said it took me approximately 5 hours to install it, but that includied having to run to grab tools I ended up needing from a different location.
The end result is well worth the effort though. If you never took your taillights off, take them off and take a look, that is where you will be working and it is a tight fit.
Here are a couple of tips.
1. Don't be afraid to double check before drilling. On the driver's side you will be drilling a large, 1" hole in your jeep so make sure you are lined up.
2. The instructions do say what you need but here are some others tools i ended up using.
a. offset 13mm box wrench
b. A flex drive for your drill, the instruction say to use a right angle drill, mine wasn't small enough to fit in all places.
c. when adjusting your tailgate and carrier, careful on the order you loosen your bolts. when everything is mounted and your doing your final adjustments to the carrier, your tailgate will have already been realigned. So to NOT lose your tailgate alignment, loosen the hinge bolts that are hidden(inside) when the tailgate is closed first. Then close your tailgate and put a few pieces of wood between it and your bumper. Then loosen the upper and lower outside hinge bolts, make your adjustments to your carrier. then retighten. Doing it this way the 2 outside hinge bolts keep everything aligned till you close the tailgate and then give it the wood to support it. Then you tighten the 2 outside which again hold everything tight, then you can open the tailgate and tighten the remaining 4 hinge bolts.
d. Assembling the hinges, it is a series of spacers, brass washers, and each one finishes with an annoying little flex washer. Now this washer...had me about ready to....tear my hair out...lol! All the pieces fit together very tight, this is so there is no rattles or unwanted movement. I couldn't get the flex washers in, I ended up taking a 2 pairs of pliers and flattening the flex washers, not completely....but just enough that I could get them in to place. Then got the hinges tightened. Haven't had any issues, mine are quiet, no rattles.
The directions do a great job of explaining things, most of the time to me is from being unfamailiar with it. If I was doing it again I'm sure I could cut that install time significantly. When you get your carrier, unpack it and read the directions...several times, make sure you have everything needed and then schedule a good solid afternoon. You won't be disappointed. Oh, by the way, go to OrFab's website and download and print out the directions. The ones off their website have much better pictures and are much clearer than the photocopied ones that come with the kit.
07-05-2011, 10:57 AM
#4
JK Freak
Thread Starter
Join Date: Aug 2009
Location: wisconsin
Posts: 899
Likes: 0
Received 0 Likes
on
0 Posts
Anyone ever have problems getting their passenger tail light back on after install? I kinda forced it a little
Last edited by debsJK; 09-07-2011 at 01:18 PM.
07-05-2011, 10:59 AM
#5
JK Jedi
I recall reaching a step that said "use the stencil provided on the back of the instructions" for lining up the holes for drilling holes into the drivers side taillight area. No stencil to be found. Was a little confusing, but still got the job done w/o it.
07-05-2011, 11:01 AM
#6
JK Jedi
Originally Posted by debsJK
Anyone elgar have problems getting their passenger tail light back on after install? I kinda forced it a little
07-05-2011, 11:42 AM
#7
JK Jedi
Nice write up.  Like the c-clamp idea...used a couple of people when I did mine so that should help someone with their install. The toughest thing for me was the brace for the tailgate hinge that mounts to the Rear Roll Bar plate. that little bugger is tough to install but after doing it a couple times now (recently upgraded to the Rotopax carrier) it's not too hard. Just need to go by feel more than anything since it's in tough spot. The design is good because it really does offer support should you take a hit on the carrier like those you might get hitting the tire on a ledge so I'm not complaining but it does taking getting used to working by feel.
Like the c-clamp idea...used a couple of people when I did mine so that should help someone with their install. The toughest thing for me was the brace for the tailgate hinge that mounts to the Rear Roll Bar plate. that little bugger is tough to install but after doing it a couple times now (recently upgraded to the Rotopax carrier) it's not too hard. Just need to go by feel more than anything since it's in tough spot. The design is good because it really does offer support should you take a hit on the carrier like those you might get hitting the tire on a ledge so I'm not complaining but it does taking getting used to working by feel.
Trending Topics
07-05-2011, 02:18 PM
#8
JK Freak
Thread Starter
Join Date: Aug 2009
Location: wisconsin
Posts: 899
Likes: 0
Received 0 Likes
on
0 Posts
Nice write up. Like the c-clamp idea...used a couple of people when I did mine so that should help someone with their install. The toughest thing for me was the brace for the tailgate hinge that mounts to the Rear Roll Bar plate. that little bugger is tough to install but after doing it a couple times now (recently upgraded to the Rotopax carrier) it's not too hard. Just need to go by feel more than anything since it's in tough spot. The design is good because it really does offer support should you take a hit on the carrier like those you might get hitting the tire on a ledge so I'm not complaining but it does taking getting used to working by feel.
Like the c-clamp idea...used a couple of people when I did mine so that should help someone with their install. The toughest thing for me was the brace for the tailgate hinge that mounts to the Rear Roll Bar plate. that little bugger is tough to install but after doing it a couple times now (recently upgraded to the Rotopax carrier) it's not too hard. Just need to go by feel more than anything since it's in tough spot. The design is good because it really does offer support should you take a hit on the carrier like those you might get hitting the tire on a ledge so I'm not complaining but it does taking getting used to working by feel.  07-05-2011, 02:50 PM
#9
JK Jedi
Originally Posted by debsJK
Tell me about it...It would be nice if you can just take the top ob the jeep body off like a lego piece. That would have made that spot so much easier
