Crawler Conceptz Body Mounted Tire Carrier (Pic heavy post)
#11
Just installed today yes it is a b(t@h.
The hinge brackets are not big enough for the original door hinge. The paint rubs off terribly and looks awful. It is stiff as grizzly d&ck to open and close normally. After that it's a piece of cake.
And sadly i love the looks of it. If I wanted an easy install any soccer mom can handle I would have gone else where.
This carrier just looks nicer and has more material than others out there. Will definitely have to touch up some areas but only 15 invested in paint I'm not too upset.
But yes it is a b)t@h, required tools I barely use to get started and complete the hinge and bracket swap
#12
I'm wondering if the tire mounting pieces should've fit together differently. It appears if you'd nested the top piece in below the other, you wouldn't have had to do any cutting. (That's what it looks like to me, but I could be wrong.)
I saw Shad posted on Facebook some time ago that they were working on a hi-lift mounting bracket, so it may exist, even if it hasn't made it to the website yet.
EDIT: After installing my own CC tire carrier, I'm in complete agreement. The pieces aren't machined to fit, there's just no way around it. Sad, because it's otherwise a very high-quality piece.
Last edited by LoneWolf; 03-03-2016 at 08:43 AM.
#13
So to my extreme surprise the $11 camera from amazon didnt work!!!! Shock and disbelief Im sure as you read that. It had a jumpy distorted picture, like an old rabbit eared TV set with poor vertical hold. The dealer wanted $125 to turn on the camera function on the 430n Headunit. I requested the rear monitor output be turned on at the same time though I doubt I would ever use it, but if im paying for an hour of shop time I might as well get as much as possible done. Well, their electronics expert doesnt know of any code to turn on rear monitor outputs on a 430n unit. So they will be looking into that and getting back to me. This dealership never gets back to anyone! Hate using them, but we had a soft top issue that they had been talking to jeep and best top about for months now that was finally getting resolved, so I figured id let them do the stereo stuff while it was there. Ended up getting it done for $95, but as mentioned only the camera function. And of course the Gino camera was crap and they made sure to note and mention that many times as they offered to install a chrysler cam unit for some crazy amount. No Thanks!
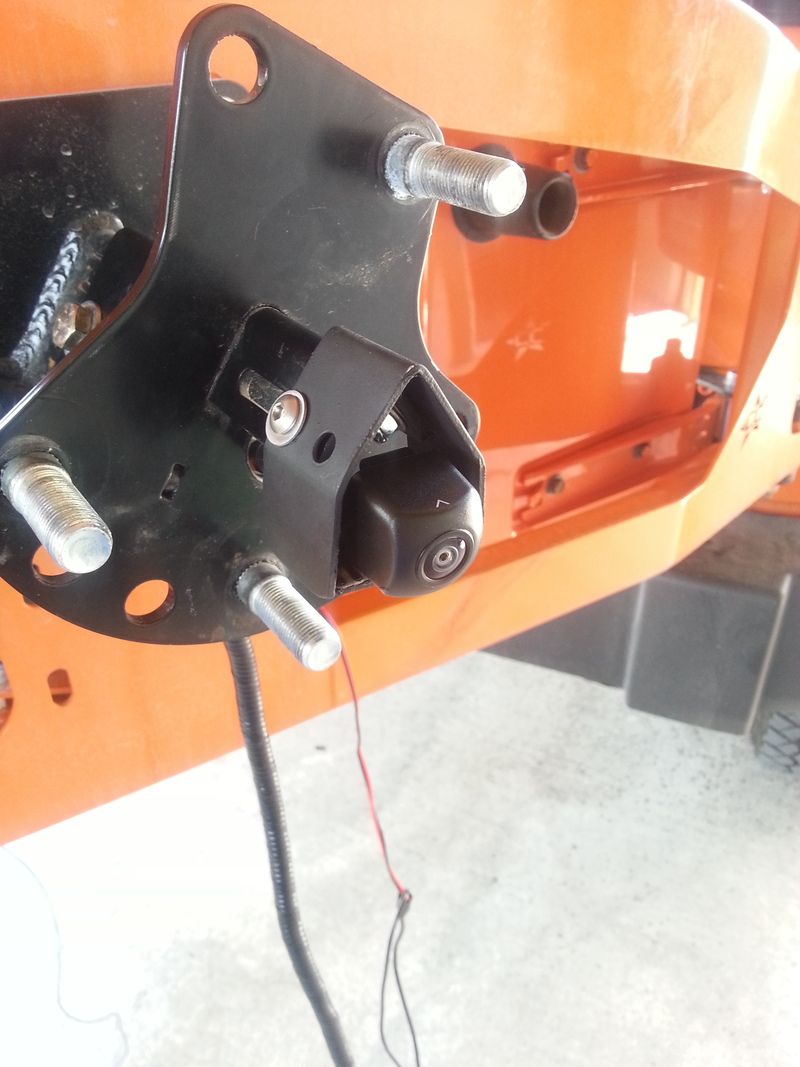
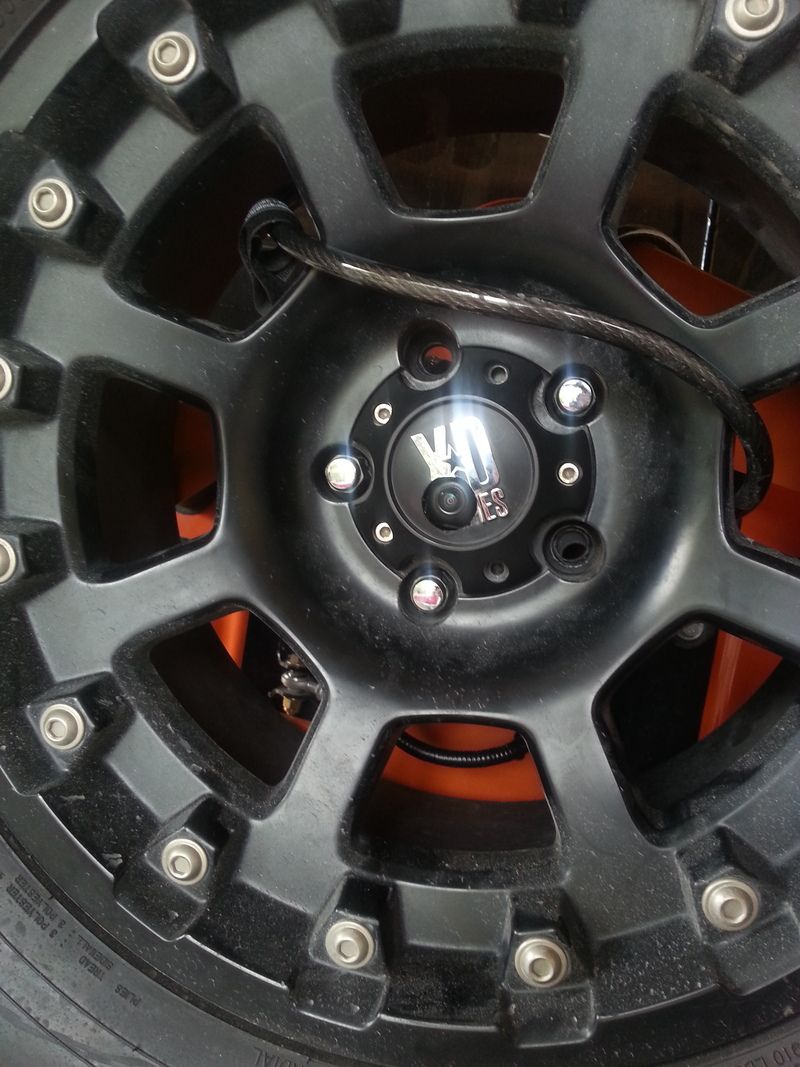
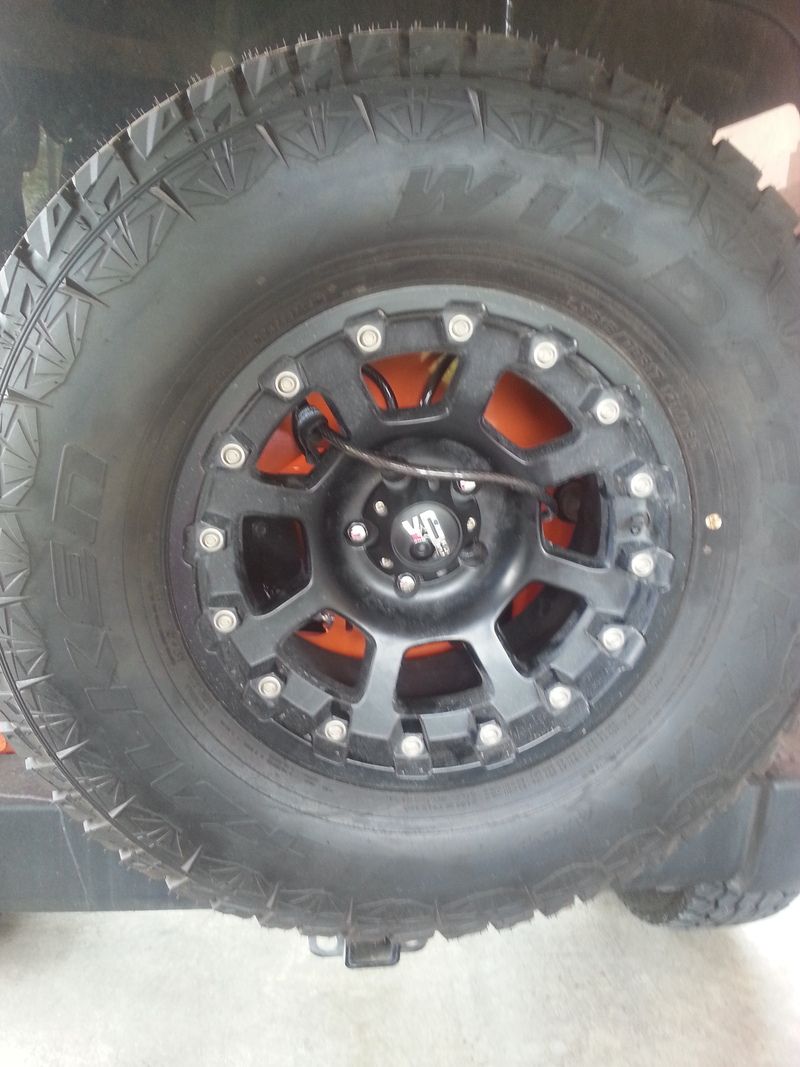
I got it home tested out my wiring with an old camcorder and the image was fine, though not really crisp or well balanced as far as light and color. So knowing that my hookups were correct, and that it was def a cam issue, I found a great deal on a Clarion CC510. This is a sugar cube shaped cam, as opposed to the tubular Gino cam. The tubular cam in the location shown above wasnt going to work anyway since the wide angle of view showed the inner lip of the wheel hub opening in a large portion of the image. The downside to the Clarion is that the wiring was the complete opposite of the Gino cam. Gino connected in the back of the rig to taps off reverse lights, the Clarion had all its connections at the headunit end of the cables. So all my wiring was unuseable. Basically a fresh new install from scratch. I fabbed up a mount that utilized the license plate relocation bracket mount on the CC tire carrier and ran wires through the rack and tailgate same as before. I wanted to provide the cam some camoflage so I took the spare wheels plastic center cap and drilled out a viewing hole, cut the caps depth to match the protrusion of the camera, cut down the screws for the new cap thickness, and loc tited them in. It seems to work really well to disguise the cam to the casual glance, looks pretty good, and gives the cam some protection. I drilled two holes at the bottom to acta as drains.
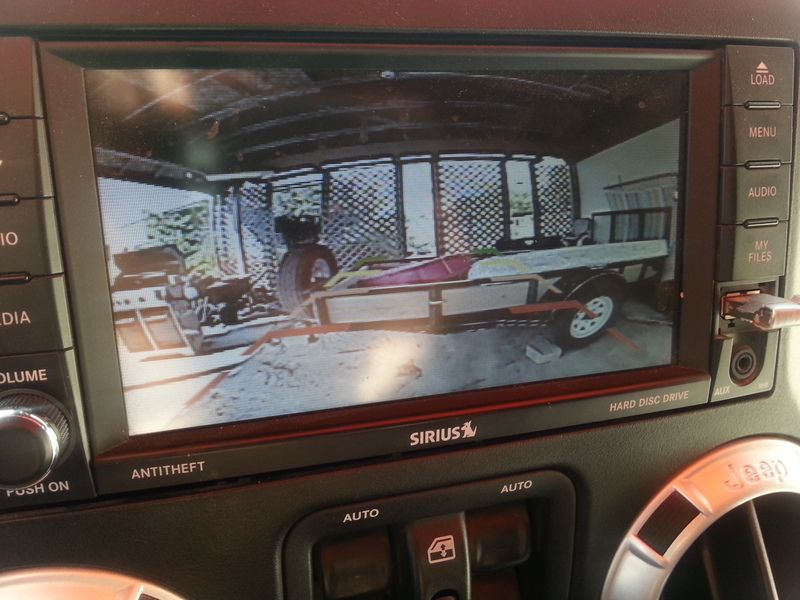
Picture quality is decent. I think it is actually more limited by the quality of the factory headunit screens resolution than by the cameras capabilities. It is mounted higher than a typical rearview cam, so at 1.5' distance we lose sight of some low close up objects. But we have learned that as set up currently green is 9-10', yellow is 6', orange is 4', first red is 3', and second red is 1.5'. The night image is very useable with just the stock reverse lights, though a bit grainy. Once again I think the 430n has issues producing higher quality images. We have a friend with this cam on his clarion headunit and the image quality is HD level clear compared to this. I havent found out yet if there is any way to adjust settings on the 430n for the camera images. If anyone knows of a way to adjust things like contrast, color, etc.... let me know.
Anyway, a couple pics of what I did with this new cam:
-Fabbed up a little housing using a basic L bracket from Home Depot. Shaped in a vise, drilled, and rattle canned with primer and black matte

- Center cap cut down and drilled out to get cam in position to get a full view, but still be protected and slightly hidden

- I dont think its completely obvious with just a quick glance

-Day image (didnt get a night one yet)

I got it home tested out my wiring with an old camcorder and the image was fine, though not really crisp or well balanced as far as light and color. So knowing that my hookups were correct, and that it was def a cam issue, I found a great deal on a Clarion CC510. This is a sugar cube shaped cam, as opposed to the tubular Gino cam. The tubular cam in the location shown above wasnt going to work anyway since the wide angle of view showed the inner lip of the wheel hub opening in a large portion of the image. The downside to the Clarion is that the wiring was the complete opposite of the Gino cam. Gino connected in the back of the rig to taps off reverse lights, the Clarion had all its connections at the headunit end of the cables. So all my wiring was unuseable. Basically a fresh new install from scratch. I fabbed up a mount that utilized the license plate relocation bracket mount on the CC tire carrier and ran wires through the rack and tailgate same as before. I wanted to provide the cam some camoflage so I took the spare wheels plastic center cap and drilled out a viewing hole, cut the caps depth to match the protrusion of the camera, cut down the screws for the new cap thickness, and loc tited them in. It seems to work really well to disguise the cam to the casual glance, looks pretty good, and gives the cam some protection. I drilled two holes at the bottom to acta as drains.
Picture quality is decent. I think it is actually more limited by the quality of the factory headunit screens resolution than by the cameras capabilities. It is mounted higher than a typical rearview cam, so at 1.5' distance we lose sight of some low close up objects. But we have learned that as set up currently green is 9-10', yellow is 6', orange is 4', first red is 3', and second red is 1.5'. The night image is very useable with just the stock reverse lights, though a bit grainy. Once again I think the 430n has issues producing higher quality images. We have a friend with this cam on his clarion headunit and the image quality is HD level clear compared to this. I havent found out yet if there is any way to adjust settings on the 430n for the camera images. If anyone knows of a way to adjust things like contrast, color, etc.... let me know.
Anyway, a couple pics of what I did with this new cam:
-Fabbed up a little housing using a basic L bracket from Home Depot. Shaped in a vise, drilled, and rattle canned with primer and black matte

- Center cap cut down and drilled out to get cam in position to get a full view, but still be protected and slightly hidden

- I dont think its completely obvious with just a quick glance

-Day image (didnt get a night one yet)

#14
Additional update:
Crawler Conceptz Tire Carrier is SOLID! not a squeak, rattle, or sound from it going down the absolutely terrible roads in unincorporated Dallas County Texas as of yet. It is still very tight to open and close. But I have no concerns regarding its reliability in carrying our 35".
Crawler Conceptz Tire Carrier is SOLID! not a squeak, rattle, or sound from it going down the absolutely terrible roads in unincorporated Dallas County Texas as of yet. It is still very tight to open and close. But I have no concerns regarding its reliability in carrying our 35".
#15
So to my extreme surprise the $11 camera from amazon didnt work!!!! Shock and disbelief Im sure as you read that. It had a jumpy distorted picture, like an old rabbit eared TV set with poor vertical hold. The dealer wanted $125 to turn on the camera function on the 430n Headunit. I requested the rear monitor output be turned on at the same time though I doubt I would ever use it, but if im paying for an hour of shop time I might as well get as much as possible done. Well, their electronics expert doesnt know of any code to turn on rear monitor outputs on a 430n unit. So they will be looking into that and getting back to me. This dealership never gets back to anyone! Hate using them, but we had a soft top issue that they had been talking to jeep and best top about for months now that was finally getting resolved, so I figured id let them do the stereo stuff while it was there. Ended up getting it done for $95, but as mentioned only the camera function. And of course the Gino camera was crap and they made sure to note and mention that many times as they offered to install a chrysler cam unit for some crazy amount. No Thanks!
I got it home tested out my wiring with an old camcorder and the image was fine, though not really crisp or well balanced as far as light and color. So knowing that my hookups were correct, and that it was def a cam issue, I found a great deal on a Clarion CC510. This is a sugar cube shaped cam, as opposed to the tubular Gino cam. The tubular cam in the location shown above wasnt going to work anyway since the wide angle of view showed the inner lip of the wheel hub opening in a large portion of the image. The downside to the Clarion is that the wiring was the complete opposite of the Gino cam. Gino connected in the back of the rig to taps off reverse lights, the Clarion had all its connections at the headunit end of the cables. So all my wiring was unuseable. Basically a fresh new install from scratch. I fabbed up a mount that utilized the license plate relocation bracket mount on the CC tire carrier and ran wires through the rack and tailgate same as before. I wanted to provide the cam some camoflage so I took the spare wheels plastic center cap and drilled out a viewing hole, cut the caps depth to match the protrusion of the camera, cut down the screws for the new cap thickness, and loc tited them in. It seems to work really well to disguise the cam to the casual glance, looks pretty good, and gives the cam some protection. I drilled two holes at the bottom to acta as drains.
Picture quality is decent. I think it is actually more limited by the quality of the factory headunit screens resolution than by the cameras capabilities. It is mounted higher than a typical rearview cam, so at 1.5' distance we lose sight of some low close up objects. But we have learned that as set up currently green is 9-10', yellow is 6', orange is 4', first red is 3', and second red is 1.5'. The night image is very useable with just the stock reverse lights, though a bit grainy. Once again I think the 430n has issues producing higher quality images. We have a friend with this cam on his clarion headunit and the image quality is HD level clear compared to this. I havent found out yet if there is any way to adjust settings on the 430n for the camera images. If anyone knows of a way to adjust things like contrast, color, etc.... let me know.
Anyway, a couple pics of what I did with this new cam:
-Fabbed up a little housing using a basic L bracket from Home Depot. Shaped in a vise, drilled, and rattle canned with primer and black matte
- Center cap cut down and drilled out to get cam in position to get a full view, but still be protected and slightly hidden
- I dont think its completely obvious with just a quick glance
-Day image (didnt get a night one yet)
#16
Why did you choose this solution over the hinged tire carrier from Teraflex. This one looks a bit more complicated (i have installed the Tereflex in 2 hours and I am not the most experienced Jeep modder around ;-)
Last edited by nkijkuit; 06-30-2015 at 04:37 AM.
#17
I personally chose it because it is different from the TF unit.
Have seen them around town and wanted something else. It's also steel and weighs a bit more but that doesn't bother me sitting on a two door jk with two seats and half doors.
It really is solid and I don't regret the purchase one bit the install was definitely not as easy as the TF carrier.
Have seen them around town and wanted something else. It's also steel and weighs a bit more but that doesn't bother me sitting on a two door jk with two seats and half doors.
It really is solid and I don't regret the purchase one bit the install was definitely not as easy as the TF carrier.
#18
I would say also the hardest parts of the install was with the hinges. They did not plan for these to just fall together.
I used two large crescent wrenches on the ears of the bracket after it was mounted to the tub of the jeep and spread it slightly to slide the factory hinge on the door side into the bracket. Worked like a charm. After cutting the pins and removing those inner pieces and filing the hinge smooth it is still tight. But never heard anybody complain about that in any instance.
Like the op I did lose fresh paint on my carrier from this friction in the hinge movement. Luckily my primer coats held up great. Have to figure out what to do about that. Maybe send em off to robar and have em np3+ coated before winter
#19
It is a really solid piece of gear. Just has some fitment issues that CC really needs to address ASAP. I havent seen CC add any options to carry hi Lift or cans/rotos yet, but im sure at some point they will. All the issues I had with install can totally be avoided if somebody were to know about them and address them before painting/powdercoating. But at the time I did this CC didnt even have a set of install instructions available to provide me, and there was very little actual user info online.
#20
I bought after seeing this review which was very well done. Knew what I was getting into before I started.
I am pretty much On the same page with weight, the rear bumper I bought with this carrier and my 35 tire and wheel is still under 200 lbs.
I am pretty much On the same page with weight, the rear bumper I bought with this carrier and my 35 tire and wheel is still under 200 lbs.


