When you click on links to various merchants on this site and make a purchase, this can result in this site earning a commission. Affiliate programs and affiliations include, but are not limited to, the eBay Partner Network.
Modified JK TechTech related bulletin board forum regarding subjects such as suspension, tires & wheels, steering, bumpers, skid plates, drive train, cages, on-board air and other useful modifications that will help improve the performance and protection of your Jeep JK Wrangler (Rubicon, Sahara, Unlimited and X) on the trail.
PLEASE DO NOT START SHOW & TELL TYPE THREADS IN THIS FORUM
I've been trying to mount my new 37's on Method 105's. Problem is, I can't get the outer bead to sit around the lip/flat so I can get the ring on. I've been trying for 3 hours now with no avail. I've tried flat heads and walking it around. Rubber mallet and beating it down...but nothing seems to work. I can only get 3/4 of the bead seated before it just starts slipping off again.
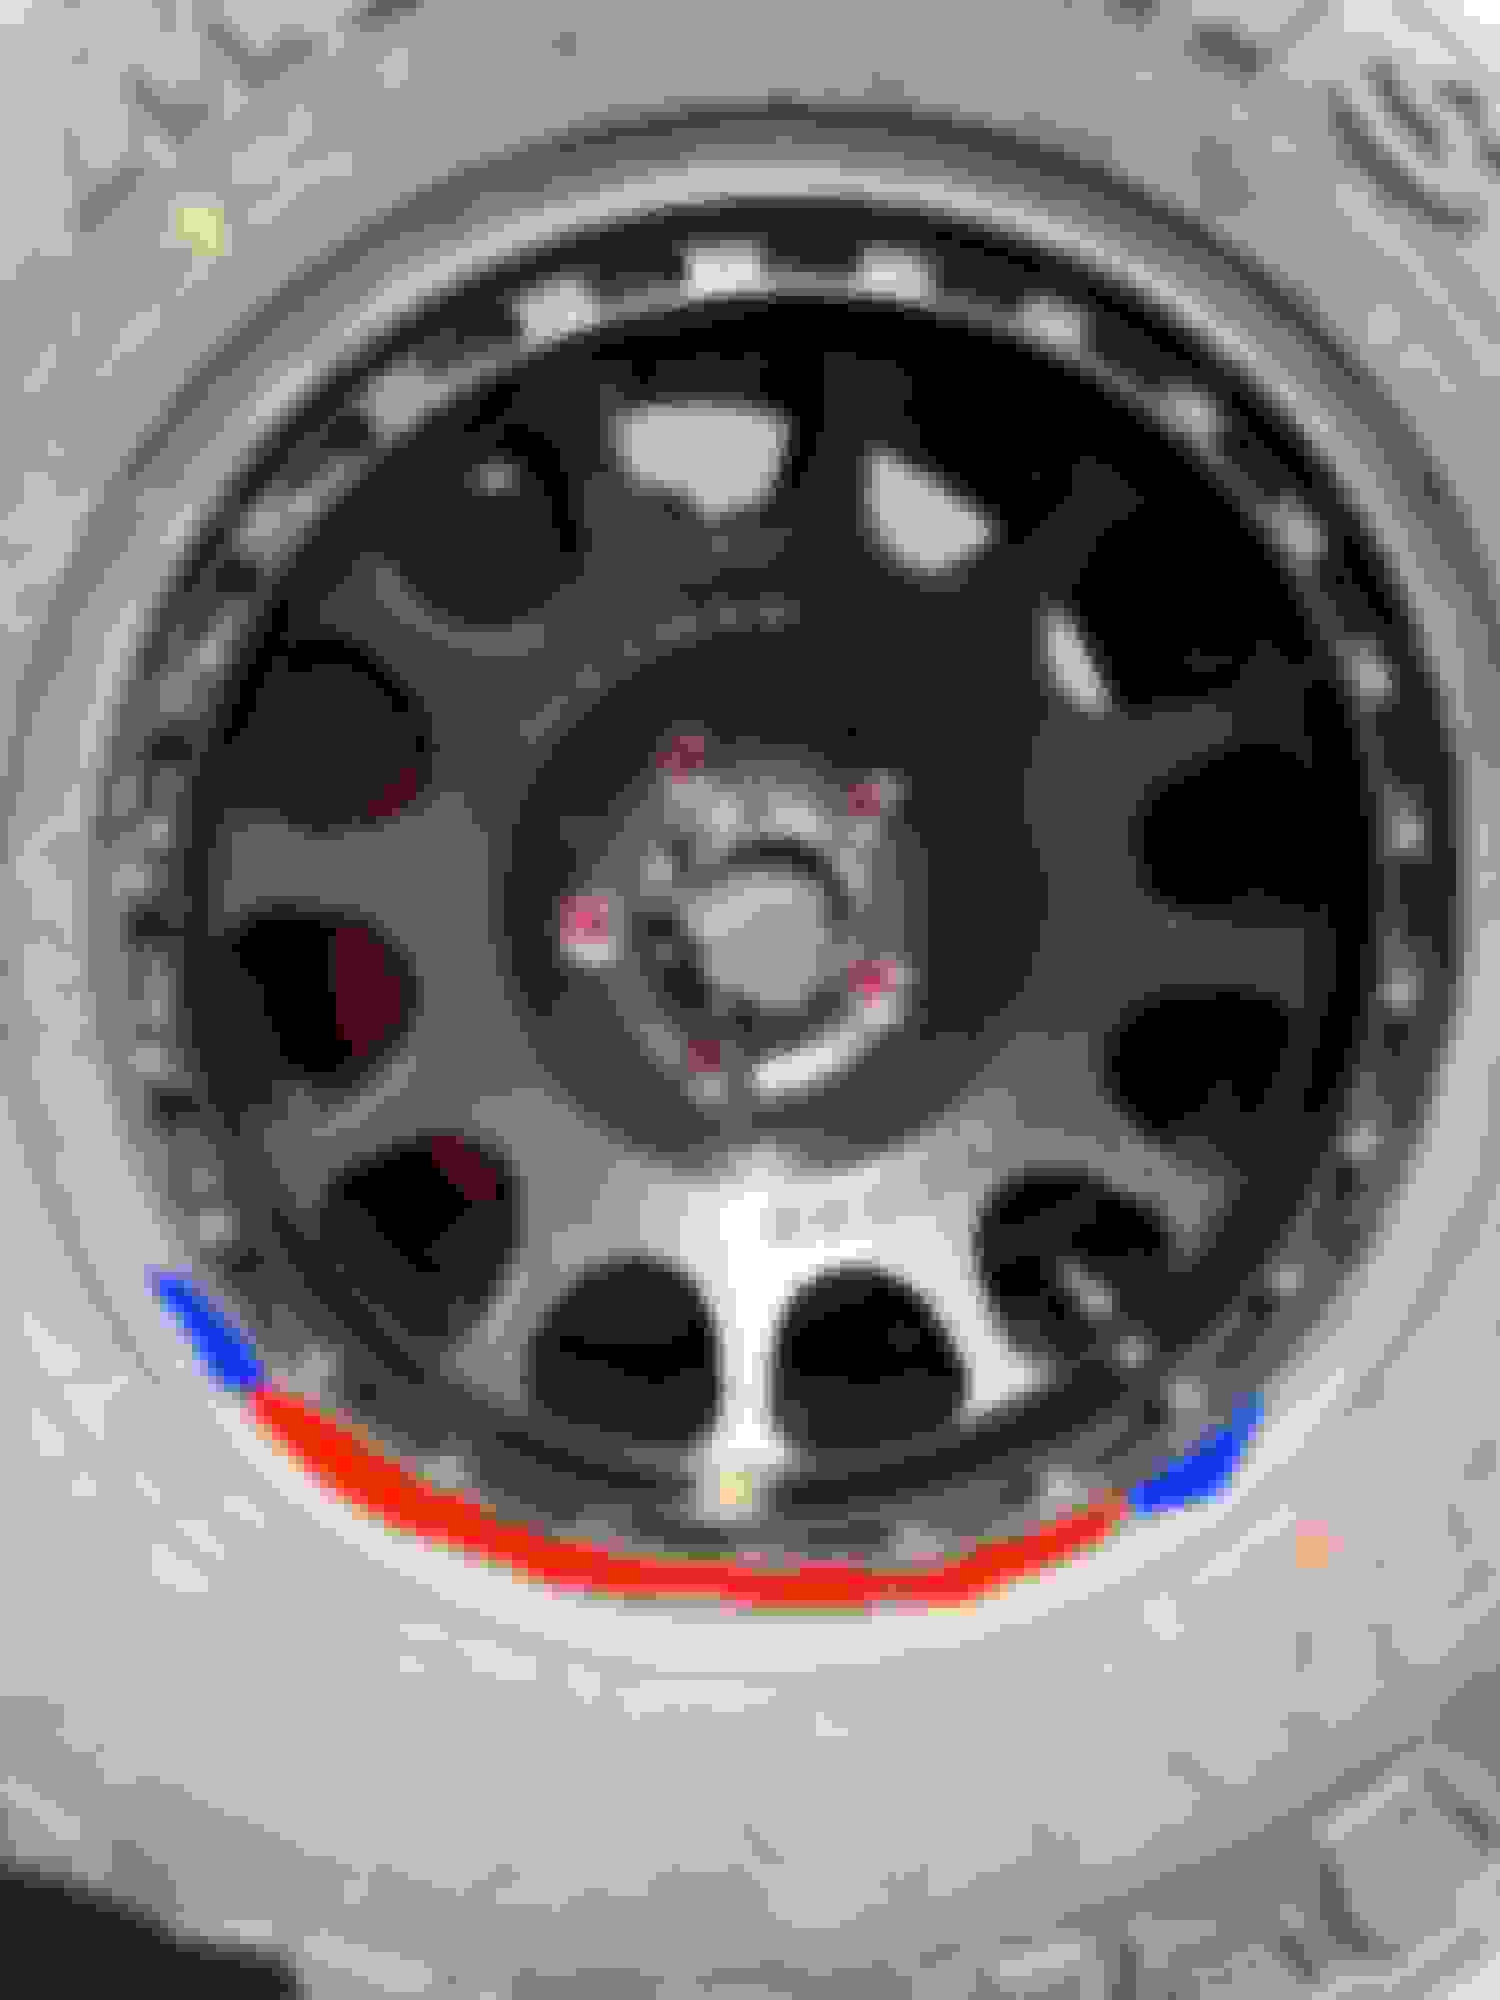
The red outline is where I can't seat it. The blue is where it starts to slip off again. I've got them sitting in the sun now (I was trying in the shade), and I'm hoping that loosens it up a bit...but I'm not banking on it. How'd you guys deal with this? 3 hours of going at it...and nothing to show for my efforts. Plz help, this is driving me insane....
The only trick I've found doing it alone is drying the bead and rim off. Set as much as you can then soap the last couple inches you need to stretch and slide it down on the rim. The other thought I had after completing this was to take small blocks of 2x4 and using a ratchet strap to hold the tire to the rim while working the rest down the edge. I'll see if I can take a pic to show what I'm talking about.
The only trick I've found doing it alone is drying the bead and rim off. Set as much as you can then soap the last couple inches you need to stretch and slide it down on the rim. The other thought I had after completing this was to take small blocks of 2x4 and using a ratchet strap to hold the tire to the rim while working the rest down the edge. I'll see if I can take a pic to show what I'm talking about.
I didn't have a small piece of 2x4 but it would go where my fingers are. A couple of these COULD do the trick. It was an after thought I had after wrecking myself doing it all alone.
Dang, it just took me 5 hours to get one done. Saving the rest for tomorrow when I have some more helping hands, and beer. Cedarraider, although my picture looks like it's close, mine was also pretty off. Needed aloootttt of finesse, and leaving the tire under the sun for an hour also helped a bit. Did you use flat heads and kinda pry and push it down?
Ended up using fender washers to help keep the bead from slipping off. That...and three screwdrivers (don't ask how), and I managed to scratch the wheels and kinda gouged at the tires for the last 2 inch stretch...but it's on there. I feel like this step is seriously downplayed compared to the rest of the process; Everything else took maybe 25 minutes, while this took hours and tons of swearing. Also noticed that almost every YouTube video has a cut scene for this step, so I imagine they either needed multiple sets of hands...or it was a PITA for them too.
I wonder if it's the Methods or even the Maxxis tire. I did my AEV wheels and it didn't even require a screwdriver to get them on. It may have also been helpful that I had run the tires for 30k miles before going to the new wheels, maybe stretched the bead a little bit allowing for easier install.
I had read a lot about getting soap on the bead there before you try to lock it down under the ring, supposedly gives it a little slip to seat just right as you're torquing down. Additionally, everyone recommends an anti-seize and I agree. My friend did Racelines with anti-seize. The bolts went down but it took more than "a few" cycles to get the torque consistent. I went with ARP Ultra Lube and the bolts went in nicely, remove nicely, and the torque is pretty spot on- right where you set it and when you set it. I ended up going in 3 stages and then one additional pass set a few fasteners to the final torque. I did a 5th pass and didn't have a single fastener that budged.
Yeah no clue. The bead on these Maxxis tires are THICK though, over 5/8".
I hear ya, I sprayed soapy water liberally for slipping the wheel in, getting the outer bead seated, and for getting the ring on evenly (without coning). ALMOST forgot the anti-seize, but luckily I was only 4 bolts in...so I took them out and applied anti-seize to every single bolt. Did the same with the body armor on my JK. Anti-seize saves hours of anger and frustration down the road...been using it for years. I've got them all hand tight now, using a ratchet. My torque wrench is 1/2" drive, so I'm gonna go pick up a 3/8" drive one tomorrow, since all these bolts are 13mm.
Sears has a 25-250in/lb in 3/8" drive for $50, comes with free calibration for 90 days and a 1yr warranty against failure. After tightening my bolts a few times, I'm going to have the calibration checked. I was going to go the Harbor Freight route for the torque wrench but tearing up threaded holes isn't my idea of fun.
Dang, it just took me 5 hours to get one done. Saving the rest for tomorrow when I have some more helping hands, and beer. Cedarraider, although my picture looks like it's close, mine was also pretty off. Needed aloootttt of finesse, and leaving the tire under the sun for an hour also helped a bit. Did you use flat heads and kinda pry and push it down?
Ended up using fender washers to help keep the bead from slipping off. That...and three screwdrivers (don't ask how), and I managed to scratch the wheels and kinda gouged at the tires for the last 2 inch stretch...but it's on there. I feel like this step is seriously downplayed compared to the rest of the process; Everything else took maybe 25 minutes, while this took hours and tons of swearing. Also noticed that almost every YouTube video has a cut scene for this step, so I imagine they either needed multiple sets of hands...or it was a PITA for them too.
Yeah I used a couple screwdrivers a rubber mallet lots of swearing pounding and like 4 days. The quickest i got one on was an hour and a half. The washer truck should help a lot just use soapy water when you work the rest of the bead down it will make things easier. I think it is a combination of the methods and the E rated Maxxis Tires. Some other brands seemed to go on with just a few taps of the hammer.
Sears has a 25-250in/lb in 3/8" drive for $50, comes with free calibration for 90 days and a 1yr warranty against failure. After tightening my bolts a few times, I'm going to have the calibration checked. I was going to go the Harbor Freight route for the torque wrench but tearing up threaded holes isn't my idea of fun.
Wow, actually thanks a lot for chiming in with this. I was planning on picking up an el-cheapo 3/8" Harbor Freight torque wrench (because how often does anyone actually use a 3/8" torque wrench)...but if the Craftsman (I'm assuming, since you said Sears) is $50...I will definitely throw the extra bones for it. Unfortunately I'm not at that point in my life where I can ball out on Matco or Snap-On tools...so Craftsman is my go to. Will definitely swing by Sears tomorrow
Originally Posted by cedarraider
Yeah I used a couple screwdrivers a rubber mallet lots of swearing pounding and like 4 days. The quickest i got one on was an hour and a half. The washer truck should help a lot just use soapy water when you work the rest of the bead down it will make things easier. I think it is a combination of the methods and the E rated Maxxis Tires. Some other brands seemed to go on with just a few taps of the hammer.
So I went ahead and decided (after dinner and a few beers) to try another one. Same deal with the bead. I think you're right with the E rated Maxxis and the Methods...they don't play nice together. The washer trick worked wonders...and I got the wheel assembled (just the ring on ratchet/hand tight) in under an hour. Feeling a little more confident about finishing the last 3 tomorrow and filling them with air.

 04-10-2018, 11:18 AM