
Stubbie bumper 101

 12-25-2008, 01:53 PM
#12
JK Junkie
Thread Starter
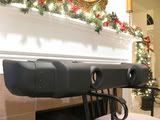
 So I knew the rivet gun wouldn't burn me, so here we are...
12-25-2008, 06:35 PM
So I knew the rivet gun wouldn't burn me, so here we are...
12-25-2008, 06:35 PM
#13
JK Enthusiast
Join Date: Sep 2008
Location: katy, texas
Posts: 203
Likes: 0
Received 0 Likes
on
0 Posts
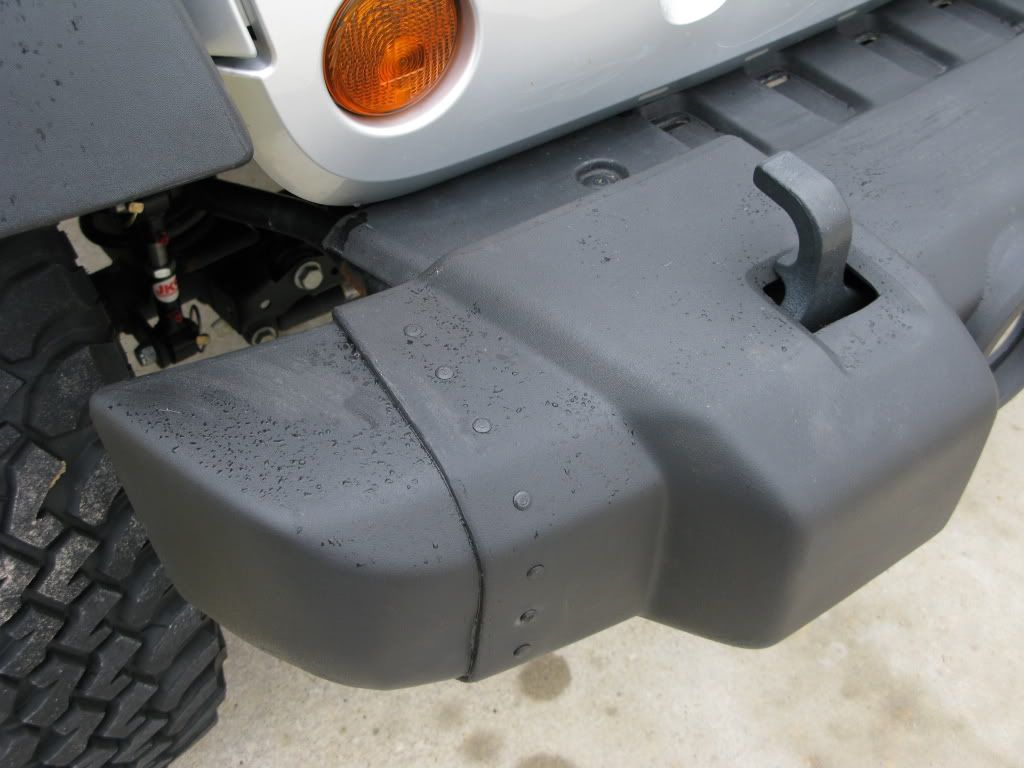
I actually did the same exact mod "and" I'm in Texas! I did a different approach though, instead of angling the cut from the rear forward...I angle cut from the front to the rear. In other words...I had more bumper face on the front, where you had 2" on the front of yours. Also, I used smaller pop-rivets with washers on the inside of the bumper - this reduced the rivet size on the exterior of the bumper. I actually ended up melting plastic into the rivet holes, then sanded it to be smooth with the rivet head...after all the parts and pieces were together, welded and riveted...I Duplicolor spray bed lined the whole bumper...which covered the rivets and all blemishes. Mind you, I used a banged up bumper but it looked real good afterwards. The rivets make it REAL strong, I already bumped it into a tree on trail and all that happened was one rivet (the one I didn't use a washer for - DOH!) came loose...I just replaced it and then re-sprayed with bed liner - done. The end never came off!! I have pics and video of my stubby process and I intend on making a write up when I get some time. Check out the pics of my finished product below. From the crush can...I have 7" to the end of the bumper...I cut off about 7". This now makes pulling off/installing my JKS Quick-Discos SO EASY - I now have great clearance to get my arm in there!!! That's the main reason I decided to chop the stocker in the 1st place!
BTW...the pic on the bottom is "after" I hit the tree with the drivers side end of the bumper...end's still there - no problem! You kinda see the smack spot near the bottom! Write-up coming soon...
http://i287.photobucket.com/albums/l...0-08FORU-3.jpg
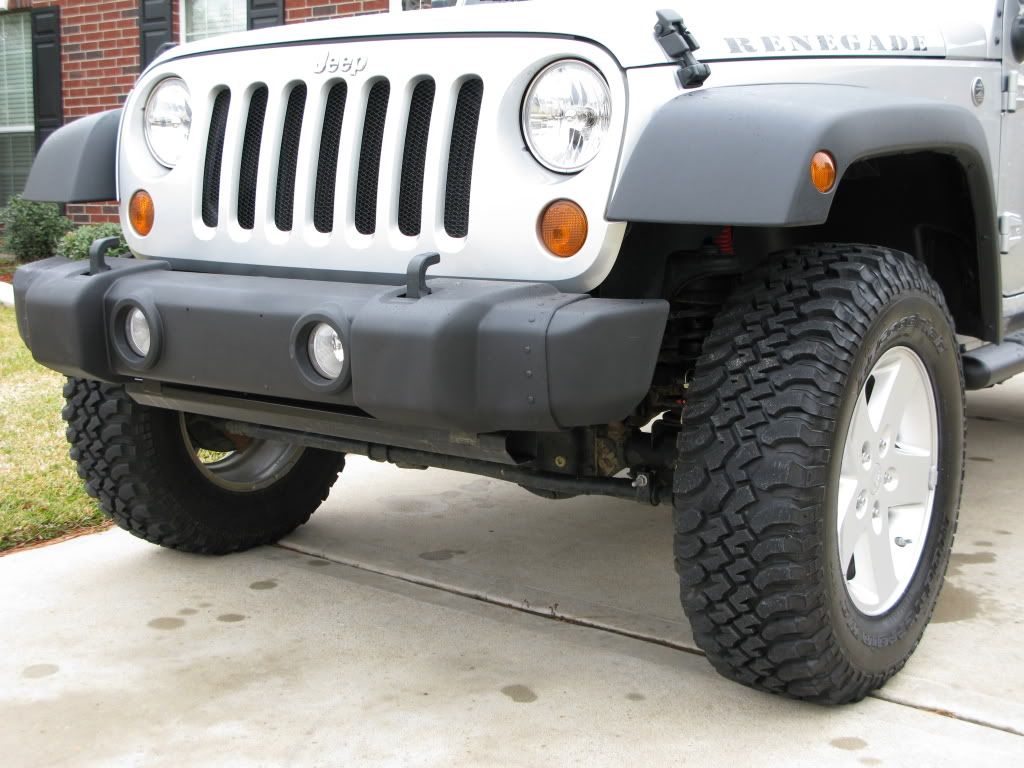
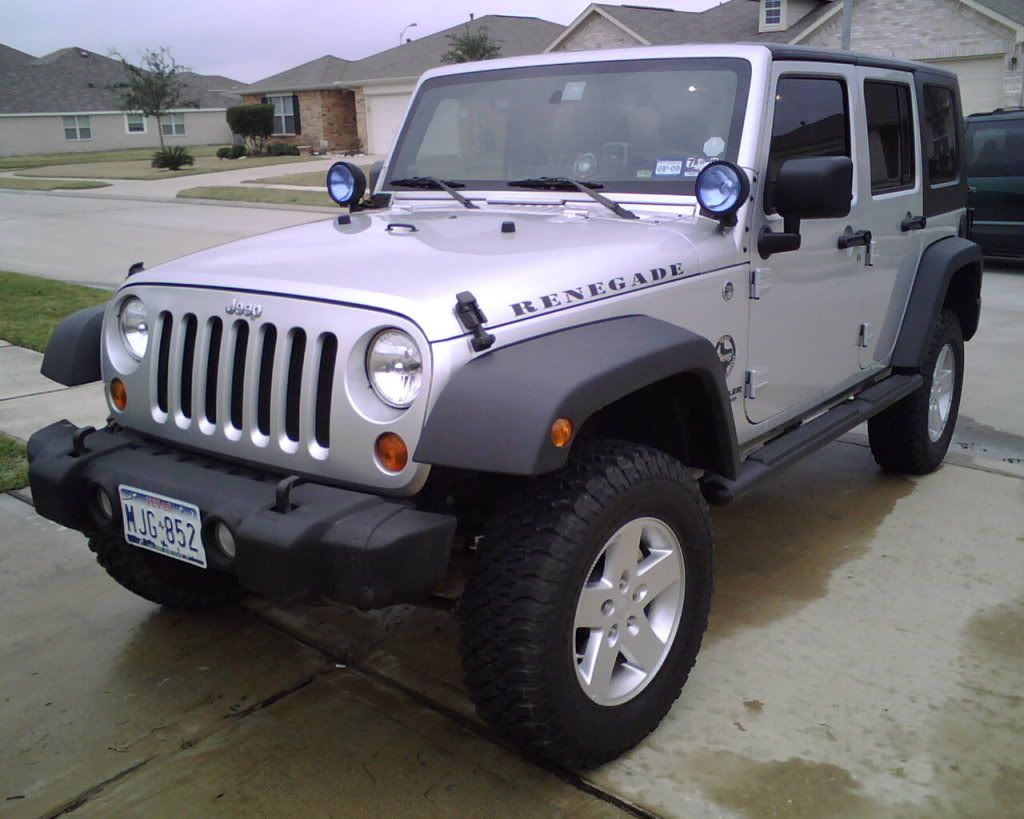
I did a different approach though, instead of angling the cut from the rear forward...I angle cut from the front to the rear. In other words...I had more bumper face on the front, where you had 2" on the front of yours. Also, I used smaller pop-rivets with washers on the inside of the bumper - this reduced the rivet size on the exterior of the bumper. I actually ended up melting plastic into the rivet holes, then sanded it to be smooth with the rivet head...after all the parts and pieces were together, welded and riveted...I Duplicolor spray bed lined the whole bumper...which covered the rivets and all blemishes. Mind you, I used a banged up bumper but it looked real good afterwards. The rivets make it REAL strong, I already bumped it into a tree on trail and all that happened was one rivet (the one I didn't use a washer for - DOH!) came loose...I just replaced it and then re-sprayed with bed liner - done. The end never came off!! I have pics and video of my stubby process and I intend on making a write up when I get some time. Check out the pics of my finished product below. From the crush can...I have 7" to the end of the bumper...I cut off about 7". This now makes pulling off/installing my JKS Quick-Discos SO EASY - I now have great clearance to get my arm in there!!! That's the main reason I decided to chop the stocker in the 1st place!BTW...the pic on the bottom is "after" I hit the tree with the drivers side end of the bumper...end's still there - no problem! You kinda see the smack spot near the bottom!
Write-up coming soon...http://i287.photobucket.com/albums/l...0-08FORU-3.jpg
Last edited by akonius; 12-25-2008 at 06:53 PM.
 12-26-2008, 10:14 AM
#16
JK Enthusiast
Join Date: Sep 2008
Location: katy, texas
Posts: 203
Likes: 0
Received 0 Likes
on
0 Posts
The best cutting tool for getting thru the bumper clean is a RotoZip with a cutoff wheel...low speed (so it doesn't melt the plastic!). Nice part is that as it cuts...it is leaving a nice sanded cut edge so you don't have to do post cutting cleanup of your edges. Any other grinder type handlheld might work but I had a RotoZip so that's what I used. Note - spin the cutoff wheel to fast and you're going to melt the plastic as it goes thru it and it get's very messy, you also end up with melted hunks stuck to the cut end of the bumper.
12-26-2008, 03:50 PM
#17
JK Junkie
Thread Starter
Looks like we are definetly thinking on the same lines. The pics I took were of a scrap bumper I had at work. I did the cut and rivet example last Friday morning, I had about 30 minutes so I didn't worry about the details like cleaning the edges up, etc. I use all high speed air tools, a rotozip would be nice for anyone who can't access heavy-duty stuff. My rivets are all aluminum anodized black, split shank, so washers are not needed. The bumper on my jeep was flawless so a coating or corrosion protection was not necessary. I preferred a narrow approach for my jeep, so I made straight parallel cuts to get my width....
12-27-2008, 04:40 PM
#18
JK Enthusiast
Join Date: Nov 2008
Location: Scottsdale,Az
Posts: 224
Likes: 0
Received 0 Likes
on
0 Posts
Ingenious, incredible...wish I had your skills.
Wanna try it but afraid mine would turn out looking like it just went through front impact test.
Of course the only downside of that scenario is I have great argument to make to the missus for buying a new bumper...so...win win!
Wanna try it but afraid mine would turn out looking like it just went through front impact test.
Of course the only downside of that scenario is I have great argument to make to the missus for buying a new bumper...so...win win!
12-27-2008, 10:57 PM
#19
JK Enthusiast
Join Date: Sep 2008
Location: katy, texas
Posts: 203
Likes: 0
Received 0 Likes
on
0 Posts
hehe...really, you just have to get it goin, the 1st cut is the worst - after that, it isn't that bad. Most of all, make sure you have all the tools you need for the job and an idea of what you want to end up with. I didn't have any plans when I made mine - just a concept of how I wanted it put together...everything else fell into place from there.
I actually only WELDED the one end and didn't rivet...I took it outside and kicked the end once, it stuck - kicked it again and it fell off! That's when I decided the RIVET route was the way to go.
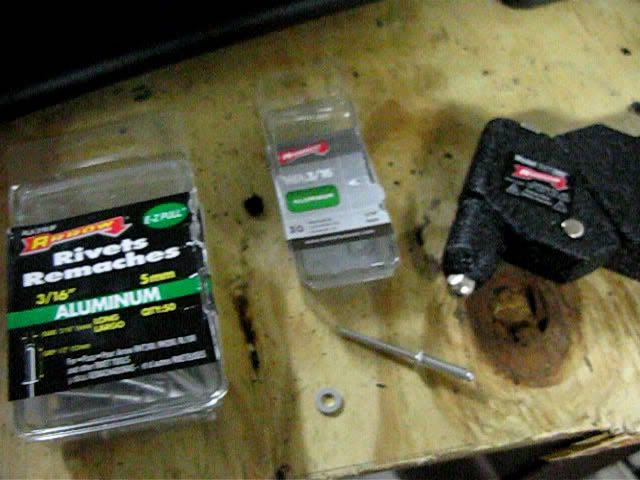
Here are the rivet's & washers I used (Home Depot)
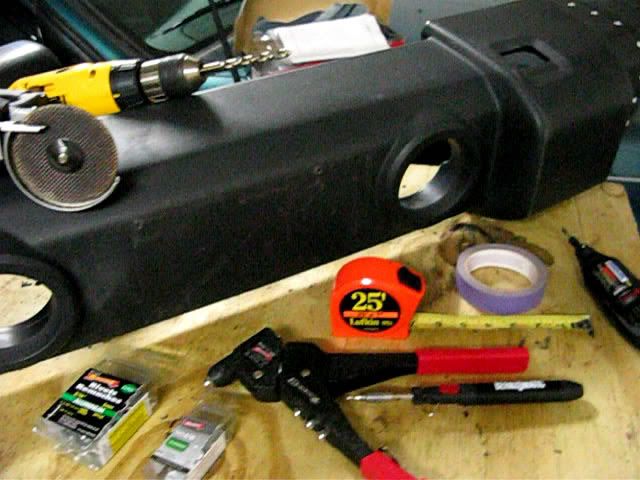
Here's a pic of the tools I used (Rivets&Tool/Drill/RotoZip cutoff/masking tape/ruler/mini butane torch/utility knife/Dremel tool sanding/shaping):
Good luck with yours!
I actually only WELDED the one end and didn't rivet...I took it outside and kicked the end once, it stuck - kicked it again and it fell off! That's when I decided the RIVET route was the way to go.
Here are the rivet's & washers I used (Home Depot)
Here's a pic of the tools I used (Rivets&Tool/Drill/RotoZip cutoff/masking tape/ruler/mini butane torch/utility knife/Dremel tool sanding/shaping):
Good luck with yours!
12-28-2008, 03:59 AM
#20
JK Enthusiast
Join Date: Nov 2008
Location: Scottsdale,Az
Posts: 224
Likes: 0
Received 0 Likes
on
0 Posts
Akonius,
Thanks for encouraging words and pics, but don't sell me short as I am capable of making anything harder than it should be...that said, the little voice in my head is telling me to go buy the RotoZip.
Thanks.
Thanks for encouraging words and pics, but don't sell me short as I am capable of making anything harder than it should be...that said, the little voice in my head is telling me to go buy the RotoZip.
Thanks.