
Six-dollar dash upgrade
 01-07-2008, 02:07 PM
#171
JK Freak
Join Date: Feb 2007
Location: Virginia Beach, VA
Posts: 739
Likes: 0
Received 0 Likes
on
0 Posts
I noticed a few people had mentioned wanting to use yellow. I got tired of waiting around to see it first and just did it. I also did the the soundbar speaker rings. Just taped off the inner speaker grill. Here it is


 01-07-2008, 03:45 PM
#173
JK Junkie
Join Date: May 2007
Location: Treasure Coast, Florida
Posts: 2,288
Likes: 0
Received 0 Likes
on
0 Posts
 .
.

 01-08-2008, 04:17 AM
#176
JK Freak
Join Date: Oct 2007
Location: KY
Posts: 563
Likes: 0
Received 0 Likes
on
0 Posts
Got my soundbar speakers sprayed perfectly.. but now having trouble getting them back into the bar. :(
Was hoping to have them back in before I came to work this morning but didn't manage. :(
Was hoping to have them back in before I came to work this morning but didn't manage. :(
01-08-2008, 07:59 AM
#177
JK Freak
Join Date: Jan 2008
Location: Central NY
Posts: 742
Likes: 0
Received 0 Likes
on
0 Posts
I ran into some issues doing this mod...
- I cleaned the parts with rubbing alcohol, allowed them to dry and then wiped them down with a lint-free cloth. I wore latex gloves to make sure I didn't get any oils or anything from my hands onto the surface once it was prepped.
- I followed directions on the can, ensuring that I shook it for a minute and held the can about 6-8 inches away from the surface and applied lightly and evenly.
- My first coat didn't fully adhere to the surface and, just like putting paint on an oil spot, it didn't apply to certain areas. So, I let it dry then applied 2 more coats. It looked like garbage, so I lightly sanded the paint off, used rubbing alcohol to clean it up and, basically, started the process over again.
Since I started over, its coming out GREAT! I put one new coat on last night and another before I came to work this morning. So, my lesson learned is that I either needed to do a better job cleaning the surface or I needed to lightly sand the surface to allow the paint to stick evenly.
UPDATE: I got home from work and was going to add another coat. I sprayed one but then wanted to bring them out to my garage to finish spraying the rest of them. Well, wouldn't you know I drop the freshly painted one on the floor, which hit my cat on the way down, and screwed up the paint and got cat hair on it. So, I had to start that one all over again! I'm beginning to wonder if I should be doing this mod.
Last edited by bobzinger; 01-08-2008 at 03:06 PM. Reason: Screwed up another piece...
01-09-2008, 09:16 AM
#178
JK Enthusiast

Join Date: Oct 2007
Location: san antonio, tx
Posts: 154
Likes: 0
Received 0 Likes
on
0 Posts
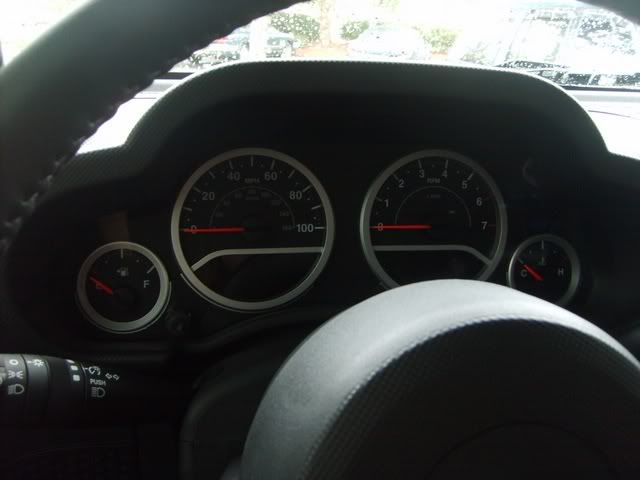
I did this mod also but with a little change. I decided to do my gauges along with the vents, but I just wanted to do the rings around the gauges and not the whole gauge pod like some did, I thought that too much silver wouldn't look as good. So I taped everything off and took my time with it and it turned out great. Here are some pics. Really looks good with the dark interior:
01-09-2008, 09:51 AM
#179
JK Freak
Join Date: Feb 2007
Location: Virginia Beach, VA
Posts: 739
Likes: 0
Received 0 Likes
on
0 Posts
