
Off-road cargo tray
 05-09-2014, 08:40 PM
#1
JK Junkie
Thread Starter
First off, 99% of the credit for this goes to JK Forum member grimmjpr!
He had posted some photos of his cargo shelf and then I pm'ed him and asked a couple dozen questions about how he built his...
Then I sketched up my take on his concept just customized for my purposes.
And then once I had all of the core pieces, I enlisted the help,of a good friend of mine who is an artist, a commercial artist, and an amazing creator/fabricator of things that only he could have.
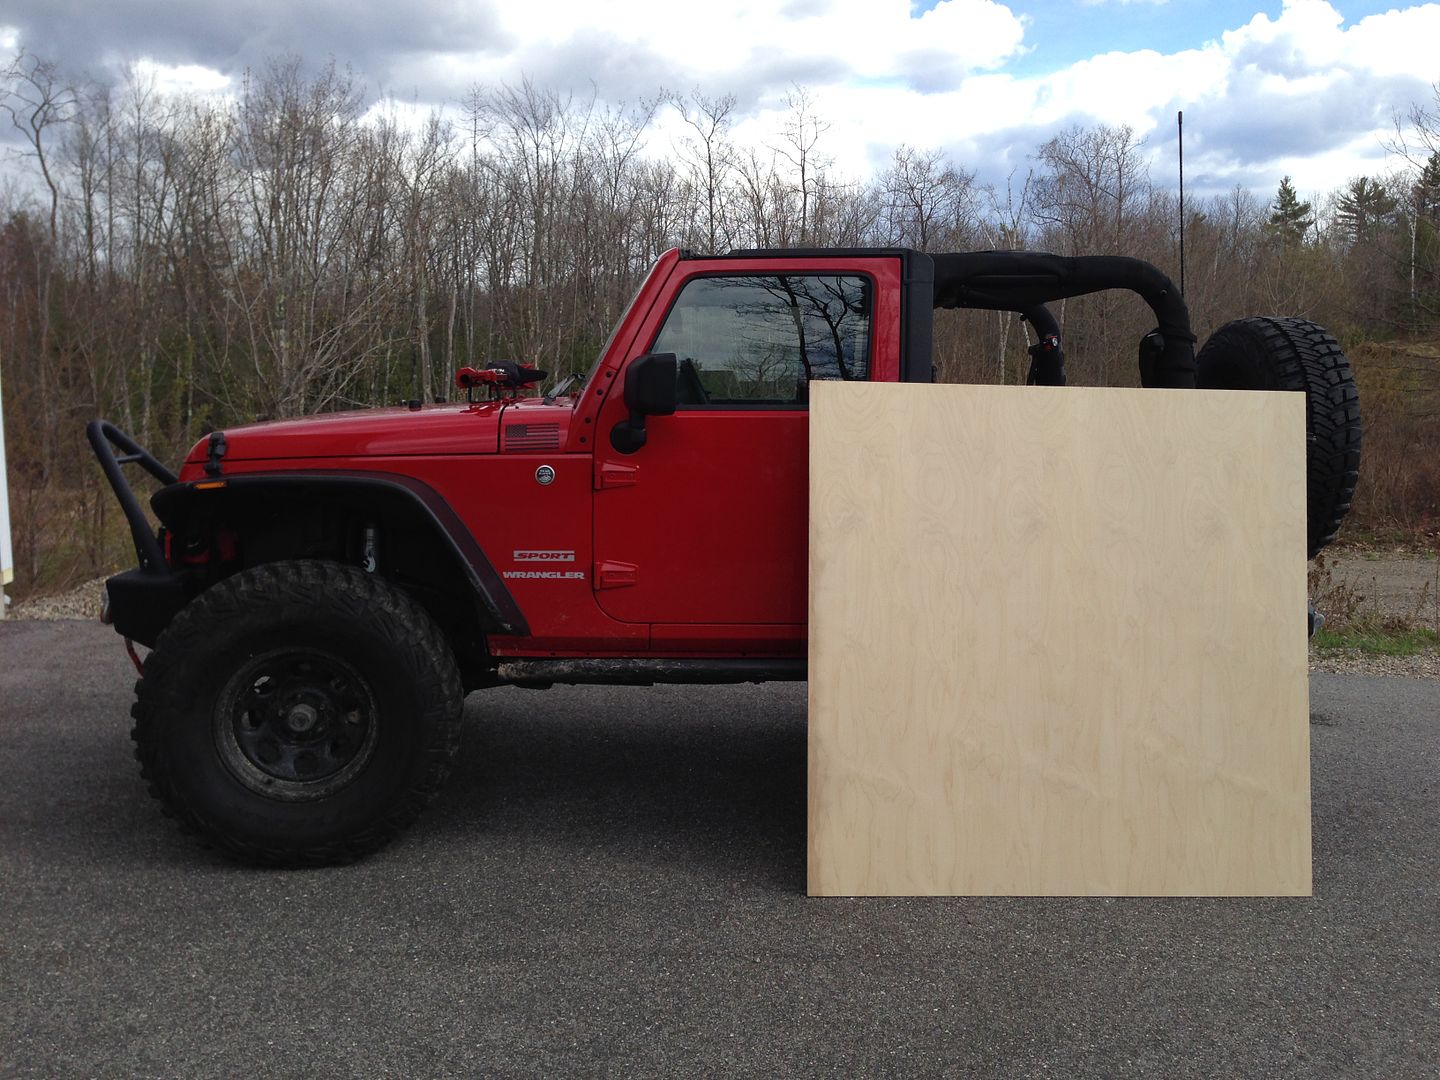
We used a piece of Baltic birch 1/2" plywood for its beautiful finish, it's light weight, and mostly because I had a spare sheet of it in my basement!
it comes in sheets 60"x60"
I can't post pictures right now as we are traveling and the hotel wifi sucks... I'll go through later and edit/add photo bucket links...
So I had some companies giant tray for the back of a 2 door JK to catch mud and sand
We put this upside down and traced the outline, we did multiple test fits and trimmed until it fit like a glove, actually it followed every curve without touching or rubbing anywhere
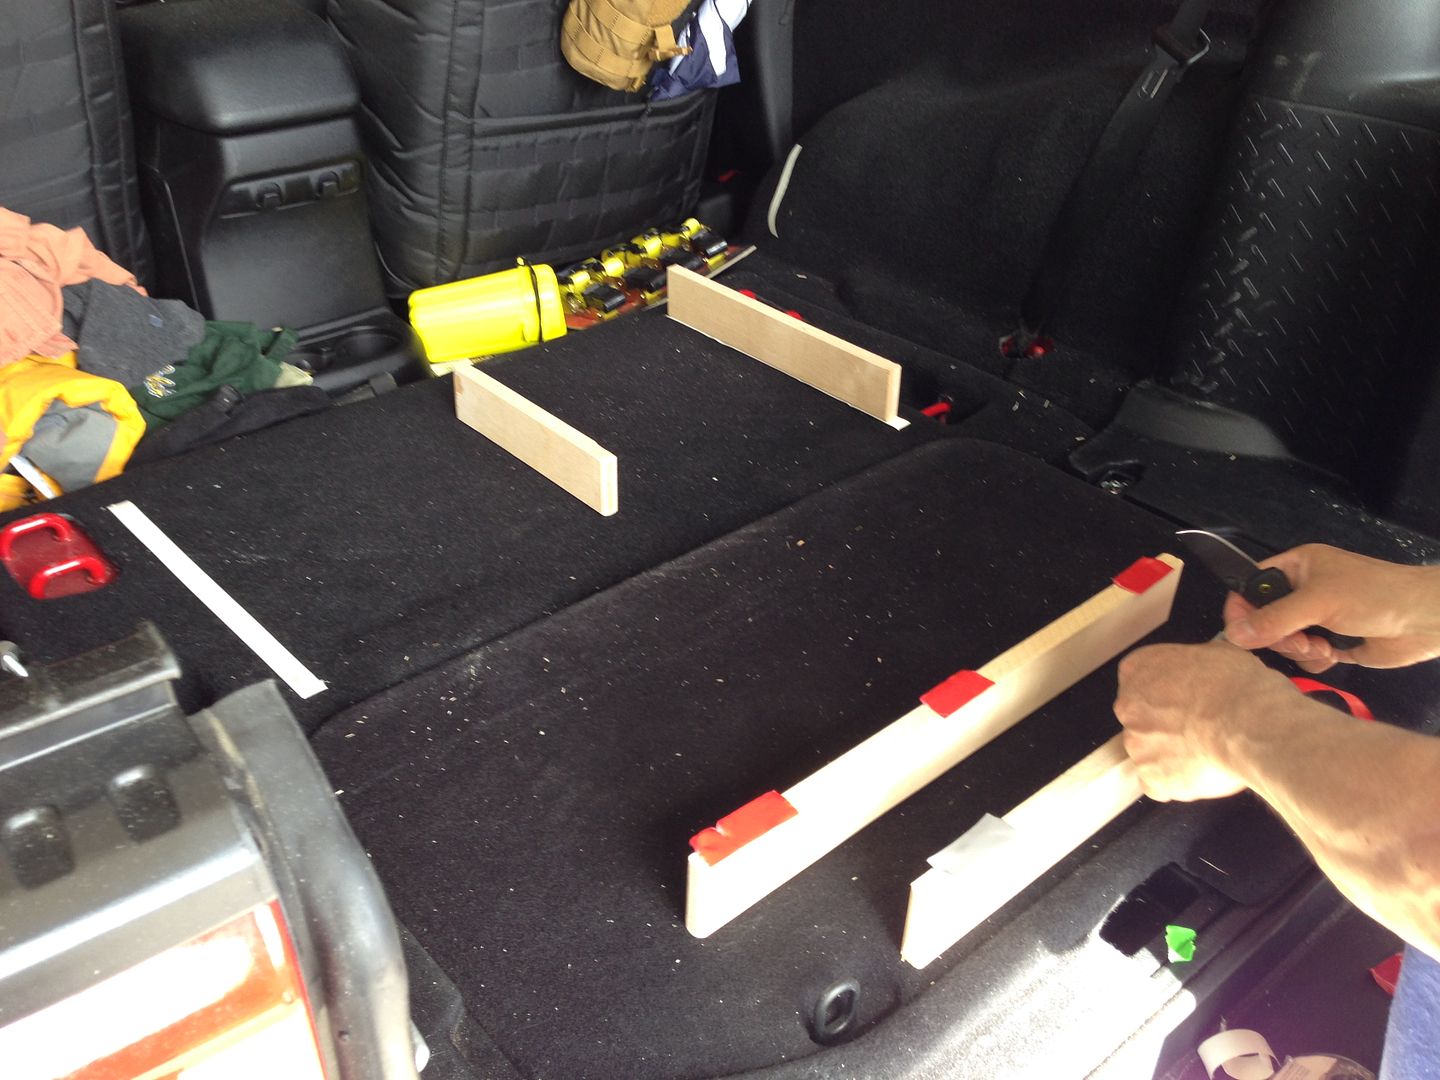
Then we built supports by measuring all of the different levels so the cargo tie down shelf would be nearly perfectly square
At the back of the shelf we added a wall and side braces to keep things separate between the cargo shelf and the space on the floor behind the two front seats in a two door... No rear seats were harmed, it's just been on two milk cartons since the day I brought this Jeep home from the dealership.
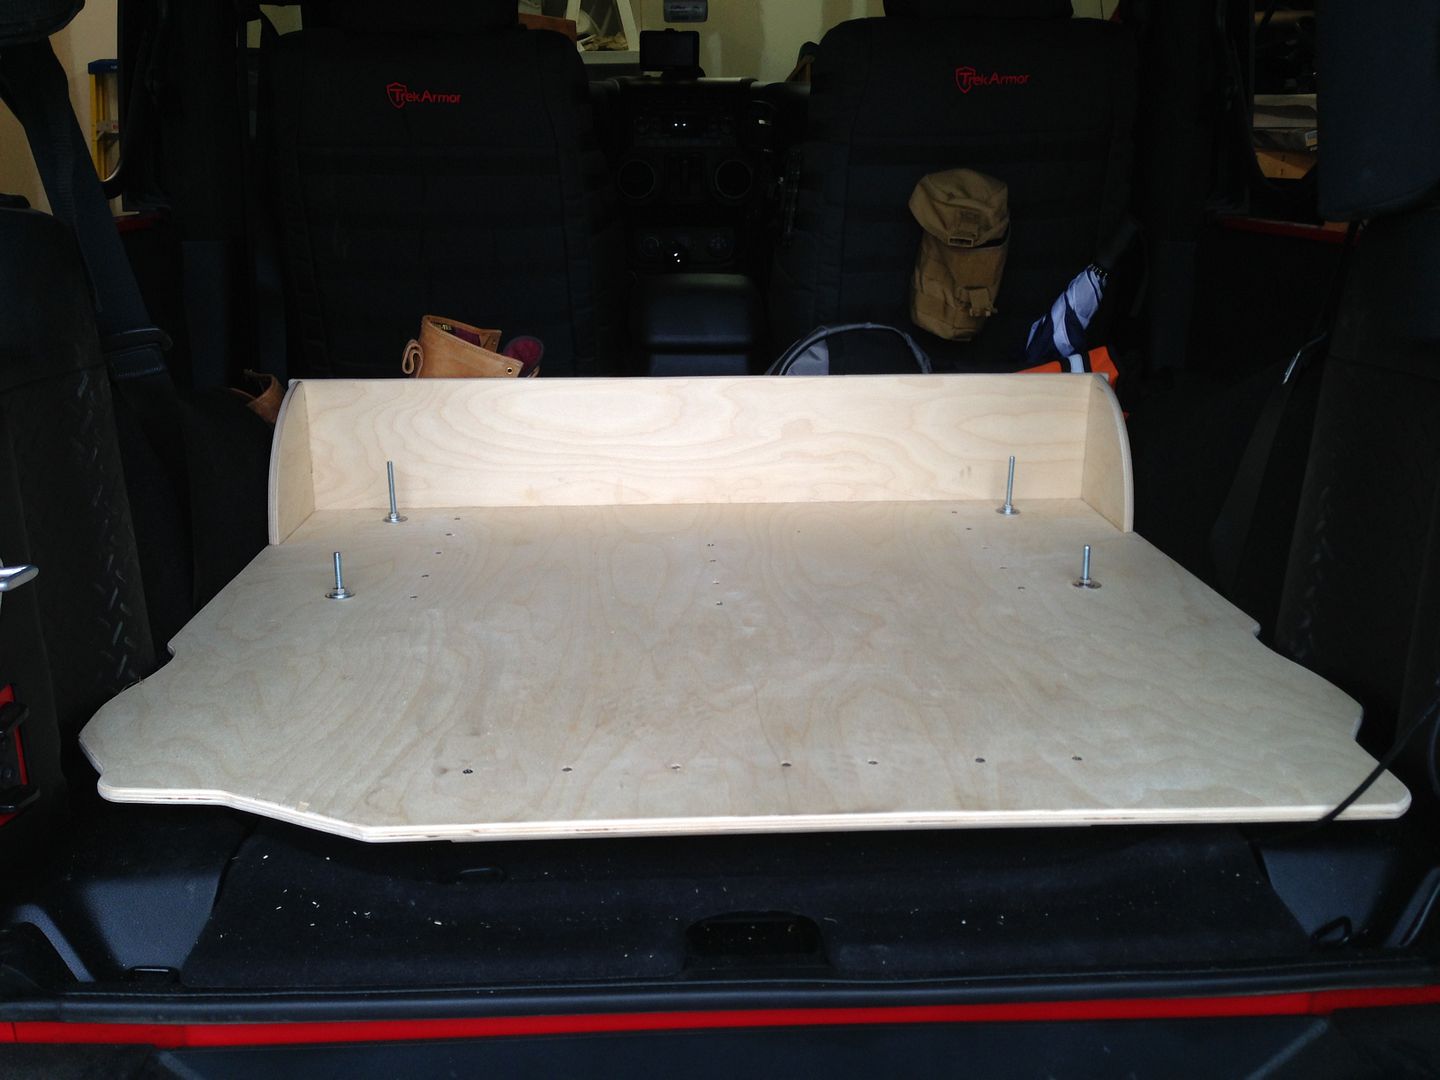
A LOT of detail went into this, every piece was glued and screwed, all square edges (minus the butt edges for joinery) were hit with a 1/4" router bit and then hand sanded...
Not just the top half but the supporting pillars and the underside of the shelf!
This is what happens when an ex-amateur cabinetmaker gets anal retentive about minute details
I chose the Core Trax 1000 system, someone on here first posted pictures and I looked into it and ordered a set that night! I believe it was Ron the JK Jedi from Maine!
I'm still playing with the locations of the tie down Trax but once that's solid I'll be painting or staining it all black.
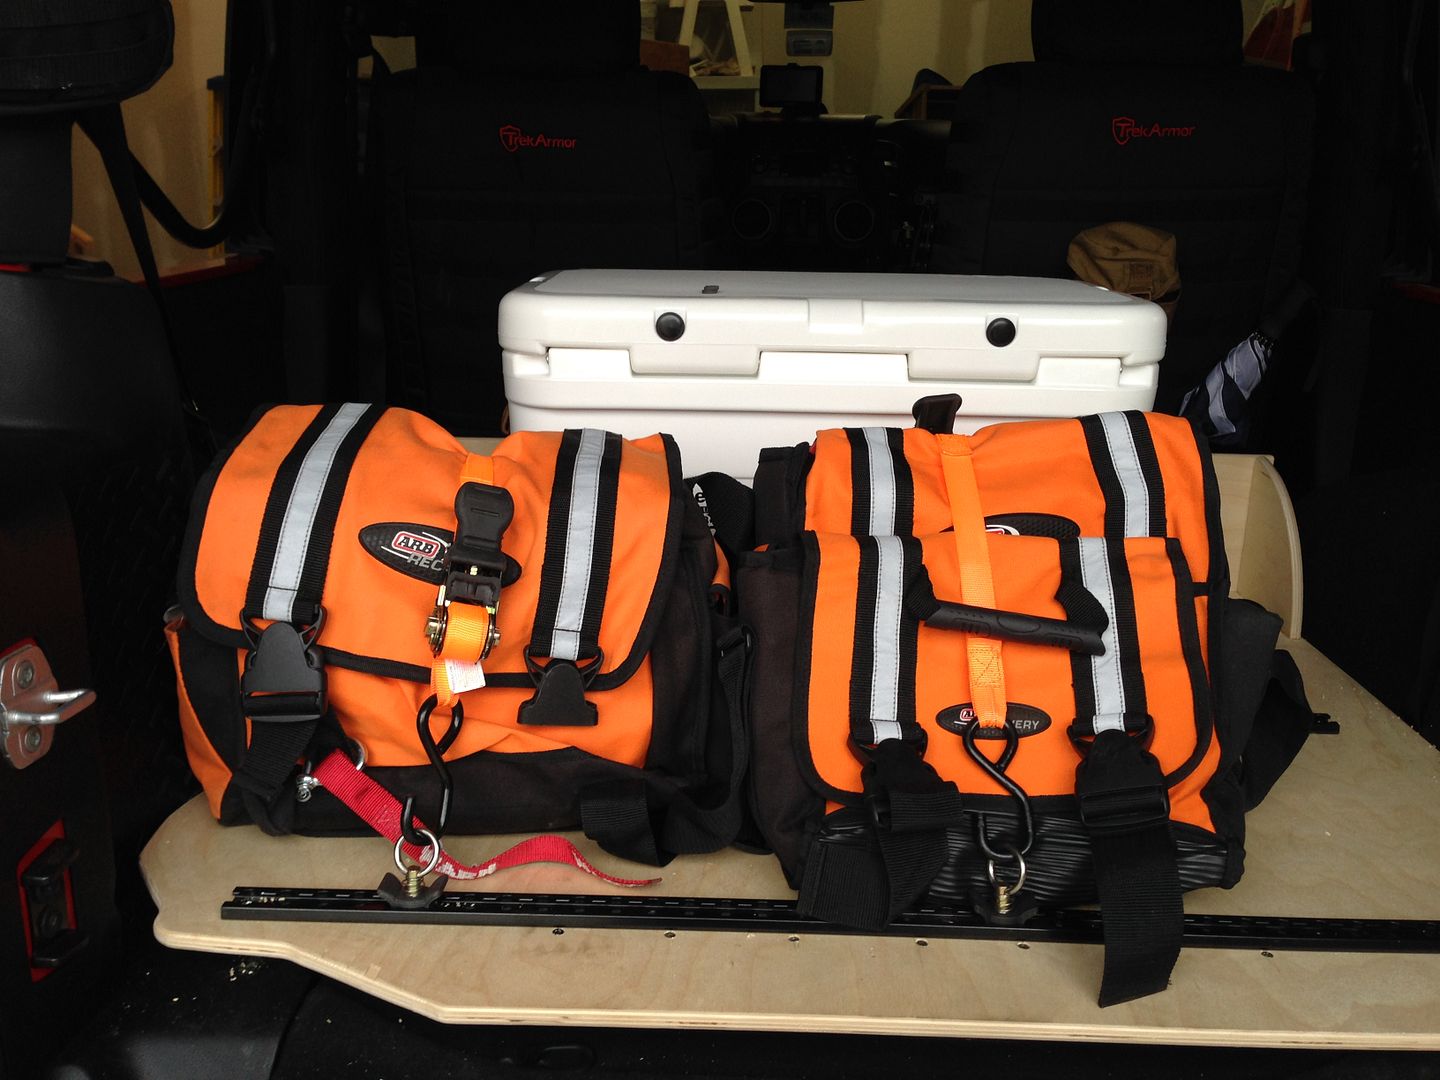
I had a chance to test the new setup today and it worked great! everything stayed in place, no surprises.
I've got some ideas about rearranging the Core Trax so I can maximize both storage and improve access to the often used gear vs. the obscure rescue/trailside repair kit...
Matthew
He had posted some photos of his cargo shelf and then I pm'ed him and asked a couple dozen questions about how he built his...
Then I sketched up my take on his concept just customized for my purposes.
And then once I had all of the core pieces, I enlisted the help,of a good friend of mine who is an artist, a commercial artist, and an amazing creator/fabricator of things that only he could have.
We used a piece of Baltic birch 1/2" plywood for its beautiful finish, it's light weight, and mostly because I had a spare sheet of it in my basement!
it comes in sheets 60"x60"

I can't post pictures right now as we are traveling and the hotel wifi sucks... I'll go through later and edit/add photo bucket links...
So I had some companies giant tray for the back of a 2 door JK to catch mud and sand
We put this upside down and traced the outline, we did multiple test fits and trimmed until it fit like a glove, actually it followed every curve without touching or rubbing anywhere
Then we built supports by measuring all of the different levels so the cargo tie down shelf would be nearly perfectly square

At the back of the shelf we added a wall and side braces to keep things separate between the cargo shelf and the space on the floor behind the two front seats in a two door... No rear seats were harmed, it's just been on two milk cartons since the day I brought this Jeep home from the dealership.

A LOT of detail went into this, every piece was glued and screwed, all square edges (minus the butt edges for joinery) were hit with a 1/4" router bit and then hand sanded...
Not just the top half but the supporting pillars and the underside of the shelf!
This is what happens when an ex-amateur cabinetmaker gets anal retentive about minute details
I chose the Core Trax 1000 system, someone on here first posted pictures and I looked into it and ordered a set that night! I believe it was Ron the JK Jedi from Maine!
I'm still playing with the locations of the tie down Trax but once that's solid I'll be painting or staining it all black.

I had a chance to test the new setup today and it worked great! everything stayed in place, no surprises.
I've got some ideas about rearranging the Core Trax so I can maximize both storage and improve access to the often used gear vs. the obscure rescue/trailside repair kit...
Matthew
Last edited by Matthewd5; 05-10-2014 at 06:21 PM. Reason: adding photos
 05-10-2014, 02:13 PM
#2
JK Newbie

Join Date: Apr 2014
Location: Rhode Island
Posts: 62
Likes: 0
Received 0 Likes
on
0 Posts
Can't wait to see some pictures. As a carpenter myself, I've been looking forward to tackling this project as soon as I get some free time. I've been drawing up a few things of my own but can't wait to see what you've come up with!!
05-10-2014, 06:30 PM
#3
JK Junkie
Thread Starter
The reason i'm moving to smaller bags is just the simplicity of getting to the piece of gear more quickly.
matthew
 05-11-2014, 01:34 PM
#5
JK Junkie
Thread Starter
The J hooks were a huge missing piece that works great, but I'm trying to make both short the end that's sticking up, and find a way to make them easier to install and to remove....
With them at the current length it's wasting space
Matthew
05-11-2014, 02:24 PM
#7
JK Junkie
Thread Starter
Yeah a drawer would be a nice feature, But I think we have less 3" of space under there...
We put in a good bit of time making those vertical pieces are custom cut to make the whole piece level.
Originally my Yeti cooler was to be on the left side, and on a piece of plywood with a small set of the Core Trax to hold it down, and it would be on a heavy duty underneath drawer slider...
This would have let 3/4 of the cooler able to slide out so you could grab food and beverage on the trail!
But that piece of real estate was deemed more valuable for gear, with the cooler setup right against the back of the front seats...
Now you can just turn around and pop open the Yeti.
On each side of the Yeti, that space is for less urgent stuff like a container full of spare fluids and weird rescue stuff like duct tape, f4 tape, tons of zip ties etc.
I'm going to rearrange some things and I'll be adding a handful of the Core Trax short Trax for randomly places to maximize space.
Eventually I'll paint it all black to blend in with the black carpet
Matthew
Trending Topics
05-13-2014, 08:54 AM
#8
JK Super Freak
Looks good! Couple questions if you don't mind.
How is the whole tray secured to the Jeep itself?
And is there a reason you went with about 3 inches clearance? Seems too small to be useful but could of made it lower to get a couple extra vertical inches?
How is the whole tray secured to the Jeep itself?
And is there a reason you went with about 3 inches clearance? Seems too small to be useful but could of made it lower to get a couple extra vertical inches?
05-13-2014, 10:21 AM
#9
JK Junkie
Thread Starter
The connection to the Jeep (talking two door here without the back seat) are hooks from a hardware store, I don't have a picture, but my local small hardware store only had round ends...
But the had me show them how much I needed and they proceeded to use a bolt cutter in the back room and then used the key making machines buffer to make it smooth.
Then you just carefully locate where the four loops are and drill the appropriate size hole, put the j hook threaded side up through the hole
Once you hook the loops put on washers and nuts with the nylon collar
The 3 inches was to level out the whole space
Matthew
05-15-2014, 03:38 PM
#10
JK Junkie
Thread Starter
use thicker wood, 3/4", put in fewer spacers underneath, space them for the width do what you want your drawers width to be.
And more importantly, please takes turns of what you did, and if you need more info or more pictures just let me know!
matthew