
LOD Signature Series Bumper Install
 02-29-2008, 04:43 PM
#1
JK Enthusiast
Thread Starter
First of all I do not work for LOD and I do not claim to be an expert on installing this bumper. I take no resposibility for injuries or damage you may do, following these directions. SO DO THIS AT YOUR OWN RISK!
To save time, I will refer you to two different threads before we get started.
Before you can install your new LOD bumper you will have to remove your stock bumper and stock grill.
The following threads will show you how to remove them.
Front Bumper removal
https://www.jk-forum.com/forums/show...bumper+removal
Grill removal
https://www.jk-forum.com/forums/show...=grill+removal
With everything removed, We'll start installing the bumper.
Step 1 Winch Plate Install.
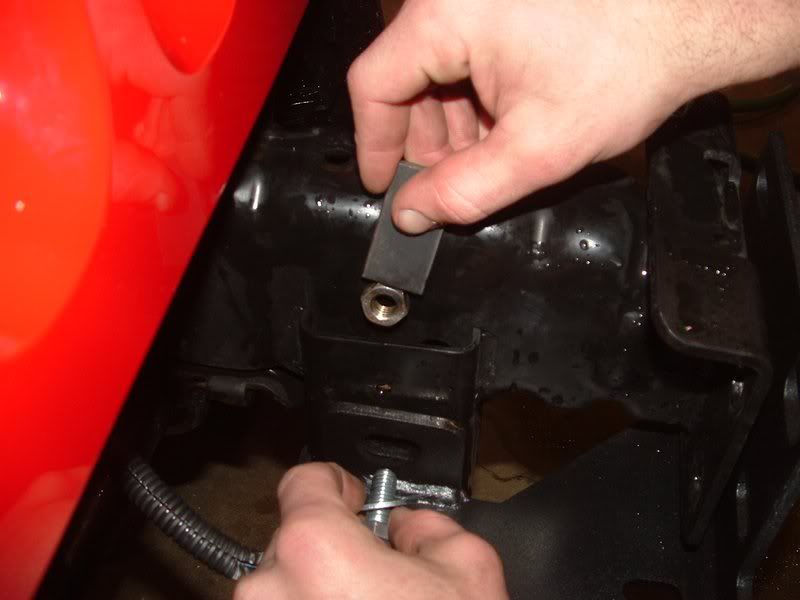
Locate the winch plate and place it between the frame rails. Using the 2 bolts and 2 nuts(nut welded to a plate) supplied, secure the lower part of the winch plate to the crossmember. *****Leave these snug,finger tight!*****
Now locate the 4 block spacers, place them between the winchplate and the bumper mounting holes(on the frame).
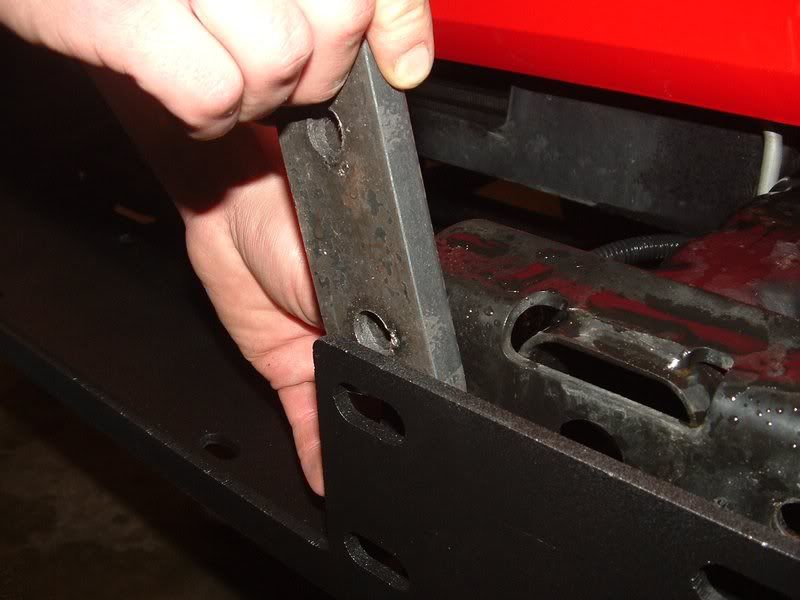
Use the 8 long bolts and push them through. No nut needed at this time. The bolts alone will hold everything up.
Step 2 Bumper Install
At this step I would recommend a friend.
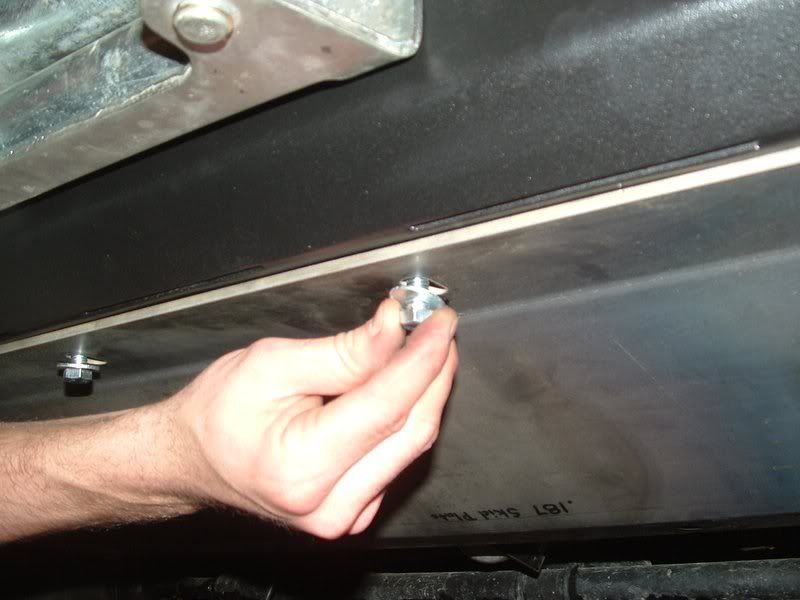
Have your friend pick the bumper up and carefully put it in place. While your friend is lifting, you should be guiding it onto the 8 loose bolts. Once on the bolts, have your friend hold it there while you place the washers and nuts on all 8 bolts. *****Again put these on finger tight or only one half turn tight, past finger tight, with a wrench*****
This pic shows using a wrench but like I said....only finger tight at this point***
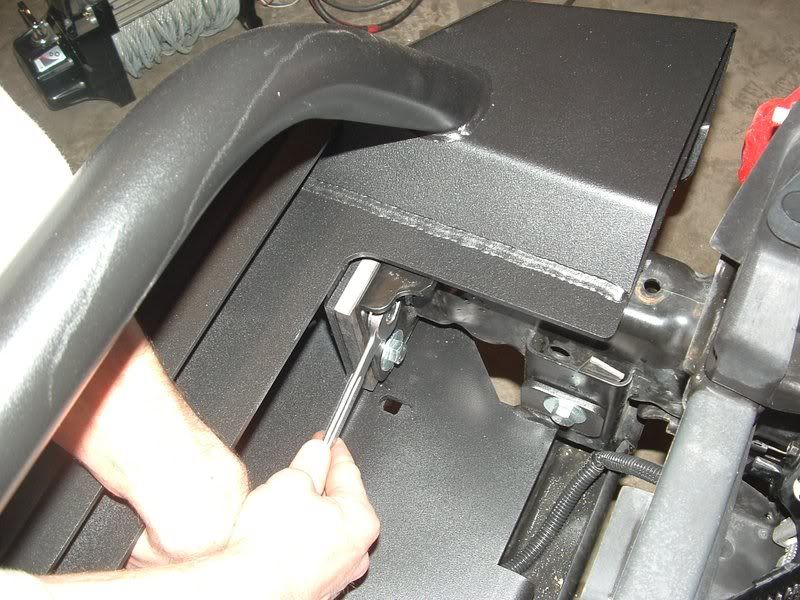
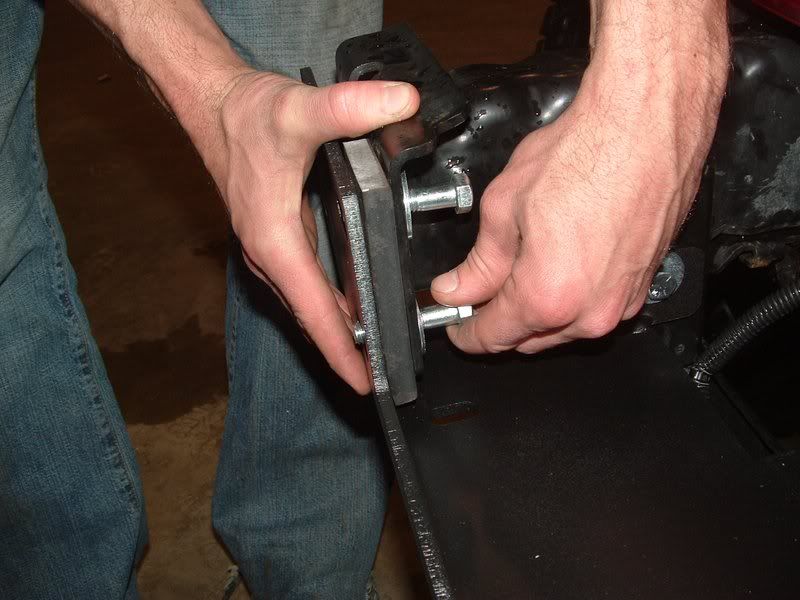
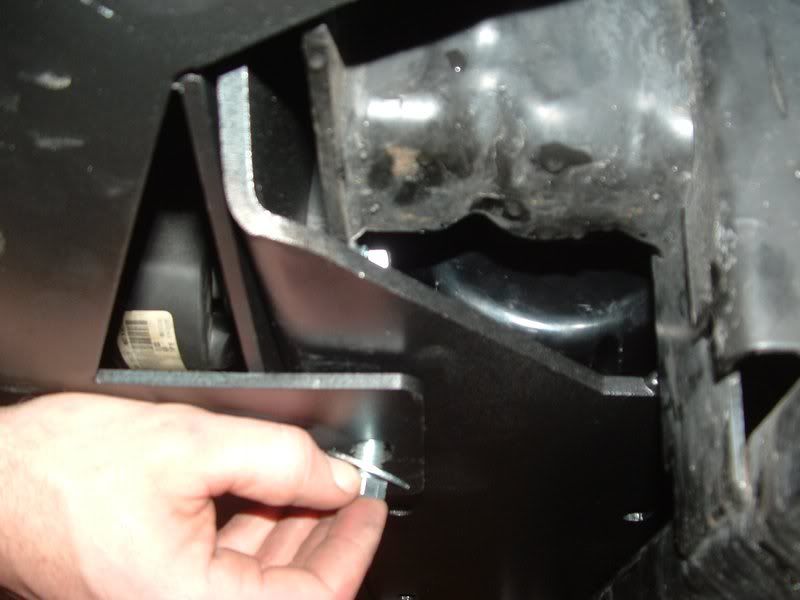
Now go under the bumper and locate the two holes that connect the bumper to the winch plate. Use the supplied hardware (2 bolts, washers and nuts) and connect to two. Tighten these down until the bumper touches the wench plate!!!!!! Not all the way snug!!! If you also look at the above pic., you can also see the hole where the bolt pops through (right below the wrench)
Step 3 Completing the Bumper Install
Now that the Winch Plate and Bumper are touching together, go back and tighten down the 8 bolts holding the bumper on (step 2).
After the 8 Bumper bolts are tight, now tighten the two crossmember bolts in step 1.
Now finish tightening the two bolts that connect the bumper to the winch plate.
Step 4 Foglight Install
Remove the stock fog lights from your stock bumper (4 phillips screws per foglight)
Using a drill and a 5/16 drill bit, drill out the holes where the screws went. ****NOTE, you may want to start out with the next smaller bit first (1/4). I tried the 1/4 but had to move up to the 5/16.

Install the foglights and use the supplied nuts to hold them in place. The foglight plugs should be pointing the the drivers side.
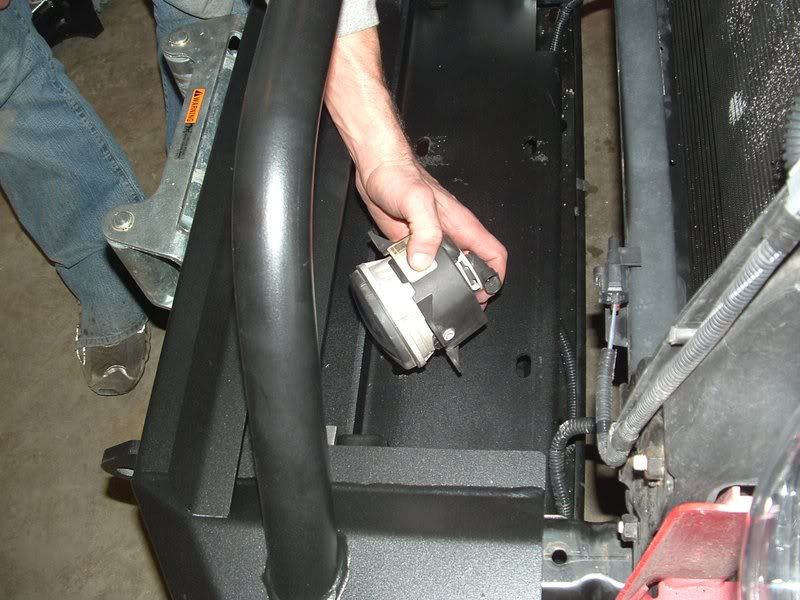
Using the stock harness, plug in the fog lights.
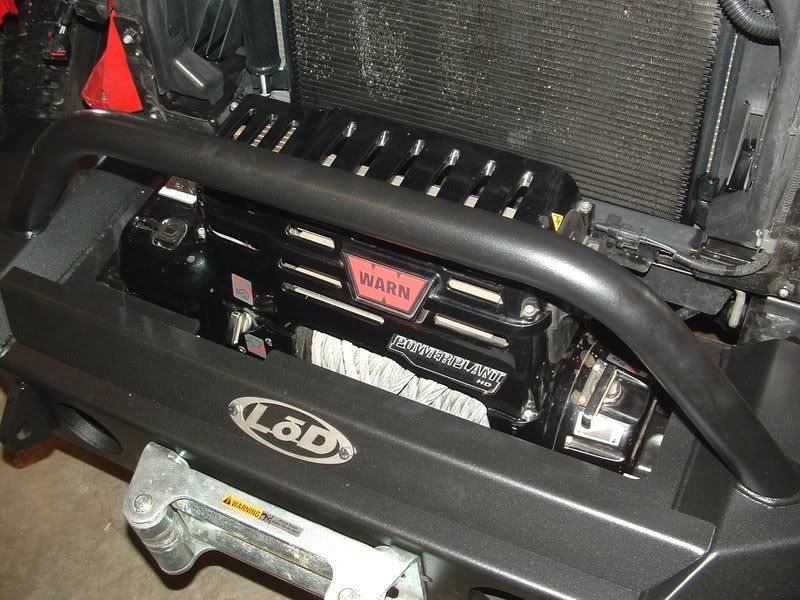
Step 5 Winch Install.
This step is why we removed the grill. It makes it much easier to install the winch, without scratching the grill up.
Bolt your Fairlead into place
Now carefully set the winch in place and bolt it down.
Run the wiring which ever way you choose.
Now install the grill.
Step 6 Optional Skid Plate Install.
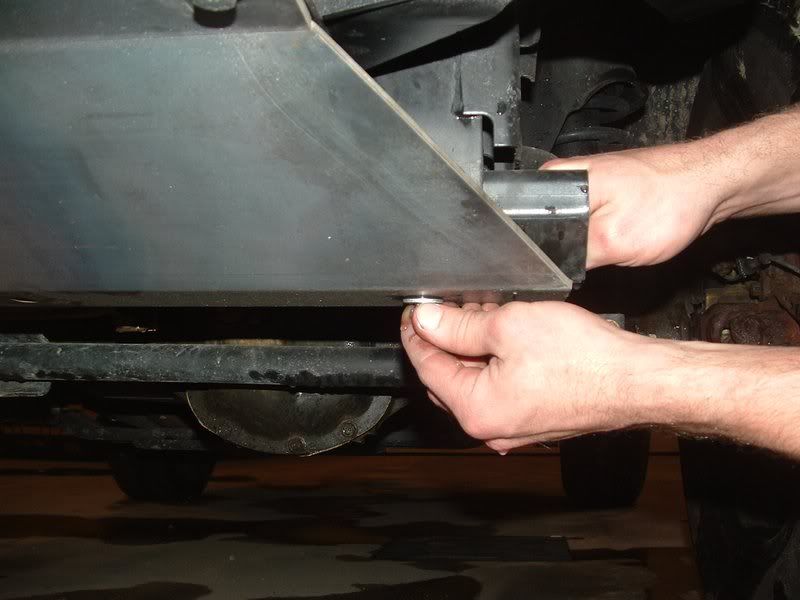
Hold the skid plate in place and use the 4 supplied bolts and washers.
Using the supplied hardware ( 2 square plates with a nut welded in the center of both), bolt the skid plate to the crossmember.
The plate will actually sit inside the crossmember. This is what the bolt screws into.
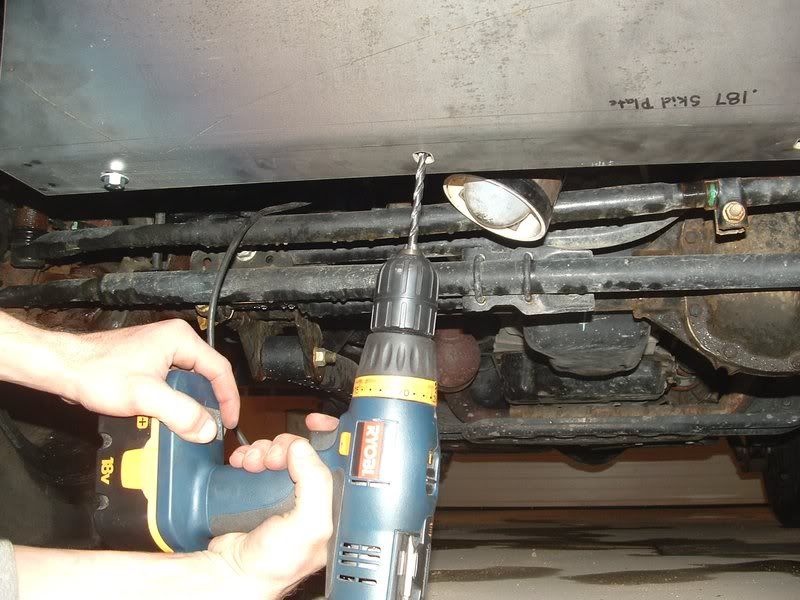
If you choose to use the two bolt holes in the center of the crossmember, you will have to drill holes, then use the supplies bolt, nut and washers (I have chosen not to do this at this time).
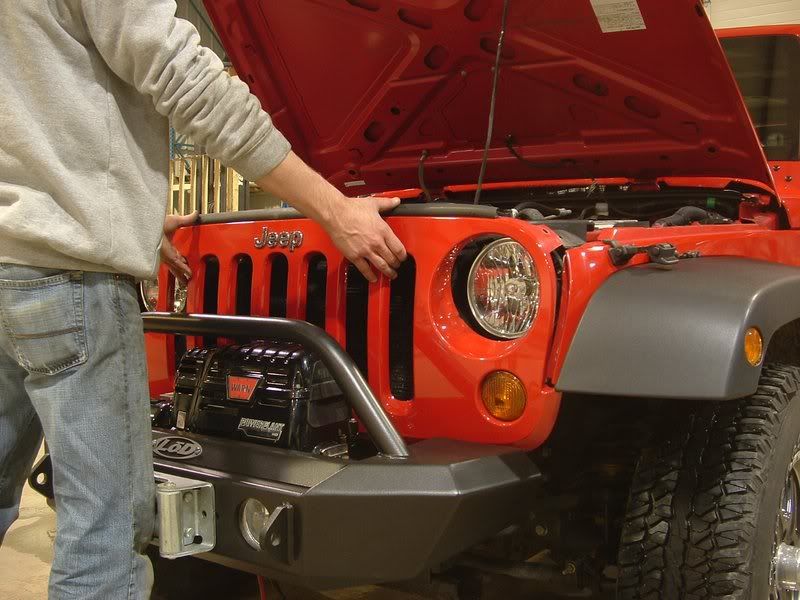
Now step back and admire your work and your new bumper.
To save time, I will refer you to two different threads before we get started.
Before you can install your new LOD bumper you will have to remove your stock bumper and stock grill.
The following threads will show you how to remove them.
Front Bumper removal
https://www.jk-forum.com/forums/show...bumper+removal
Grill removal
https://www.jk-forum.com/forums/show...=grill+removal
With everything removed, We'll start installing the bumper.
Step 1 Winch Plate Install.
Locate the winch plate and place it between the frame rails. Using the 2 bolts and 2 nuts(nut welded to a plate) supplied, secure the lower part of the winch plate to the crossmember. *****Leave these snug,finger tight!*****
Now locate the 4 block spacers, place them between the winchplate and the bumper mounting holes(on the frame).
Use the 8 long bolts and push them through. No nut needed at this time. The bolts alone will hold everything up.
Step 2 Bumper Install
At this step I would recommend a friend.
Have your friend pick the bumper up and carefully put it in place. While your friend is lifting, you should be guiding it onto the 8 loose bolts. Once on the bolts, have your friend hold it there while you place the washers and nuts on all 8 bolts. *****Again put these on finger tight or only one half turn tight, past finger tight, with a wrench*****
This pic shows using a wrench but like I said....only finger tight at this point***
Now go under the bumper and locate the two holes that connect the bumper to the winch plate. Use the supplied hardware (2 bolts, washers and nuts) and connect to two. Tighten these down until the bumper touches the wench plate!!!!!! Not all the way snug!!! If you also look at the above pic., you can also see the hole where the bolt pops through (right below the wrench)
Step 3 Completing the Bumper Install
Now that the Winch Plate and Bumper are touching together, go back and tighten down the 8 bolts holding the bumper on (step 2).
After the 8 Bumper bolts are tight, now tighten the two crossmember bolts in step 1.
Now finish tightening the two bolts that connect the bumper to the winch plate.
Step 4 Foglight Install
Remove the stock fog lights from your stock bumper (4 phillips screws per foglight)
Using a drill and a 5/16 drill bit, drill out the holes where the screws went. ****NOTE, you may want to start out with the next smaller bit first (1/4). I tried the 1/4 but had to move up to the 5/16.
Install the foglights and use the supplied nuts to hold them in place. The foglight plugs should be pointing the the drivers side.
Using the stock harness, plug in the fog lights.
Step 5 Winch Install.
This step is why we removed the grill. It makes it much easier to install the winch, without scratching the grill up.
Bolt your Fairlead into place
Now carefully set the winch in place and bolt it down.
Run the wiring which ever way you choose.
Now install the grill.
Step 6 Optional Skid Plate Install.
Hold the skid plate in place and use the 4 supplied bolts and washers.
Using the supplied hardware ( 2 square plates with a nut welded in the center of both), bolt the skid plate to the crossmember.
The plate will actually sit inside the crossmember. This is what the bolt screws into.
If you choose to use the two bolt holes in the center of the crossmember, you will have to drill holes, then use the supplies bolt, nut and washers (I have chosen not to do this at this time).
Now step back and admire your work and your new bumper.
Last edited by VBS4; 02-29-2008 at 05:12 PM.


