Grill Mod
#901
The way I look at it... If the plastic doesn't hold up... I'll buy the metal ones. The hardest part is installing the tie blocks. BUT for now they have been through 3 snow storms with no wear.
#902
I have had the plastic gutter guard on for about 6 months. I also didn't even use glue to attach the mounts, I only used the adhesive on the mounts. It has lasted through snow storms, rain, and even a high pressure car wash. Still holding up great.
#903
Same here, been 4 months only with the adhesive on the tie blocks and it's holding up fine. Straight on powerwasher to it and crazy winter conditions and it's fine. The blocks are made for outdoor use so there's no point in waisting time using glue. I used 6 blocks per section with 2 shared with the one beside.
#904
i went with the expanded steel and attached it to the radiator shroud with self tapping screw and washers. $20 and two hours of time. i had it cut to 13 1/2 inches by 27 inches. huge difference in the look of the grill. definitely brick proof.
#905
I've done this mod and it looks great. I found the zip tie blocks didn't adhere strongly enough though (could be the heat down here in OZ!) and a couple came loose after about 6 weeks. I just used a hard setting glue like araldite to re-inforce around the tie blocks and have had no problems over the last 3 months or so.
#906
[IMG] [/IMG]
[IMG] [/IMG]
I cut a piece of expanded aluminum metal 15" x 28". Primed and painted satin black and then notched out around the retaining clips for the grill, I used self adhesive zip tie blocks and trimmed them to fit between the grill slots. I used 3 on each slot of the grill and 3 on each end, all of them evenly spaced and used black zip ties to secure the grill insert in place.
All the materials came to around $25 or less.
[IMG]
I cut a piece of expanded aluminum metal 15" x 28". Primed and painted satin black and then notched out around the retaining clips for the grill, I used self adhesive zip tie blocks and trimmed them to fit between the grill slots. I used 3 on each slot of the grill and 3 on each end, all of them evenly spaced and used black zip ties to secure the grill insert in place.
All the materials came to around $25 or less.
#907
I was running zip tie blocks previously with a shite load of araldite and it still came loose!!
If you're worried about it coming off with heat try the breadboard cut in to strips and use sikaflex (see my photos earlier in the thread) . Solid as and i've been in 35 degree Celsius plus for the last 3 weeks and it hasn't budged.
If you're worried about it coming off with heat try the breadboard cut in to strips and use sikaflex (see my photos earlier in the thread) . Solid as and i've been in 35 degree Celsius plus for the last 3 weeks and it hasn't budged.
Last edited by vans; 02-10-2011 at 12:14 AM.
#908
GREAT job on that. I've been wanting to do this but have been holding off for now because the kits out there are 100+ bucks! This is a much better alternative! I just can't believe it took me 4 years to find this thread, my god! LOL
Last edited by JKStell; 02-10-2011 at 02:34 AM.
#909
I ordered mine through www.mcmaster.com
type in sheet metal
Click "Sheet Metal Products:
Click "Sheets,Bars,Strip, Cubes"
Thats for the sheet- 28.5x14
Part # 7582K12 for the zip tie cubes in black
I used Brake cleaner to clean the grill and black caliper paint to paint it.
Paint first so its ready for install!!
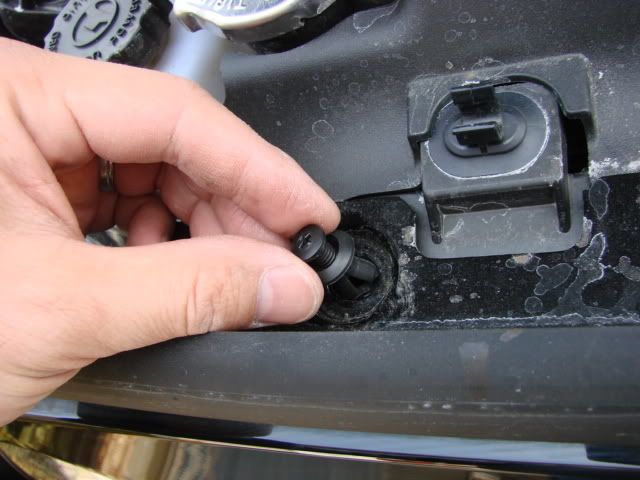
I Took out the 6 plastic screw- did by hand - hint hint
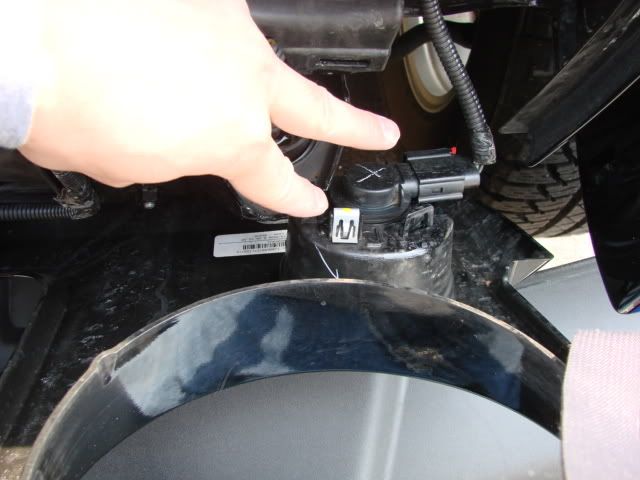
Pulled gently by the blinker- not to hard now its still connected
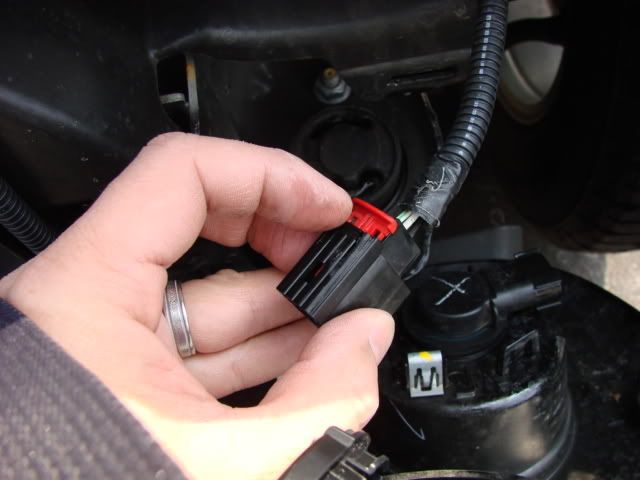
Pulled red tab out FIRST- then pulled plug out
Pulled bottom out
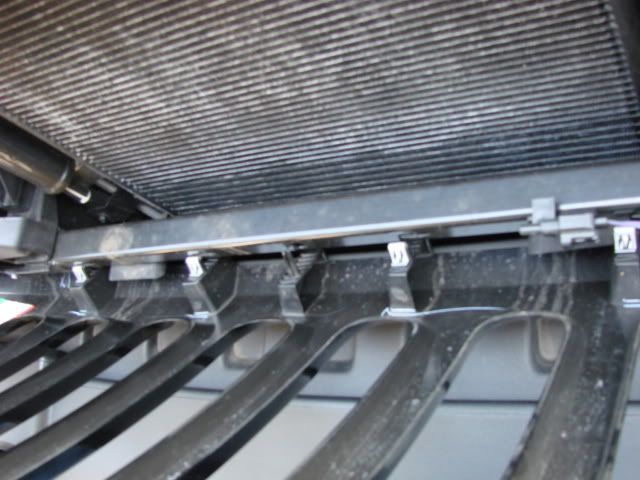
Have grill ready
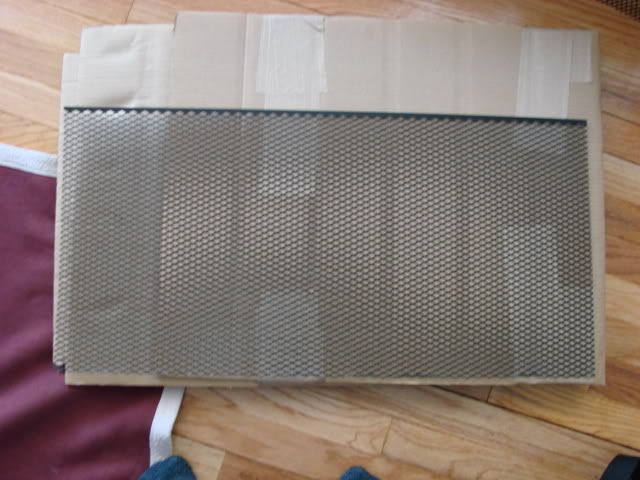
Laid all the tie downs - 3 going down and one on each top hole
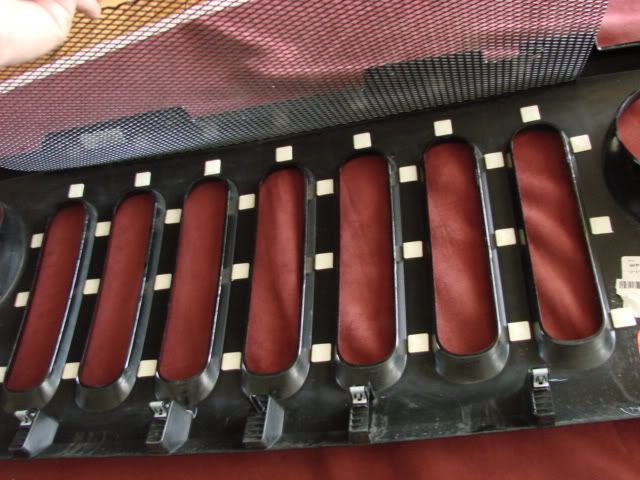
Zip tied each one using a small screwdriver to help get the tie up
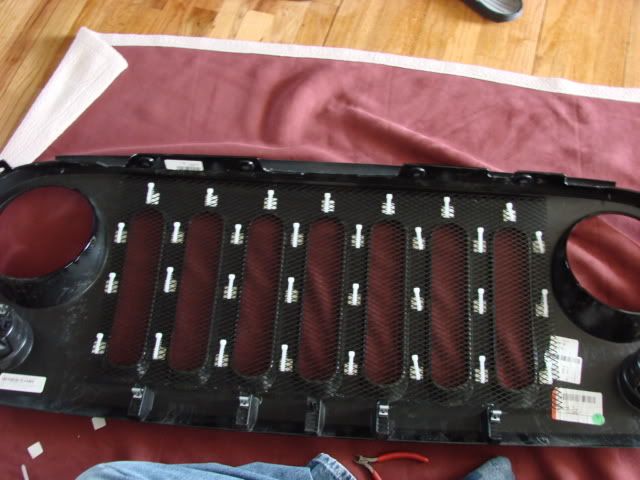
Re Install the grill and Vuala!!
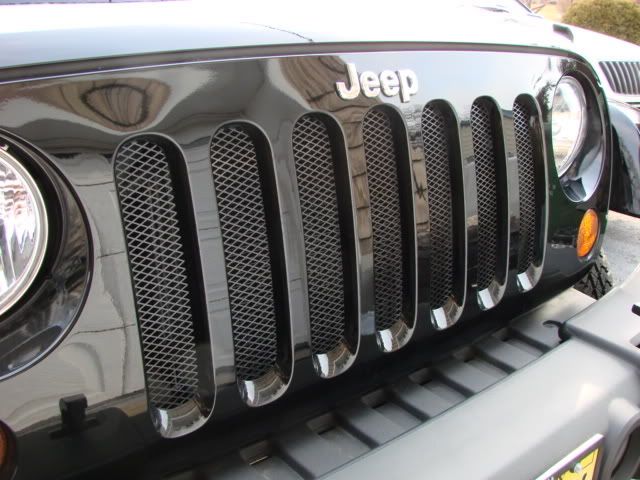
THANKS Ponpeta!!!!!!
type in sheet metal
Click "Sheet Metal Products:
Click "Sheets,Bars,Strip, Cubes"
Thats for the sheet- 28.5x14
Part # 7582K12 for the zip tie cubes in black
I used Brake cleaner to clean the grill and black caliper paint to paint it.
Paint first so its ready for install!!
I Took out the 6 plastic screw- did by hand - hint hint

Pulled gently by the blinker- not to hard now its still connected

Pulled red tab out FIRST- then pulled plug out

Pulled bottom out

Have grill ready

Laid all the tie downs - 3 going down and one on each top hole

Zip tied each one using a small screwdriver to help get the tie up

Re Install the grill and Vuala!!

THANKS Ponpeta!!!!!!
#910
how about this sort of mesh, it should look good and I think that this slab is big enough right?
http://www.mcmaster.com/#perforated-metal/=b3fo7y
its the hex pattern one and its made of aluminum
Material Type
Aluminum
Aluminum Type
Alloy 3003
Condition/Temper
H14 Temper (half hard)
Form
Hexagonal Hole Perforated Sheet
Shape
Sheets
Opening Pattern
Staggered
Hex Size
1/4"
Percentage of Open Area
79
Center-to-Center Spacing
.281"
Sheet Width
36"
Sheet Length
40"
Thickness
.032"
Gauge
20


