
4dr removing rear seats and console for linex prep
 06-27-2009, 03:31 PM
#1
JK Freak
Thread Starter
Join Date: Oct 2007
Location: Hangin in the sunshine state....staging forum..
Posts: 943
Likes: 0
Received 2 Likes
on
2 Posts
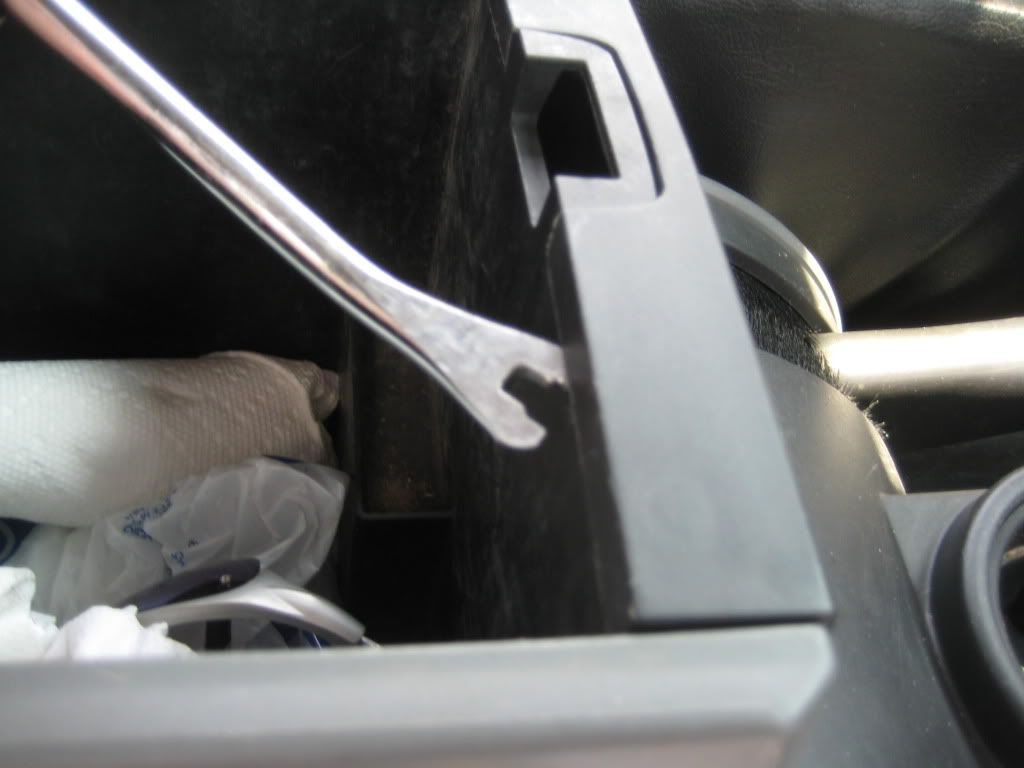
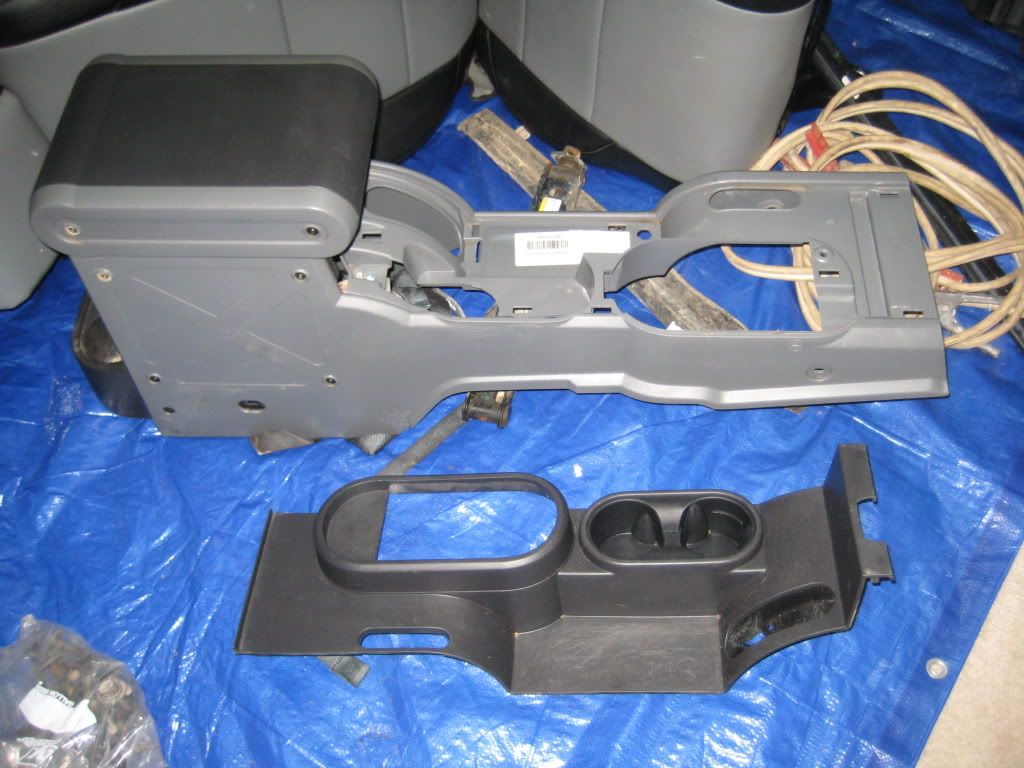
the center console comes out so easy, put the transfer case in 4hi, pull the emergency brake all the way up, put a 5/8'ths wrench under the transfer case shifter and hit it up with a hammer to pop the handle off, next pry off the console bezel or surround, its the black part that contains the cup holders and surrounds the transfer case shifter, open the storage compartment and pry it up from the front edge, it just unsnaps from the console
next take out the 4 torx screws, two on each side, see pics below
rear screw in the center on the pic
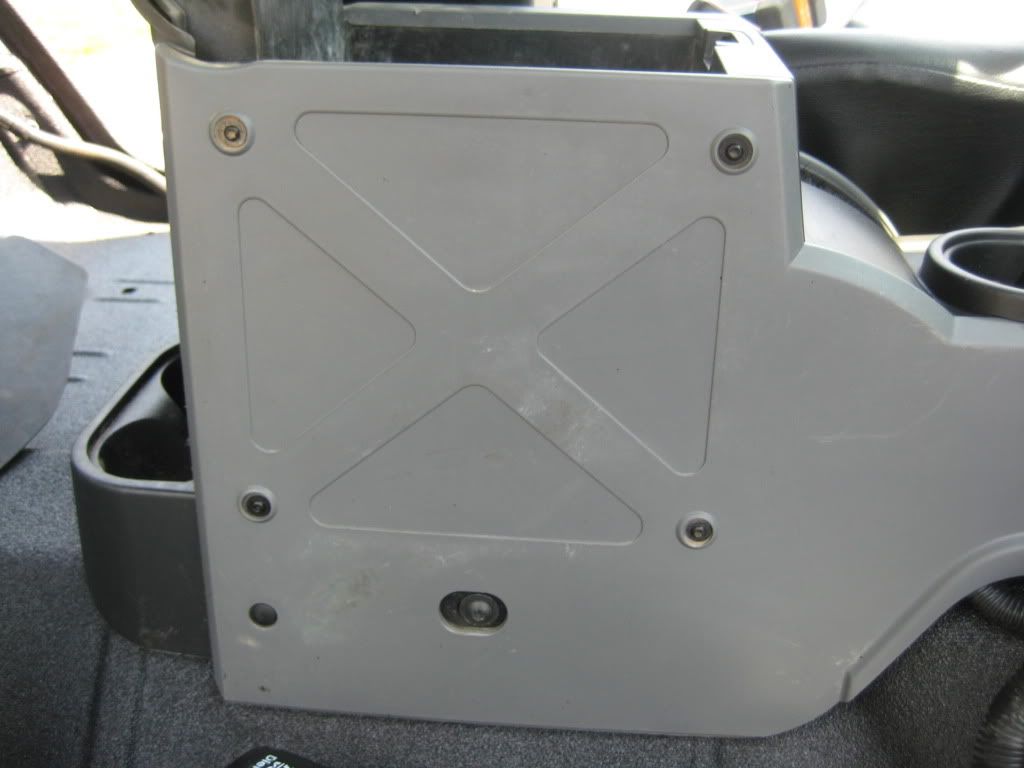
then the front screw
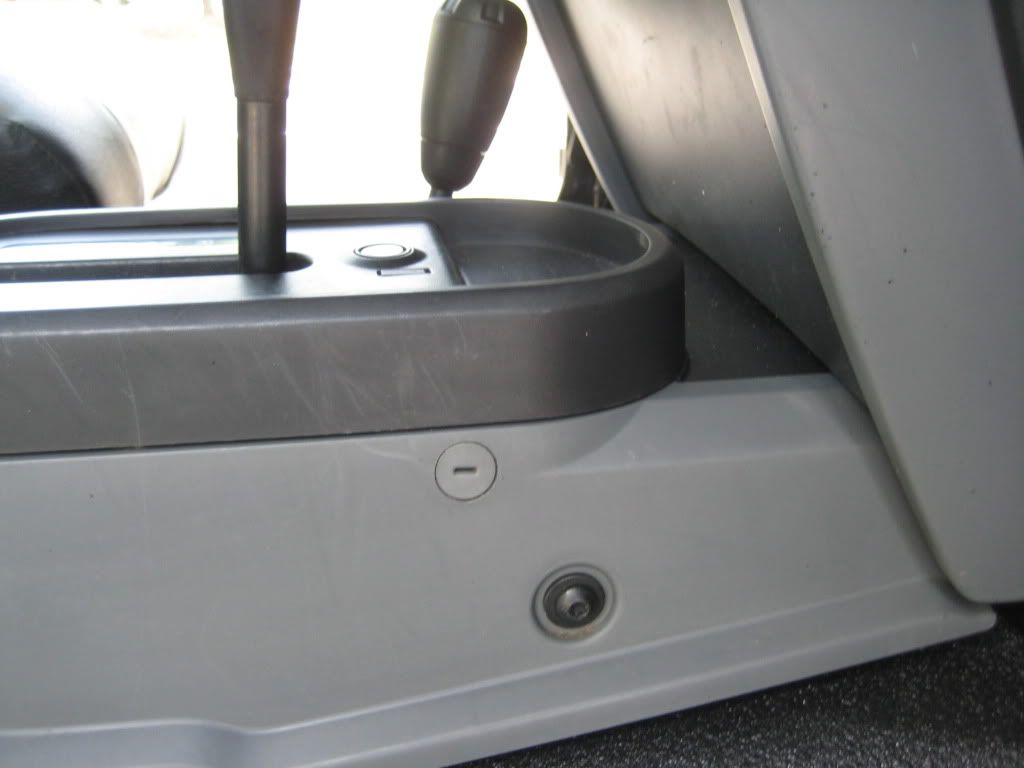
now you can lift the console off from the rear
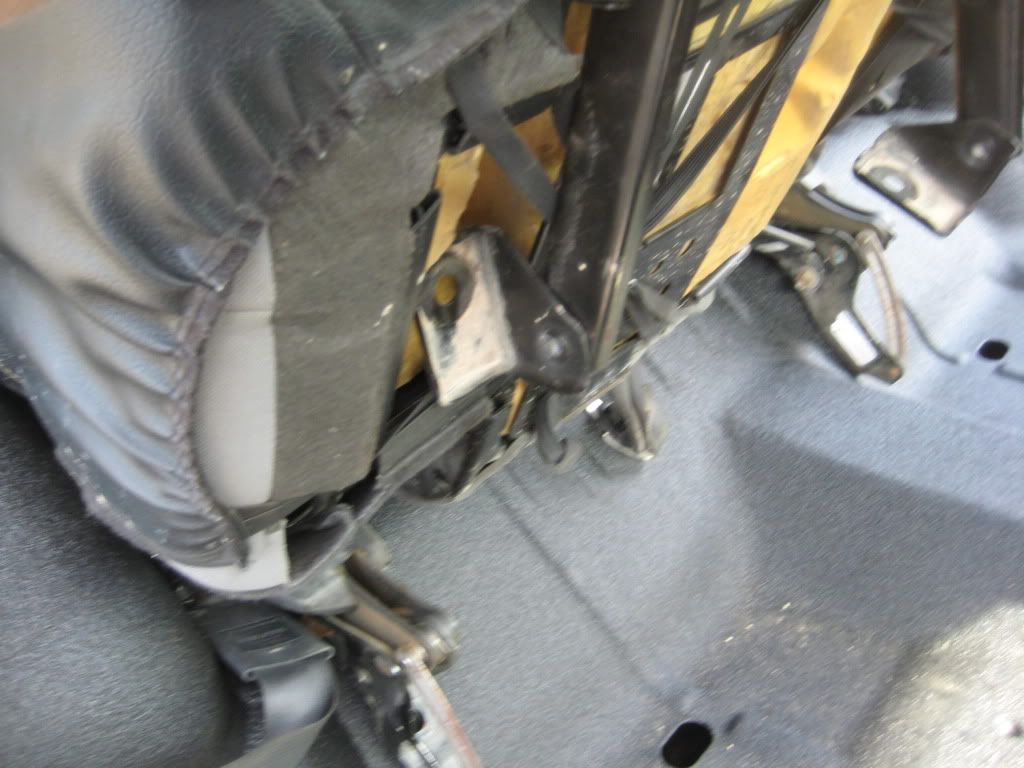
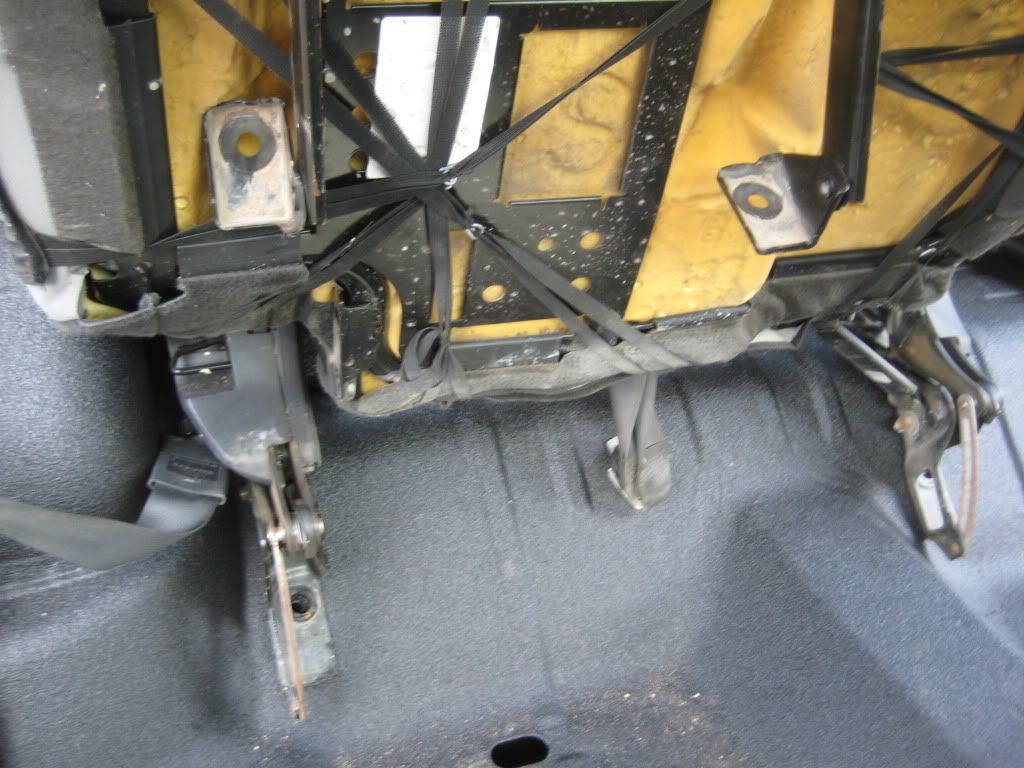
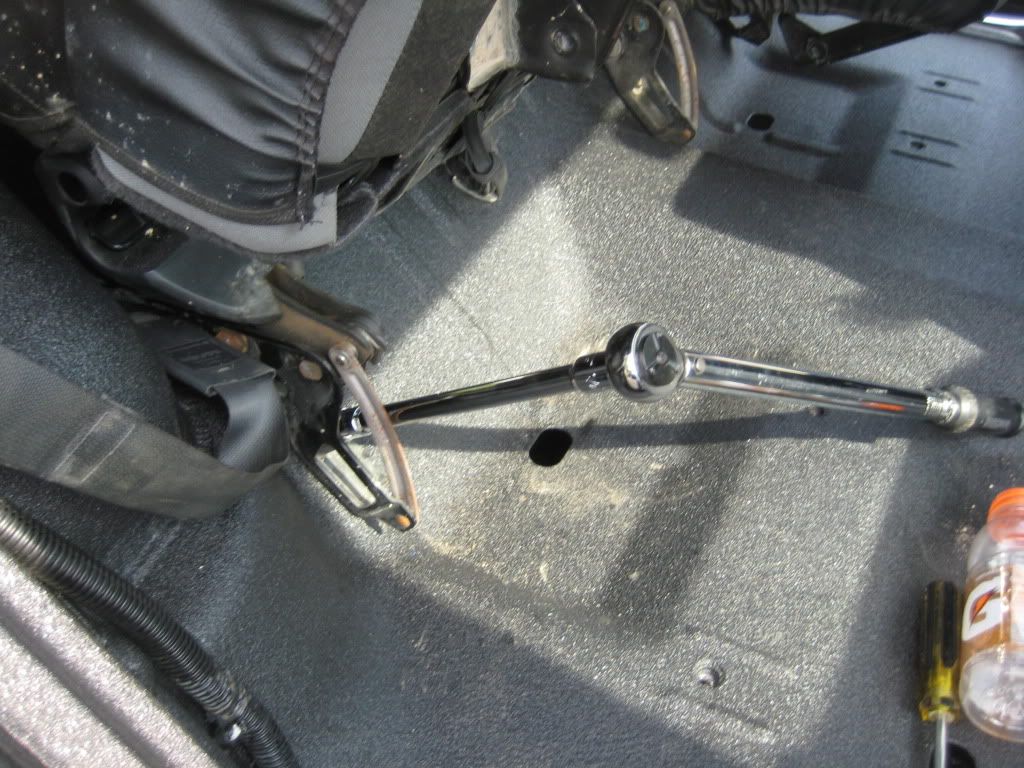
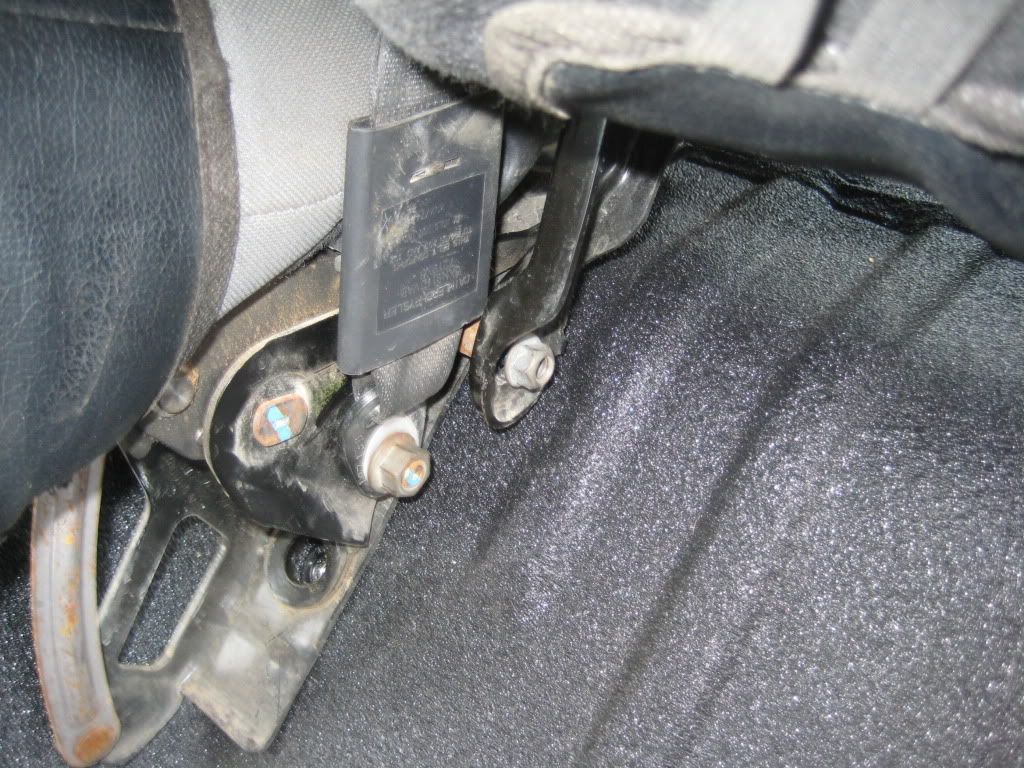
the rear seats on the 4dr have a ton of red locktite holding then on, they only get torqued to 55lbs, remove all the front leg screws completely then you can flip the legs up and the bottom of the seat back so you can get to the bolts on the angle you need at least a 6in extension, 10in worked better, there are also 2 nuts on the rear of the seats you can get after the angle ones by flipping seat forward, and one that holds the center seat belts. there are also two nuts you have to remove on the side of the drivers side rear that hold the two seats together.
rear seat legs
folded up
bolt hole

only way to get to that bolt is having the seat flipped up
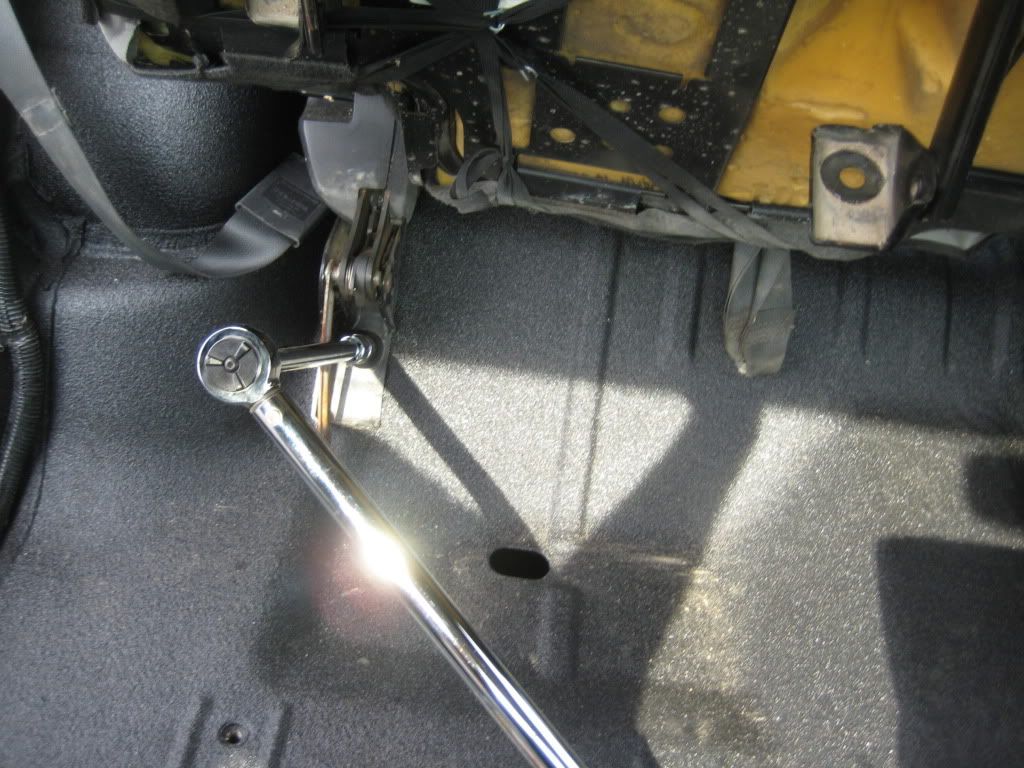
the 2 nuts holding the 2 sections of the rear seats together
the console in the 2 pieces it comes out in
the plastic trim at the kicker panels comes off easy, if you use the trim removal tool like I show in first pic you can get them off without breaking and reuse them
next take out the 4 torx screws, two on each side, see pics below
rear screw in the center on the pic
then the front screw
now you can lift the console off from the rear
the rear seats on the 4dr have a ton of red locktite holding then on, they only get torqued to 55lbs, remove all the front leg screws completely then you can flip the legs up and the bottom of the seat back so you can get to the bolts on the angle
you need at least a 6in extension, 10in worked better, there are also 2 nuts on the rear of the seats you can get after the angle ones by flipping seat forward, and one that holds the center seat belts. there are also two nuts you have to remove on the side of the drivers side rear that hold the two seats together.rear seat legs
folded up
bolt hole
only way to get to that bolt is having the seat flipped up
the 2 nuts holding the 2 sections of the rear seats together
the console in the 2 pieces it comes out in
the plastic trim at the kicker panels comes off easy, if you use the trim removal tool like I show in first pic you can get them off without breaking and reuse them
Last edited by tkob1060; 06-29-2009 at 07:53 AM.
 06-29-2009, 07:59 AM
#2
JK Junkie
Join Date: Feb 2008
Location: Hollywood, MD
Posts: 2,126
Likes: 0
Received 0 Likes
on
0 Posts
Man where was this when I was ripping my interior apart??  Good write-up for future reference. btw, I bought a trim tool for $8 and ended up destroying the plastic clip thingies anyway..... 33cents each from the dealership so it's cheaper to just get a handful of those if someone doesn't want to spend the coin on a trim tool (that's my new word I'm going to try and work into conversation everyday)
Good write-up for future reference. btw, I bought a trim tool for $8 and ended up destroying the plastic clip thingies anyway..... 33cents each from the dealership so it's cheaper to just get a handful of those if someone doesn't want to spend the coin on a trim tool (that's my new word I'm going to try and work into conversation everyday)
06-29-2009, 08:07 AM
#3
JK Freak
Thread Starter
Join Date: Oct 2007
Location: Hangin in the sunshine state....staging forum..
Posts: 943
Likes: 0
Received 2 Likes
on
2 Posts
Man where was this when I was ripping my interior apart?? Good write-up for future reference. btw, I bought a trim tool for $8 and ended up destroying the plastic clip thingies anyway..... 33cents each from the dealership so it's cheaper to just get a handful of those if someone doesn't want to spend the coin on a trim tool (that's my new word I'm going to try and work into conversation everyday)
Good write-up for future reference. btw, I bought a trim tool for $8 and ended up destroying the plastic clip thingies anyway..... 33cents each from the dealership so it's cheaper to just get a handful of those if someone doesn't want to spend the coin on a trim tool (that's my new word I'm going to try and work into conversation everyday) lol
lol what is going to be your new word trim tool?

I cant believe the dealer only charged you .33 when the fender clips are over $4 a piece
06-29-2009, 08:10 AM
#4
JK Junkie
Join Date: Feb 2008
Location: Hollywood, MD
Posts: 2,126
Likes: 0
Received 0 Likes
on
0 Posts
yep, "trim tool"  it just sounds filthy and my wife hates when I say trim, vag, gash, hatchet wound, etc so it's more to drive her up the wall
I haven't had to get any fender clips, yet, but my parts department up here is pretty cool and the service dept is very mod friendly.
it just sounds filthy and my wife hates when I say trim, vag, gash, hatchet wound, etc so it's more to drive her up the wallI haven't had to get any fender clips, yet, but my parts department up here is pretty cool and the service dept is very mod friendly.
06-29-2009, 08:33 AM
#5
JK Freak
Thread Starter
Join Date: Oct 2007
Location: Hangin in the sunshine state....staging forum..
Posts: 943
Likes: 0
Received 2 Likes
on
2 Posts
yep, "trim tool" it just sounds filthy and my wife hates when I say trim, vag, gash, hatchet wound, etc so it's more to drive her up the wall
I haven't had to get any fender clips, yet, but my parts department up here is pretty cool and the service dept is very mod friendly.
it just sounds filthy and my wife hates when I say trim, vag, gash, hatchet wound, etc so it's more to drive her up the wallI haven't had to get any fender clips, yet, but my parts department up here is pretty cool and the service dept is very mod friendly.
07-11-2009, 02:03 PM
#6
JK Enthusiast

Join Date: Jan 2007
Location: New England
Posts: 139
Likes: 0
Received 0 Likes
on
0 Posts
I will be having my Jeep Line-X'd this week, and will do the prep of removing the seats and console myself like you did. Thanks for the excellent write-up and pictures: it will be my guide.
Since you did it yourself, I have a couple of questions and hope you can answer them. First, I presume I shoud disconnect the battery before I remove the front passenger seat and its electrical connections. Since I will need to drive to the shop to get it done, will any codes or other malfunctions occur when I re-connect the battery with the front passenger seat removed? Second, did you remove the wiring loom entirely before spraying, or just wrap it in plastic or wahtever? Third, are there any nuts to the bolts that hold the seats in place which will fall off when the bolts are removed, (and drop into a location impossible to retrieve them from) or are there just threads in the body/frame that holds the seat bolts in palce? Finally, are there any other "bewares" that you learned the hard way that you can warn me and others about?? I'm going with the gray color as my Unlimited is silver with the gray interior. I'll post pictures when it's done. Thanks.
Since you did it yourself, I have a couple of questions and hope you can answer them. First, I presume I shoud disconnect the battery before I remove the front passenger seat and its electrical connections. Since I will need to drive to the shop to get it done, will any codes or other malfunctions occur when I re-connect the battery with the front passenger seat removed? Second, did you remove the wiring loom entirely before spraying, or just wrap it in plastic or wahtever? Third, are there any nuts to the bolts that hold the seats in place which will fall off when the bolts are removed, (and drop into a location impossible to retrieve them from) or are there just threads in the body/frame that holds the seat bolts in palce? Finally, are there any other "bewares" that you learned the hard way that you can warn me and others about?? I'm going with the gray color as my Unlimited is silver with the gray interior. I'll post pictures when it's done. Thanks.
07-11-2009, 07:14 PM
#7
JK Super Freak
Join Date: Mar 2007
Location: Coastal Bend
Posts: 1,769
Likes: 0
Received 0 Likes
on
0 Posts
I didn't disconnect the battery before or after removing and installing the seat. Never had a code.
I also just pulled the wiring up to the roll bars.
I can't remember if the bolt holding the 60/40 had a nut or not. It's been awhile since mine. I don't think it did, but it won't go anywhere but the floor board.
I also just pulled the wiring up to the roll bars.
I can't remember if the bolt holding the 60/40 had a nut or not. It's been awhile since mine. I don't think it did, but it won't go anywhere but the floor board.