
$5 Hi-Lift mount
 02-24-2013, 07:33 AM
#1
JK Enthusiast
Thread Starter
Join Date: Jan 2011
Location: Friendswood, TX
Posts: 256
Likes: 0
Received 0 Likes
on
0 Posts

What you will need:
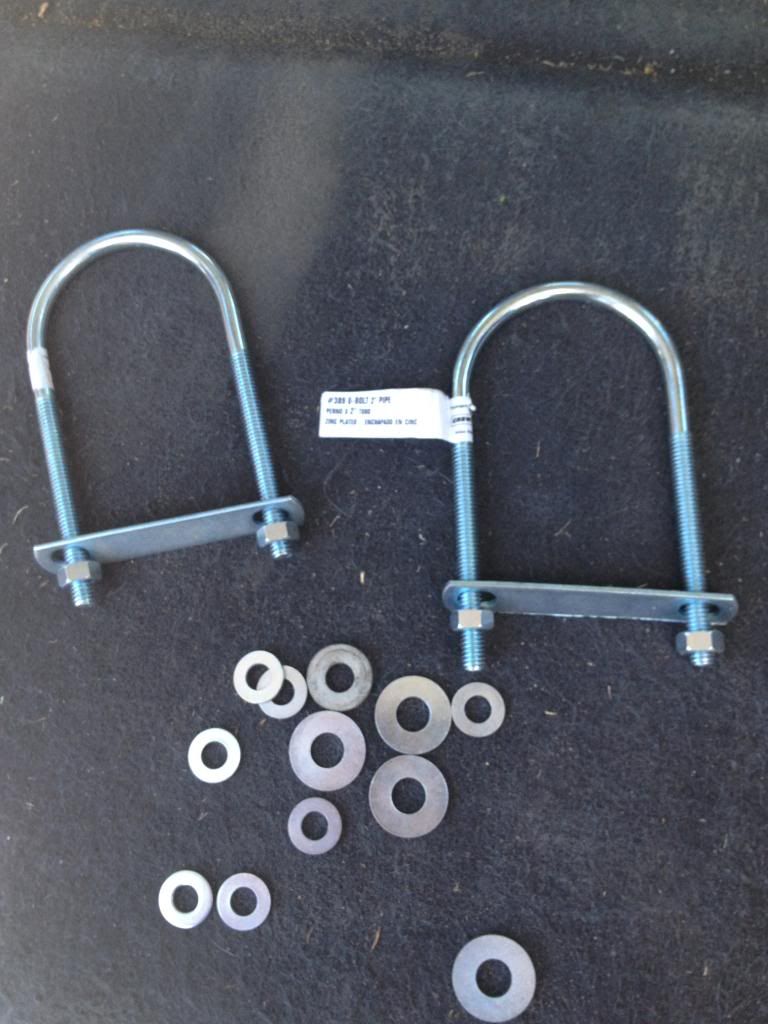
Two 2 inch U-bolts (part #389,bought at Home Depot, they’re roughly 5-6 inches long)
2 washers (not necessary, but I had them laying around)
Lighter
Crescent wrench
sheet rock saw or other foam cutting device
Your favorite hole poking device (I used a large screw)
Here's two pictures of the u-bolts:

I got tired of the Hi-lift always being in the way when it was mounted low in the back of the jeep. I still wanted the Hi-lift inside, but out of the way. When I’m not using the space under my rear seats , they’re typically folded down, so storing the Hi-lift under the seats was not an option for me. I decided it’s going up top.
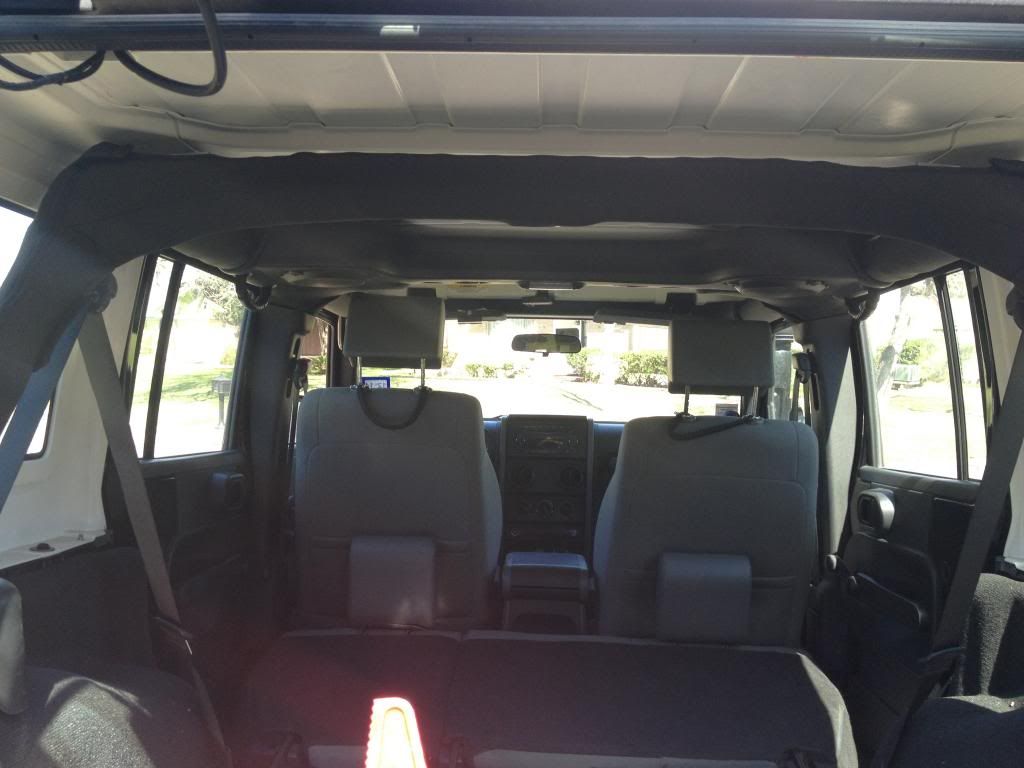
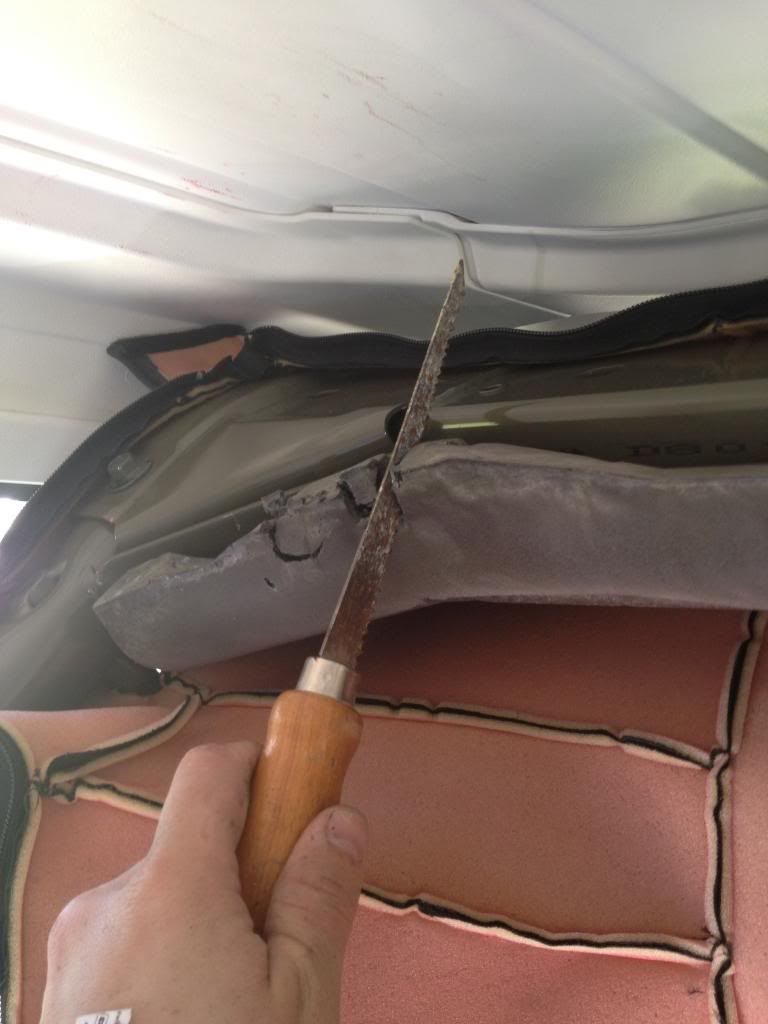
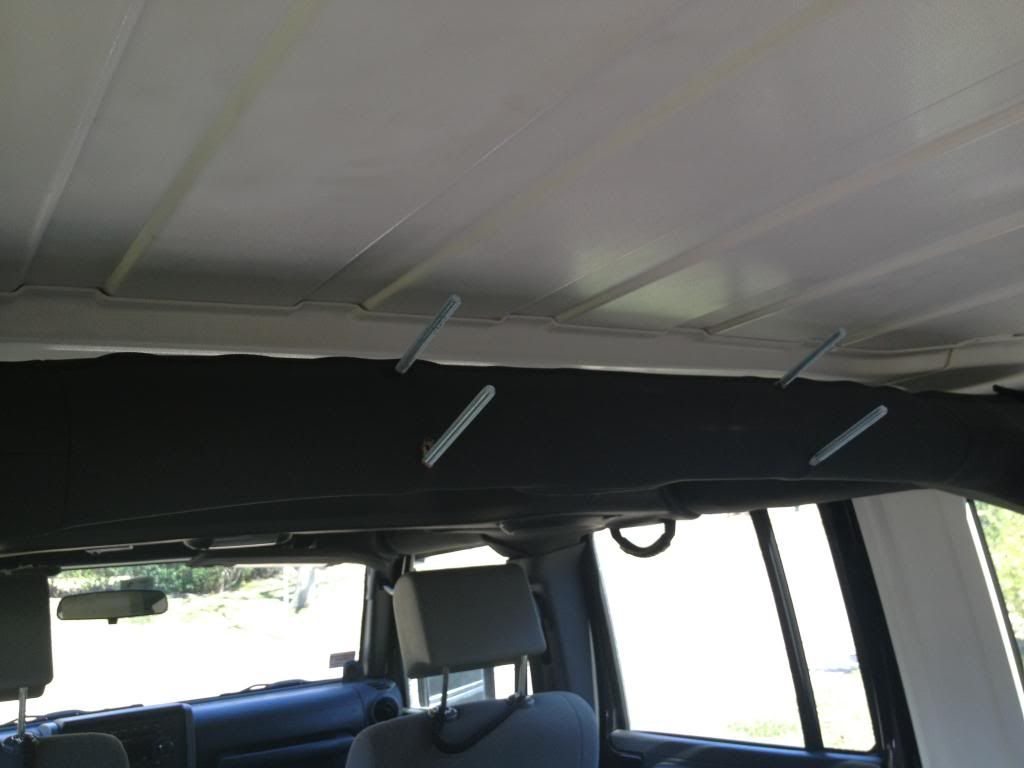
Starting on the left side, open up the Velcro strap and unzip the cloth cover. Completely unzip the top horizontal beam, I suggest only going about ľ the way down on the rear vertical beams because it will make reassembly easier.
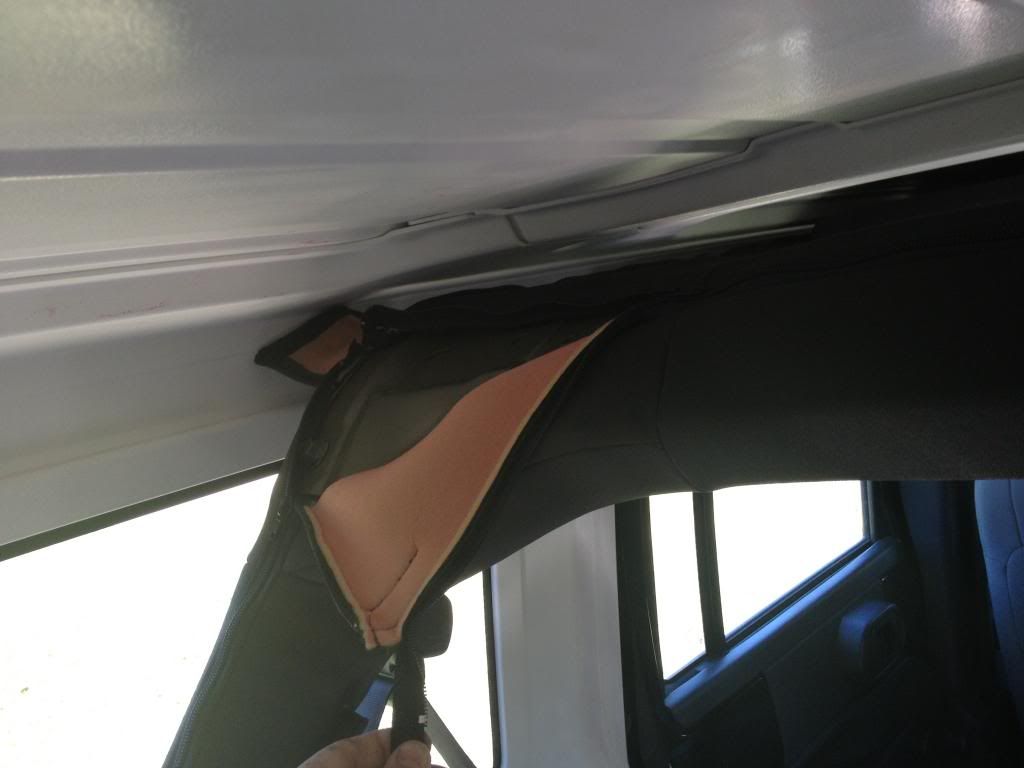
With the cover off you can see the two holes we will be using to mount the jack. Be mindful of the rear light and the cloth cover that stretches around it. I was not and spent a good 5 extra minutes after full assembly trying to fit the cover around the light.
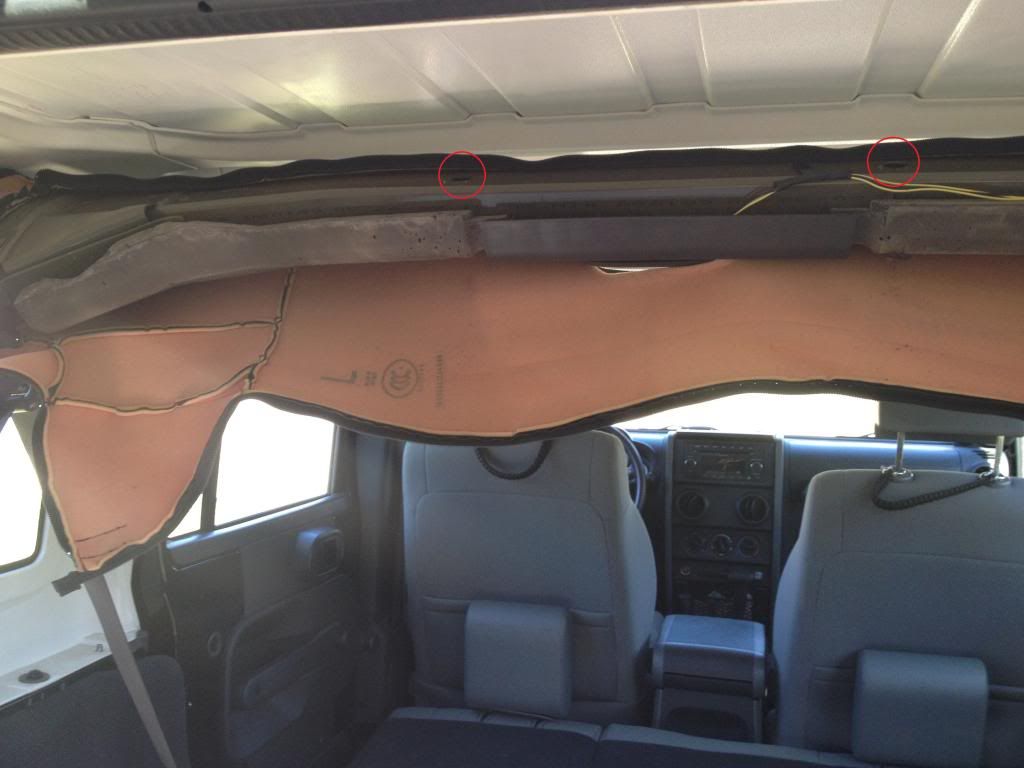
Poke holes through the foam from the light side of the roll bar using your favorite hole poking device. You don’t have to be exact, just don’t get crazy with it, we only need a hole big enough for the U-bolts to fit through.
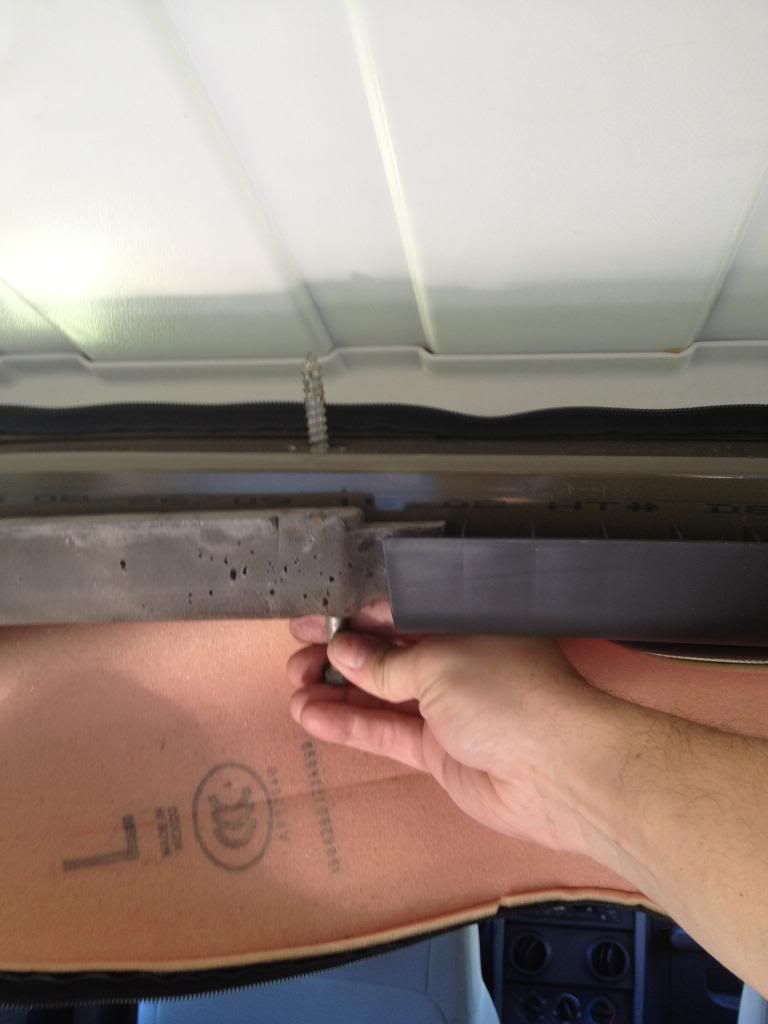
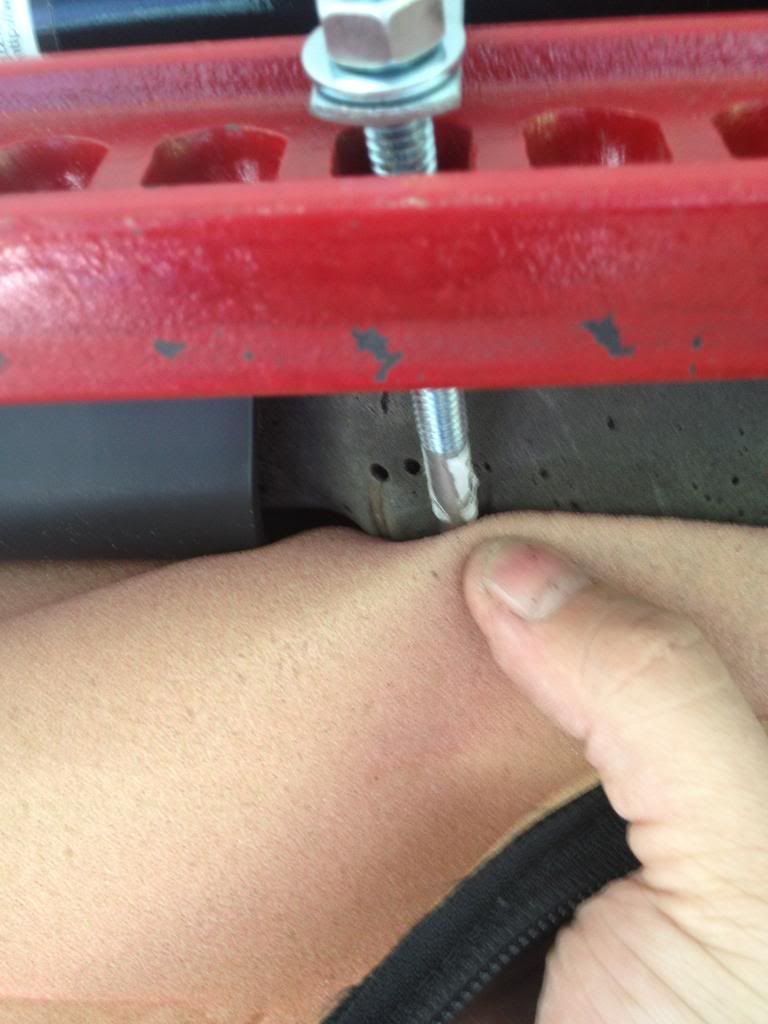
Put the U-bolts in from the top, rotating the ends toward you, and put the u-bolt plates on the u-bolts, Make note of the wires and make sure not to pinch, bind, or sever them or you will lose your rear light.
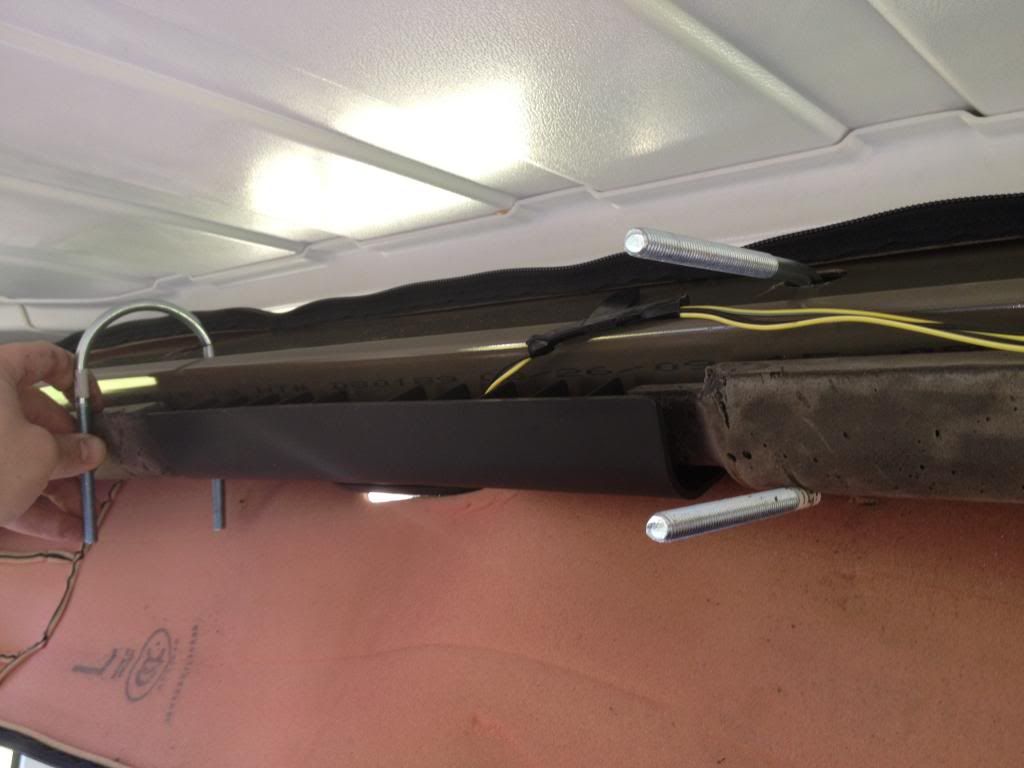
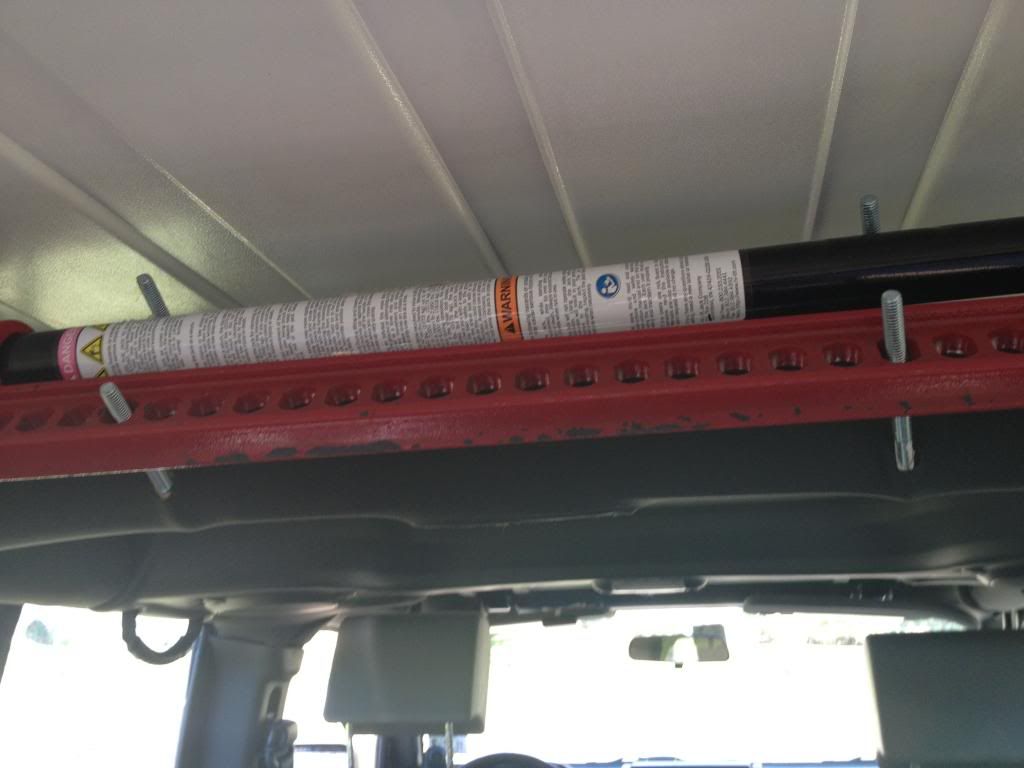
Do a test fit. With the u-bolts parallel to the ground, bring your hi-lift up to them. The lever side should be facing the ceiling with the bulkiest part of the jack on the left side and the top clamp-clevis (skinny top part) on the right side. The hi-lift should line up very easily. Once the hi-lift is on the u-bolts, push the jack toward the top of the roll bar. The u-bolts should no longer be parallel to the ground, instead they should be facing upward at about a 45 degree angle.
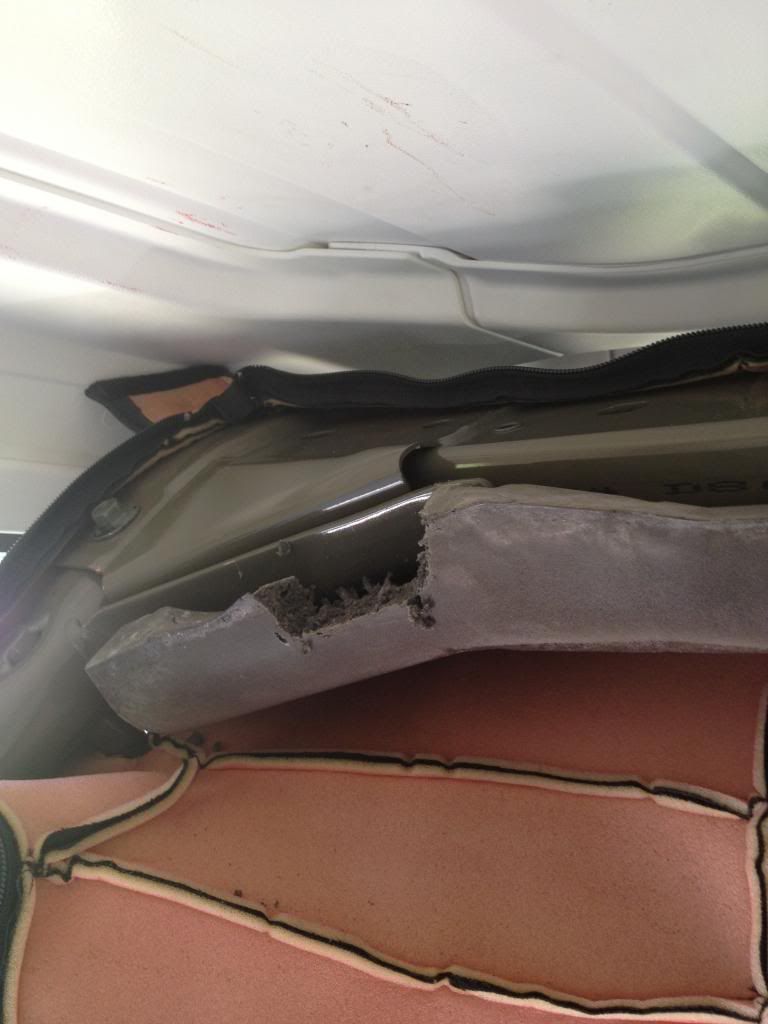
You will notice that part of the hi-lift comes into contact with foam of the upper left side. Mark where the hi-lift contacts the foam, I did this by pushing the hi-lift into the foam as far as it would go to simulate how it would be fully tightened down.
Take the hi-lift down. Use your sheet rock saw or other foam cutting device to cut out the section where the hi-lift contacts it.
It should look something like this when you’re done
Test fit the hi-lift again to make sure you trimmed enough foam off. Repeat the cutting and fitting until you get it where you like it.
Take the hi-lift off and remove the u-bolt plates, the plates will actually go on the outside of the hi-lift instead of between it and the roll bar. We need to mark where the u-bolts will poke through the fabric cover. Put the hi-lift back on to the u-bolts and put the plates and nuts on, hand tightened. I put washers between the nuts and the plates, but they are not necessary if you do not have them.
We need to mark where the u-bolts will poke through the fabric cover. Pull the cover up to the bottom part of the u bolt and mark where the u-bolt touches.
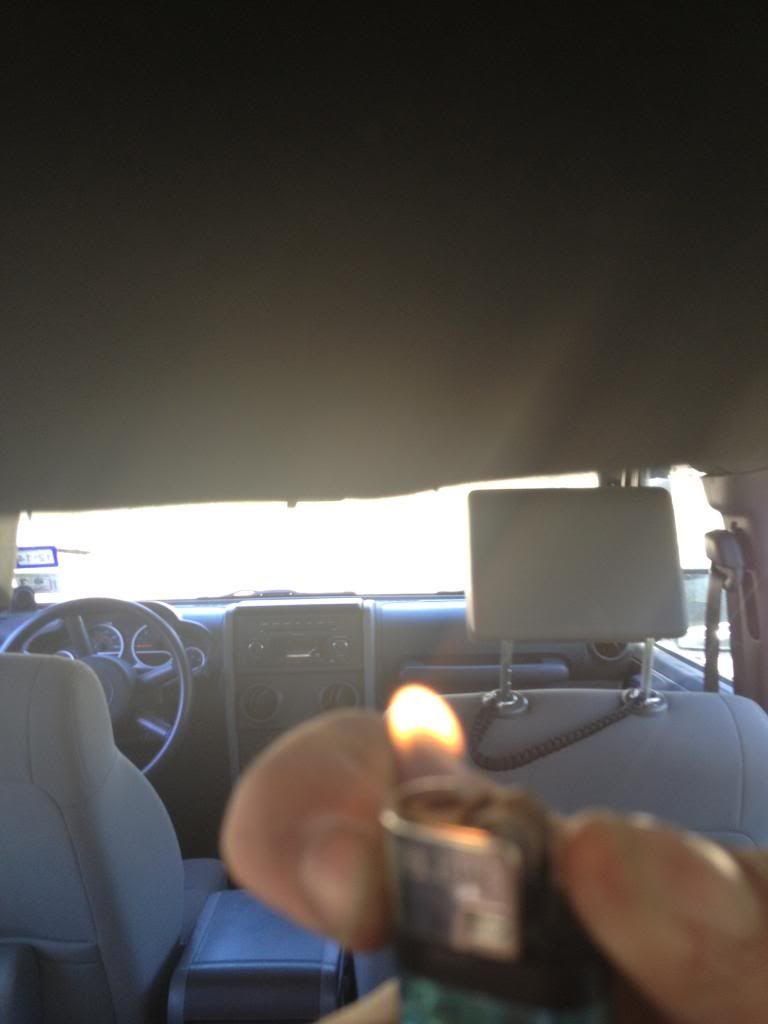
I tried using a box cutter to cut a hole, but I was not very successful so instead I used a lighter to carefully burn holes where the u-bolts go. Be very careful, it burns fast so take your time and go slow.
Remove the hi-lift once again and slip the u-bolts into the lower holes you made. You may have to wiggle the u-bolts around to make them fit, I would suggest moving them over trying to force the fabric onto the u-bolts.
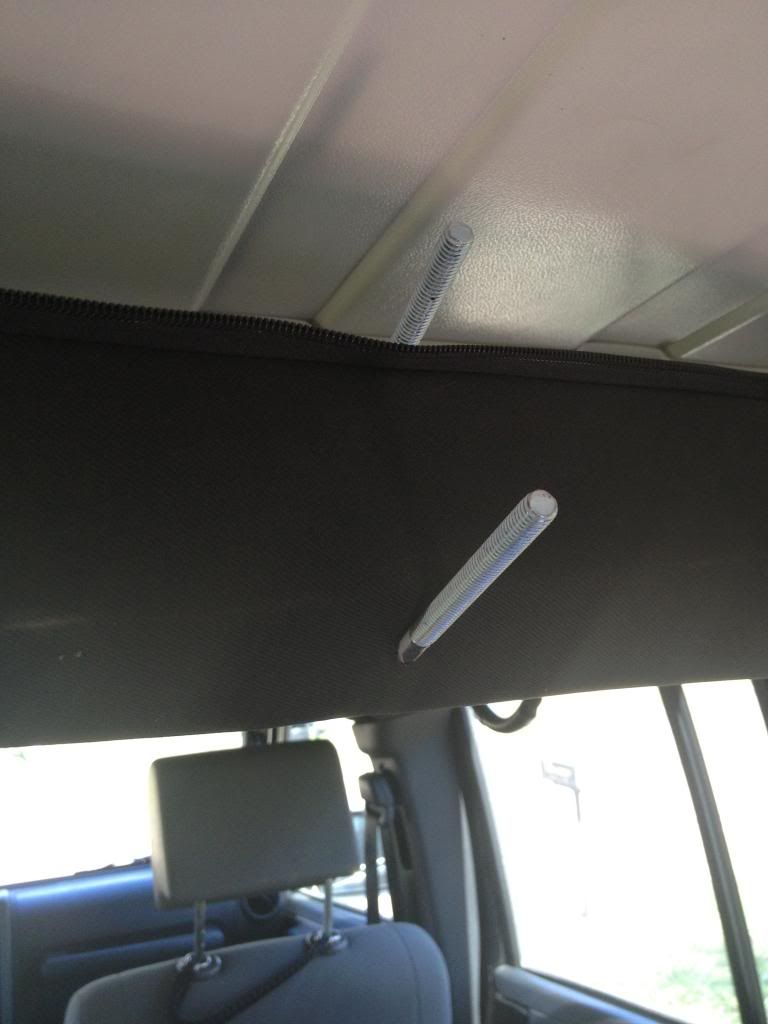
Mark where the top of the u-bolts touch the fabric and use your trusty lighter again to burn some holes.
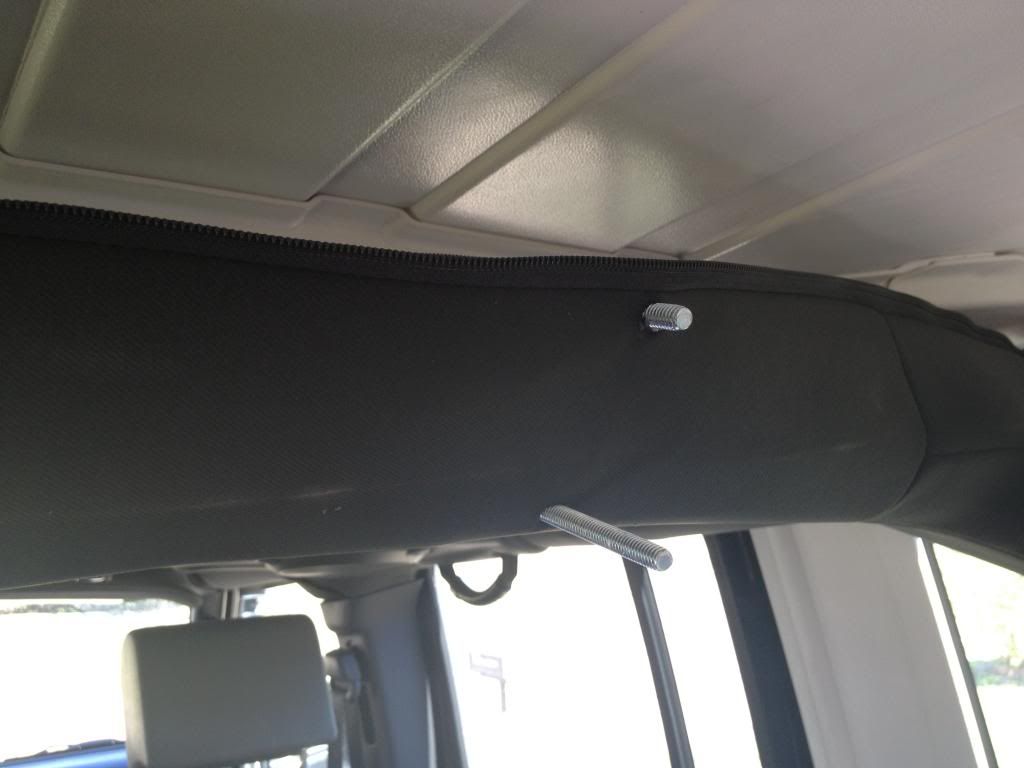
Put the cover on and zip everything back up. Here you can notice where I got a little carried away with the lighter on the bottom left hole. I can’t stress enough to take your time and be careful.
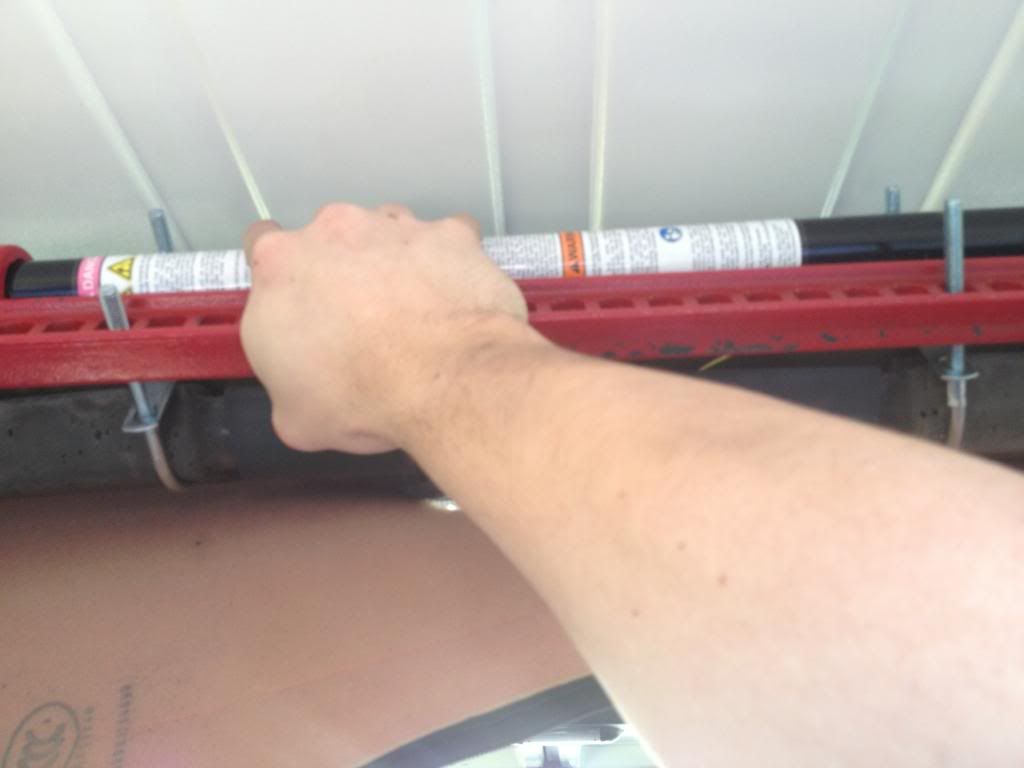
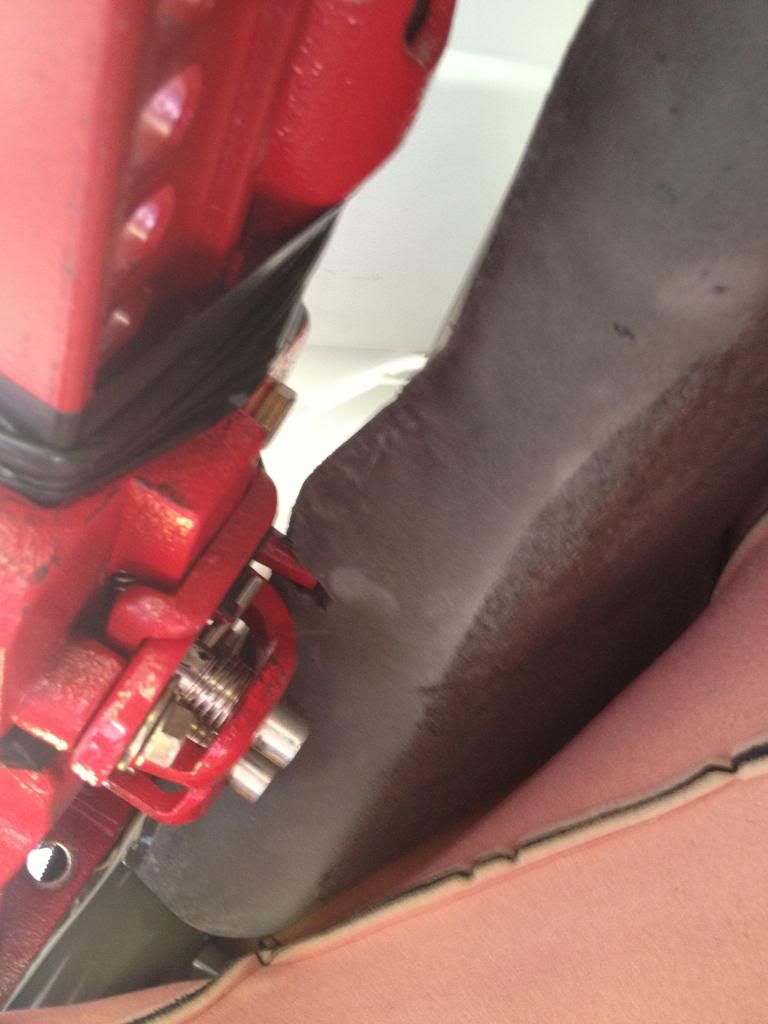
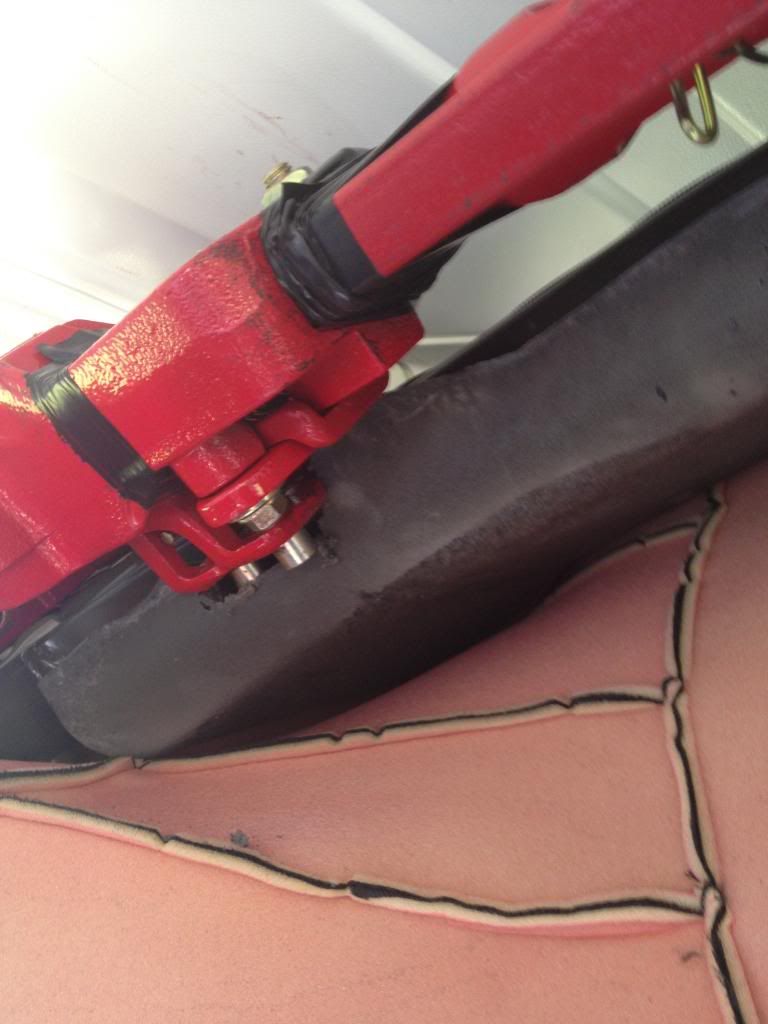
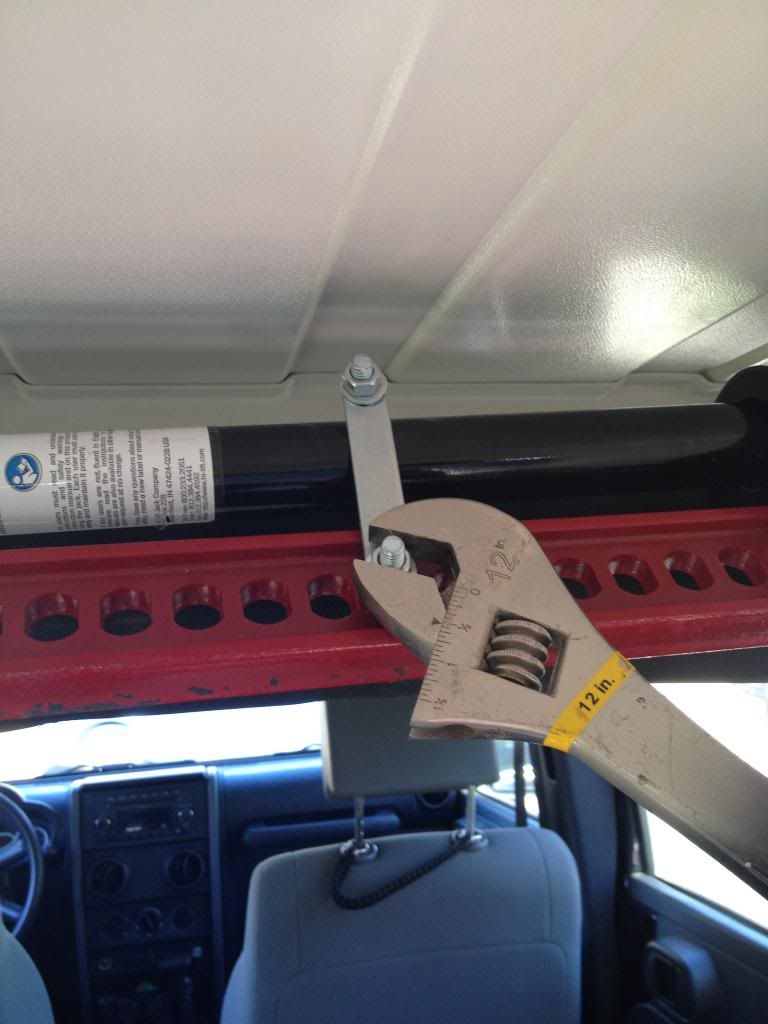
Put your hi-lift back on for the final mounting. Place the plates and nuts on and hand tighten.
Then use a crescent wrench to tighten it down.
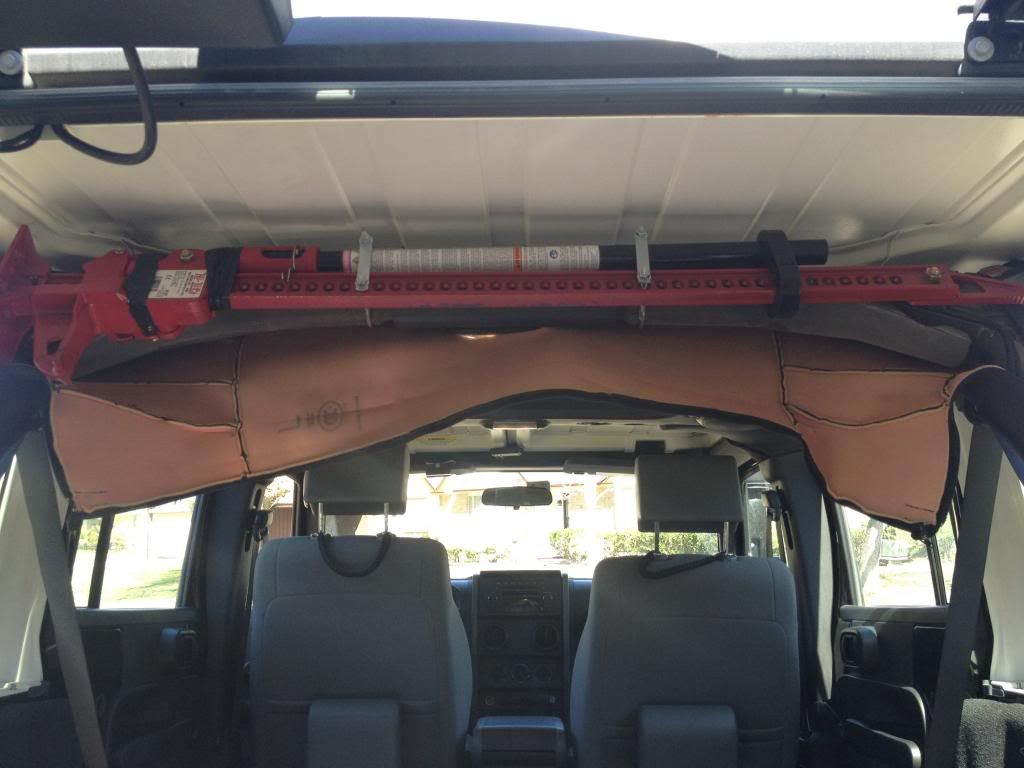
Done:
I forgot to take a picture from the drive's seat, you can't even see it! I might get around to uploading a picture of it later.


Trending Topics
 02-24-2013, 04:19 PM
#9
JK Enthusiast
Thread Starter
Join Date: Jan 2011
Location: Friendswood, TX
Posts: 256
Likes: 0
Received 0 Likes
on
0 Posts
I only have the one pic of the u-bolt information, but I just picked up the $2.50 u bolts from home depot. Since the high lift actually makes contact on both ends to the top of the rollbars, the u-bolts just keep it tighlty nestled up top. With that said I can literally hang from it without it moving and I'm about 190lbs. I considered that option, but then I'd have to run back to the hardware store.
@Phantasm:
I don't have a soft top, but I don't see why it wouldnt fit. If the soft top is too close to the rear roll bar perhaps you could get some longer u-bolts and make it sit a little lower.
Thanks everybody else for the feedback! I plan on making write ups as I mod my jeep, hopefully they'll benefit someone.
02-24-2013, 04:32 PM
#10
JK Freak
Join Date: May 2012
Location: Winchester, Ca
Posts: 864
Likes: 0
Received 0 Likes
on
0 Posts
Sweet. Just what I was thinking about mounting the hi lift there as well..except i was going to use rachet straps and cut the straps short. This looks much more clean.  (im stealing your idea)
(im stealing your idea)