Tanimal/Limitless 2008 2D JK Build Thread!

 12-27-2012, 08:10 PM
#13
JK Enthusiast
Thread Starter
Join Date: May 2012
Location: Chicago, IL
Posts: 114
Likes: 0
Received 0 Likes
on
0 Posts
12-28-2012, 08:34 AM
#15
JK Enthusiast
Thread Starter
Join Date: May 2012
Location: Chicago, IL
Posts: 114
Likes: 0
Received 0 Likes
on
0 Posts
01-04-2013, 03:21 PM
#16
JK Enthusiast
Thread Starter
Join Date: May 2012
Location: Chicago, IL
Posts: 114
Likes: 0
Received 0 Likes
on
0 Posts
Finally got around to installing my Superchips today. It was fairly simple but it's very cold out so it seemed like the minutes it took to install were hours.
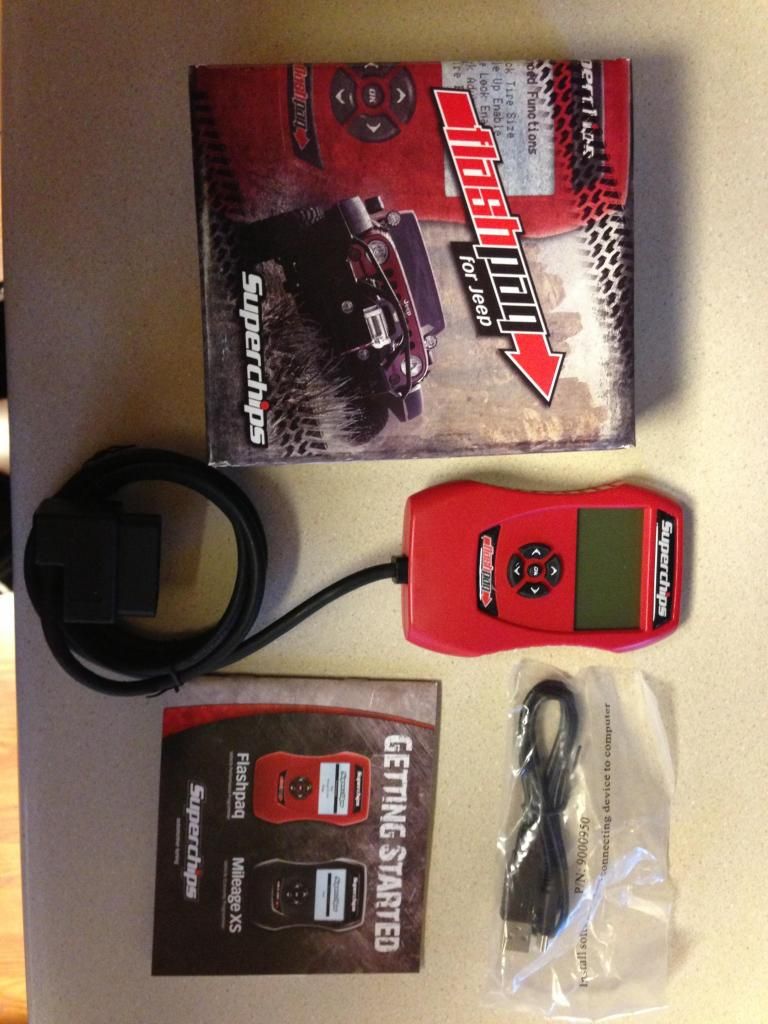
I am running the 87 tune, got my tire size corrected and now the speedometer is actually right(tested it on one of those GPS apps on the phone with the MPH listed and it's dead on.), and disabled the TPMS. I immediately noticed the Jeep seems to have more jump right from the start and it seems like pushing the pedal down has less lag. Didn't get to take it on the highway yet but I just put a full tank of gas in so I guess we will actually see what it does overtime I understand this mod is very controversial but I figured I'd give it a shot. I'll try to remember to post back my findings.
I am running the 87 tune, got my tire size corrected and now the speedometer is actually right(tested it on one of those GPS apps on the phone with the MPH listed and it's dead on.), and disabled the TPMS. I immediately noticed the Jeep seems to have more jump right from the start and it seems like pushing the pedal down has less lag. Didn't get to take it on the highway yet but I just put a full tank of gas in so I guess we will actually see what it does overtime
I understand this mod is very controversial but I figured I'd give it a shot. I'll try to remember to post back my findings.
01-07-2013, 04:00 PM
#17
JK Enthusiast
Thread Starter
Join Date: May 2012
Location: Chicago, IL
Posts: 114
Likes: 0
Received 0 Likes
on
0 Posts
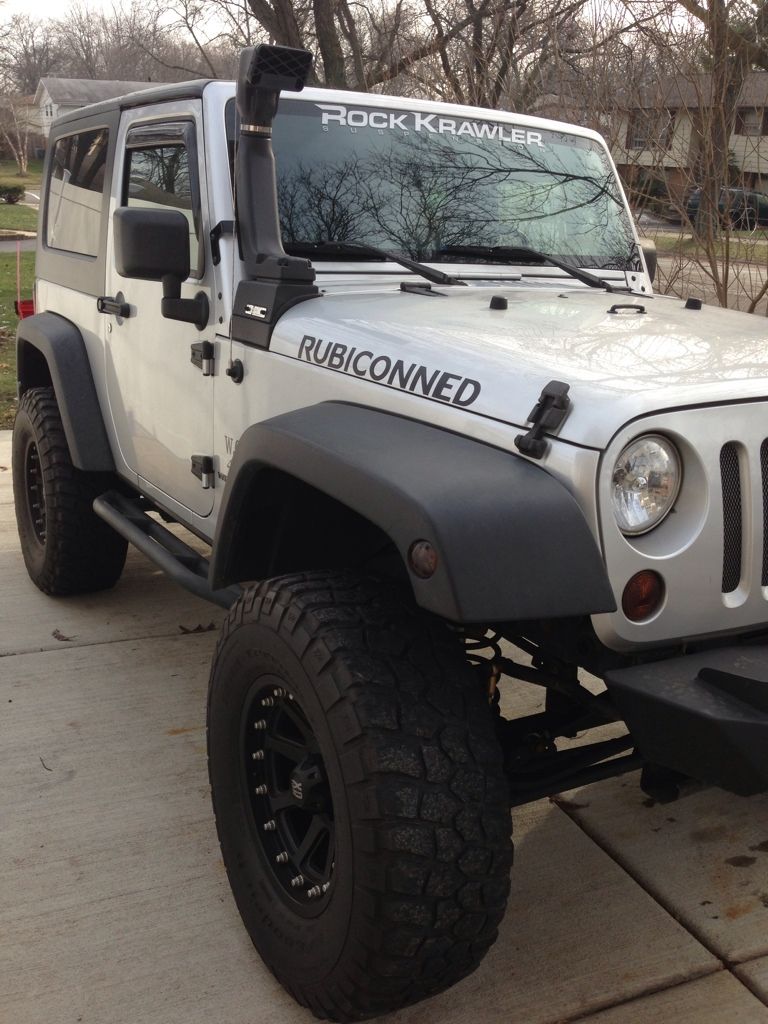
Finally got around to installing my Rugged Ridge snorkel today. I'll have more pictures tomorrow and more to type up so here is a teaser shot for you all:
01-08-2013, 08:33 AM
#18
JK Enthusiast
Thread Starter
Join Date: May 2012
Location: Chicago, IL
Posts: 114
Likes: 0
Received 0 Likes
on
0 Posts
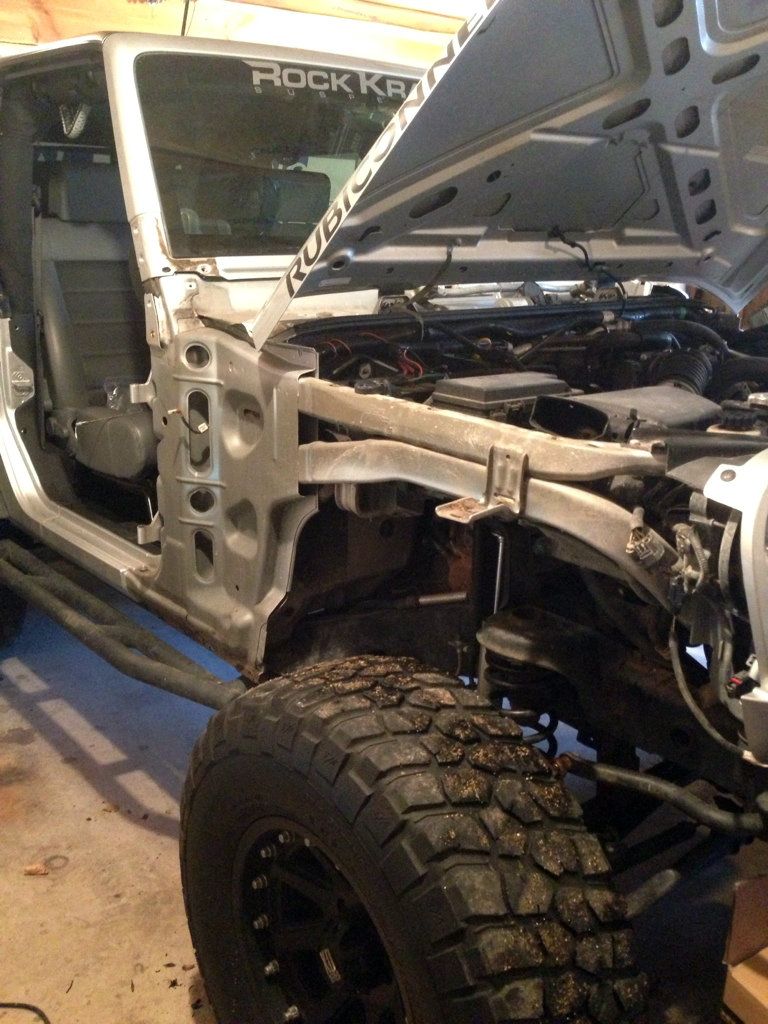
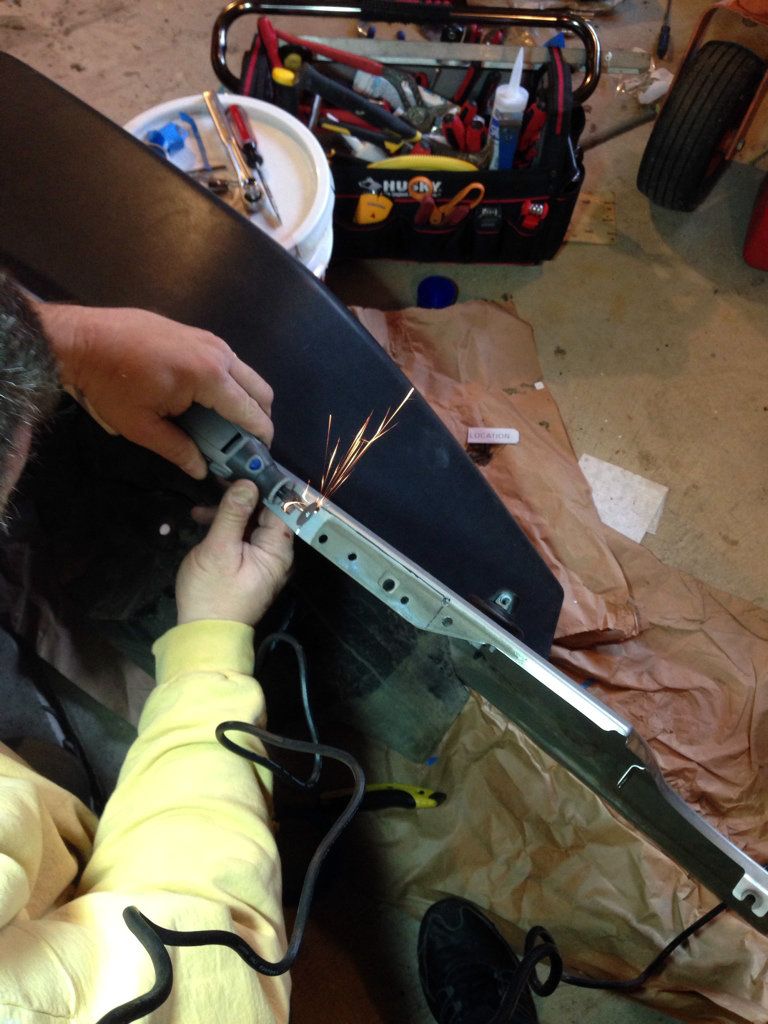
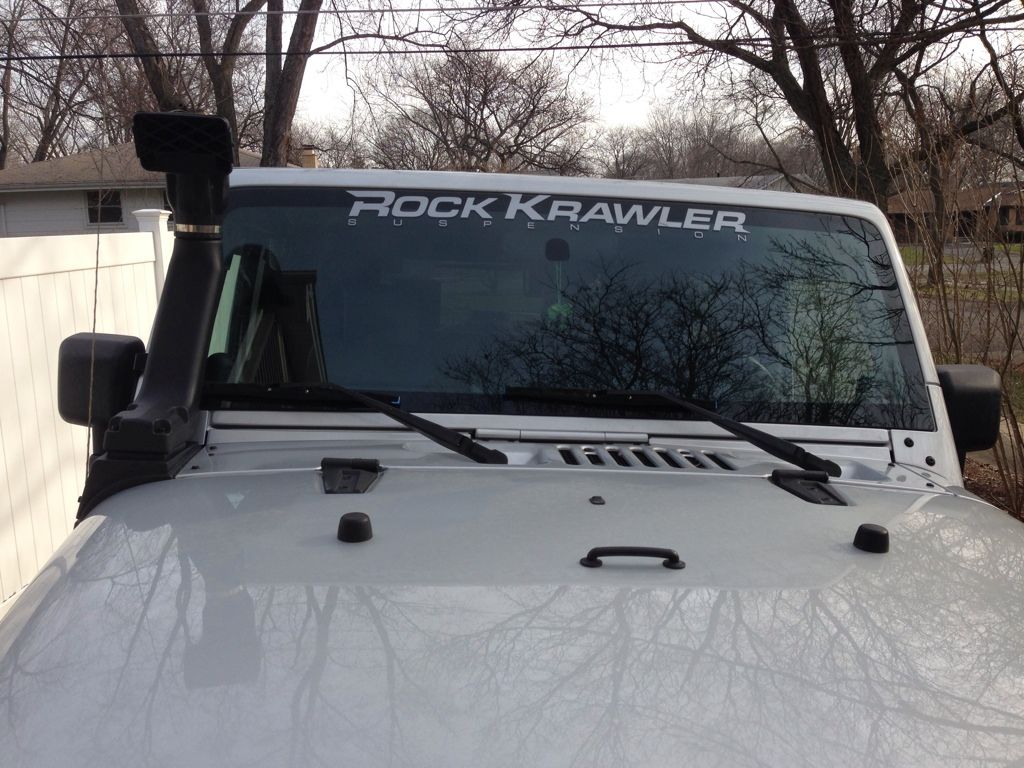
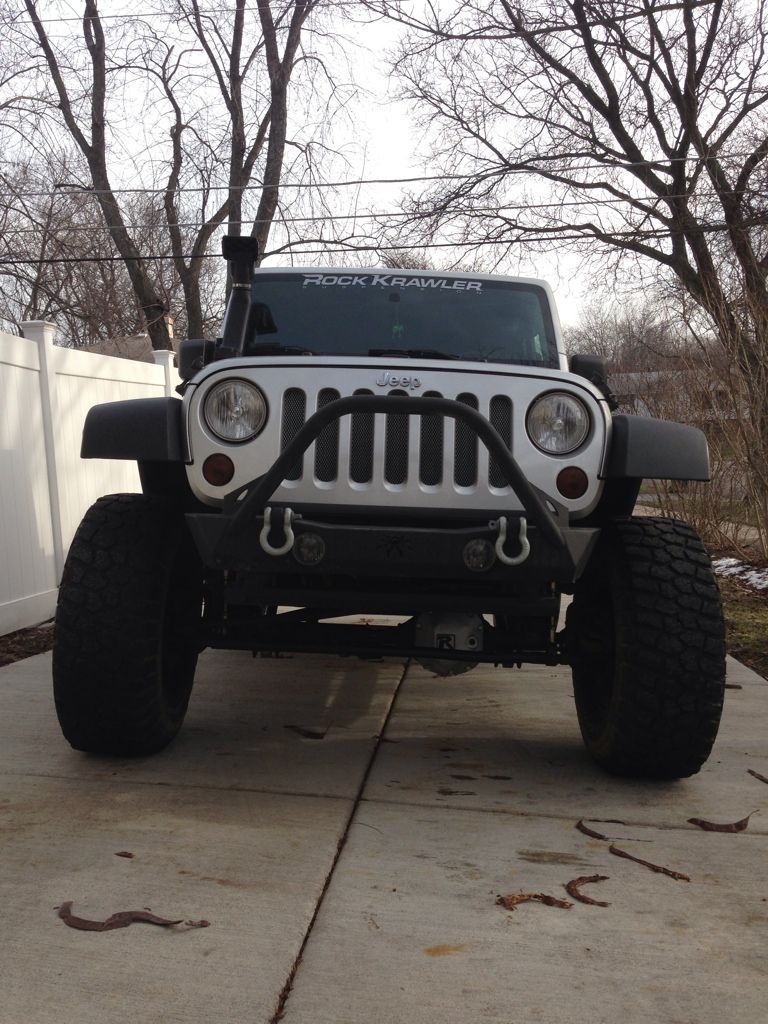
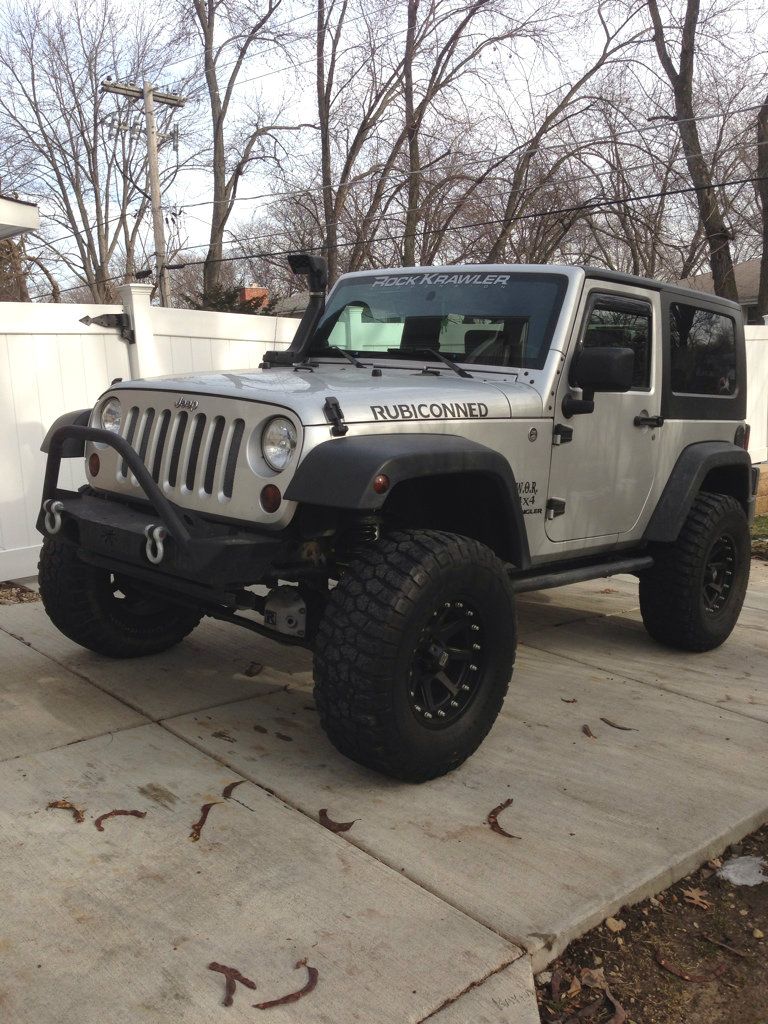
You already got my teaser shot photo so here's more photos on the Rugged Ridge snorkel, my install, and a big thanks to Rugged Ridge for the helpful and quick tech support when the template cutout didn't fit.
We got the fender all removed and than had to make the cutout. This is where the template didn't fit and after a quick phone call to Rugged Ridge they advised us that the template was just to long and that it is sized properly. After hearing that we just cut the template in half and over laid it so the hole and the square matched up on either side and marked our line:
We used a dremel with a precise metal cutting wheel. Don't worry I let me father make the cut since his hands are a bit more steady
After the cut was made we sanded it down a bit and then painted around the edge:
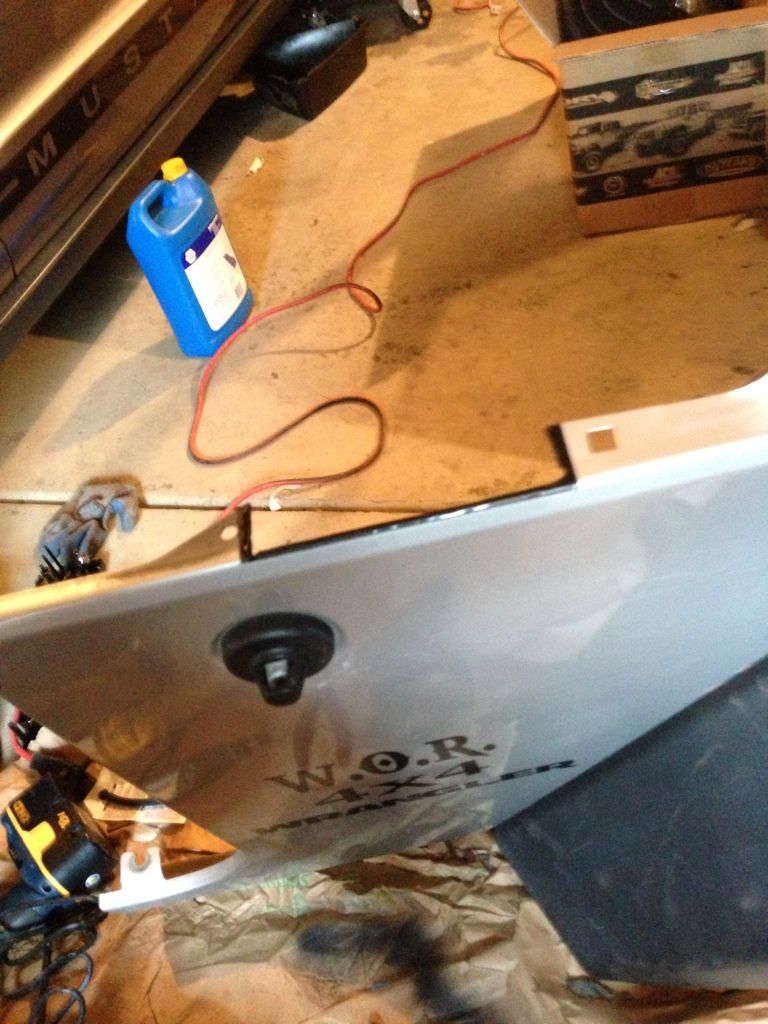
The whole process took the two of us around 6 hours and we didn't have any breaks. We were extremely careful during the install and paid special attention to all the connections and fitment:
Here's some finished installed pics:
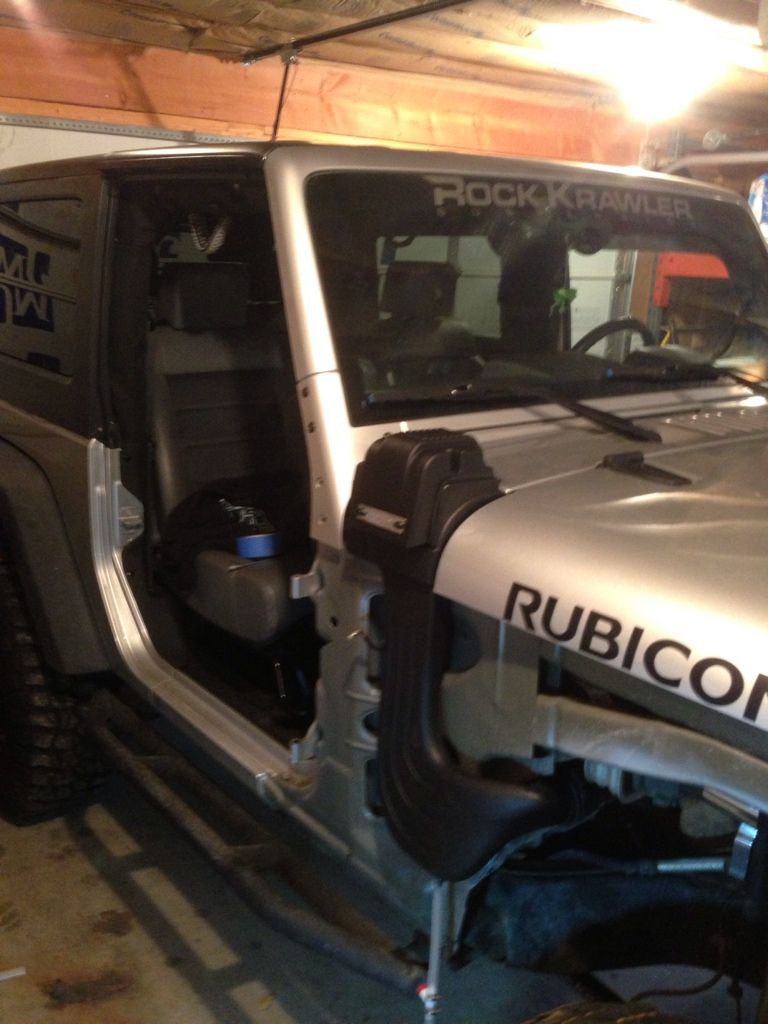
Closeup of the snorkel and fender cut:
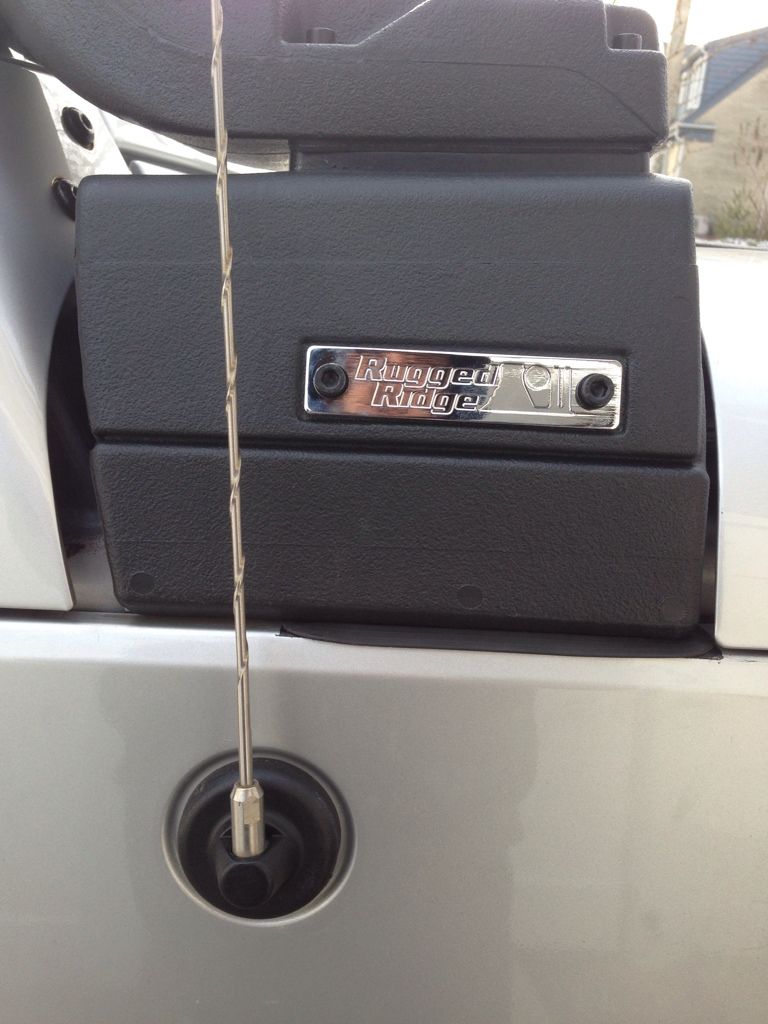
Side view:
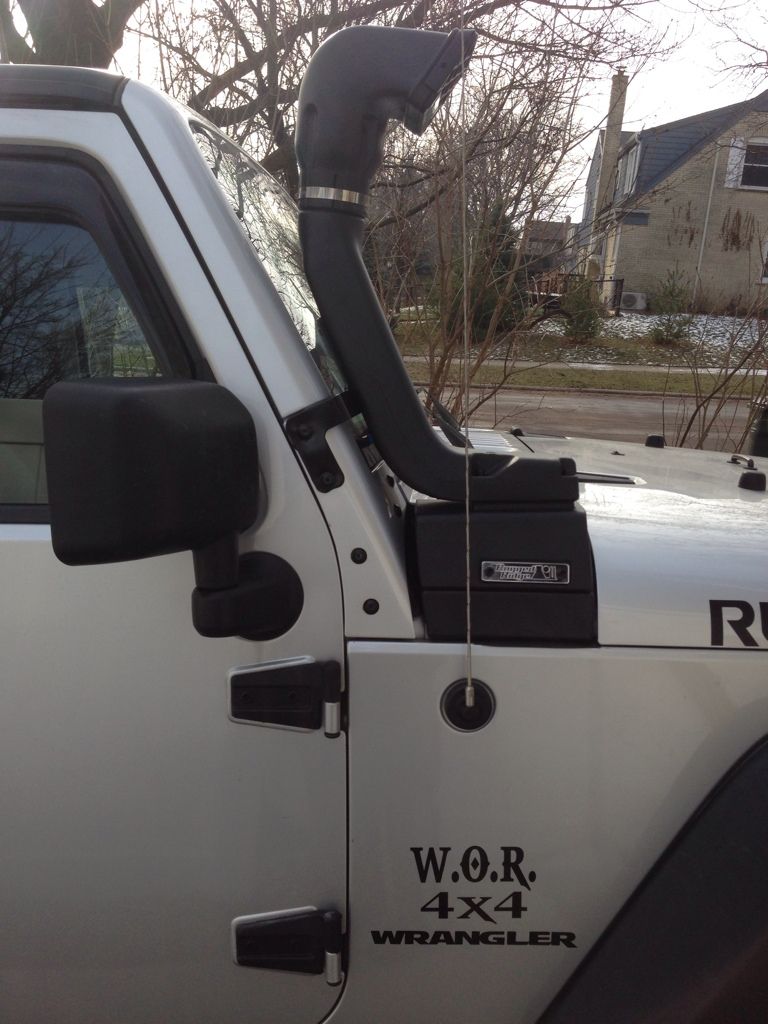
Front view:
Full body shots:
Up next is my Coast front drive shaft so stay tuned!
We got the fender all removed and than had to make the cutout. This is where the template didn't fit and after a quick phone call to Rugged Ridge they advised us that the template was just to long and that it is sized properly. After hearing that we just cut the template in half and over laid it so the hole and the square matched up on either side and marked our line:
We used a dremel with a precise metal cutting wheel. Don't worry I let me father make the cut since his hands are a bit more steady
After the cut was made we sanded it down a bit and then painted around the edge:
The whole process took the two of us around 6 hours and we didn't have any breaks. We were extremely careful during the install and paid special attention to all the connections and fitment:
Here's some finished installed pics:
Closeup of the snorkel and fender cut:
Side view:
Front view:
Full body shots:
Up next is my Coast front drive shaft so stay tuned!
01-09-2013, 07:02 AM
#19
JK Enthusiast
Thread Starter
Join Date: May 2012
Location: Chicago, IL
Posts: 114
Likes: 0
Received 0 Likes
on
0 Posts
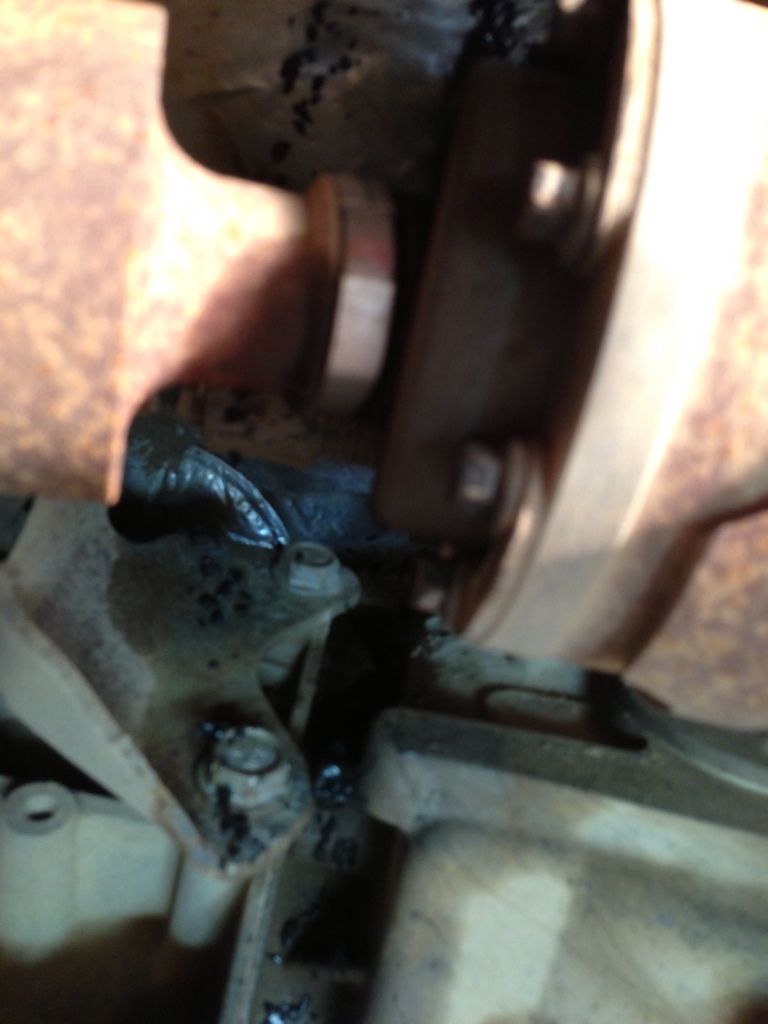
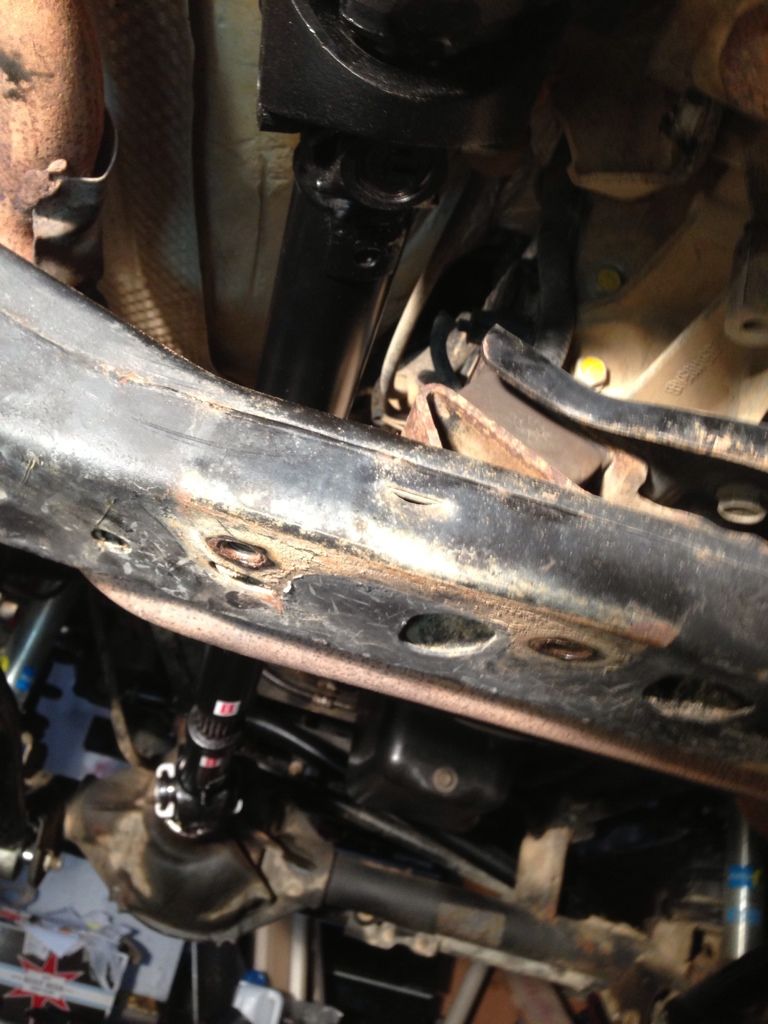
Did the Coast front drive shaft install. It was pretty straight forward and I'm glad we got it done when we did because it was spitting grease at the boot pretty good:
You can see in this picture the grease splattered:
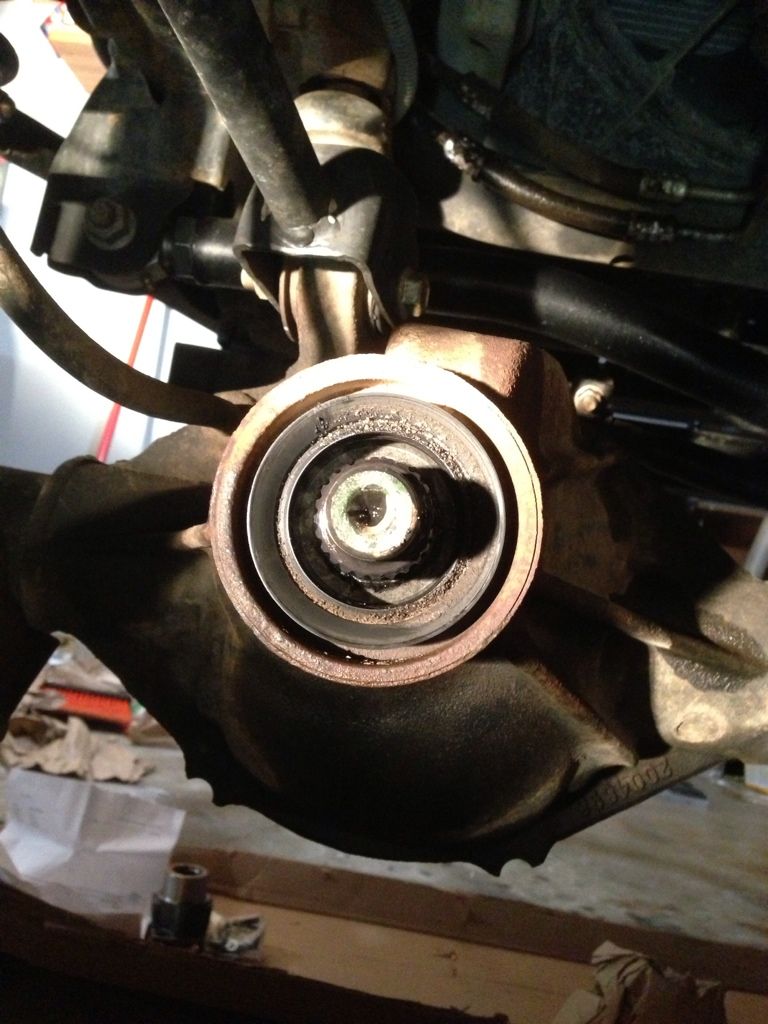
Got the flange off and noticed the pinion seal was leaking and the seal didn't look so hot. This is where we ran into our problem because it seems no one carries this seal except the dealer ($27, Part # 68004072AA) and after we ran around checking Napa, Autozone, and Lee Auto Parts we finally had to bite the bullet and buy it from the dealer.
Old pinion seal:
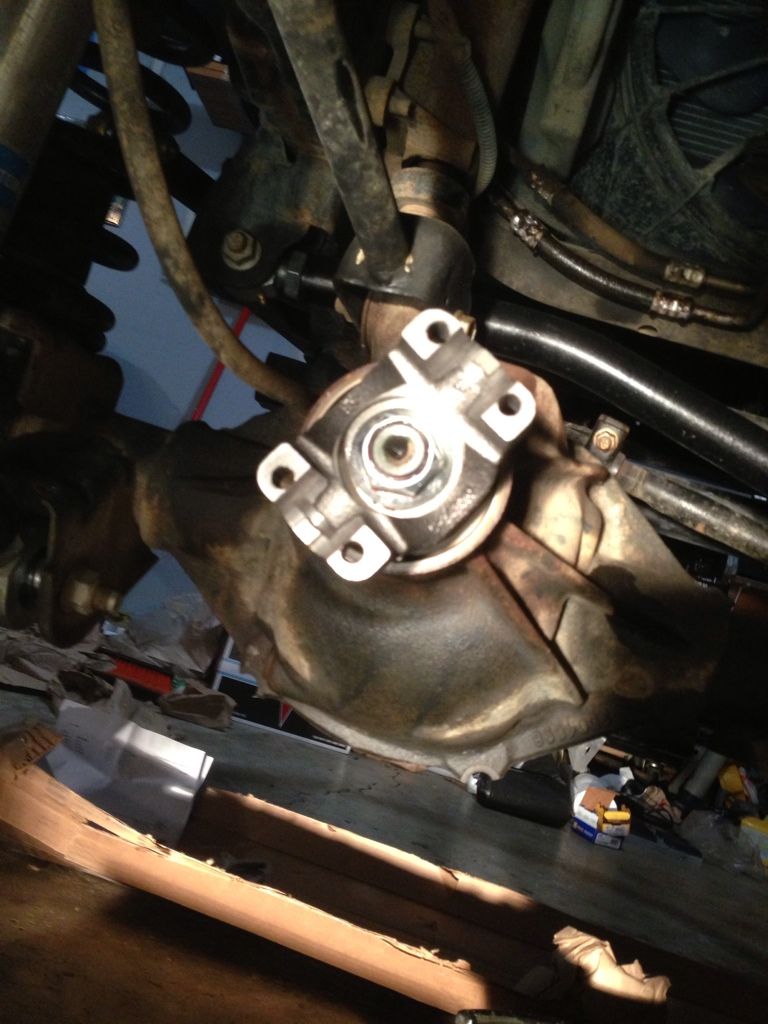
New pinion seal installed :

Put the new yolk on and torqued to 160 lb/ft:
Also put the new yolk on at the output shaft on the transfer case and torqued to 130 lb/ft (notice the grease from the old drive shaft boot):

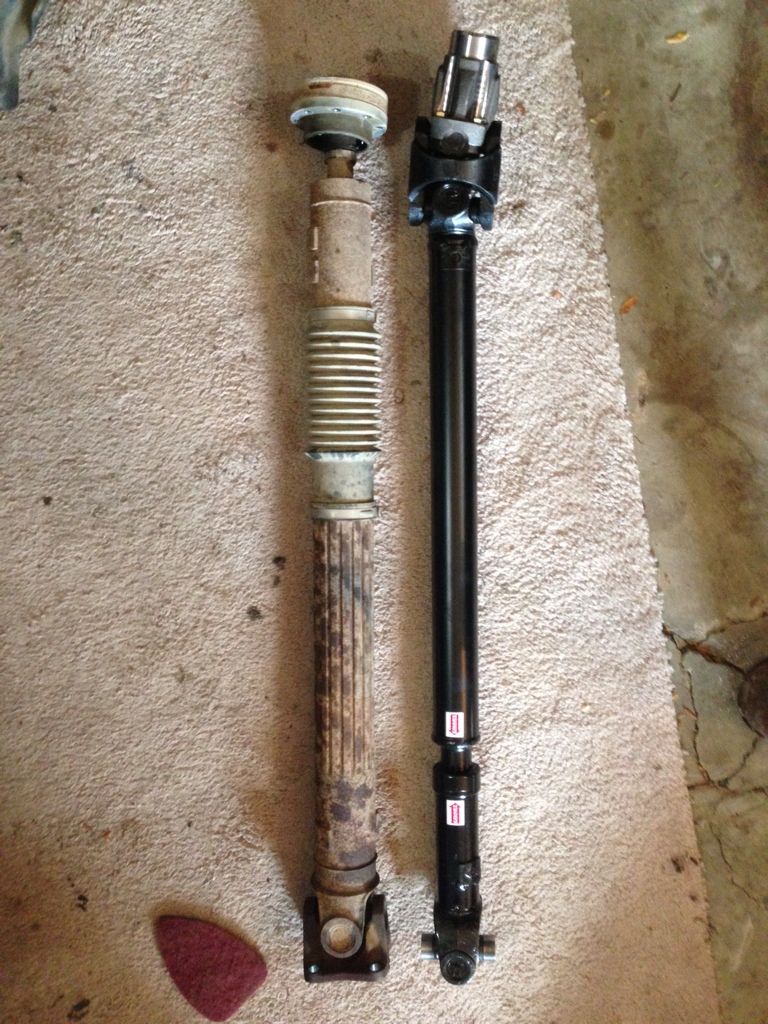
New and old drive shaft laid side by side for comparison :
Got it all installed :
Also figured since we were already right next to it that the transfer case needed a little love also:
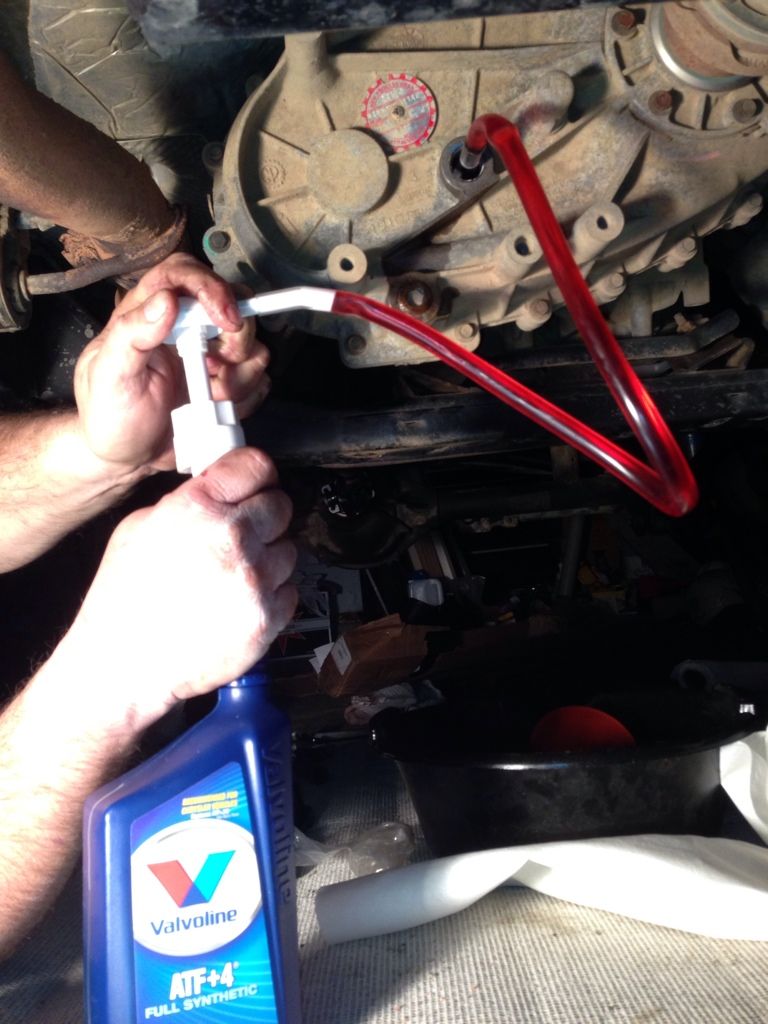
The fluid that came out was a dark maroon color so I'm glad we changed it.
Jeep rides with no vibration anymore and really happy with how quickly the install was. :2thumbsup:
You can see in this picture the grease splattered:
Got the flange off and noticed the pinion seal was leaking and the seal didn't look so hot. This is where we ran into our problem because it seems no one carries this seal except the dealer ($27, Part # 68004072AA) and after we ran around checking Napa, Autozone, and Lee Auto Parts we finally had to bite the bullet and buy it from the dealer.
Old pinion seal:
New pinion seal installed :
Put the new yolk on and torqued to 160 lb/ft:
Also put the new yolk on at the output shaft on the transfer case and torqued to 130 lb/ft (notice the grease from the old drive shaft boot):
New and old drive shaft laid side by side for comparison :
Got it all installed :
Also figured since we were already right next to it that the transfer case needed a little love also:
The fluid that came out was a dark maroon color so I'm glad we changed it.
Jeep rides with no vibration anymore and really happy with how quickly the install was. :2thumbsup:
01-24-2013, 01:45 PM
#20
JK Enthusiast
Thread Starter
Join Date: May 2012
Location: Chicago, IL
Posts: 114
Likes: 0
Received 0 Likes
on
0 Posts
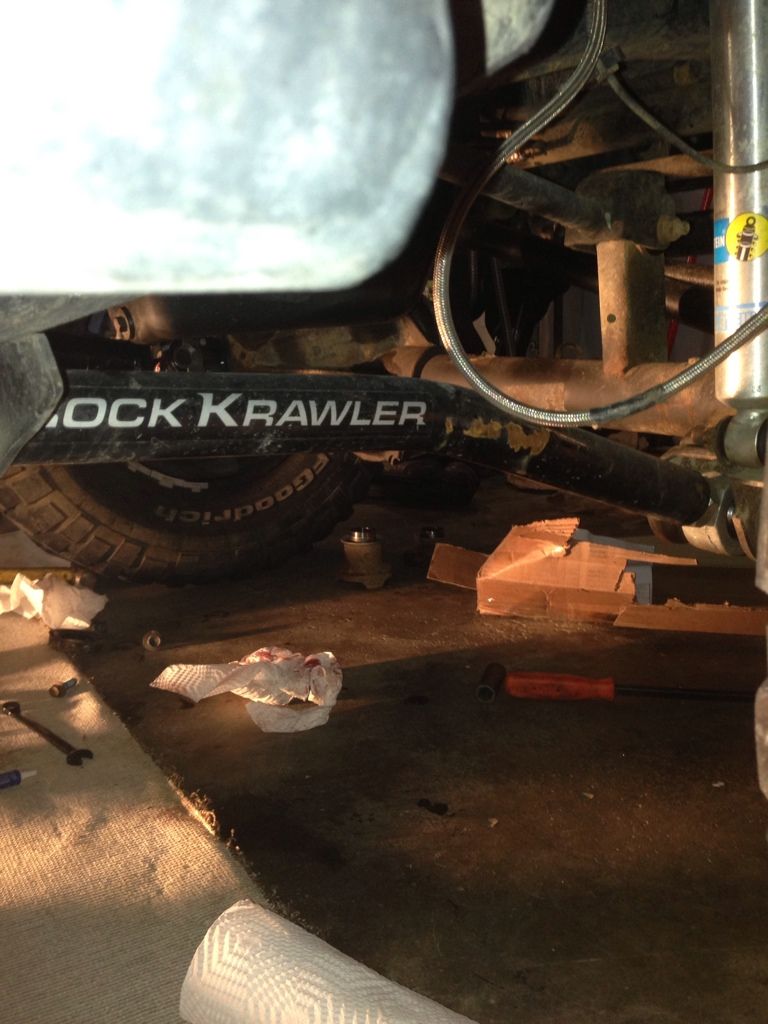
Looks like the powder coating on one of my Rock Krawler control arms isn't bonding well at all. Snapped a picture before I scraped it off and sprayed it with rustoleum rust reformer. Shot Northridge4x4 an email just bringing it to their attention just so Northridge could inform Rock Krawler if they had a bad batch go out or something. A couple days later a new control arm was at my door, got to love Northridge's customer service and that lifetime warranty from Rock Krawler