
Scorpicon's Bolt-On Build Thread
 05-16-2013, 12:32 PM
#21
JK Enthusiast
Thread Starter

Join Date: Sep 2011
Location: USA
Posts: 429
Likes: 0
Received 0 Likes
on
0 Posts
So when I initially did my EVO 1/4 pounder front bumper, I very temporarily rigged up the vacuum canister. All JK's from 2012+ will require this if you are installing the EVO or some other high clearance front bumpers. I later, after seeing the prices of relocation kits between 60 and 120 bucks, decided to fab up something cheap! Here was my solution.
Total Parts list from Ace Hardware
2- 1.25" x 2" angled truss clips @ $0.79 each
2- 3/8" fender washers @ $0.25 each
1- 3/8" Hex bolt @ $0.45
1- 3/8" nut @ $0.12
2- 3/8" lock washers @ $0.20
1- bag of #24 1.25" bolts and nuts @ $1.18 (only used 2)
Total Cost = $4.23
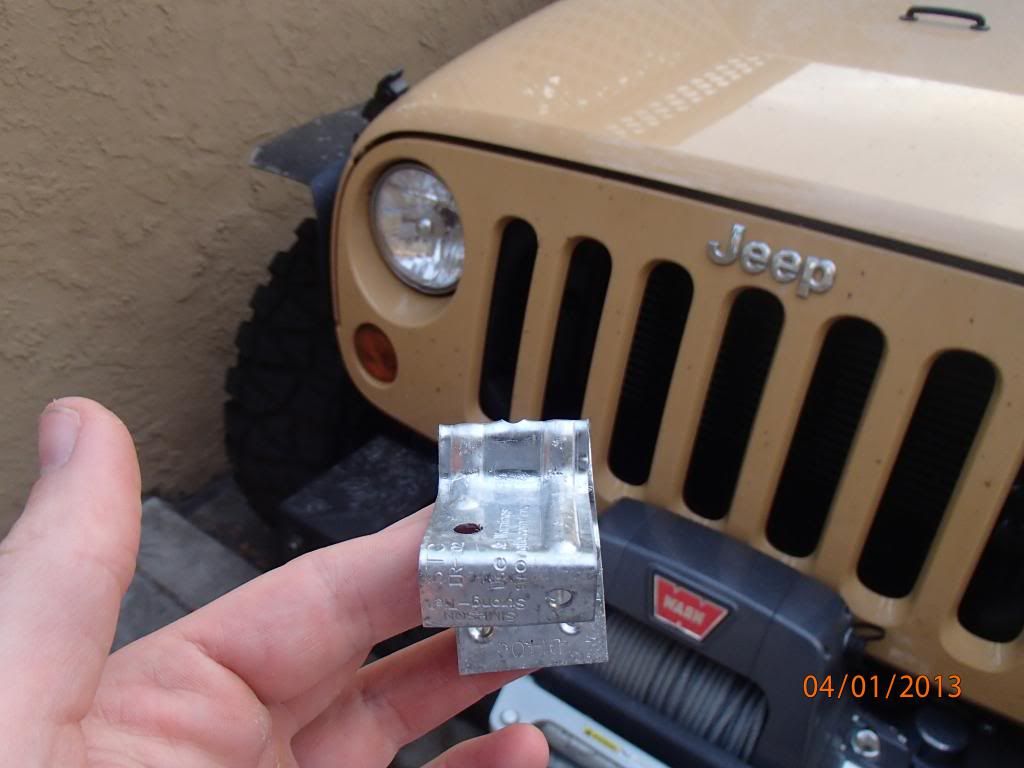
First I measured and marked (2) 1.25"x2" angled truss clips for drilling and bending
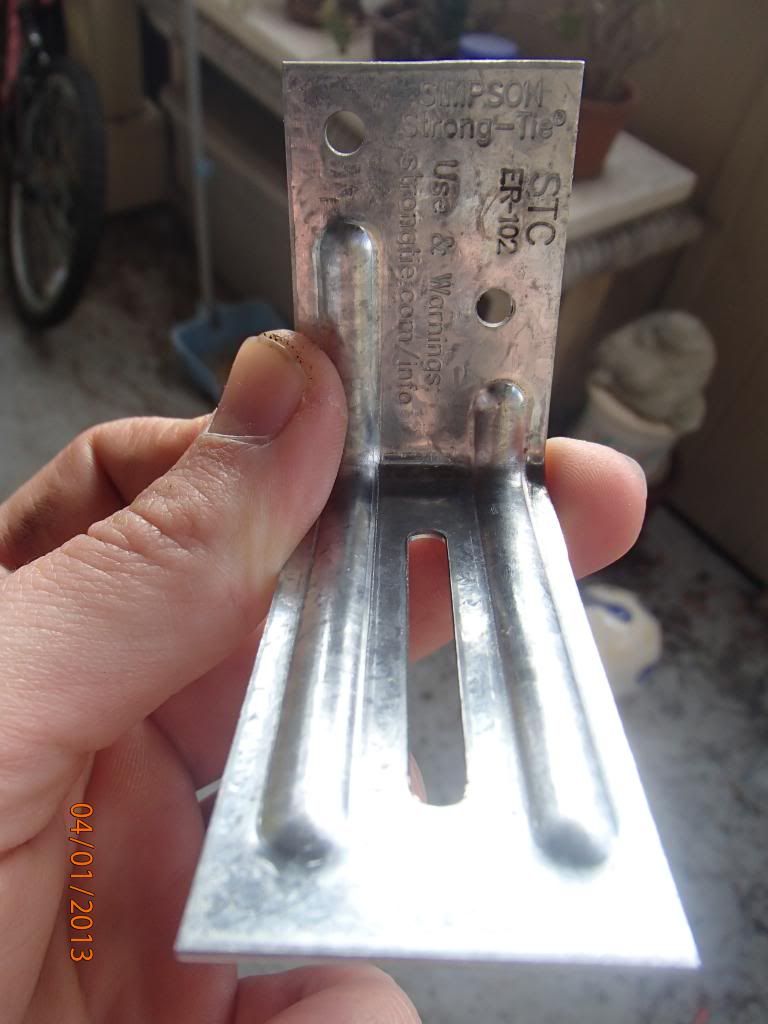
Drilled a 3/8 hole in the clip for mounting a hex-bolt through
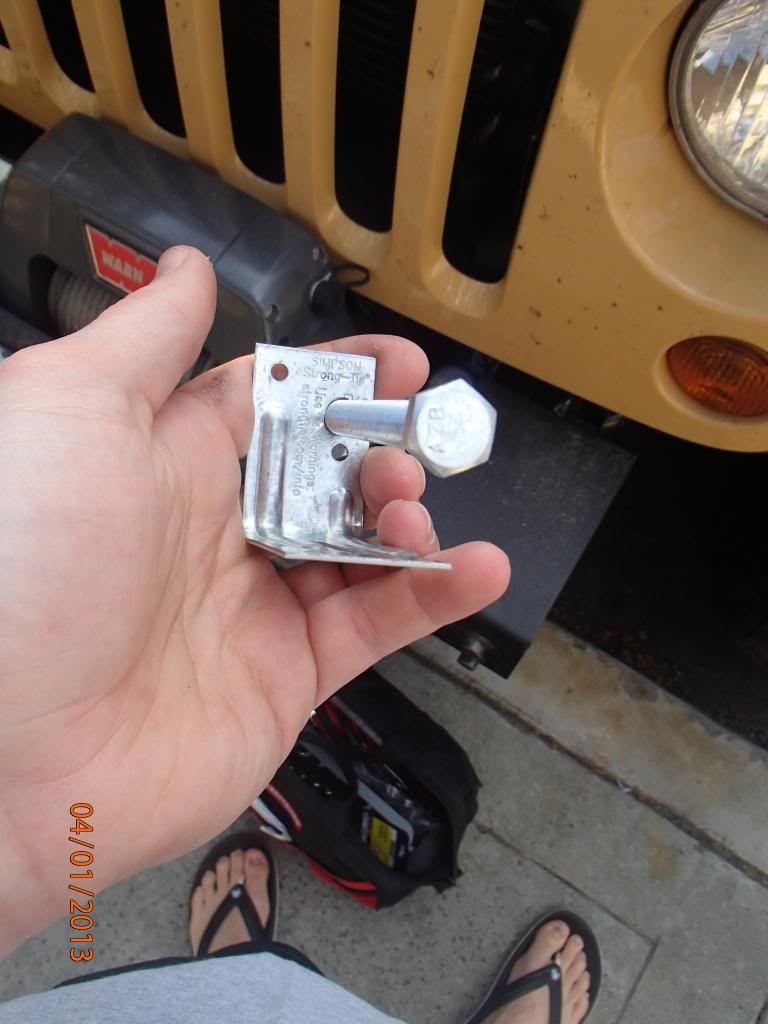
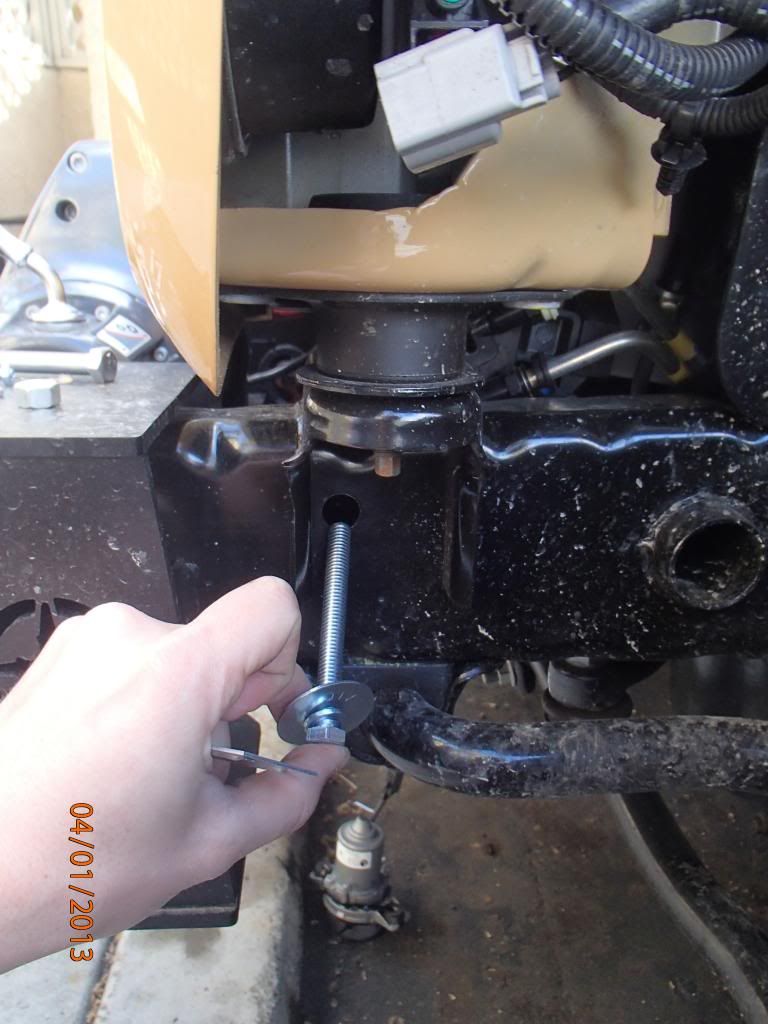
I used the preexisting frame hole to mount it. This is the hole just below the front body mount. On both sides I used a 3/8" fender washer and lock washer as well as the 3/8" bolt and nut
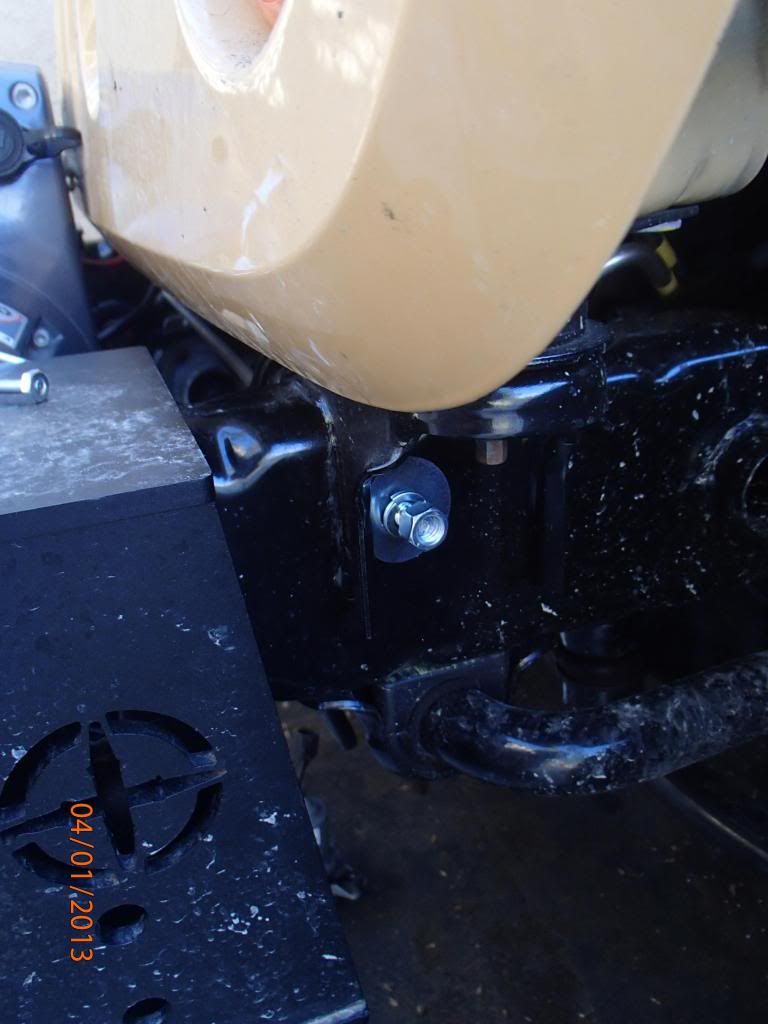
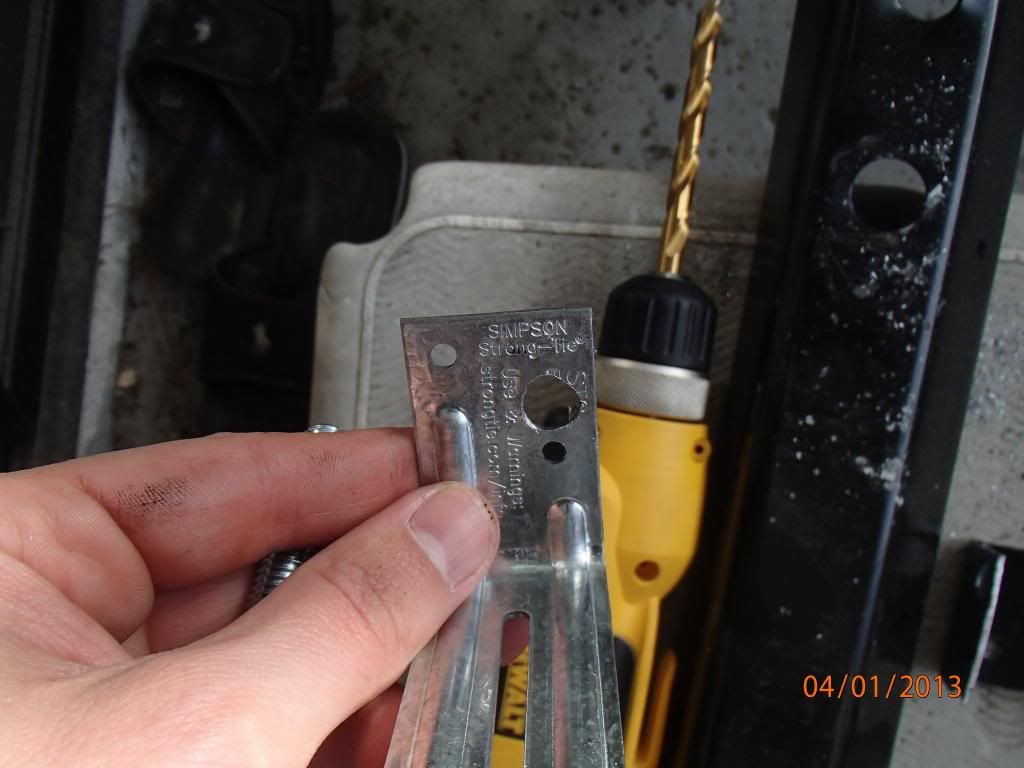
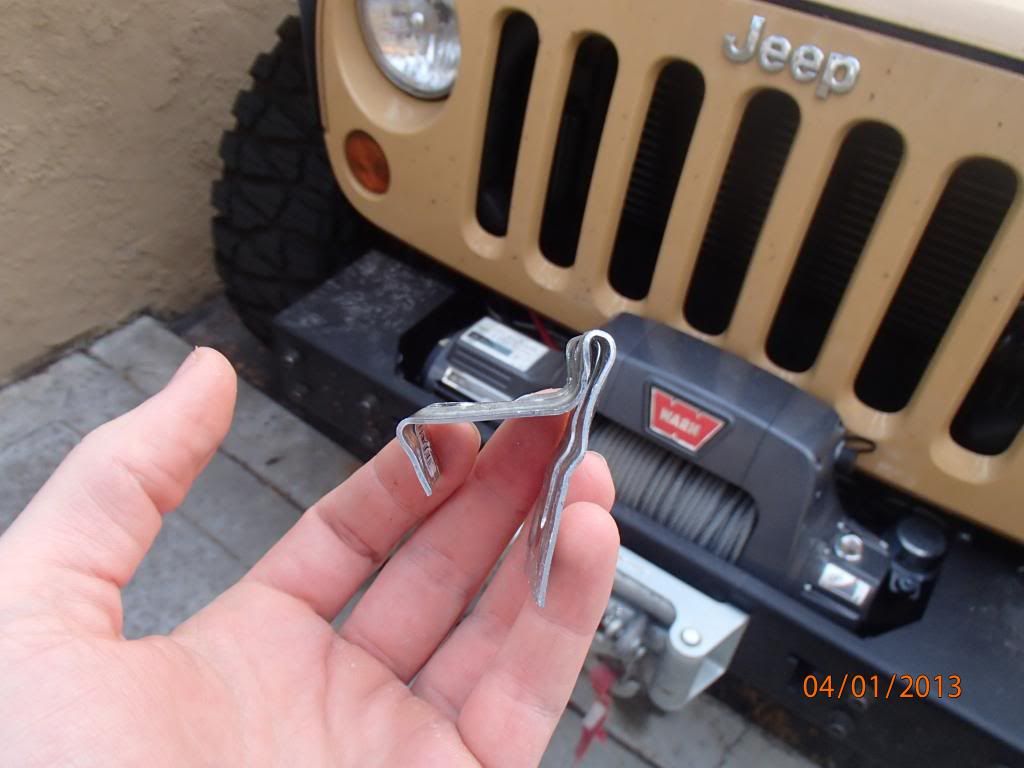
I then used a table vice to clamp and bend the second truss clip to clear the winch in the front, then to bend up and over the mount for the old swaybar guard/lower air dam mount. I bent this tightly as to "clamp down" and secure itself on install. I had to use a hammer to tap it down onto the frame bracket.
Once the two brackets were installed I mounted the Vacuum to the tabs using size #24 1.25" bolts and nuts. Trust me, you will want to do this before you install your winch. The tolerances are a complete PITA and you have to be a contortionist to place the nuts in the screws.
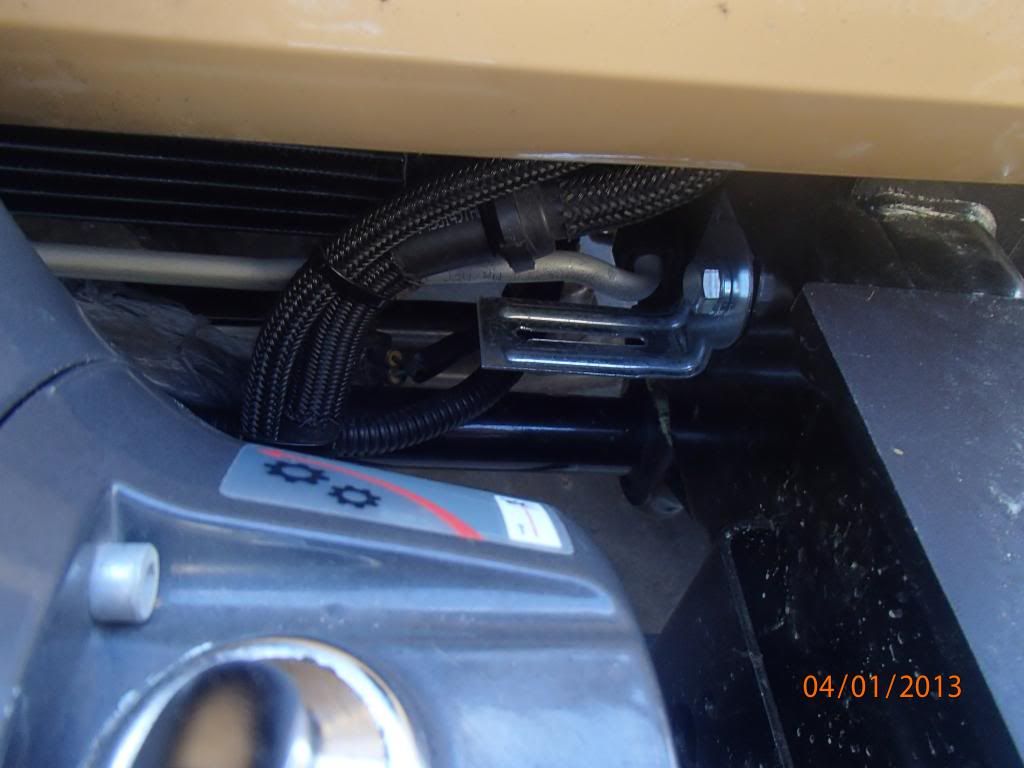
This is the front mount
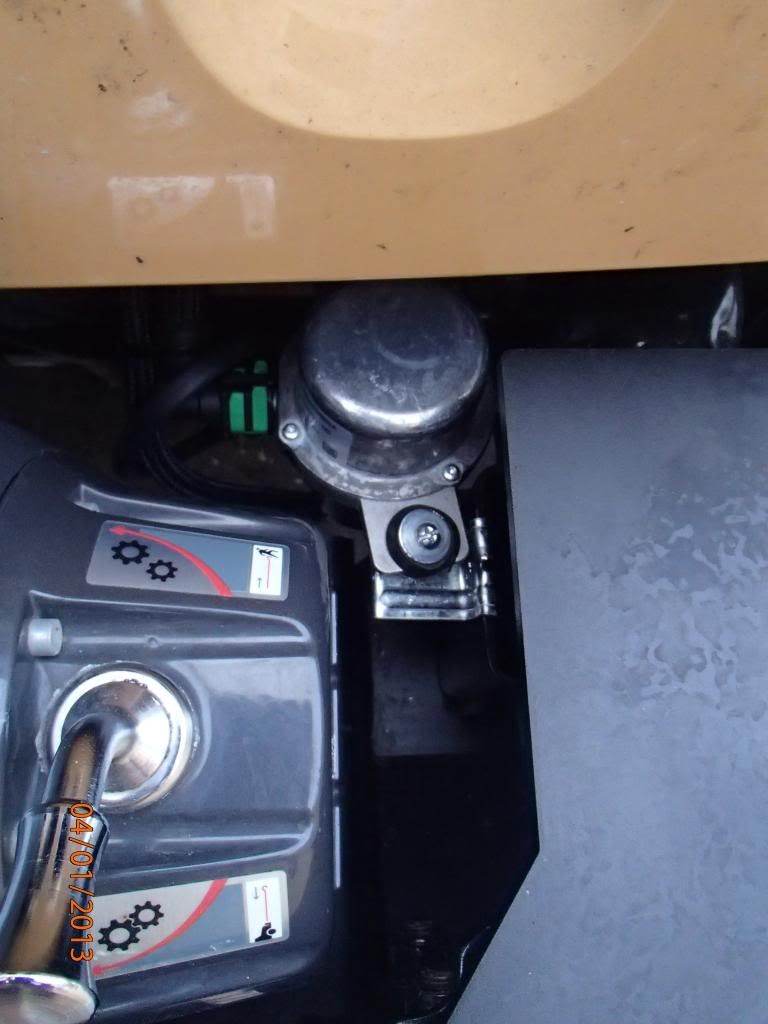
The back mount

Sorry the pics are not the best, I did it with the bumper already installed and it's very tight in there for a camera.
Total Parts list from Ace Hardware
2- 1.25" x 2" angled truss clips @ $0.79 each
2- 3/8" fender washers @ $0.25 each
1- 3/8" Hex bolt @ $0.45
1- 3/8" nut @ $0.12
2- 3/8" lock washers @ $0.20
1- bag of #24 1.25" bolts and nuts @ $1.18 (only used 2)
Total Cost = $4.23
First I measured and marked (2) 1.25"x2" angled truss clips for drilling and bending
Drilled a 3/8 hole in the clip for mounting a hex-bolt through
I used the preexisting frame hole to mount it. This is the hole just below the front body mount. On both sides I used a 3/8" fender washer and lock washer as well as the 3/8" bolt and nut
I then used a table vice to clamp and bend the second truss clip to clear the winch in the front, then to bend up and over the mount for the old swaybar guard/lower air dam mount. I bent this tightly as to "clamp down" and secure itself on install. I had to use a hammer to tap it down onto the frame bracket.
Once the two brackets were installed I mounted the Vacuum to the tabs using size #24 1.25" bolts and nuts. Trust me, you will want to do this before you install your winch. The tolerances are a complete PITA and you have to be a contortionist to place the nuts in the screws.
This is the front mount
The back mount
Sorry the pics are not the best, I did it with the bumper already installed and it's very tight in there for a camera.
 06-13-2013, 02:08 PM
#22
JK Enthusiast
Thread Starter
Join Date: Sep 2011
Location: USA
Posts: 429
Likes: 0
Received 0 Likes
on
0 Posts
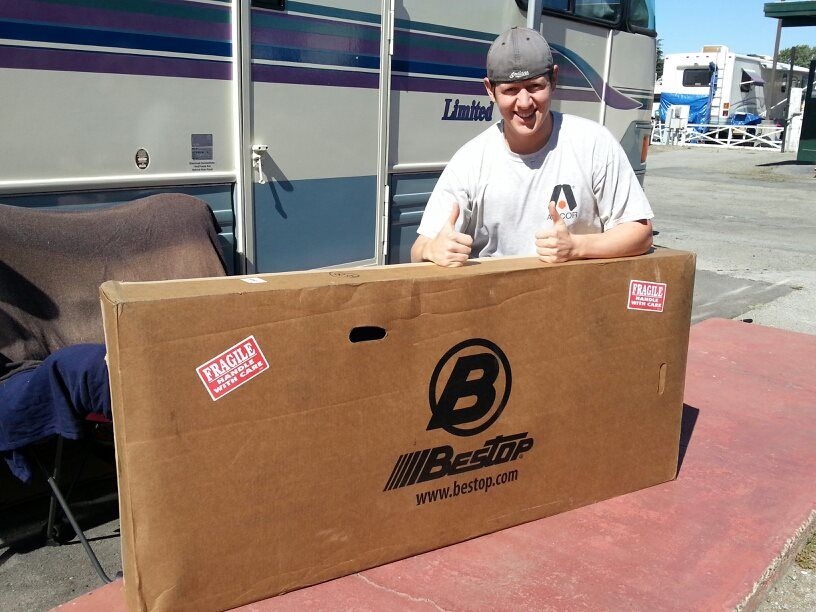
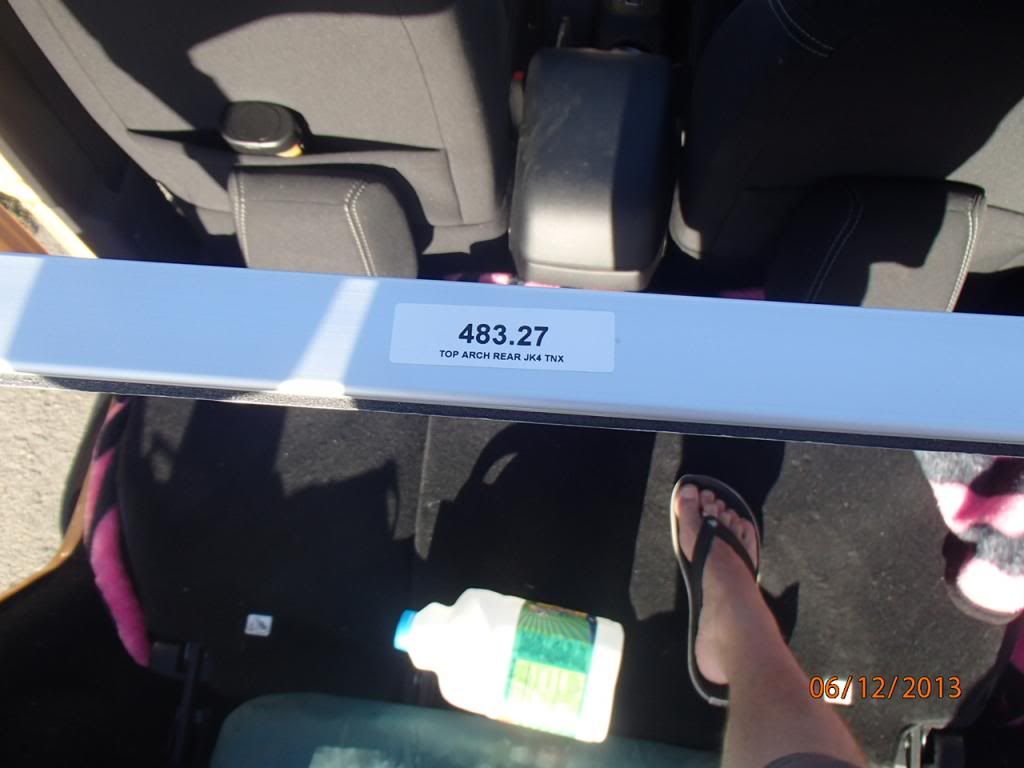
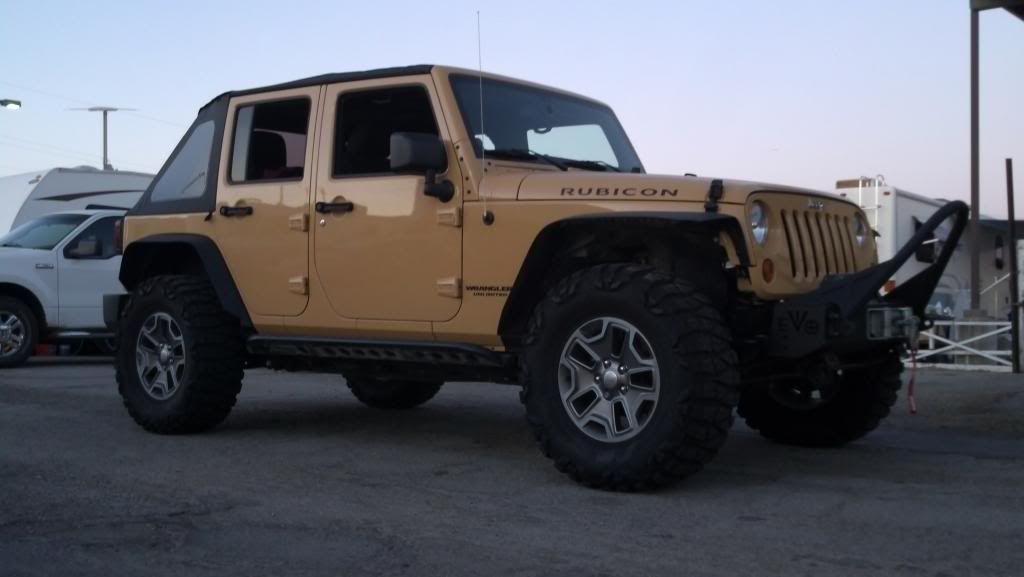
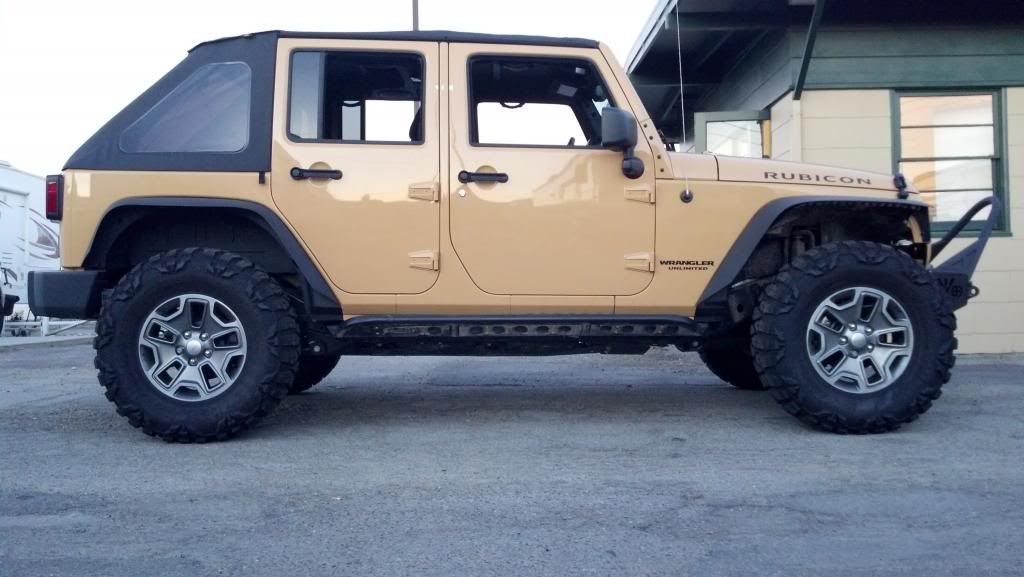
My girlfriend did some great recon on me to get the best anniversary gift I could imagine! She knows I spend more time tinkering with my Jeep and reading on forums than anything else, and she�s always sitting beside me as I am reading my pm's from people and responding to questions on my threads. Well in her brilliantness she created a fake screenname on one of the forums, sent me a pm acting like a noob saying �he� really liked my build and was wanting my advice on soft tops. I sent a lengthy reply covering 5 that I liked and disliked from what I have seen/owned/played with. I ended that with the fact that I was looking to purchase a Bestop Trektop NX Diamond Series and would be putting up a little review and write-up when I do�well what showed up at my door yesterday�you guessed it!
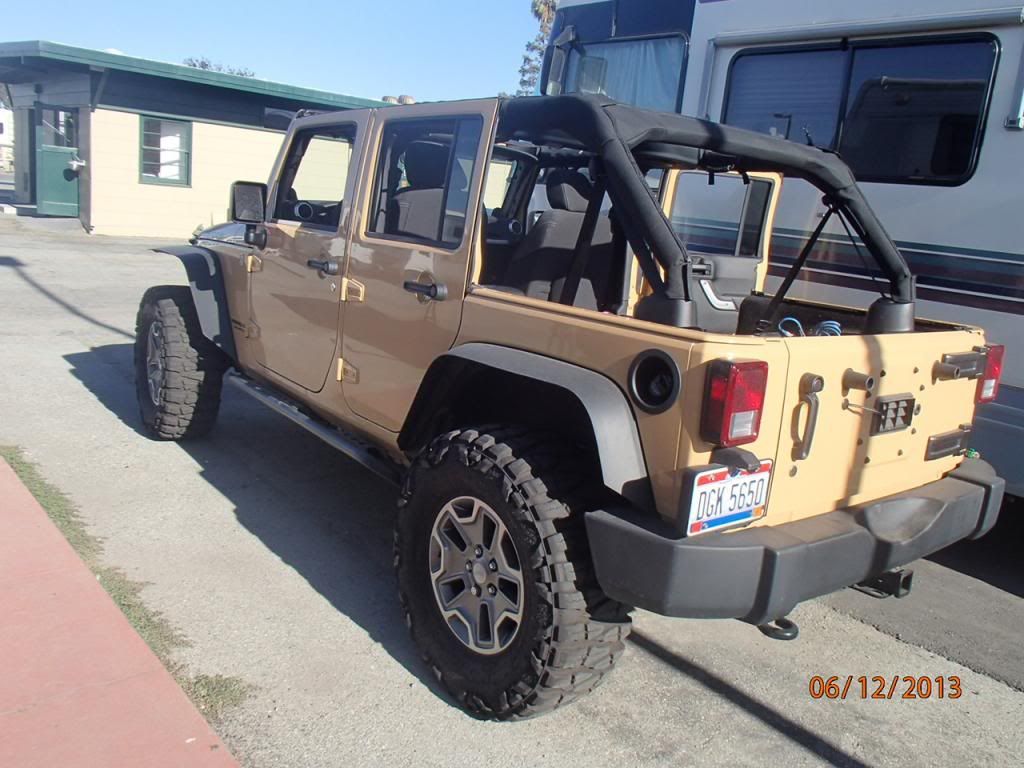
So I got my Jeep naked for the first time by removing the hard top
The first step to installing this is to install the door surrounds. These are simple enough and install in pre-existing holes in the rear tub of the Jeep. Start from the rear door surround first, making sure that the seals are not being �bunched up� and that the surround sits perfectly into the seals.
After the rear is in place you will install one of the long bolts into the rear secure hole.
Next is the front door surround. Same as before, make sure the seals are not being bunched and install the very front long bolt
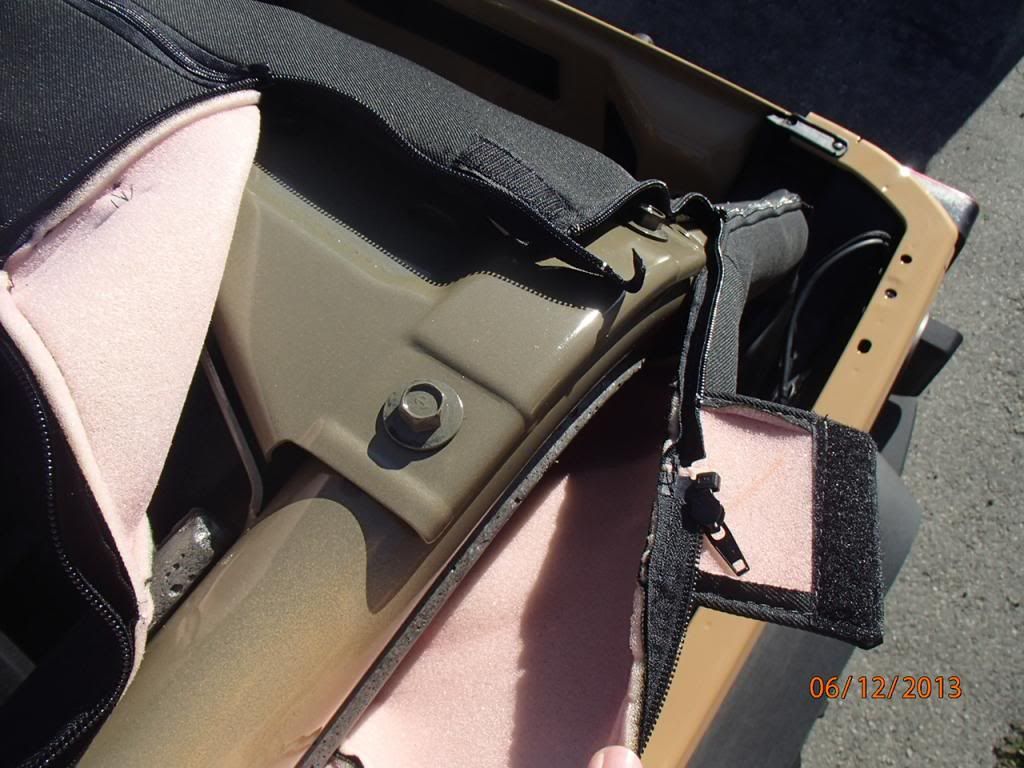
Last step in installing the door surrounds is the pivot bar bracket the mounts where the front and rear surround secures together. You will notice the bracket is molded and fits perfectly into place if you have it on the right side. Once in place use the remaining small screw to finish the door surrounds

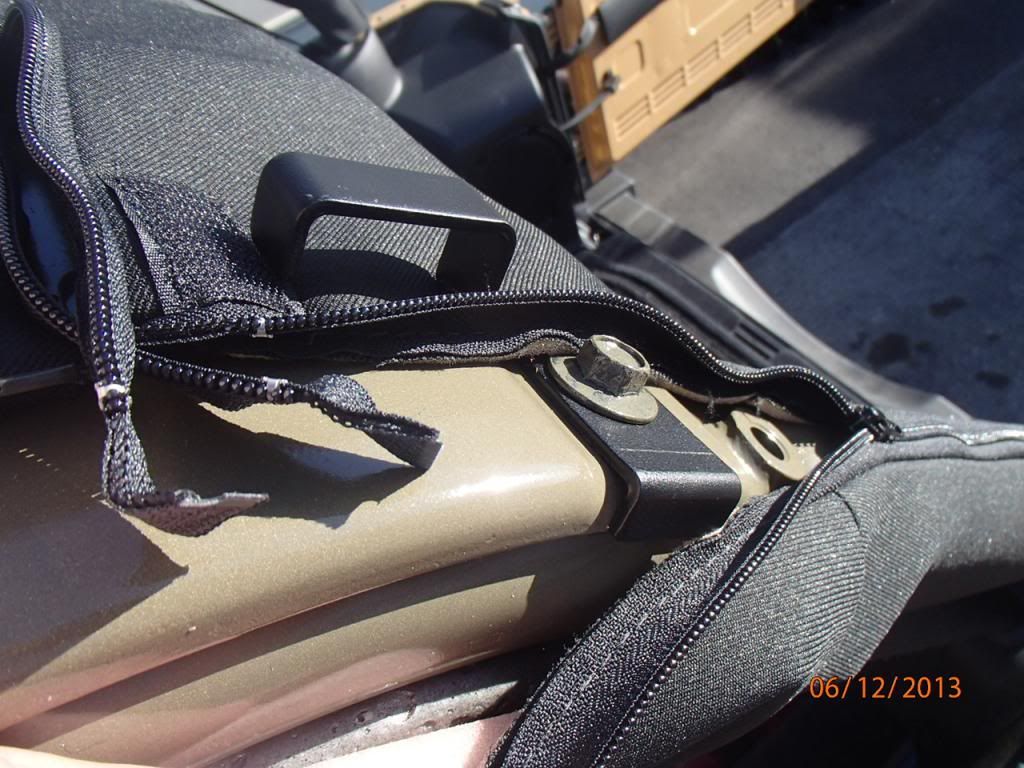
Next you will unzip the rear cage covers to access the factory bolts. You will use these bolts as the rear bracket mounting points and they require a 13mm wrench for removal.
You will line the upper front bolt bracket up and with a utility knife make a small cut just enough that the bracket slides through. IT WILL NOT FIT INTO THE DOOR CHANNELS! I spent 20 minutes flipping and switching the brackets thinking they were supposed to fit securely into the door surrounds.

You will do the same with the smaller rear bracket on the lower cage bolt.
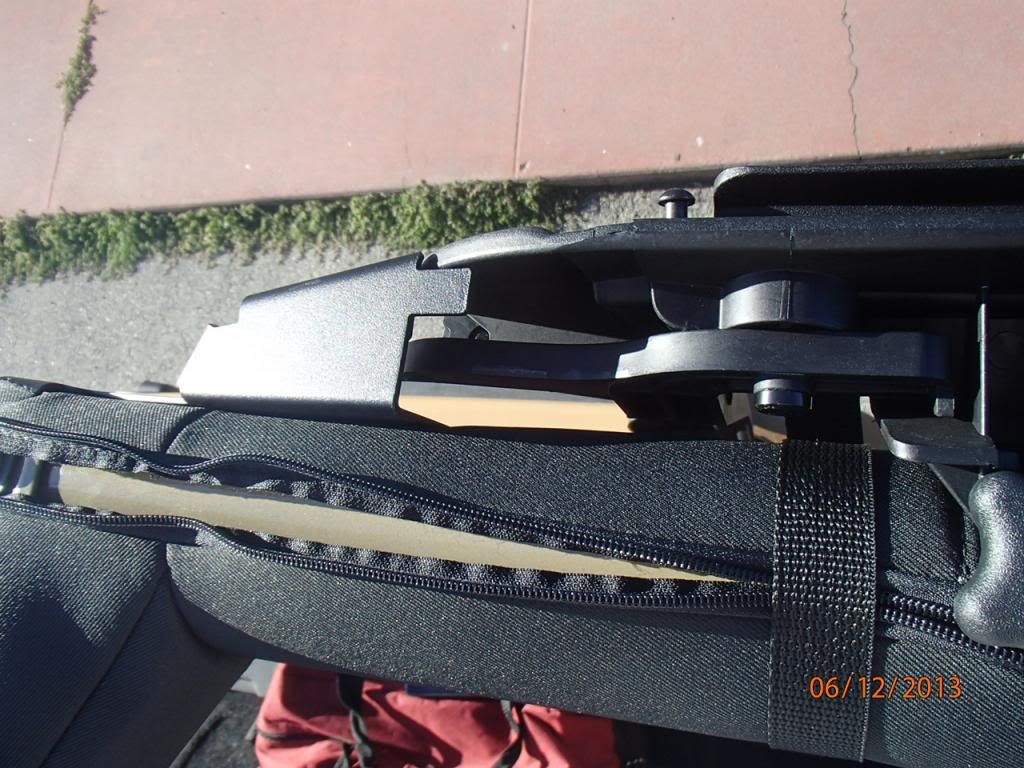
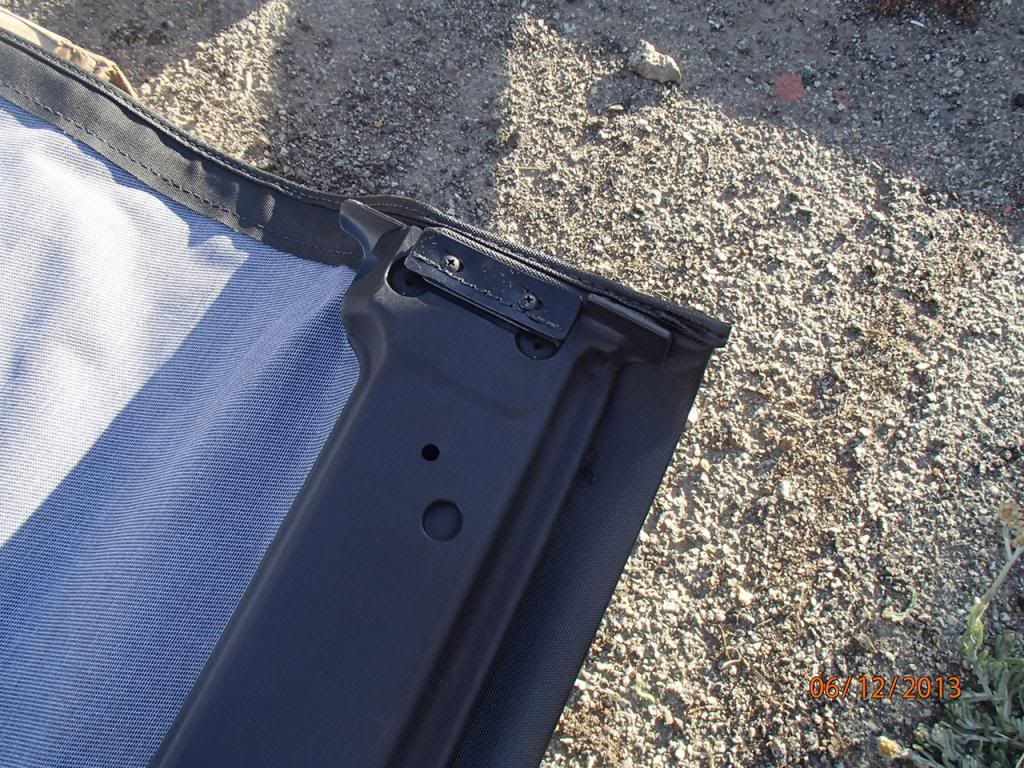
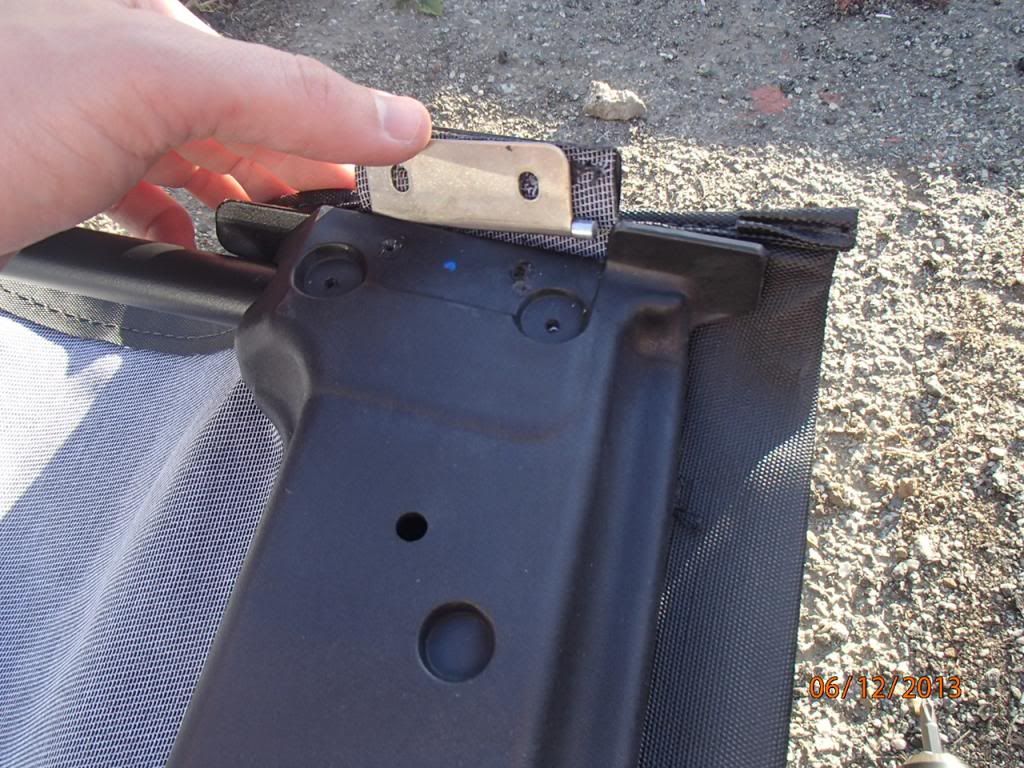
Now you will take the two bows and install them into the door surround brackets. These are the two bows that says front and back WITH the black feet at the end. You will install these with the paper tape facing up and remove the tape after install. There is no residue left behind, the tape is stricktly protective.


Next you install the rear tailgate bar clips. If you start from the rear clip(inside the jeep) and press/roll it forward, they will just snap in.

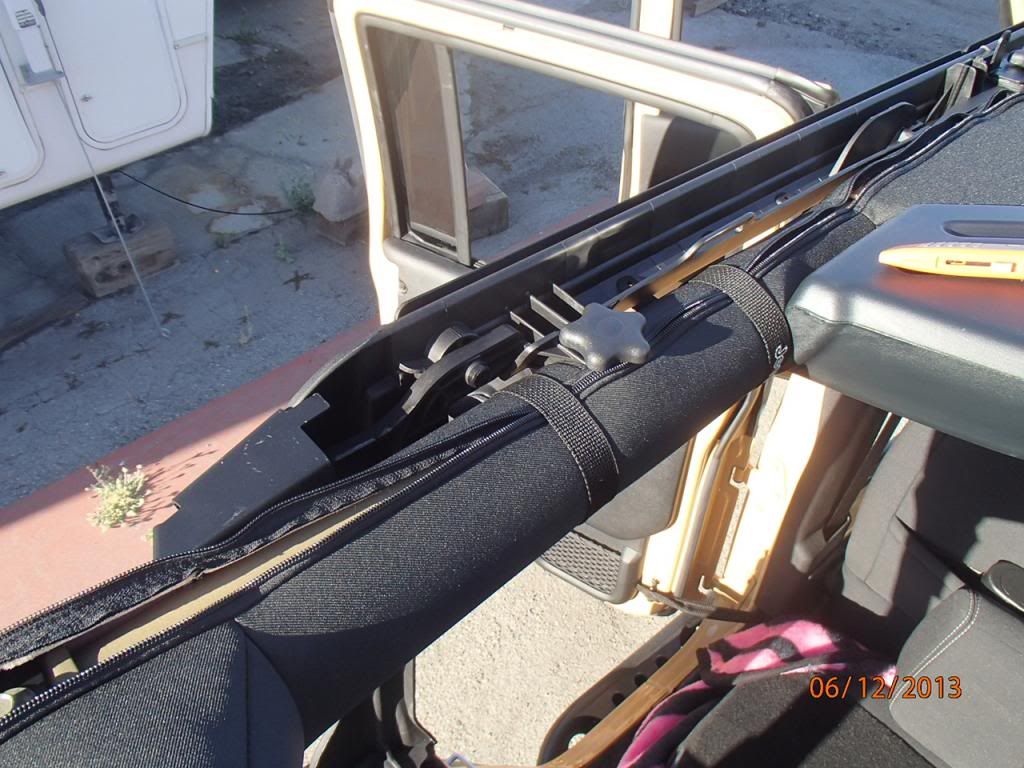
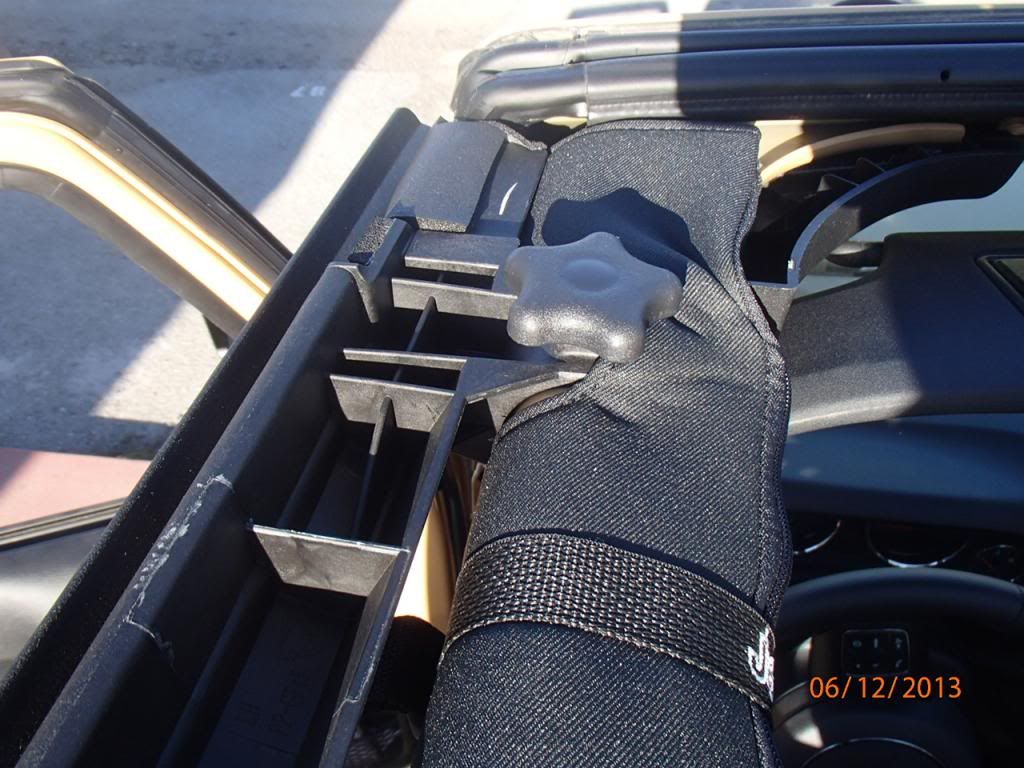
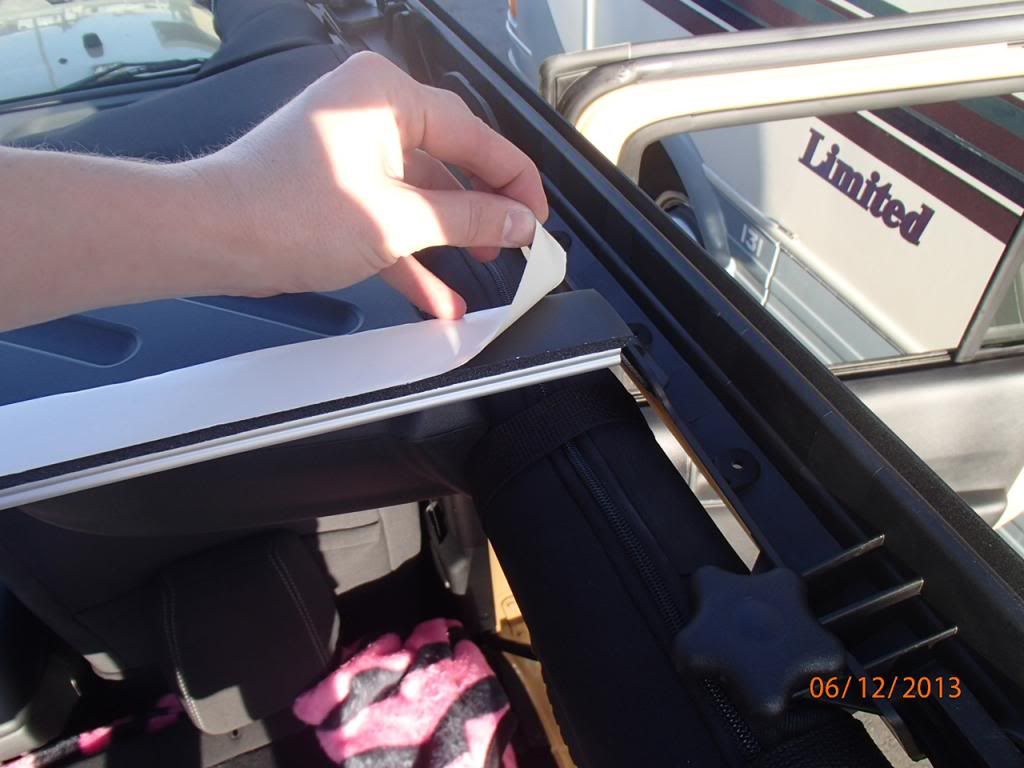
Next you will need to install the pivot bars to the header. You will unscrew the material to allow access to the bar mounting holes
You then insert the bar with the clip pin on the inside of the top and align the pre-existing holes in the bar to the header.
 [/URL]
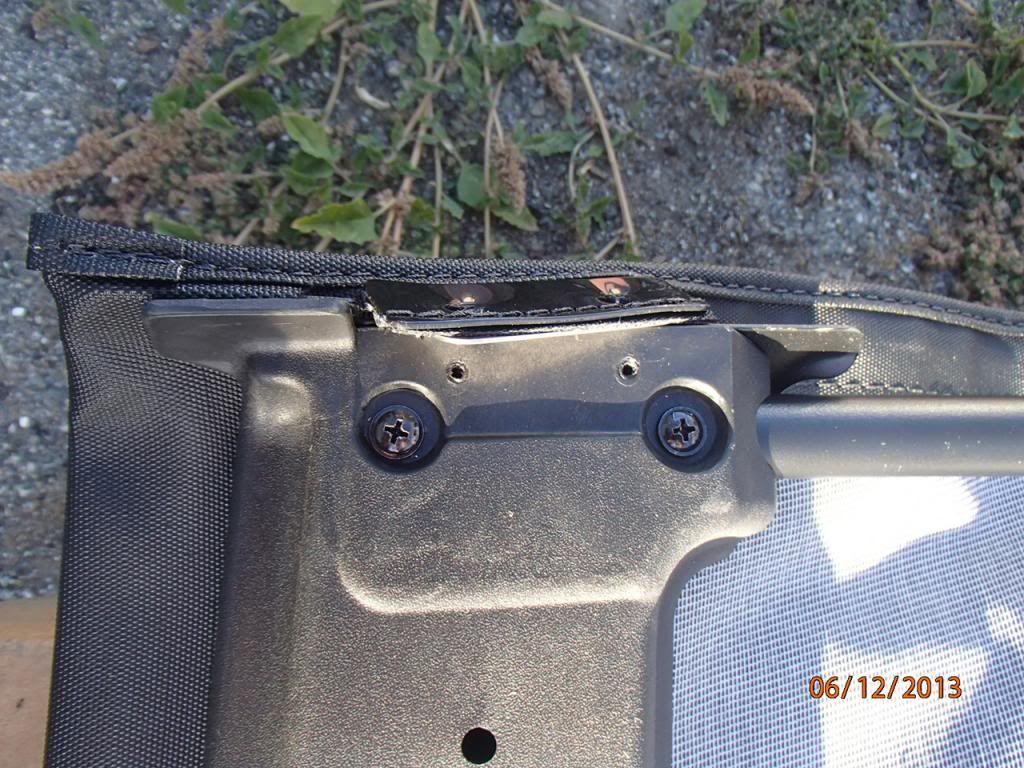
I forgot to take the pictures, but you will grab the installed bars and flip the header over and install two more screws(just like pictured above) but in the back side of the header in the pre-existing holes.
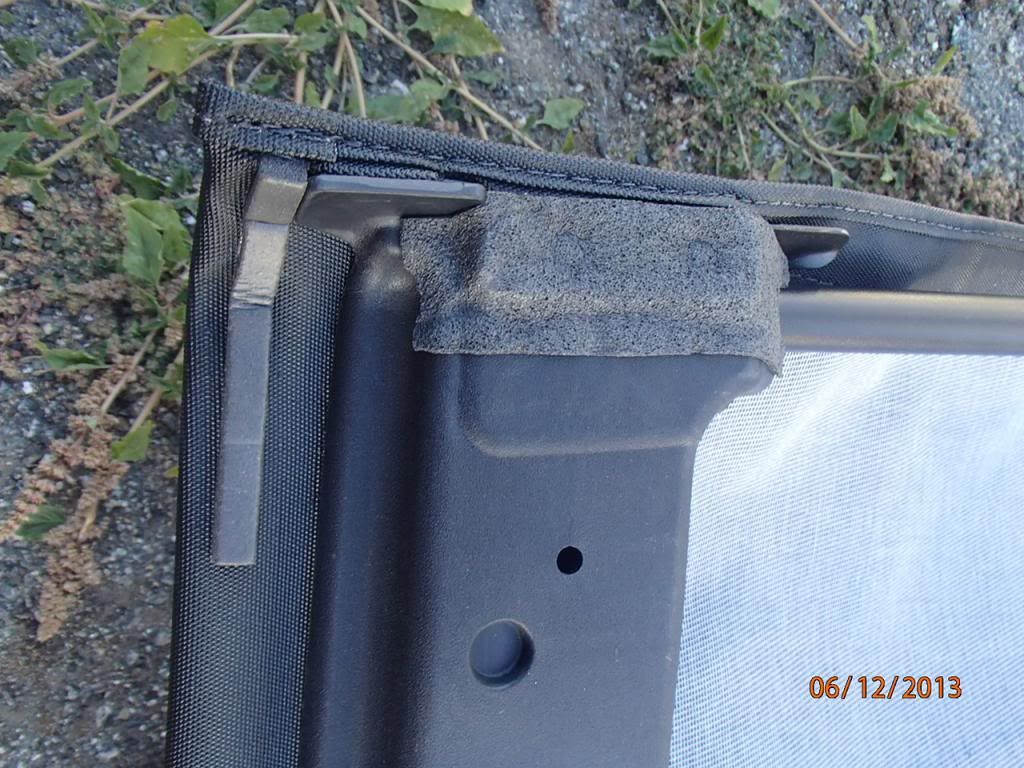
You will then re-install the original fabric tabs with original screws.
Next you will install the foam seals provided. The youtube video and instructions were not too clear, but I believe this is how it should look.
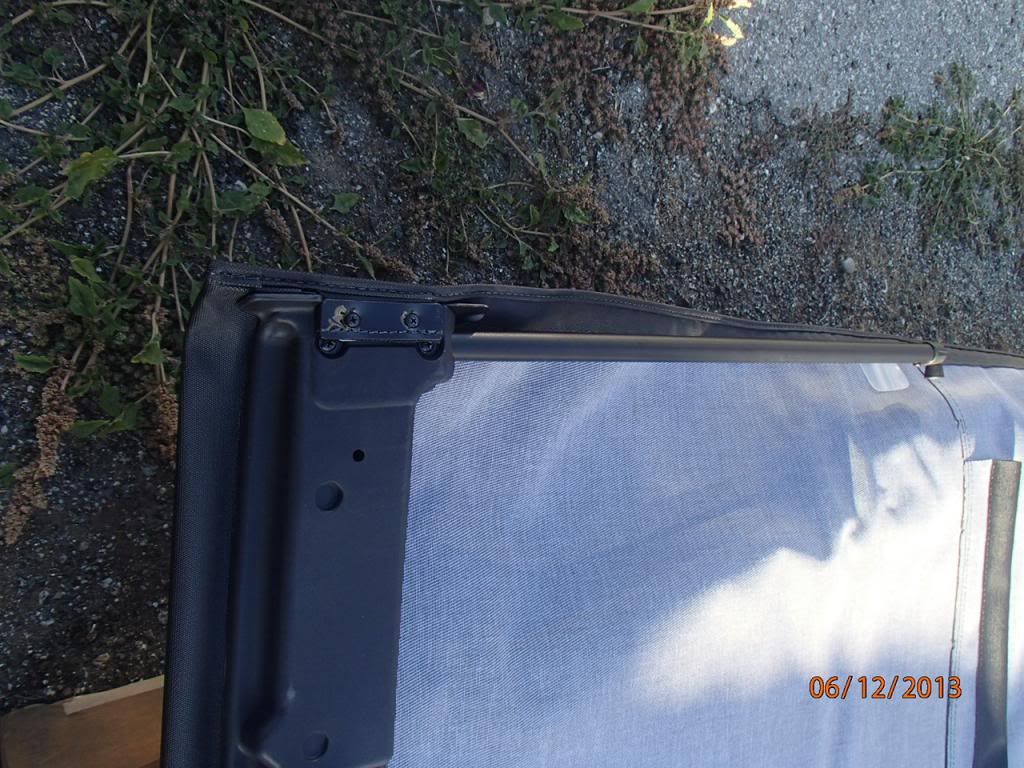
It is now time to begin installing the top onto the Jeep. Take the fabric and place it on to the hood of your jeep. You will then install the pivot arms into the door surround bracket you installed in the beginning.


Now install the middle bow bar into the sleeve. Make sure it is centered and then install the c-clip provided in the kit to secure it into place.

Now lift the bar up and into the u-bracket that is in the header.

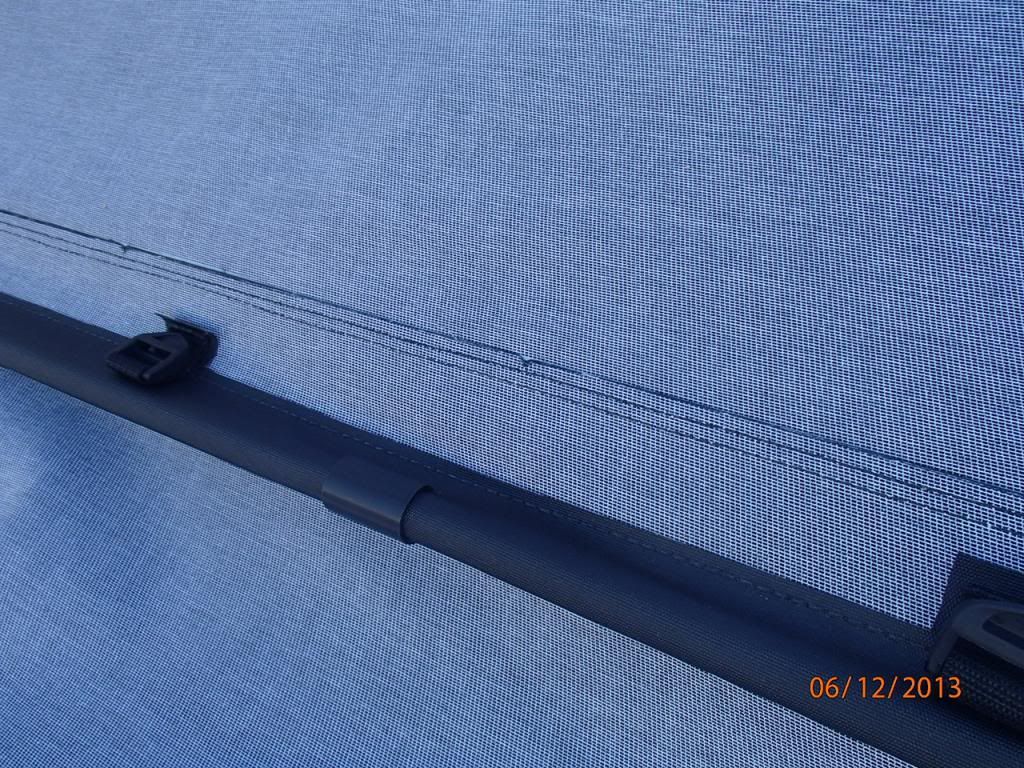
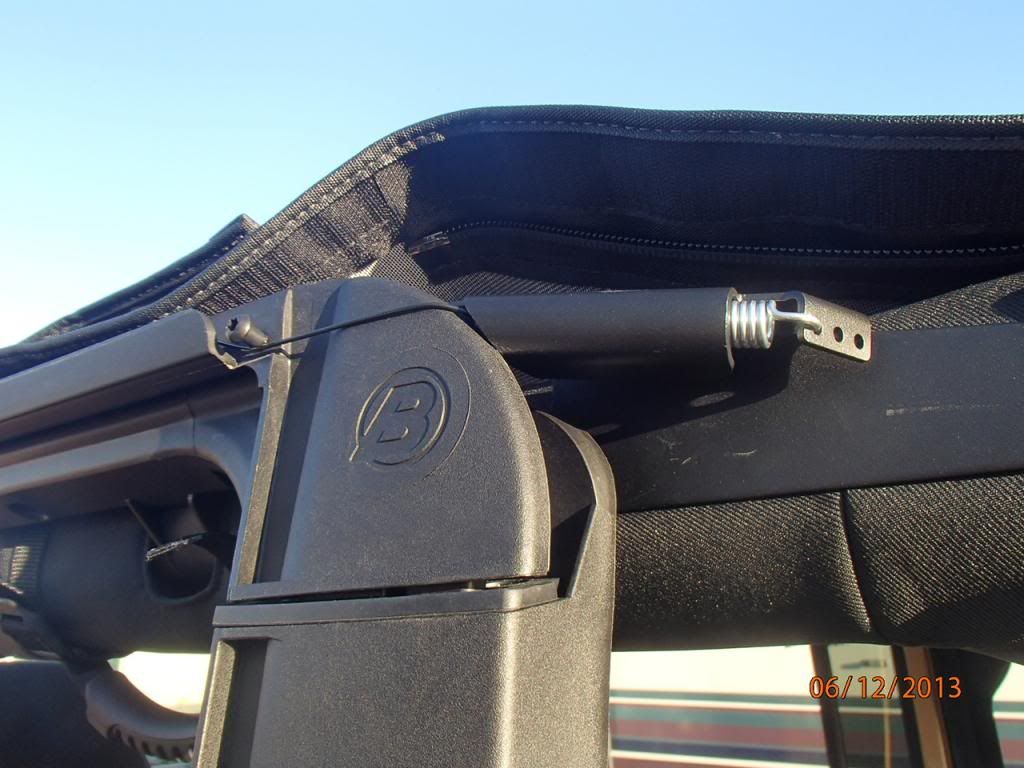
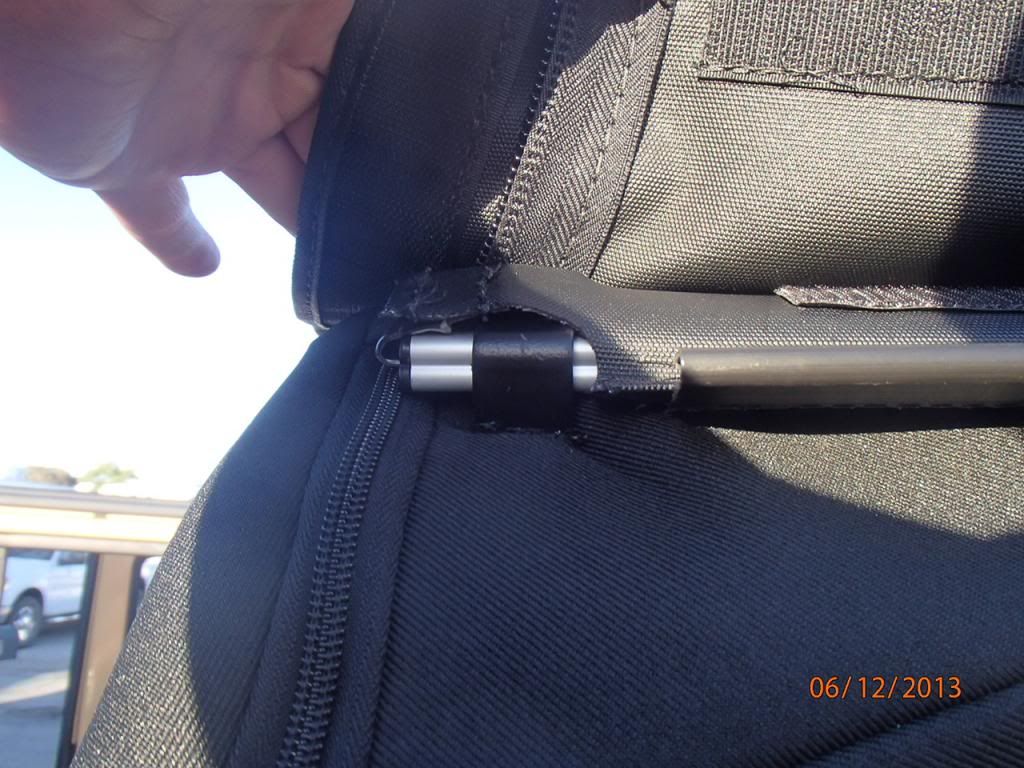
Next, flip the remaining material over your jeep to install the tensioner line/spring into the front hole. Before doing this you will want to flip the front portion of the top back to allow slack. The line will go under the screw, then over the header and under the bracket. This was a very tough install for me, and I don�t have fat fingers, so I used needle nose pliers for this step.
You will then slide the bow though the rear sleeve, then through the far back bracket. AFTER it is through and under all of this you will install the retaining clips that are already on the top to secure into place.
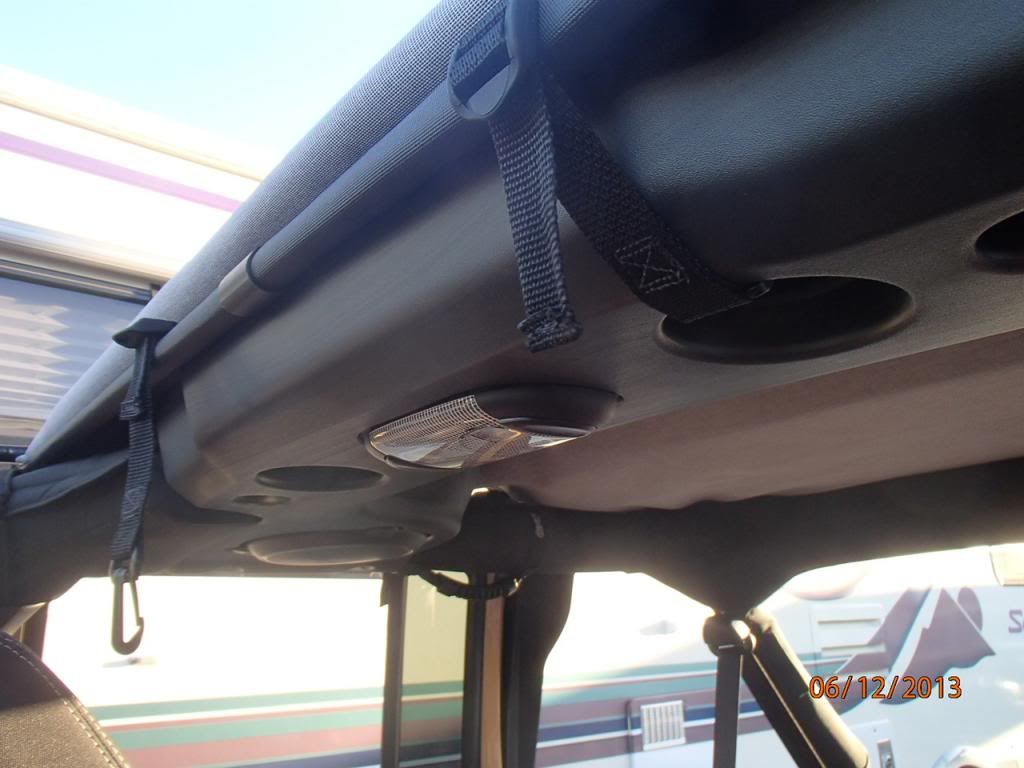
Next thread the supplied straps and clips into the buckle on the top. You will then insert the clip into the factory holes in your roof/B pillar cross section.
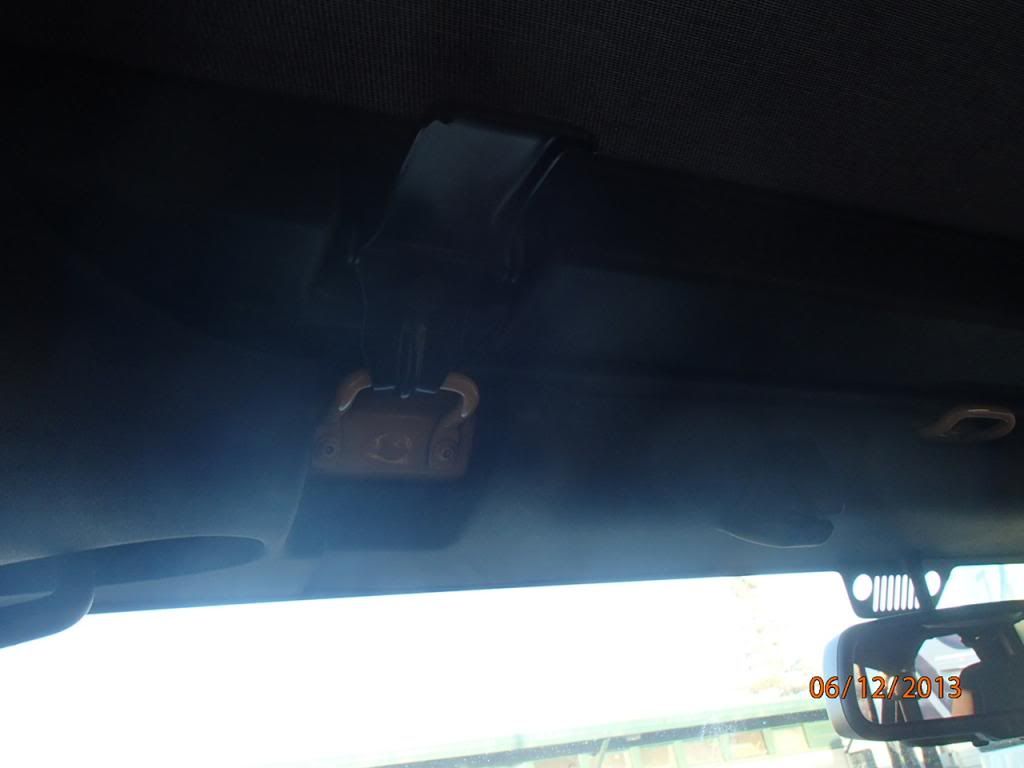
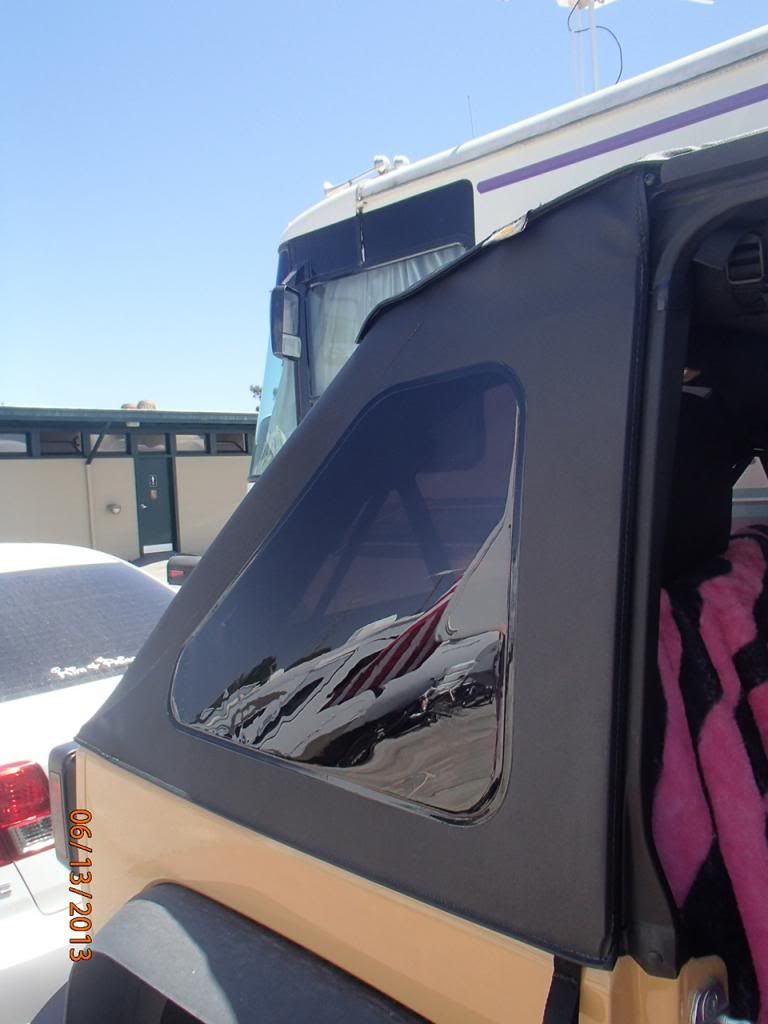
Now flip the front section of the top back down into place and ONLY attach the header clamps. DO NOT clamp them down all the way. Doing so will make your install a real PITA!
You will then insert the rear window first. Begin at the very end and you will hear a clicking sound. MAKE SURE YOU HEAR THE CLICK. You then slide the top down through the groove until it is centered into the channel .
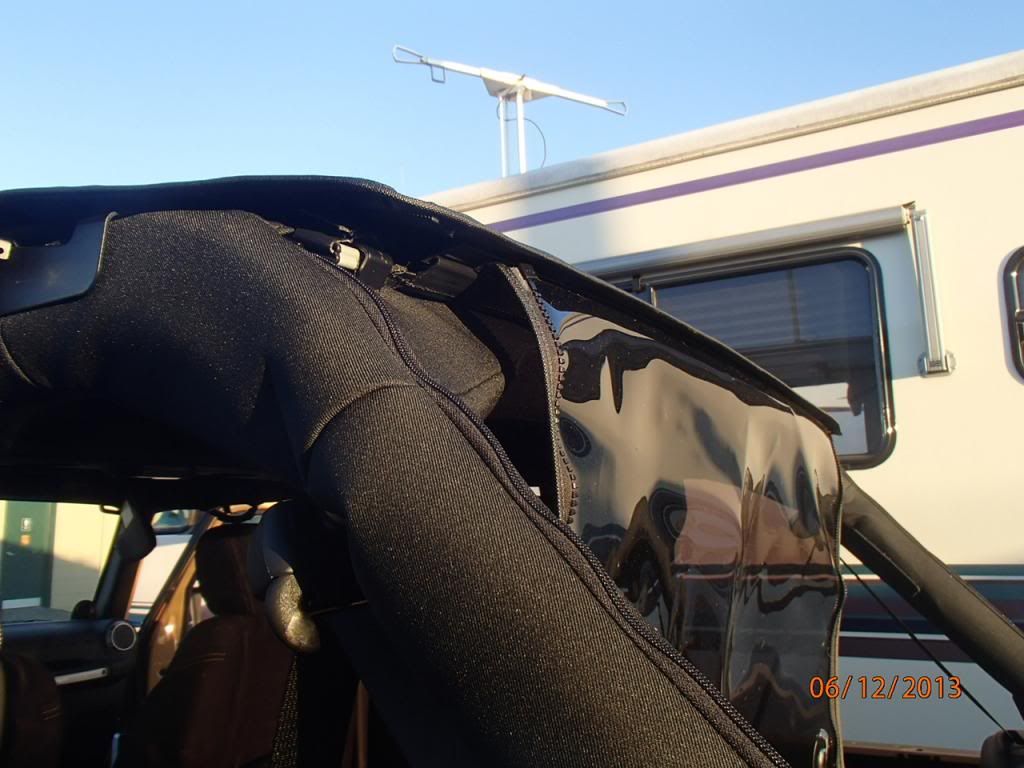

Now you will install the sides. Begin with the top zippers above the doors. And ONLY zip the first 2 inches of the zipper to get them started. You will then do the rear window zippers 2 inches as well
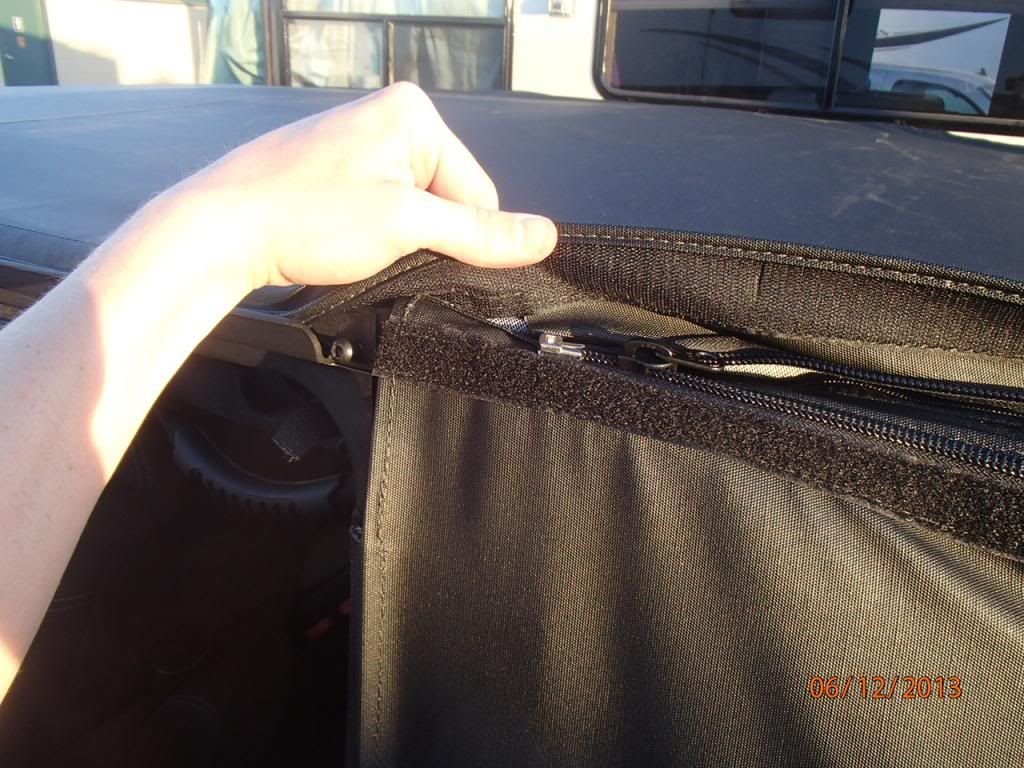
After they are started, you will install the window sections around the door channels. Make sure they are completely rolled around the door surround and in the channel.
Next you install the lower rail tabs like an original soft top uses.(sorry no pic of this step. )
Lastly after all the door channels and tub seam channel tabs are secured you will slowly go around and zip the windows closed. Be sure to not force it or you can and will bust a seam!!! If you hit much resistance let the material sit and relax. Because it was getting late/dark and the material cooled off, I had to wait until the next morning to finish one of the zippers.
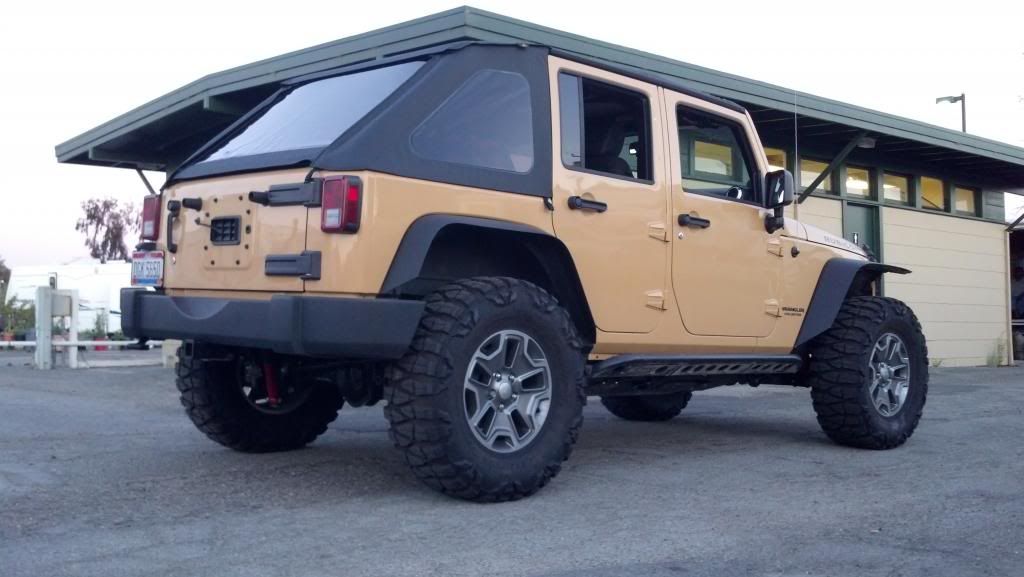
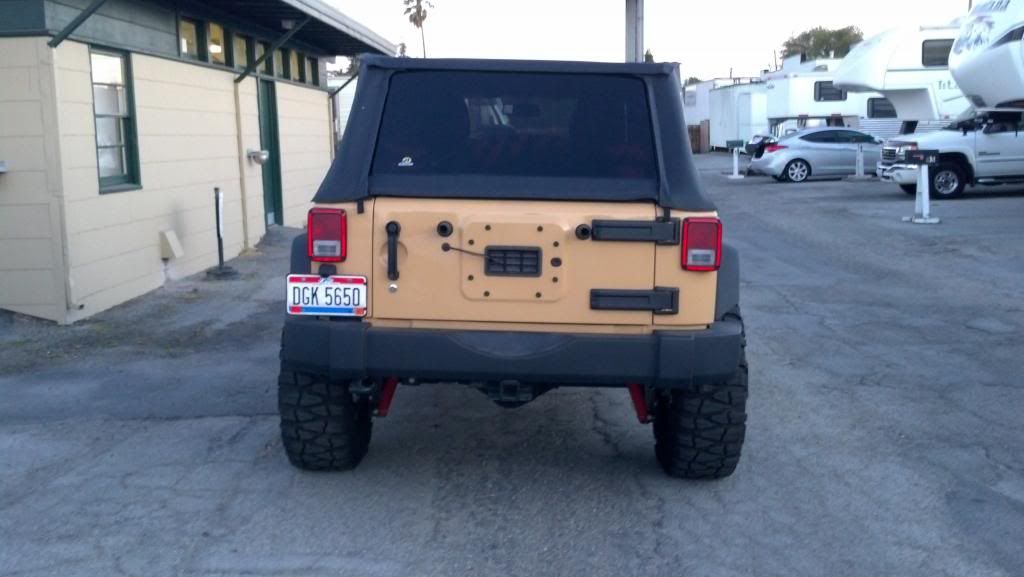
So I got my Jeep naked for the first time by removing the hard top
The first step to installing this is to install the door surrounds. These are simple enough and install in pre-existing holes in the rear tub of the Jeep. Start from the rear door surround first, making sure that the seals are not being �bunched up� and that the surround sits perfectly into the seals.
After the rear is in place you will install one of the long bolts into the rear secure hole.
Next is the front door surround. Same as before, make sure the seals are not being bunched and install the very front long bolt
Last step in installing the door surrounds is the pivot bar bracket the mounts where the front and rear surround secures together. You will notice the bracket is molded and fits perfectly into place if you have it on the right side. Once in place use the remaining small screw to finish the door surrounds
Next you will unzip the rear cage covers to access the factory bolts. You will use these bolts as the rear bracket mounting points and they require a 13mm wrench for removal.
You will line the upper front bolt bracket up and with a utility knife make a small cut just enough that the bracket slides through. IT WILL NOT FIT INTO THE DOOR CHANNELS! I spent 20 minutes flipping and switching the brackets thinking they were supposed to fit securely into the door surrounds.
You will do the same with the smaller rear bracket on the lower cage bolt.
Now you will take the two bows and install them into the door surround brackets. These are the two bows that says front and back WITH the black feet at the end. You will install these with the paper tape facing up and remove the tape after install. There is no residue left behind, the tape is stricktly protective.
Next you install the rear tailgate bar clips. If you start from the rear clip(inside the jeep) and press/roll it forward, they will just snap in.
Next you will need to install the pivot bars to the header. You will unscrew the material to allow access to the bar mounting holes
You then insert the bar with the clip pin on the inside of the top and align the pre-existing holes in the bar to the header.
[/URL]I forgot to take the pictures, but you will grab the installed bars and flip the header over and install two more screws(just like pictured above) but in the back side of the header in the pre-existing holes.
You will then re-install the original fabric tabs with original screws.
Next you will install the foam seals provided. The youtube video and instructions were not too clear, but I believe this is how it should look.
It is now time to begin installing the top onto the Jeep. Take the fabric and place it on to the hood of your jeep. You will then install the pivot arms into the door surround bracket you installed in the beginning.
Now install the middle bow bar into the sleeve. Make sure it is centered and then install the c-clip provided in the kit to secure it into place.
Now lift the bar up and into the u-bracket that is in the header.
Next, flip the remaining material over your jeep to install the tensioner line/spring into the front hole. Before doing this you will want to flip the front portion of the top back to allow slack. The line will go under the screw, then over the header and under the bracket. This was a very tough install for me, and I don�t have fat fingers, so I used needle nose pliers for this step.
You will then slide the bow though the rear sleeve, then through the far back bracket. AFTER it is through and under all of this you will install the retaining clips that are already on the top to secure into place.
Next thread the supplied straps and clips into the buckle on the top. You will then insert the clip into the factory holes in your roof/B pillar cross section.
Now flip the front section of the top back down into place and ONLY attach the header clamps. DO NOT clamp them down all the way. Doing so will make your install a real PITA!
You will then insert the rear window first. Begin at the very end and you will hear a clicking sound. MAKE SURE YOU HEAR THE CLICK. You then slide the top down through the groove until it is centered into the channel .
Now you will install the sides. Begin with the top zippers above the doors. And ONLY zip the first 2 inches of the zipper to get them started. You will then do the rear window zippers 2 inches as well
After they are started, you will install the window sections around the door channels. Make sure they are completely rolled around the door surround and in the channel.
Next you install the lower rail tabs like an original soft top uses.(sorry no pic of this step. )
Lastly after all the door channels and tub seam channel tabs are secured you will slowly go around and zip the windows closed. Be sure to not force it or you can and will bust a seam!!! If you hit much resistance let the material sit and relax. Because it was getting late/dark and the material cooled off, I had to wait until the next morning to finish one of the zippers.
 06-16-2013, 11:07 PM
#26
JK Enthusiast
Thread Starter
Join Date: Sep 2011
Location: USA
Posts: 429
Likes: 0
Received 0 Likes
on
0 Posts
 and yes the GF is a keeper!
I will keep posting install descriptions, plenty of pics as i go along and continue the build. I am hoping to have the coilovers installed by end of july/early Aug if the stars all align and another member is able to give a helping hand and garage/tool support!
12-25-2013, 11:51 PM
#28
JK Enthusiast
Thread Starter
Join Date: Sep 2011
Location: USA
Posts: 429
Likes: 0
Received 0 Likes
on
0 Posts
The build is in a holding pattern for the temporary. The guy and the offer to install my coilovers fell through. You can see in a few of my soft top install pics, that I am living in an RV. All my tools are in Ohio but I'm in norcal....and because of that I don't have a garage to install major components in. I'll be leaving San Fran in Feb and hope to work on the Jeep at that time.