
Project-JK Gets Off Road Evolution EVO-flex - Part 2: Rear EVO Lever
 09-01-2008, 09:19 PM
#1
JK-Forum Founder
Thread Starter

As most of you know by now, WOL and I recently had our JK outfitted with the new Off Road Evolution EVO front coilover system and we posted a brief overview of the steps required to have it installed here:
https://www.jk-forum.com/forums/showthread.php?t=52448
Now, while we were getting our new EVO front coilover system installed, we also had the rear EVO Lever system worked in as well and are now highlighting it in this new Part-2 post.
Although we had some of the brackets welded on, this kit will be availale as a complete bolt on system for those who want to do it themselves. Here is a brief overview of the steps required.
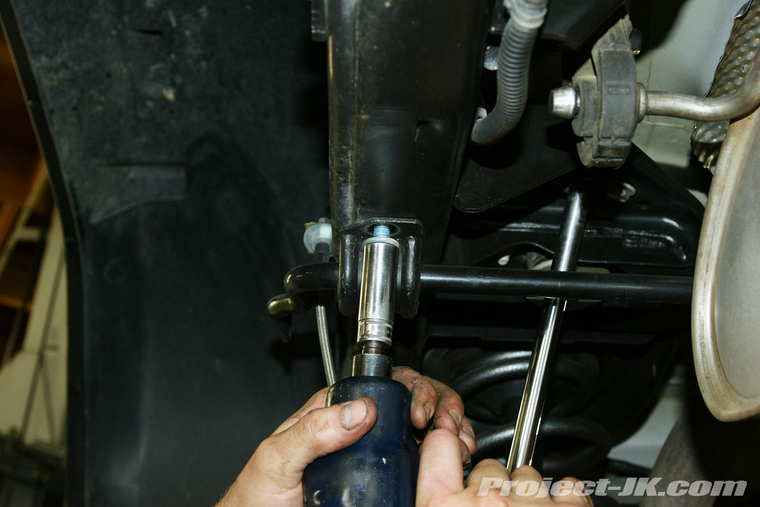
• Start by removing your current rear suspension components (shocks, coils, sway bar links, track bar, etc.)
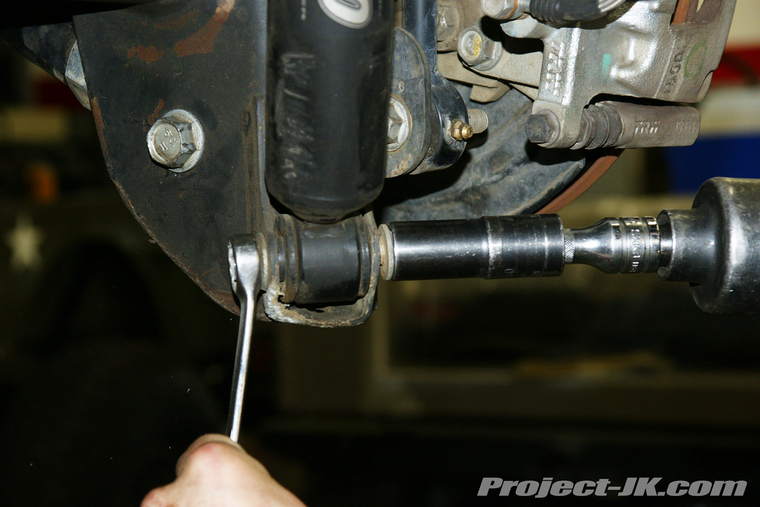
• Remove the rear sway bar as it will need to be relocated.
Because the EVO Lever system is located where the factory muffler is, the exhaust will have to be relocated. To accomplish this we decided to install the Rancho Cat-Back Exhaust Kit but with a slight modification to it.
• Here is a picture of the Rancho Cat-Back Exhaust Kit. It is a complete bolt on kit.
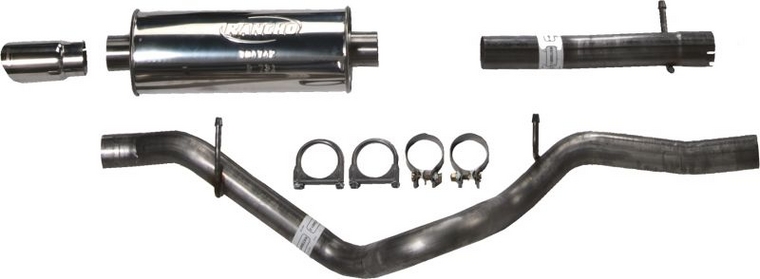
We will be doing a more detailed write-up on the Rancho exhaust system soon.
• Installing the new Rancho muffler
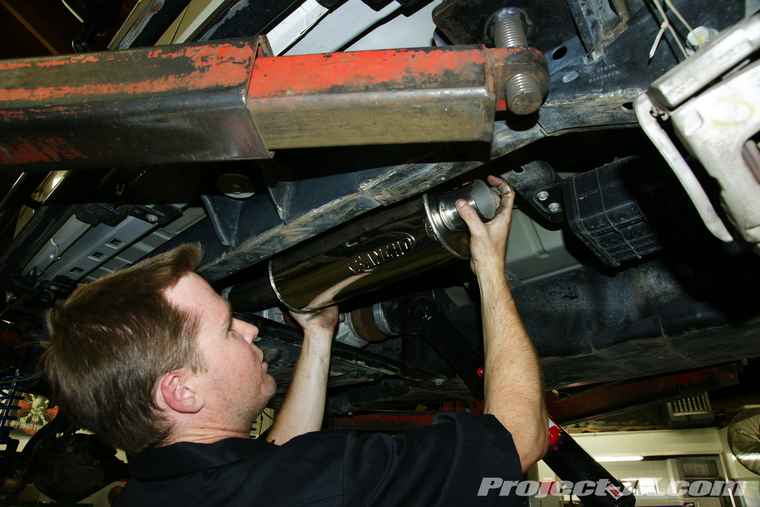
The Rancho exhaust kit comes with all the tubes necessary to route the exhaust to the factory location, but since we are going to be installing the EVO Lever, we modifyed the Rancho exhaust tubes in order to leave the rear space open.
• First we cut out a small section of the exhaust tube then welded it on and installed the exhaust tip.

Now that we have the exhaust relocated and out of the way, it's time to start installing the EVO Lever components.
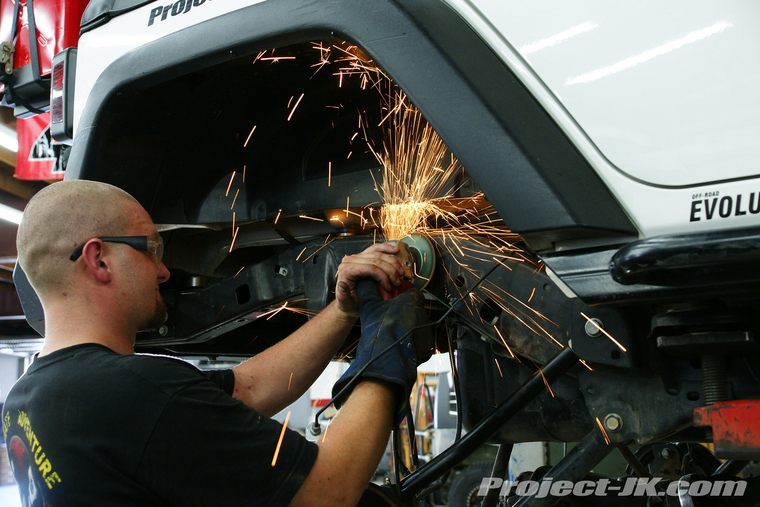
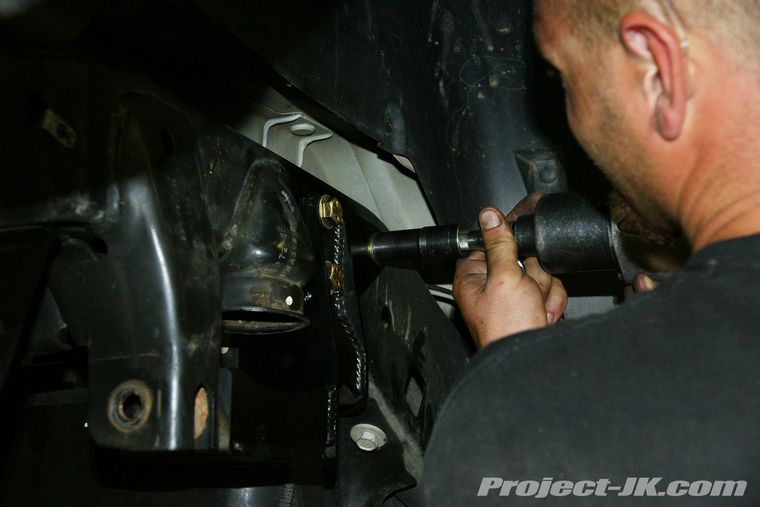
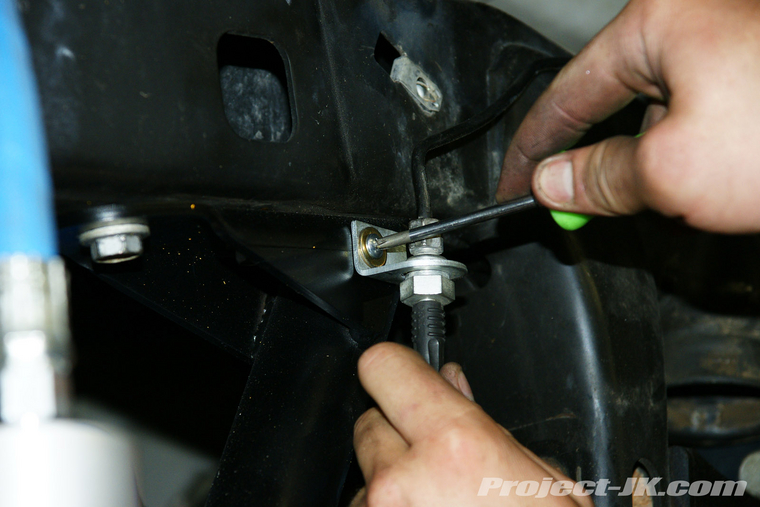
• In order to install the new bump stop bracket, you will need to do a little grinding to smooth out the frame.
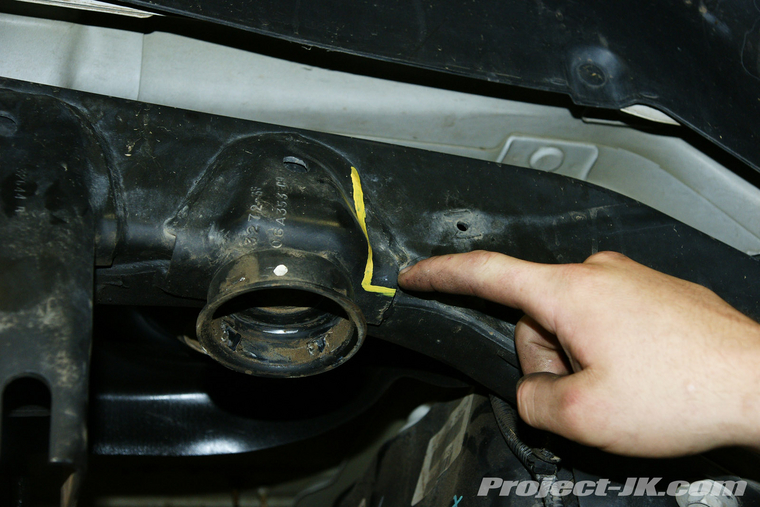
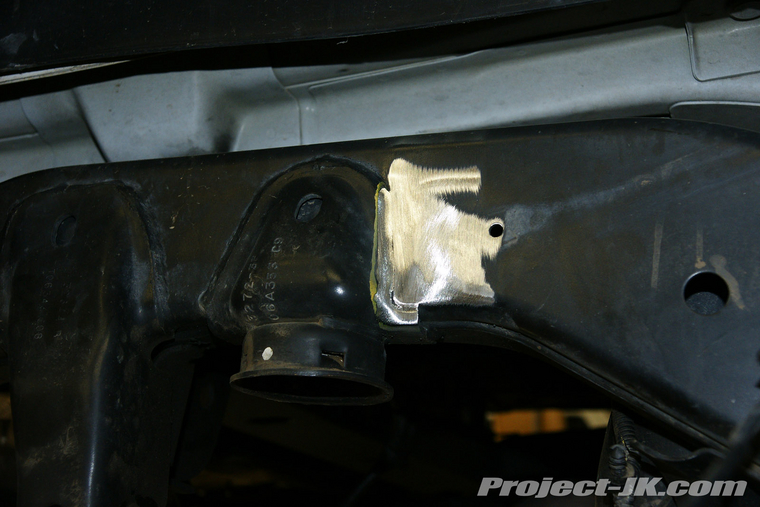
• Tap the bump stop bracket into place on the frame
• Mark and drill the new holes for the bracket
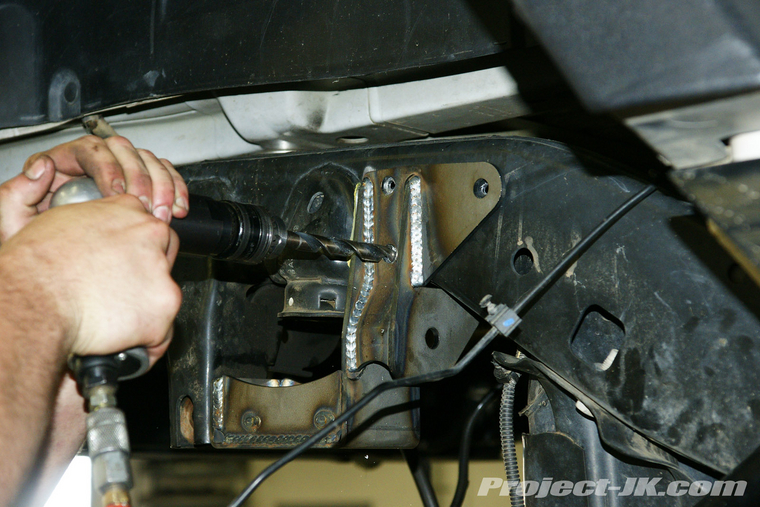
• Insert bolts and tighten
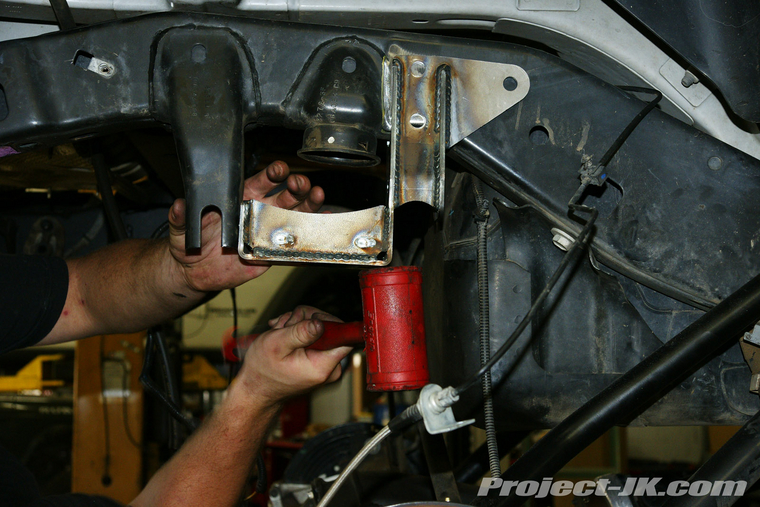
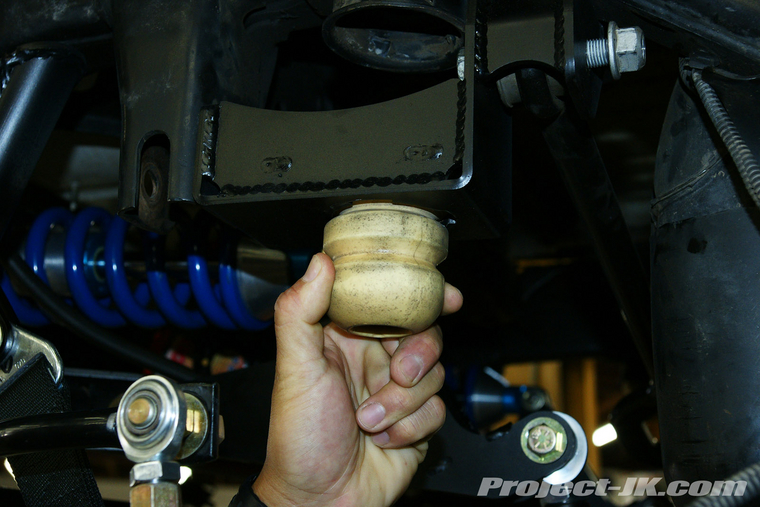
• Install the factory bump stop in the new bracket
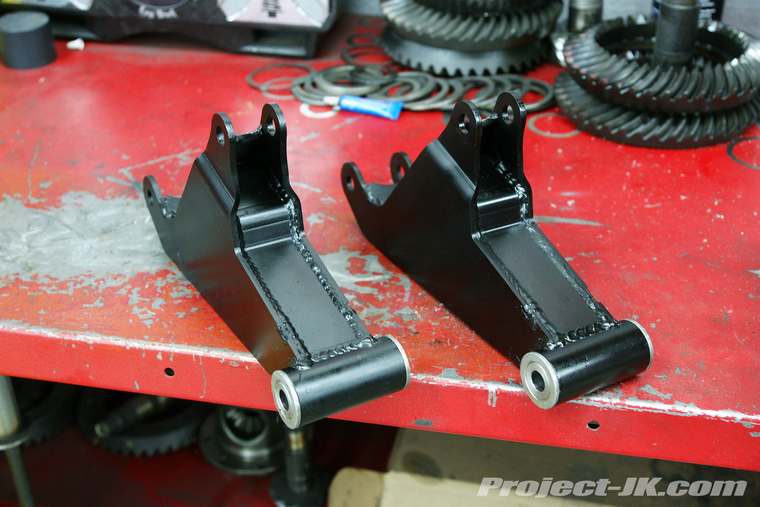
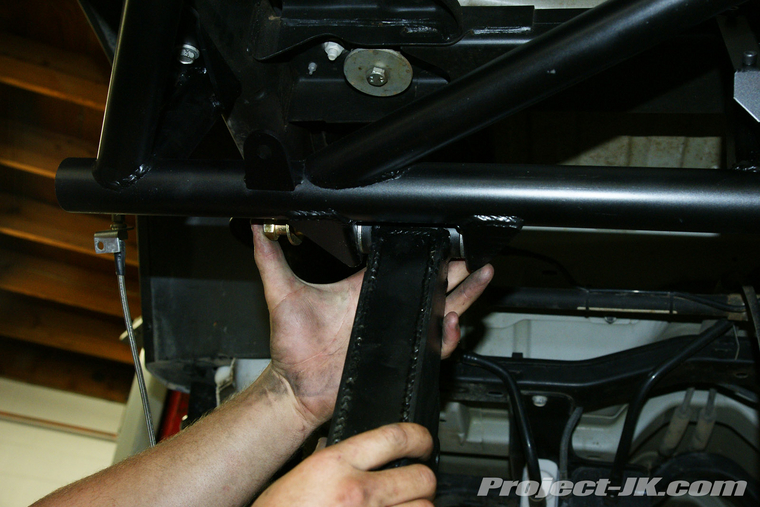
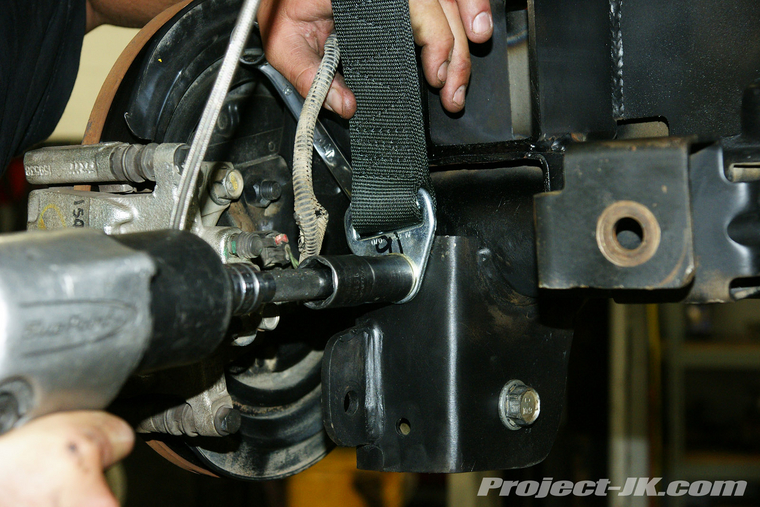
• Bolt on the EVO Lever frame. There are multiple bolt points.
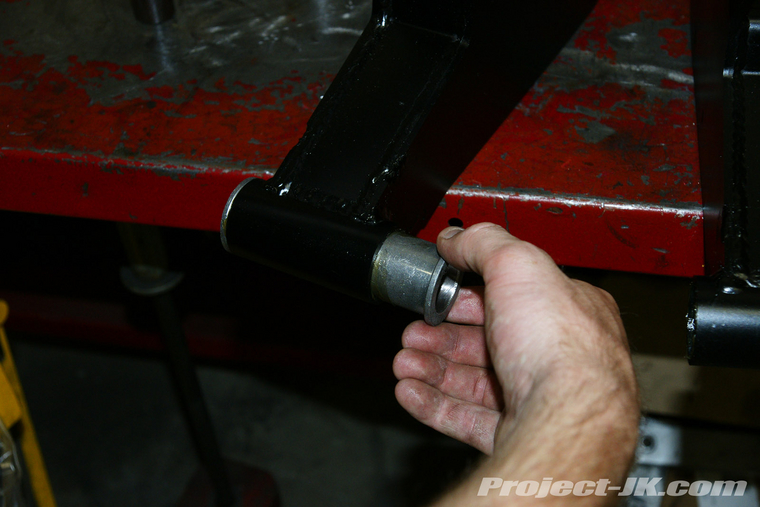
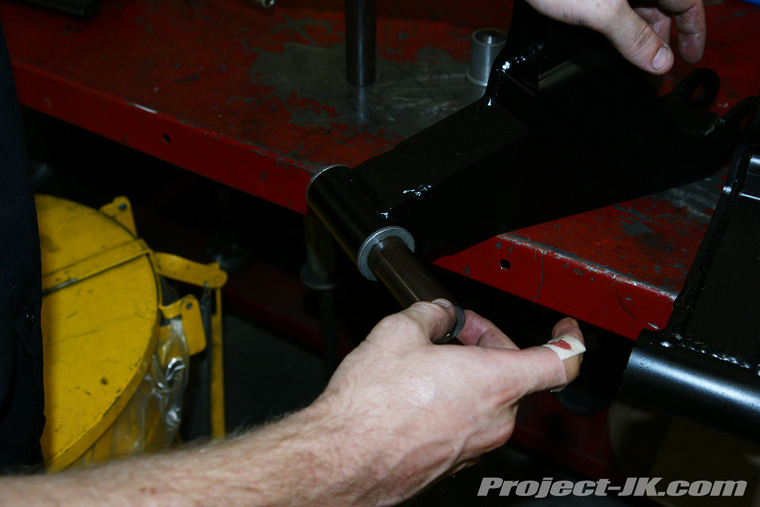
• Grease and assemble the EVO Lever arms
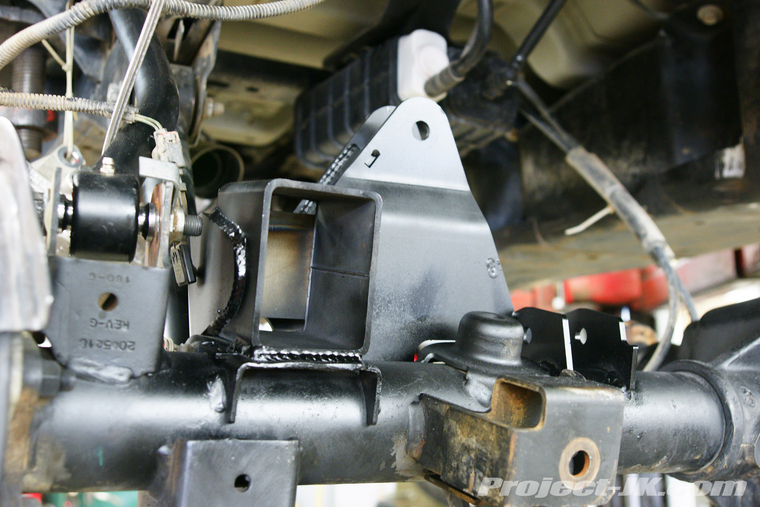
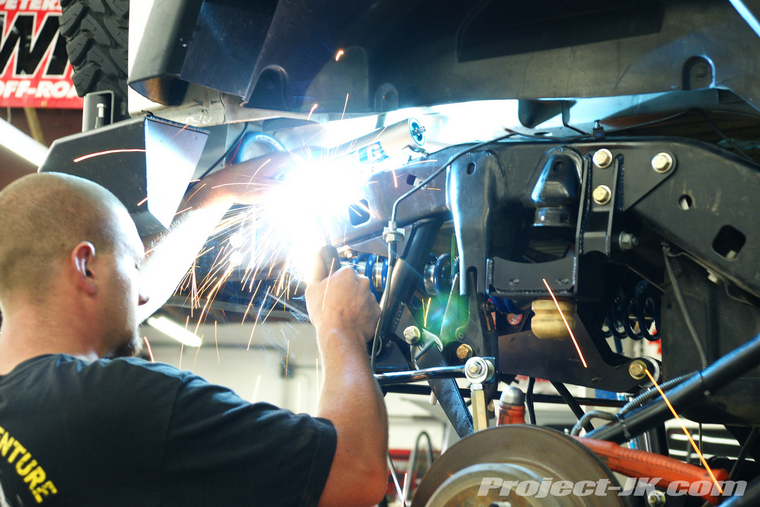
• Weld on the trackbar bracket and bump stop extension. This will also be available as a bolt on bracket.

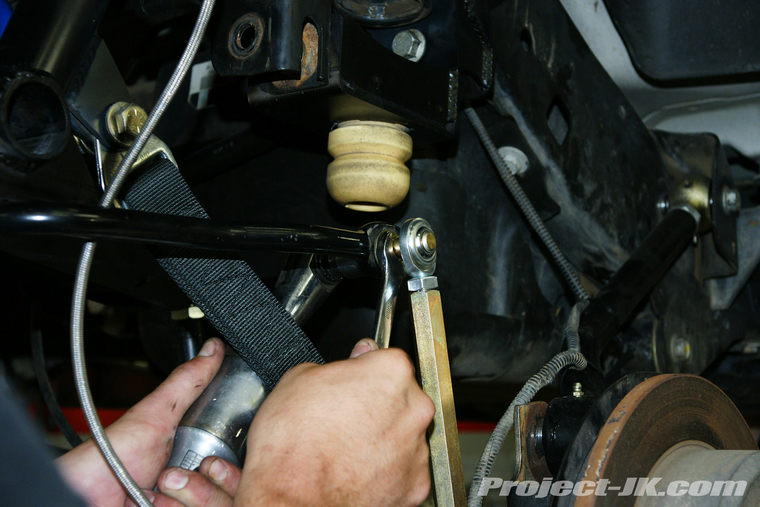
• Install the EVO Lever arms and links on to the frame
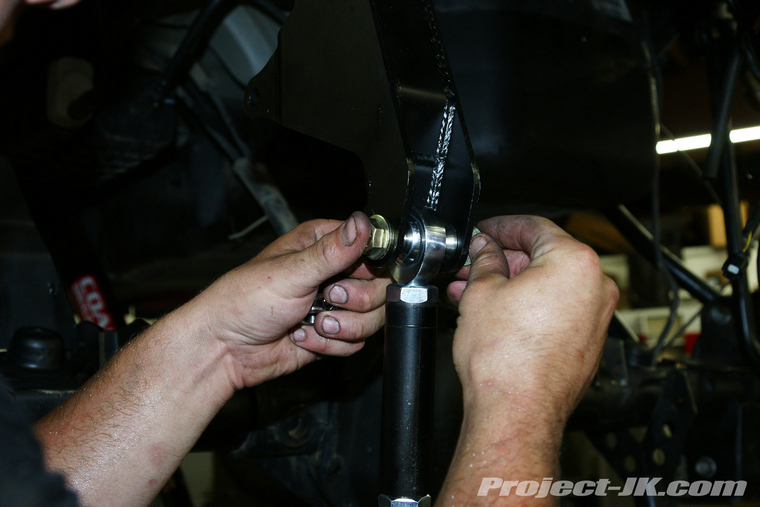
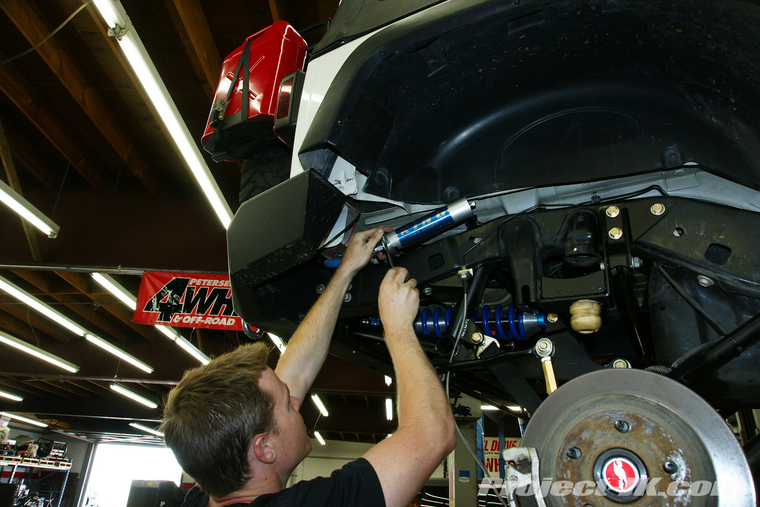
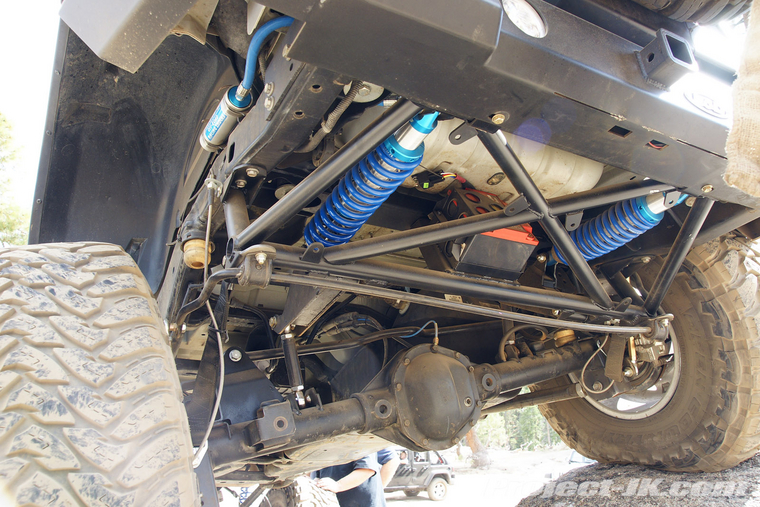
• Install the coil overs on to the EVO Lever arms
• Install limit straps
• Install the factory sway bar on to the EVO frame and attach longer swaybar links
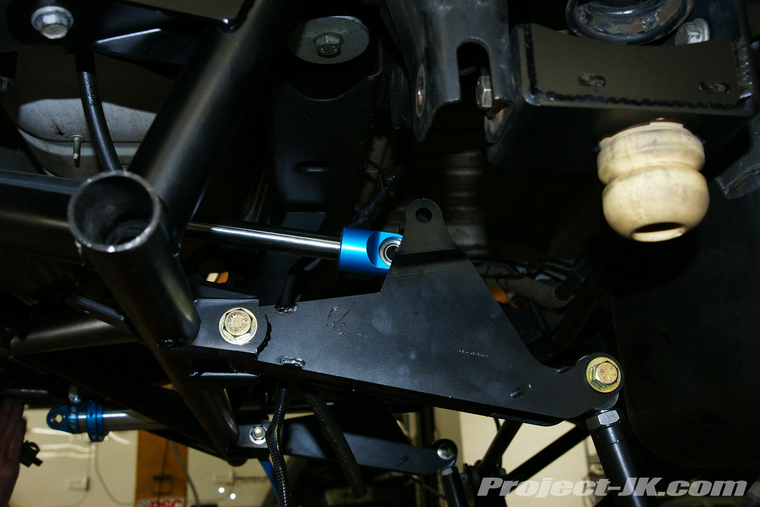
• Locate and weld on the shock reservoir brackets
• And finally, relocate the brake lines
That's it! All Done!
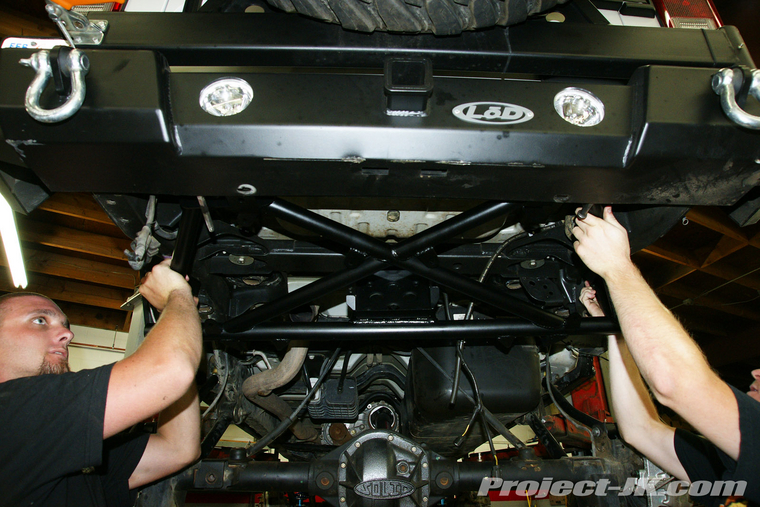
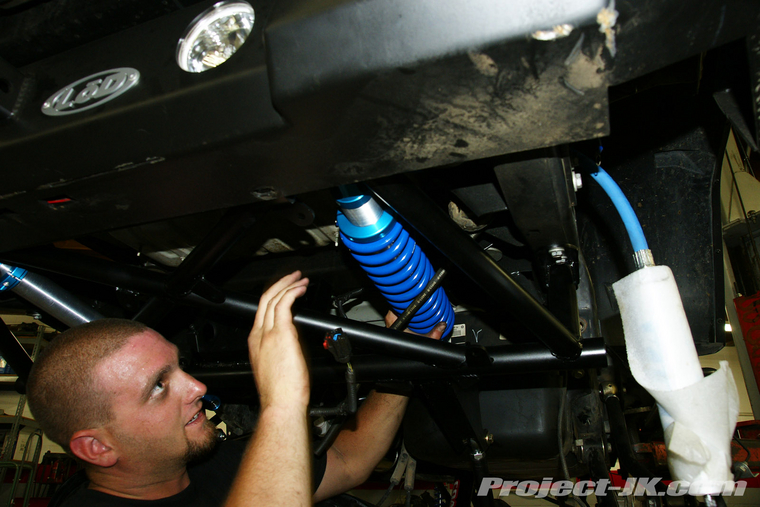
Here are some pics of the EVO Lever on the trail
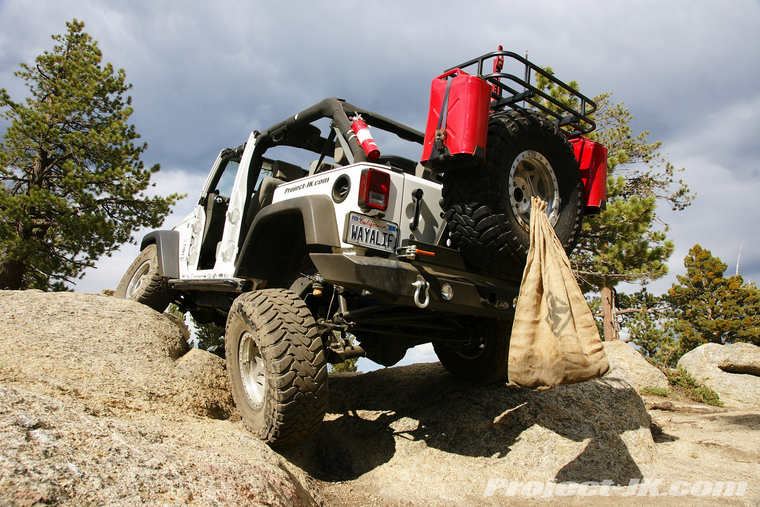
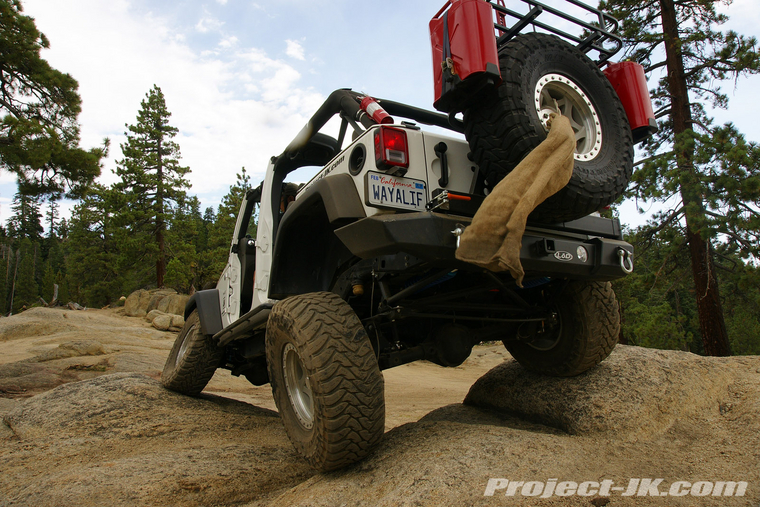

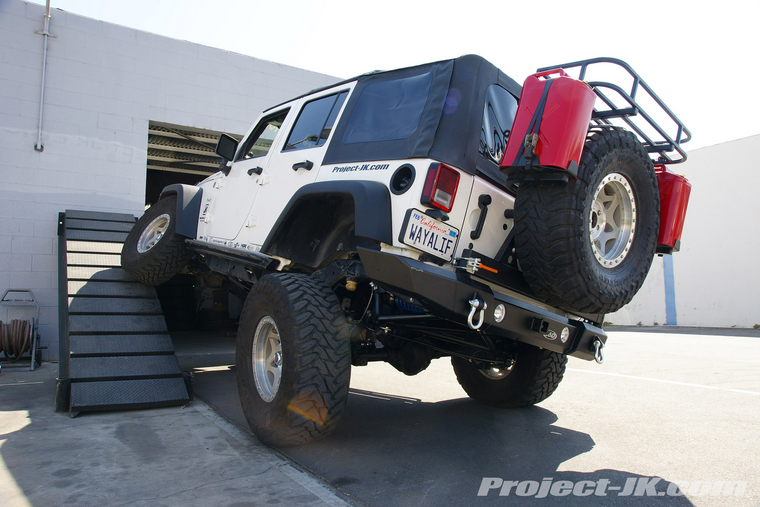
As you can see, the flex offered by the EVO Lever with just a good set of adjustable short control arms is outstanding enough to warrant the use of limiting straps. And, as was the case with the EVO front coilovers, our experience with this setup impressed us enough to question the need for a long arm kit.
As mentioned before, although we had the EVO system welded on, it will be available as a bolt on kit for those who would like to install it themselves. We will be doing a more complete instructional write-up on project-jk.com in the future.
https://www.jk-forum.com/forums/showthread.php?t=52448
Now, while we were getting our new EVO front coilover system installed, we also had the rear EVO Lever system worked in as well and are now highlighting it in this new Part-2 post.
Although we had some of the brackets welded on, this kit will be availale as a complete bolt on system for those who want to do it themselves. Here is a brief overview of the steps required.
• Start by removing your current rear suspension components (shocks, coils, sway bar links, track bar, etc.)
• Remove the rear sway bar as it will need to be relocated.
Because the EVO Lever system is located where the factory muffler is, the exhaust will have to be relocated. To accomplish this we decided to install the Rancho Cat-Back Exhaust Kit but with a slight modification to it.
• Here is a picture of the Rancho Cat-Back Exhaust Kit. It is a complete bolt on kit.
We will be doing a more detailed write-up on the Rancho exhaust system soon.
• Installing the new Rancho muffler
The Rancho exhaust kit comes with all the tubes necessary to route the exhaust to the factory location, but since we are going to be installing the EVO Lever, we modifyed the Rancho exhaust tubes in order to leave the rear space open.
• First we cut out a small section of the exhaust tube then welded it on and installed the exhaust tip.
Now that we have the exhaust relocated and out of the way, it's time to start installing the EVO Lever components.
• In order to install the new bump stop bracket, you will need to do a little grinding to smooth out the frame.
• Tap the bump stop bracket into place on the frame
• Mark and drill the new holes for the bracket
• Insert bolts and tighten
• Install the factory bump stop in the new bracket
• Bolt on the EVO Lever frame. There are multiple bolt points.
• Grease and assemble the EVO Lever arms
• Weld on the trackbar bracket and bump stop extension. This will also be available as a bolt on bracket.
• Install the EVO Lever arms and links on to the frame
• Install the coil overs on to the EVO Lever arms
• Install limit straps
• Install the factory sway bar on to the EVO frame and attach longer swaybar links
• Locate and weld on the shock reservoir brackets
• And finally, relocate the brake lines
That's it! All Done!
Here are some pics of the EVO Lever on the trail
As you can see, the flex offered by the EVO Lever with just a good set of adjustable short control arms is outstanding enough to warrant the use of limiting straps. And, as was the case with the EVO front coilovers, our experience with this setup impressed us enough to question the need for a long arm kit.
As mentioned before, although we had the EVO system welded on, it will be available as a bolt on kit for those who would like to install it themselves. We will be doing a more complete instructional write-up on project-jk.com in the future.
Last edited by wayoflife; 09-01-2008 at 09:25 PM.

 09-02-2008, 05:23 AM
#4
JK-Forum Founder

Join Date: Jul 2006
Location: Laguna Niguel, CA
Posts: 36,534
Likes: 0
Received 16 Likes
on
15 Posts

i blew out my factory rear locker for the 2nd time and was lucky enough to pick up Off Road Evolution's old Sahara 44 with ARB and Superior 35 spline chromo shafts.
09-02-2008, 05:23 AM
#5
JK Super Freak
Join Date: Dec 2007
Posts: 1,235
Likes: 0
Received 0 Likes
on
0 Posts
WOW! That is absolutely impressive. Your JK is wicked, WOL.
Curious about that exhaust though. I understand why you ended the system where you did, but it seems like a bad idea to exhaust it under the JK. Why not route the pipe out to the side a bit, in front of the wheel well or something? I can't imagine that's good for breathing while driving, especially if you've got the drain plugs pulled.
----------------
Now playing: Phil Western - Its Ok If Your Bells Are Digital
via FoxyTunes


