
LED light bar mounting and wiring
 12-01-2013, 07:03 PM
#1
JK Enthusiast
Thread Starter
Join Date: Jan 2013
Location: United States
Posts: 174
Likes: 0
Received 0 Likes
on
0 Posts
I just ordered a 20" and 4 6" led light bars for my gobi stealth rack. I am exploring different mounting and wiring options and wanted to see what you guys have done. Any pictures of your mounts or wiring would be greatly appreciated. Also anyone with a gobi rack, I would love to see where your wires are ran.
Thanks!!
Now show off those awesome lights!!
Thanks!!
Now show off those awesome lights!!
 12-01-2013, 08:24 PM
#3
JK Jedi
No Gobi rack but I have a ton of lights lol
50" Hanma light bar
20" Hanma light bar
3 BlitzPro Hawk 6D lights(1 in the rear)
2 PIAA 85watt 520 series lights (halogen )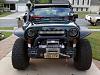
I wired them all the same, a basic accessory relay, and inline fuse. I just use the diagram that confess with the relay
50" Hanma light bar
20" Hanma light bar
3 BlitzPro Hawk 6D lights(1 in the rear)
2 PIAA 85watt 520 series lights (halogen )
I wired them all the same, a basic accessory relay, and inline fuse. I just use the diagram that confess with the relay
12-01-2013, 09:39 PM
#4
JK Super Freak
No Gobi rack but I have a ton of lights lol
50" Hanma light bar
20" Hanma light bar
3 BlitzPro Hawk 6D lights(1 in the rear)
2 PIAA 85watt 520 series lights (halogen )<img src="https://www.jk-forum.com/forums/attachment.php?attachmentid=513833"/>
I wired them all the same, a basic accessory relay, and inline fuse. I just use the diagram that confess with the relay
Do you mind posting up pics of the wiring and switch panel or where you put the switches?
Going to be ordering some as well
12-02-2013, 01:28 AM
#5
JK Jedi Master


I don't have LED lights, but I do have a few.

Some thoughts:
1. Putting all of those lights you propose on separate circuits with the typical wiring harness provided by the light manufacturer will create a real rats nest of wiring under your hood. An sPOD, or something similar that you can put together, will clean that up.
2. Over the Road and the Through the Woods (OTRATTW.com) can provide custom imprinted switch labels for your lights.
3. I drilled a hole in the curved panel just to the driver's side of the hood cowel and ran the wiring up through it into my MBRP overhead rack extension. Makes for a very clean install with mostly hidden cabling.
4. I used Weatherpac connectors at the lights, as well as other appropriate places (one at that hood cowel hole to allow quick removal of the rack extension). You can get Weatherpacs, along with the necessary crimping tool (there are two--one expensive and one not quite so expensive), colored wiring, Spectroflex loom, and adhesive-lined heatshrink from spectrowireandcable.com. If you do it right, you will have a very professional looking install.
12-02-2013, 06:47 AM
#6
JK Jedi
I don't have LED lights, but I do have a few.
Some thoughts:
1. Putting all of those lights you propose on separate circuits with the typical wiring harness provided by the light manufacturer will create a real rats nest of wiring under your hood. An sPOD, or something similar that you can put together, will clean that up.
2. Over the Road and the Through the Woods (OTRATTW.com) can provide custom imprinted switch labels for your lights.
3. I drilled a hole in the curved panel just to the driver's side of the hood cowel and ran the wiring up through it into my MBRP overhead rack extension. Makes for a very clean install with mostly hidden cabling.
4. I used Weatherpac connectors at the lights, as well as other appropriate places (one at that hood cowel hole to allow quick removal of the rack extension). You can get Weatherpacs, along with the necessary crimping tool (there are two--one expensive and one not quite so expensive), colored wiring, Spectroflex loom, and adhesive-lined heatshrink from spectrowireandcable.com. If you do it right, you will have a very professional looking install.
Sent from my obama monitoring device
12-02-2013, 08:41 AM
#7
JK Jedi Master
sPOD is a great device, but cheap it isn't. Honestly, if you can live without the very nice remote control housing (I showed it above), then there are generic fuse and relay boxes that you could easily wire up for well under $50 (not including all that nice wiring and loom and such that I recommended--add another $50 or so for that). That would mean you're living with whatever interior switch solutions you come up with, and you'd also lose the battery low-voltage cut-off circuit (shuts down everything on the sPOD in the event of too low of a battery current--may be disabled if desired). But, you'd save a lot of coin for other work.
Trending Topics
12-02-2013, 04:10 PM
#8
JK Enthusiast
Thread Starter
Join Date: Jan 2013
Location: United States
Posts: 174
Likes: 0
Received 0 Likes
on
0 Posts
Thanks for the replies so far!! I've looked at the spod, but can't justify the $$. My plan is to order otrattw switches to go in a rr a pillar mount. The 20" will be on one circuit mounted to the center of the light bar. Two 6" in the front (outside of the 20) and two 6" out back on separate circuits as well. Hopefully that will be enough lighting until I upgrade stock headlights and fogs!! I am pulling up those connectors now, thanks.
12-02-2013, 04:50 PM
#9
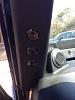
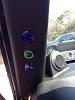
I installed three Plasmaglow led switches in my stock a pillar for my 50", duallys and 6" rigid sr reverse lights. Didn't want to have to deal with the fitment and color match issues that some have with the rr panel.
12-02-2013, 05:30 PM
#10
JK Jedi
That looks nice Matt. I opted for the spod and really like it. Makes wiring a breeze. I admit it was a bit pricey but I like my stuff to be clean and organized and I new I couldn't do that on my own...