
Interior Modifications.

 06-12-2012, 08:48 PM
#22
JK Newbie
Join Date: Mar 2012
Location: San luis az
Posts: 99
Likes: 0
Received 0 Likes
on
0 Posts
Originally Posted by oO_Rogue_Oo
Since people are posting pics for ideas here are a few of my interior
Left of the headuint is an ultra-gauge, on the right is radio mic and above is a TrailGuide GPS
12 VoltGuy winch controls left of the steering wheel
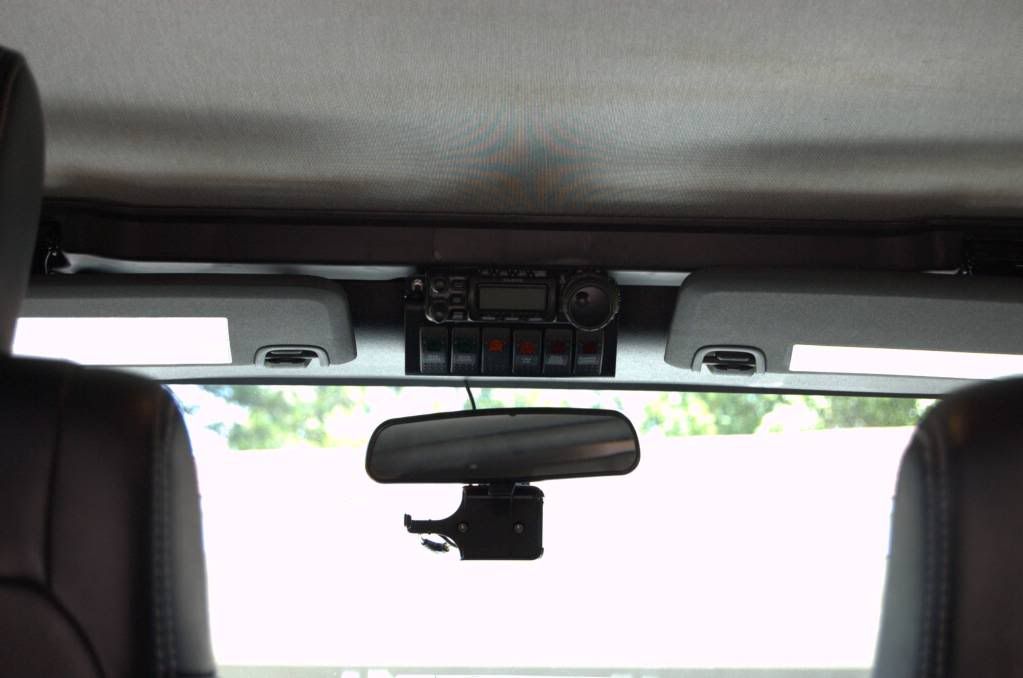
Above the rearview mirror is a switch control module that has to remain nameless here and the control face for my Ham radio
Added a couple of 1" footmans loops at the side of each seat to keep the seatbelts from flapping
The Velcro is captured so it stays in place when not in use
Tuffy underseat drawer provides secure storage; you can also catch a glimpse of the Springtail Customs center console saddle
MOLLE setup on the tailgate
MOLLE setup on the doors
Flashlight mount on the back of the soundbar
bags on the back of the seats
Springtail customs saddle
TrailGuide deployed
Fire extingusher
RAM mount on the rearview mirror for the iPhone
Left of the headuint is an ultra-gauge, on the right is radio mic and above is a TrailGuide GPS
12 VoltGuy winch controls left of the steering wheel
Above the rearview mirror is a switch control module that has to remain nameless here and the control face for my Ham radio
Added a couple of 1" footmans loops at the side of each seat to keep the seatbelts from flapping
The Velcro is captured so it stays in place when not in use
Tuffy underseat drawer provides secure storage; you can also catch a glimpse of the Springtail Customs center console saddle
MOLLE setup on the tailgate
MOLLE setup on the doors
Flashlight mount on the back of the soundbar
bags on the back of the seats
Springtail customs saddle
TrailGuide deployed
Fire extingusher
RAM mount on the rearview mirror for the iPhone
 01-18-2014, 08:13 AM
#25
JK Enthusiast

I have never taken apart the dash but I did use a Ram Mount to mount my iPad and have tons of other interior mods...hope you manage to get some good ideas.
Attachment 311757
Attachment 311757
01-18-2014, 09:08 AM
#26
JK Enthusiast
I did my interior done in "A-Tacs" camo. First had the trip pieces dipped, and then had Trek Armor do some custom seat covers. I am starting to begin doing the outside with some also to match the interior.


Maybe this will help with your ideas
Cheers
Maybe this will help with your ideas
Cheers
01-18-2014, 04:12 PM
#28
JK Enthusiast
Join Date: Nov 2010
Location: saskatchewan
Posts: 185
Likes: 0
Received 0 Likes
on
0 Posts
Sent from my recliner
01-18-2014, 04:31 PM
#29
JK Enthusiast
"Dipping" basic explanation, the piece to be done goes thru a multi step process, it is first cleaned and then sprayed with the appropriate base coat color that will complete the final pattern. The pattern is laid out on water in a tank, then sprayed with a chemical that turns the pattern into liquid, the piece is then, "dipped" thru the pattern and becomes completely coated. After drying it is then sprayed with a clear coat, either high gloss or flat.
This is the process that is done for cars that have a "wood grain" dash, of course the dash is not wood it has been dipped into a wood pattern that looks like the actual wood grain. If you do a "You Tube" search for " water transfer printing" and/or " transfer dipping" you will be able to get a real good look at the process.
Cheers