
Custom modular JK hardtop
 09-26-2015 | 11:22 AM
#543

JK Enthusiast
Joined: Aug 2012
Posts: 266
Likes: 9
From: Myrtle Beach, SC
Saw this gem the other day. Land Rover Discovery top. If you can look closely yo can see that it is not quite flush with the JK body. Otherwise the old guy did a decent job getting it on there. Over the back window it even say Jeep Rover
09-26-2015 | 12:37 PM
#544

Thread Starter
JK Super Freak
Joined: Jul 2012
Posts: 1,556
Likes: 37
From: Elmira, NY
Saw this gem the other day. Land Rover Discovery top. If you can look closely yo can see that it is not quite flush with the JK body. Otherwise the old guy did a decent job getting it on there. Over the back window it even say Jeep RoverAttachment 625579

Whoever did it did a nice job though, looks very well done.
I rotated and enhanced your photo a bit:

Maybe it should be called a LandWrangler instead of a Jeep Rover?
09-29-2015 | 07:16 AM
#546
Thread Starter
JK Super Freak
Joined: Jul 2012
Posts: 1,556
Likes: 37
From: Elmira, NY
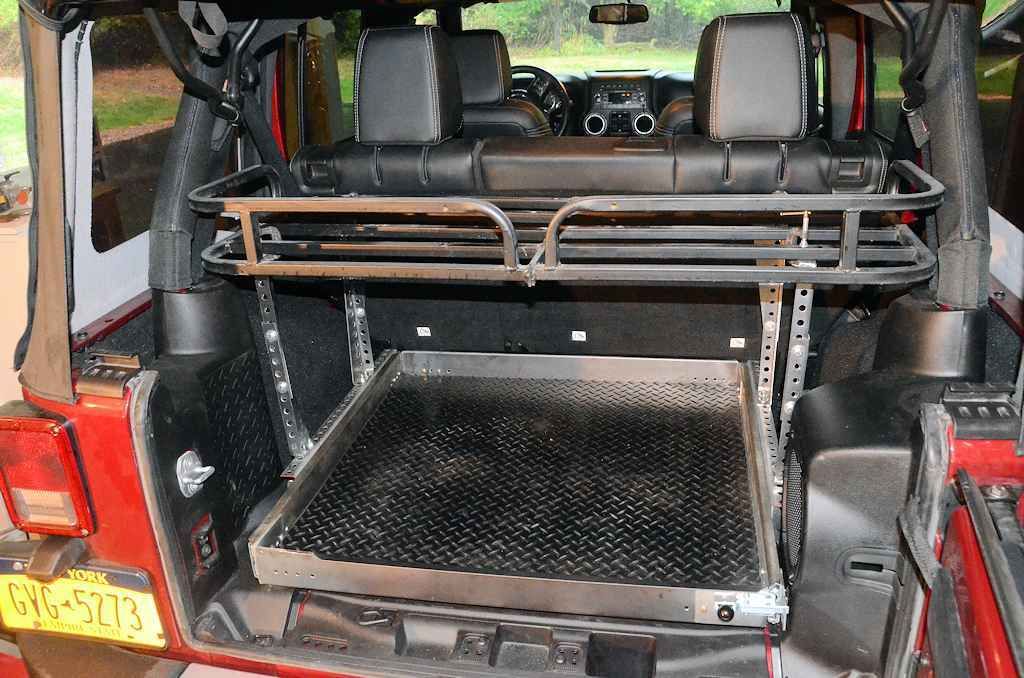
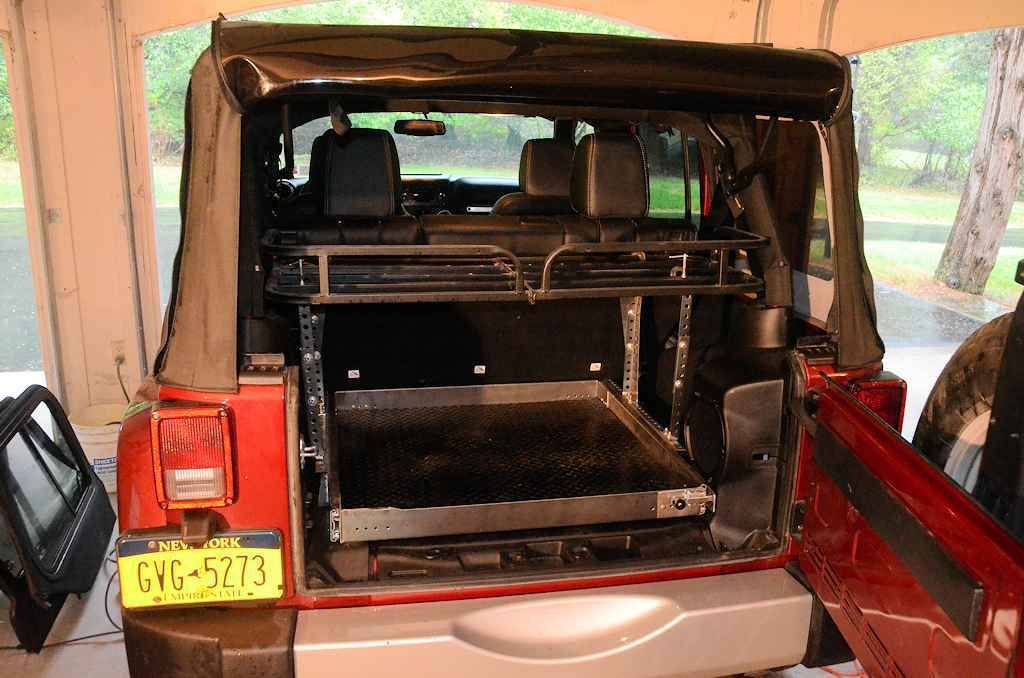
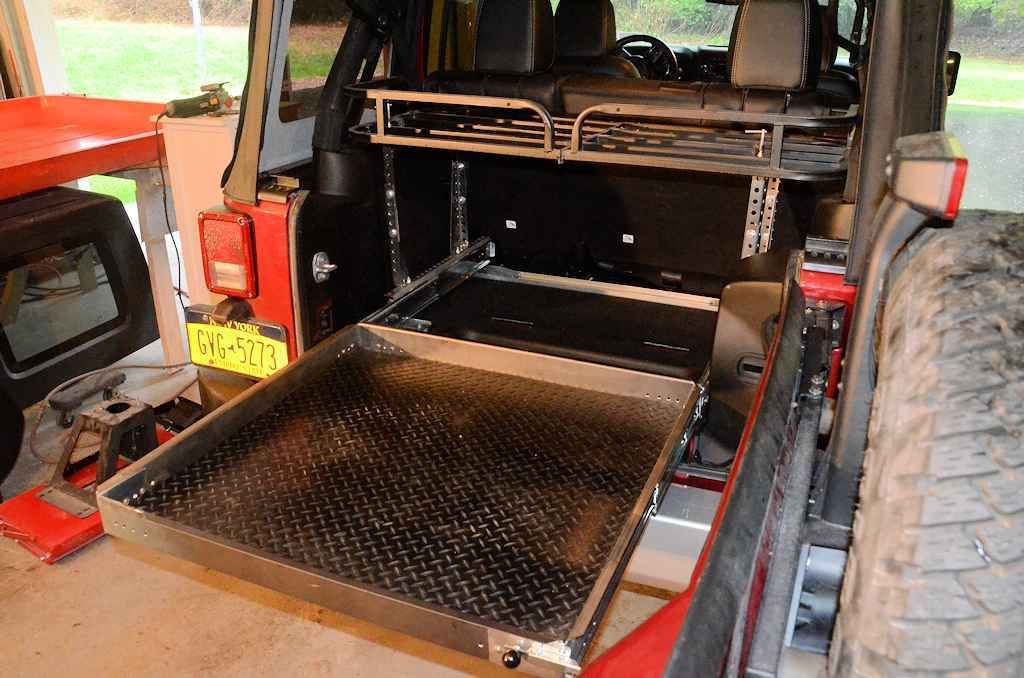
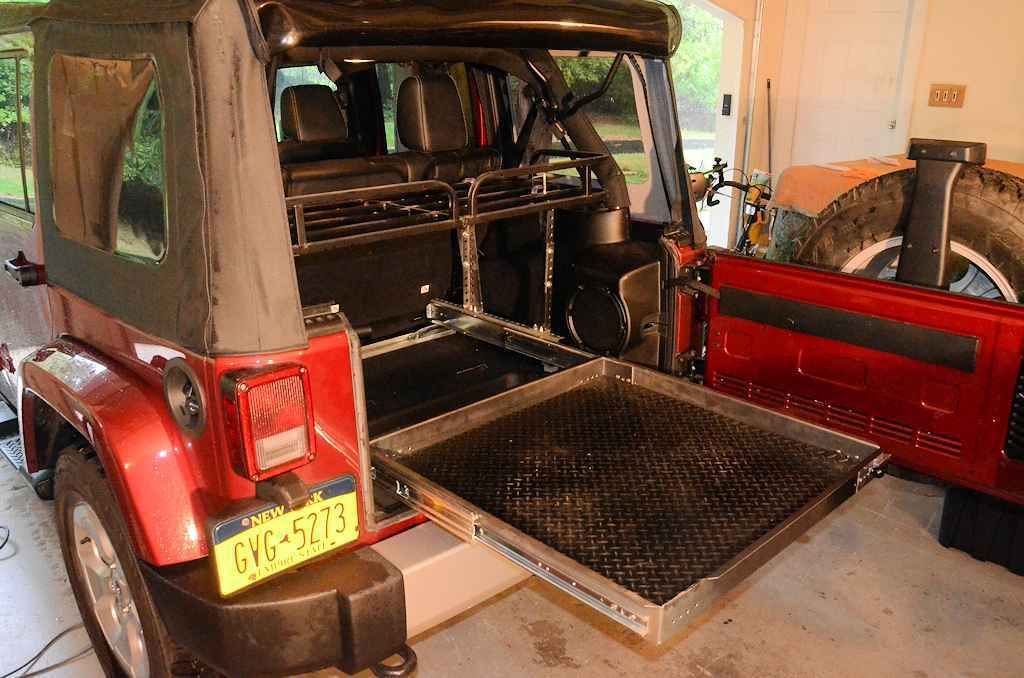
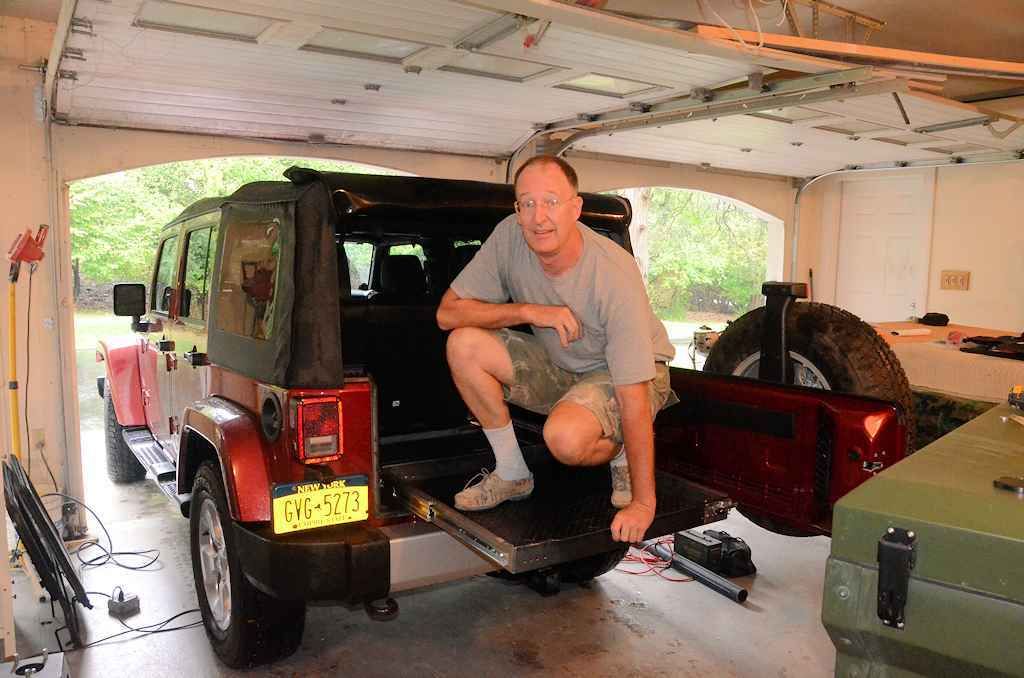
I got the prototype cargo/slide system installed in the JKU this morning. The slide has a 250+ lb. capacity, and there's a shelf mounted above the slide. The shelf height is adjustable, in this photo it's just over the midpoint of the height adjustment. This shelf is a bit wide to mount much lower, but this is just a cargo rack I borrowed from my trailer and won't be the final shelf. At maximum height, an ARB 50-qt. fridge/freezer will fit on the slide under the shelf, and minimum height the shelf is about level with the top of the tub.
A 6'-6" 235-lb. gorilla testing the weight capacity of the slide:
More testing...
http://www.youtube.com/watch?v=_9w1JvfSaTA Some cargo.

Now that this project is more or less done I can get back to working on the JK Safari Cab.
A 6'-6" 235-lb. gorilla testing the weight capacity of the slide:
More testing...
http://www.youtube.com/watch?v=_9w1JvfSaTA Some cargo.
Now that this project is more or less done I can get back to working on the JK Safari Cab.
Last edited by jscherb; 09-29-2015 at 07:49 AM.
10-02-2015 | 06:03 AM
#547
Thread Starter
JK Super Freak
Joined: Jul 2012
Posts: 1,556
Likes: 37
From: Elmira, NY
I haven't been able to make any progress on the JK Safari Cab for the past month due to other projects like the cargo slide, travel, etc. Today I'm back on it - I'm making the mold for the last required fiberglass part - the windshield header. This part will get bonded into the inside of the roof, and will be where the latches mount to secure the roof to the windshield.
I've made a wooden master for the part (the red part), and it's held into the roof mold with double-sided tape. The reason it's in the roof mold is so I can form a flange on the part that exactly matches the contour of the roof. Modeling clay is used to form a nice fillet between the master part and what will become its mounting flange.
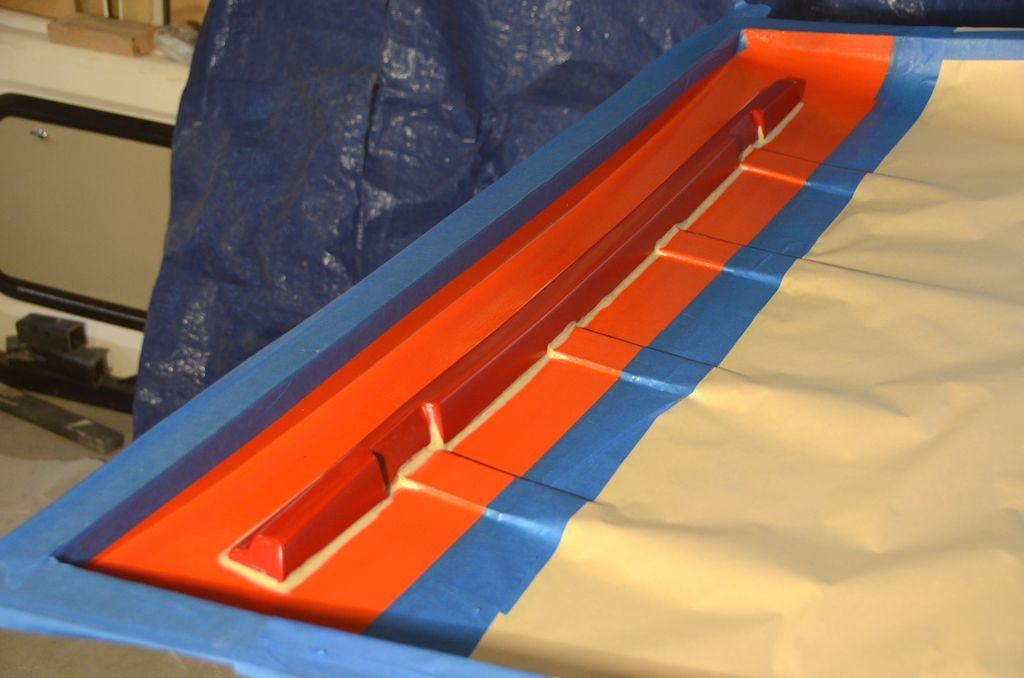
In the photo above it's waxed and had the mold release sprayed on it, as soon as the mold release dries I'll begin the fiberglass work.
Today I'll make the mold, and tomorrow I'll use the resulting mold to make the header.
I'm also scheduled to have a call today with a company that's interested in the Safari Cab.
I've made a wooden master for the part (the red part), and it's held into the roof mold with double-sided tape. The reason it's in the roof mold is so I can form a flange on the part that exactly matches the contour of the roof. Modeling clay is used to form a nice fillet between the master part and what will become its mounting flange.
In the photo above it's waxed and had the mold release sprayed on it, as soon as the mold release dries I'll begin the fiberglass work.
Today I'll make the mold, and tomorrow I'll use the resulting mold to make the header.
I'm also scheduled to have a call today with a company that's interested in the Safari Cab.
10-03-2015 | 03:38 AM
#548
JK Super Freak
Joined: Sep 2010
Posts: 1,103
Likes: 3
From: Central Ny
I hope the company decides to produce this ; Nice alternative to Factory hardtop. I'm looking forward to the side window Retrofit for the 2door, 2015. The price of the window mod will be more in line with the budget cconscious .
10-03-2015 | 04:26 AM
#549
Thread Starter
JK Super Freak
Joined: Jul 2012
Posts: 1,556
Likes: 37
From: Elmira, NY
I met with the RV window company on Thursday, and the hardtop retrofit window kit is moving forward, although that's a back burner project - the JK half door slider window project is the first priority there. The first production order for those slider windows is underway, so the half door window kits should hopefully hit the market in October.
10-03-2015 | 10:56 AM
#550
Thread Starter
JK Super Freak
Joined: Jul 2012
Posts: 1,556
Likes: 37
From: Elmira, NY
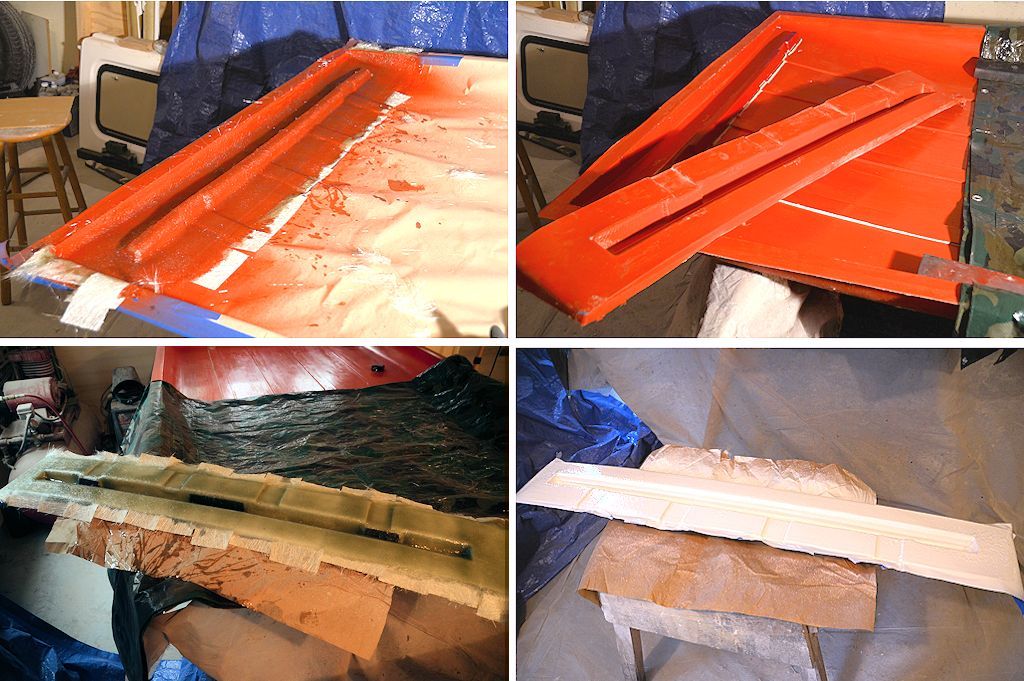
Yesterday I made the mold for the hardtop windshield header; today I used that mold to make the header itself. Clockwise from top left:
- The mold as it looked when I finished yesterday, the fiberglass layup is complete and it was left on the master parts overnight to cure.
- This is what the mold looked like when I popped it off the master this morning. It is shown right after I trimmed the rough edges of the fiberglass off; they're dangerous so trimming them off right away is important. I haven't washed the mold release off yet.
- The mold shot with white gelcoat as the first step in making the header
- The fiberglass layup of the header is finished. I'll let this cure overnight and pop the header out of the mold tomorrow morning. I've embedded metal plates in the fiberglass to serve as nut plates for attaching the latches.
Last edited by jscherb; 10-04-2015 at 06:51 AM.