
Custom modular JK hardtop
 08-25-2015 | 07:04 AM
#521

Thread Starter
JK Super Freak
Joined: Jul 2012
Posts: 1,556
Likes: 37
From: Elmira, NY
I've assembled most of the parts (except for the roof panel) on the workshop floor so I can make a few small tweaks to the drip rail parts. Also I wanted to make sure the second set of side panels bolted up interchangeably with the set with the vent windows, in these photos I've got the driver's side cargo hatch panel installed.
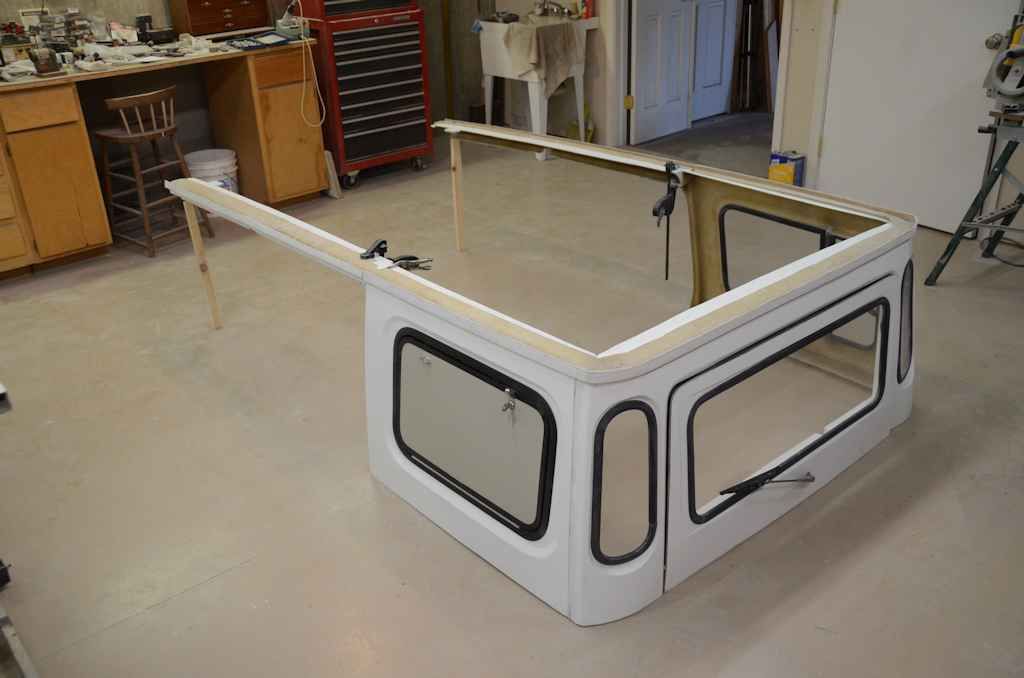


The parts are now ready to go back on the Jeep so I can do a final trim on the roof panel.
The parts are now ready to go back on the Jeep so I can do a final trim on the roof panel.
08-26-2015 | 01:45 PM
#522
Thread Starter
JK Super Freak
Joined: Jul 2012
Posts: 1,556
Likes: 37
From: Elmira, NY
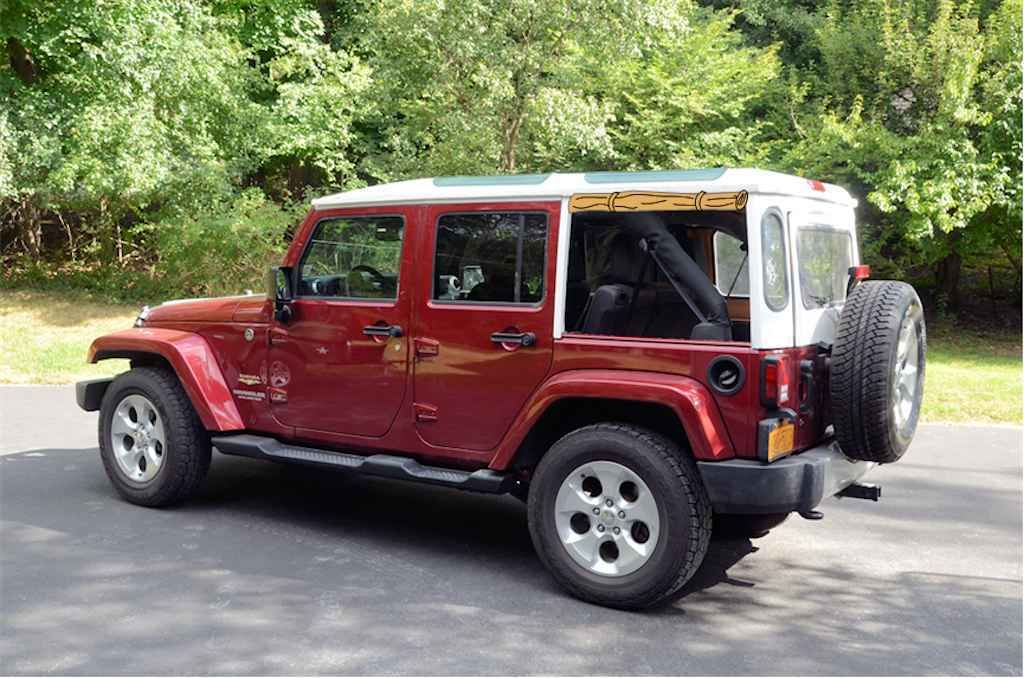
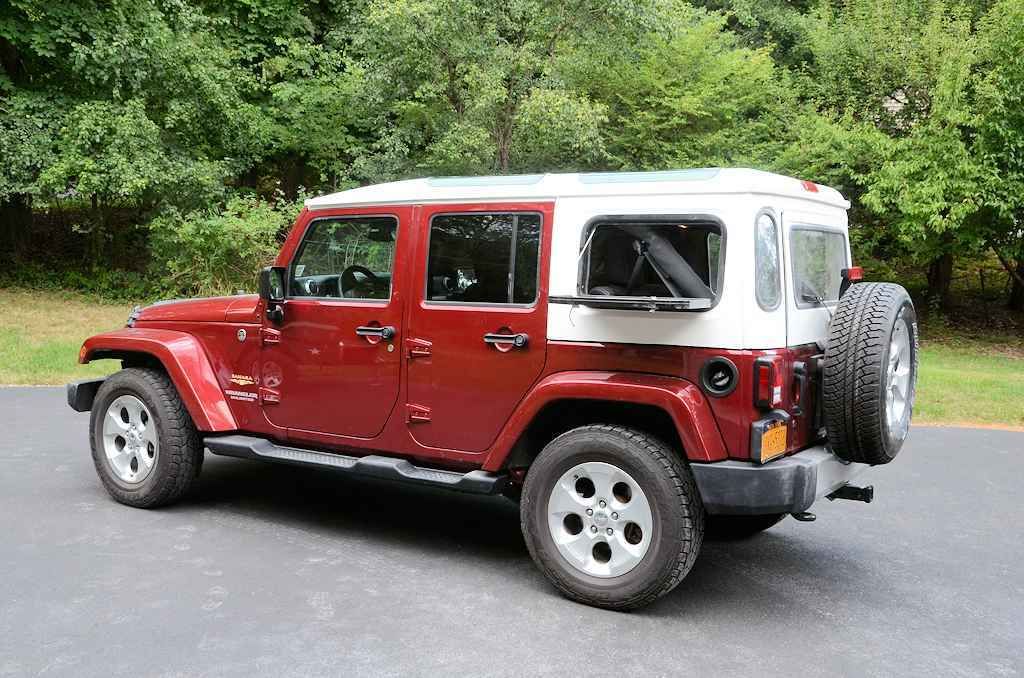
I did the second test fit of the Safari Cab parts on the JK today. Here's a shot with the sides, back panel and upper jambs in place.
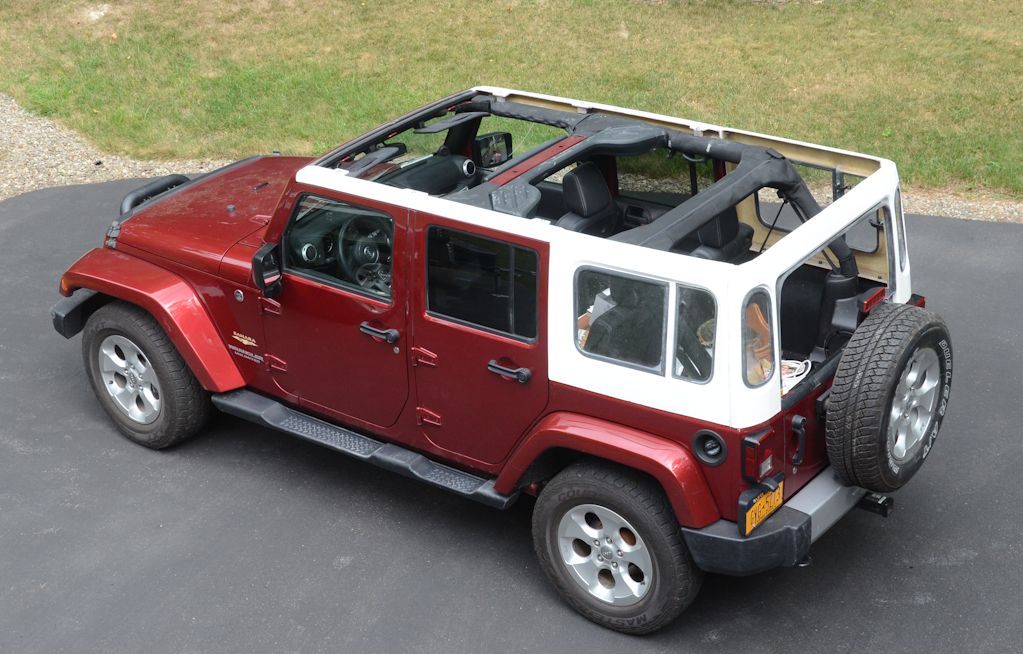
The next step was the drip rails; these get bolted to the tops of the side panels and jambs, and serve as the mounting flange to secure the roof to the rest of the hardtop. In this photo they're held in place with clamps, it was taken just before I drilled the bolt holes. The drip rail goes along the full length of the sides and across the back.
Next I'll do a little more trimming to fit the roof panel exactly to the drip rails.
08-26-2015 | 01:49 PM
#523
Thread Starter
JK Super Freak
Joined: Jul 2012
Posts: 1,556
Likes: 37
From: Elmira, NY
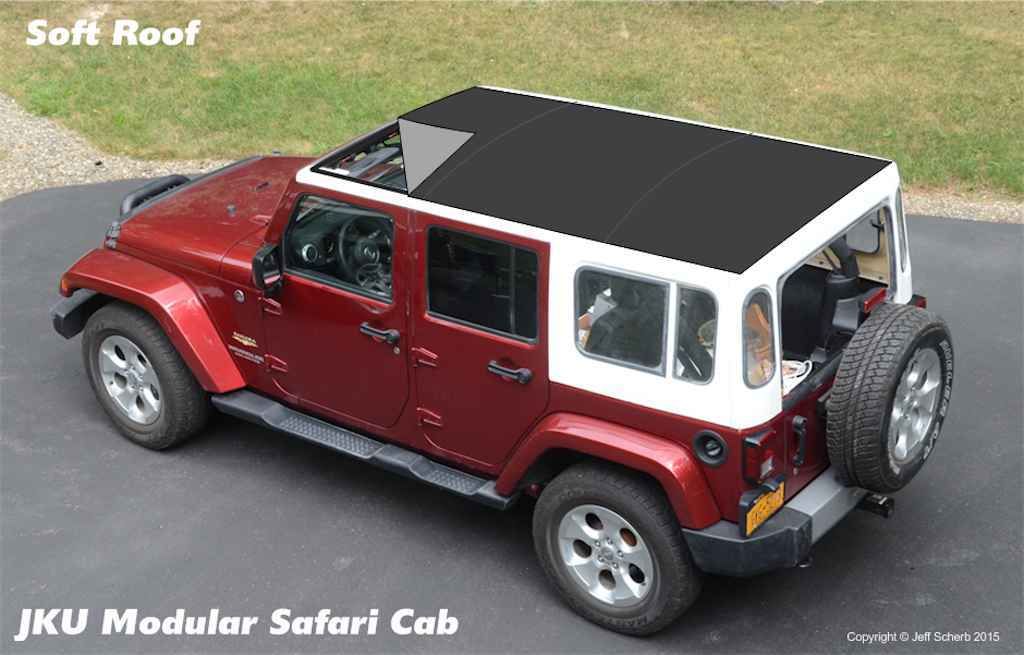
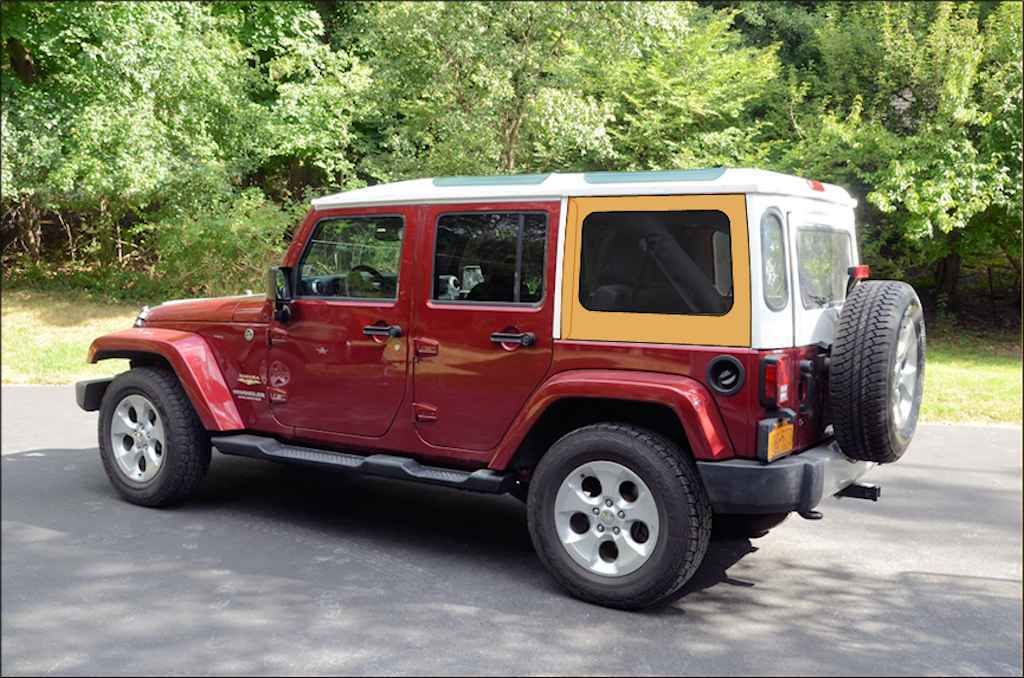
Part of the design all along has been that the roof panel can be swapped for a soft roof. The soft roof would be very similar to a pickup truck tonneau cover. Here's an edit of a photo from my last post with the soft roof draw in place.
08-27-2015 | 02:57 AM
#524
Thread Starter
JK Super Freak
Joined: Jul 2012
Posts: 1,556
Likes: 37
From: Elmira, NY
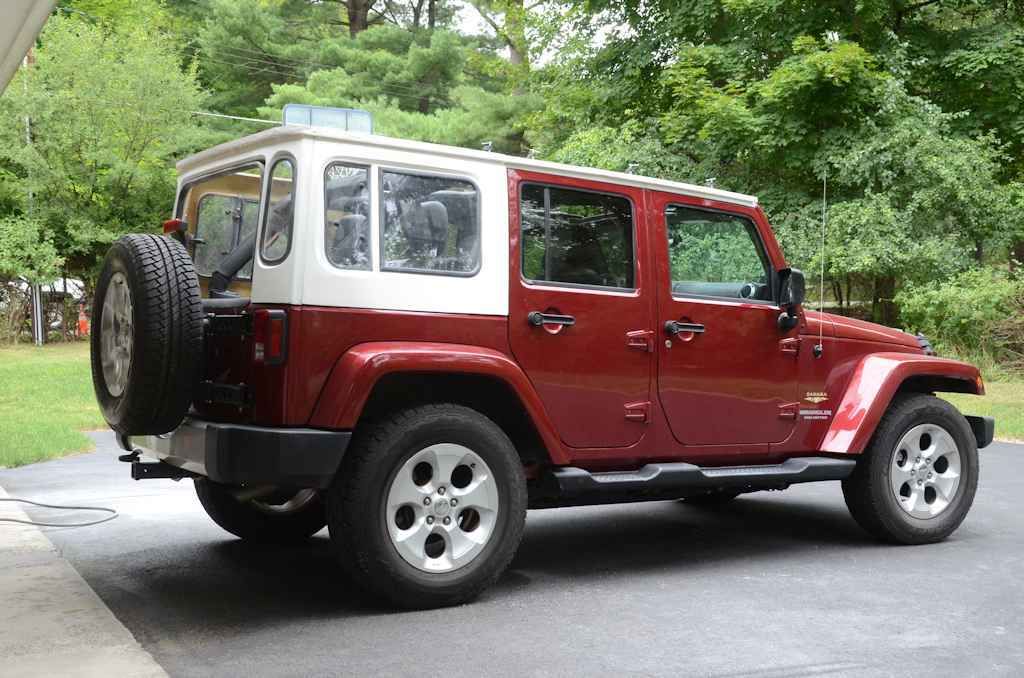
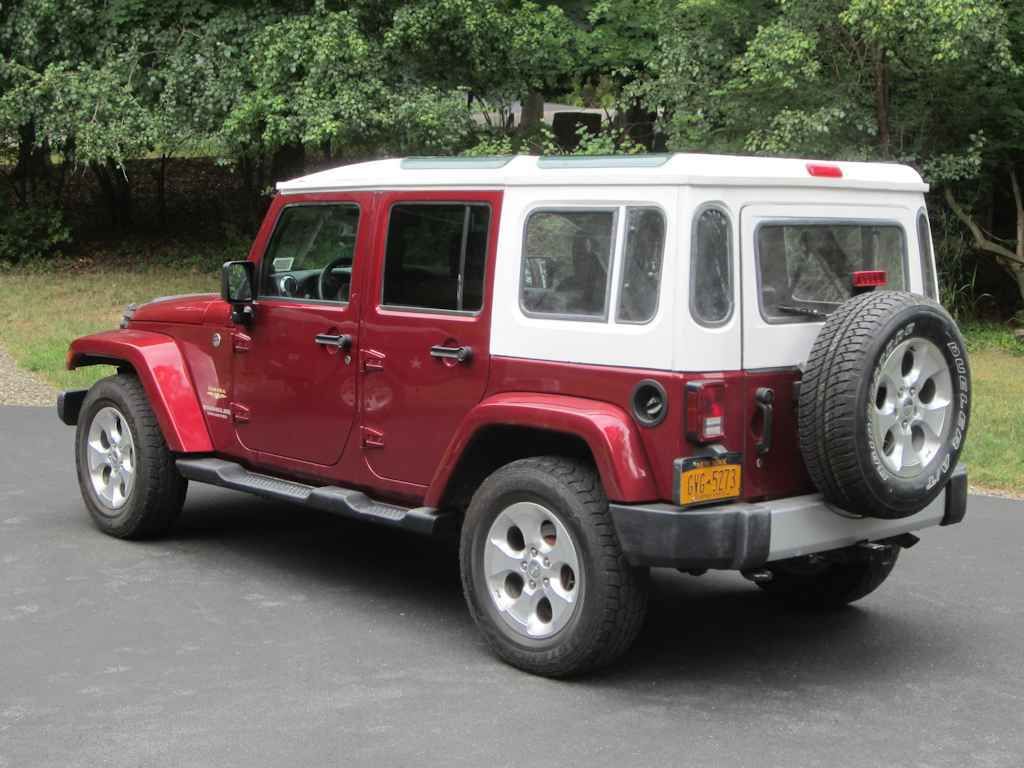
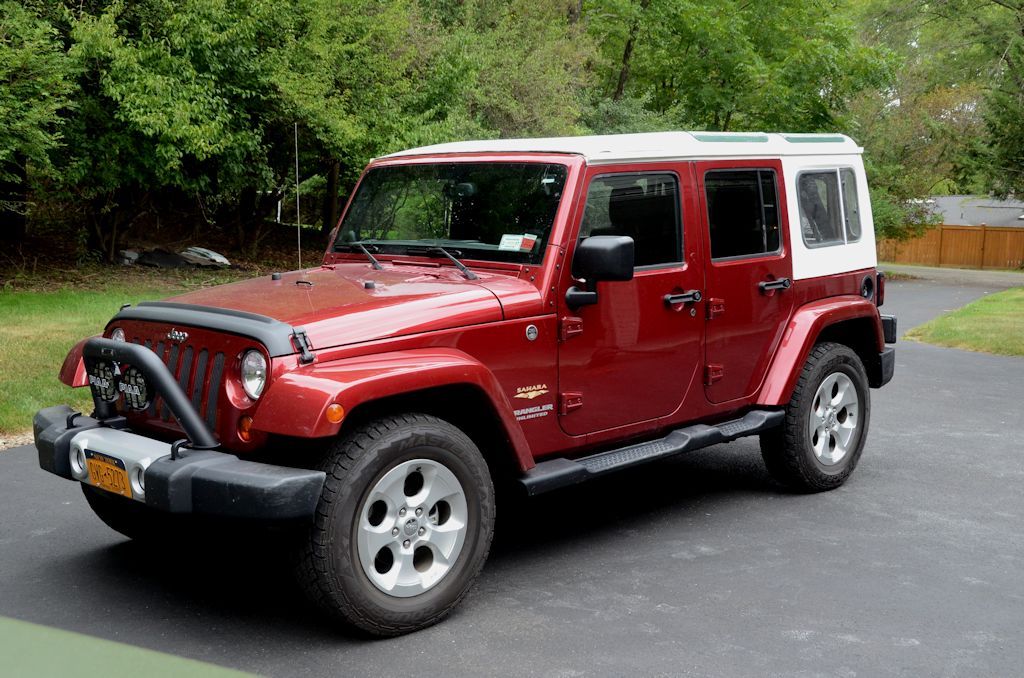
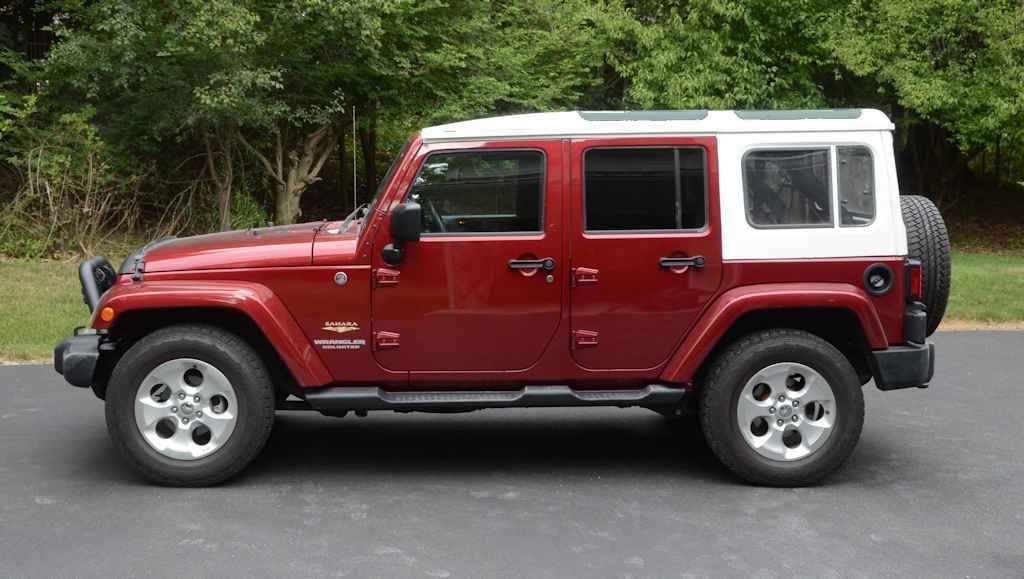
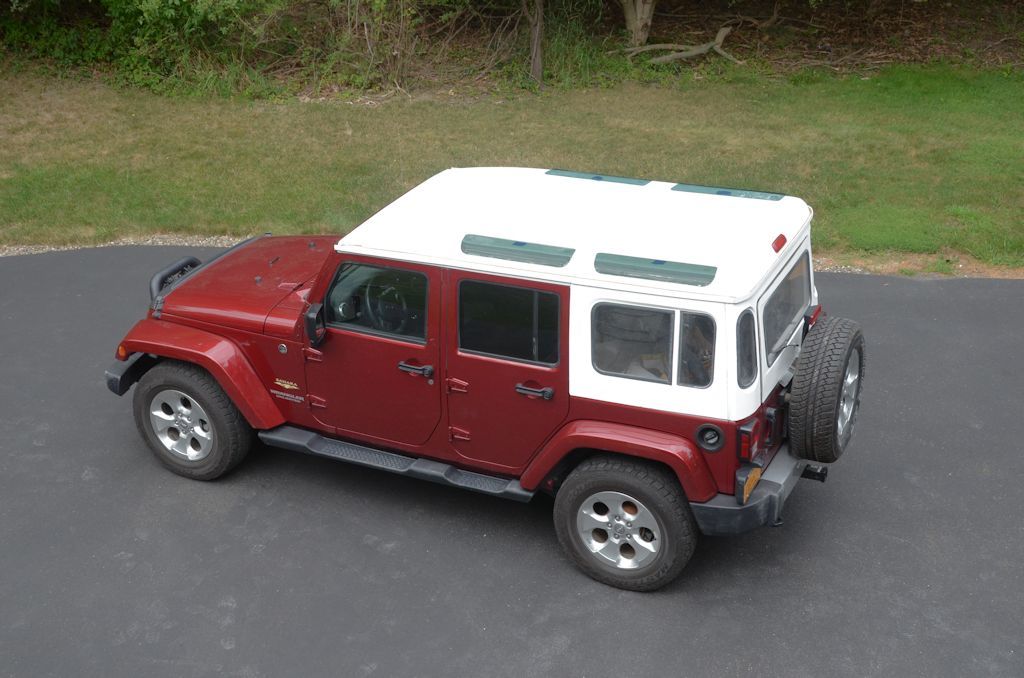
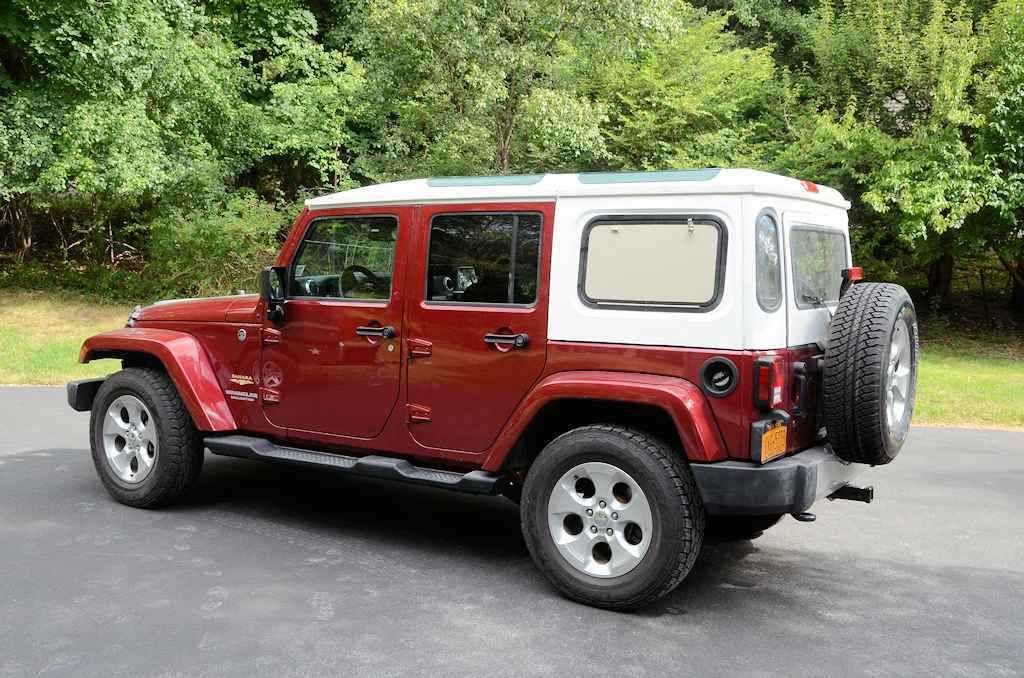
Here are a few photos with the roof in place; a little bit of trimming/fitting still has to happen at the front corners. The photos aren't the best because the white fiberglass is so bright it confuses the camera so the exposures leave a little to be desired.
08-27-2015 | 02:59 AM
#525
Thread Starter
JK Super Freak
Joined: Jul 2012
Posts: 1,556
Likes: 37
From: Elmira, NY
Now that I've got the roof trimmed and fitted, I can make the mold for the windshield header. I've waited until now to make this mold so I could measure to precisely fit it to the roof once it was trimmed and in place. I'll be using TJ latches, they latch down on the loops on the windshield just fine and they're much more easily available used than JK latches.
I'm also planning to add some additional capability to the header - I'll mold an overhead gauge/switch panel into it. Controls for anything in the hardtop can go up there, like the switch for the power vent windows, or anything else that might be needed in the Jeep - extra gauges or other switches.
Here's a rough idea of what I'm planning. The gauges/switches just show what might fit in there, I don't have any specific plans at the moment for what will go in there except for the power vent window switch.
08-27-2015 | 12:29 PM
#526
Thread Starter
JK Super Freak
Joined: Jul 2012
Posts: 1,556
Likes: 37
From: Elmira, NY
Today I tested the fit of some of the alternate sides. In this next photo I've removed the window side panel and installed the c-pillar for the soft sides.

I drew some soft sides on the photo, rolled up and rolled down. I drew them in tan so they would be visible in these illustrations, but black is probably a better color.
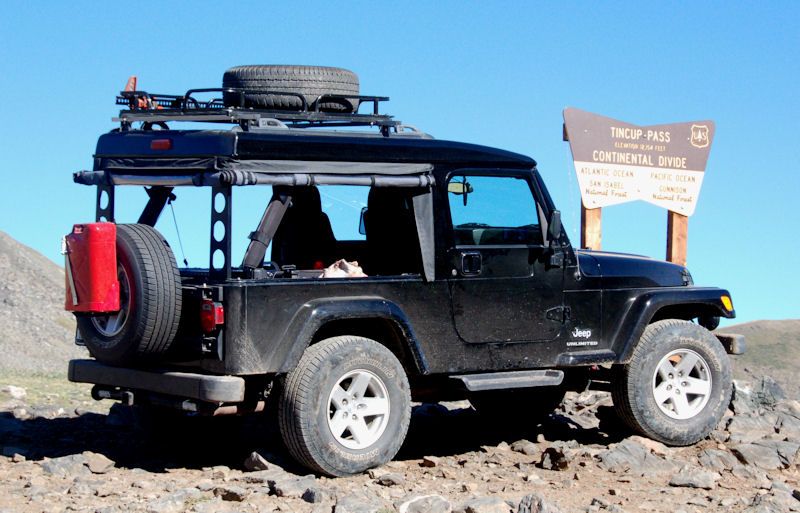
With the soft sides the rear panel and barn door can remain in place as in the photos above, or the rear can be swapped for a soft panel as well, like in this photo of my LJ.
I drew some soft sides on the photo, rolled up and rolled down. I drew them in tan so they would be visible in these illustrations, but black is probably a better color.
With the soft sides the rear panel and barn door can remain in place as in the photos above, or the rear can be swapped for a soft panel as well, like in this photo of my LJ.
08-27-2015 | 12:31 PM
#527
Thread Starter
JK Super Freak
Joined: Jul 2012
Posts: 1,556
Likes: 37
From: Elmira, NY
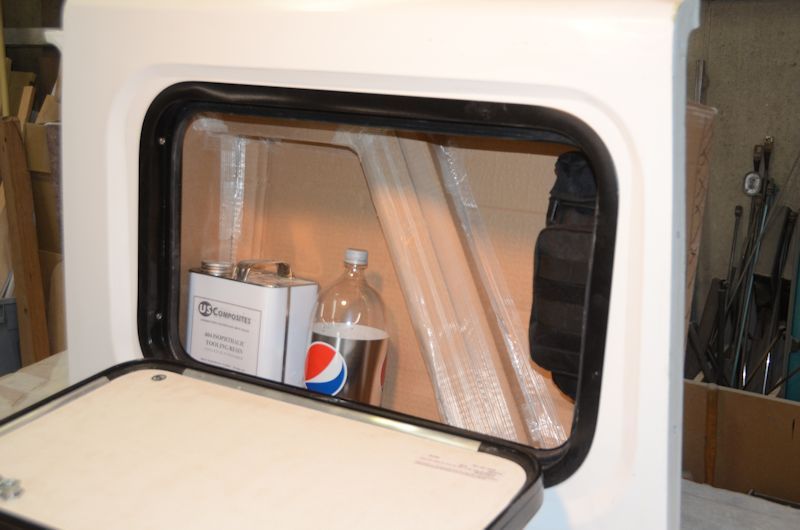
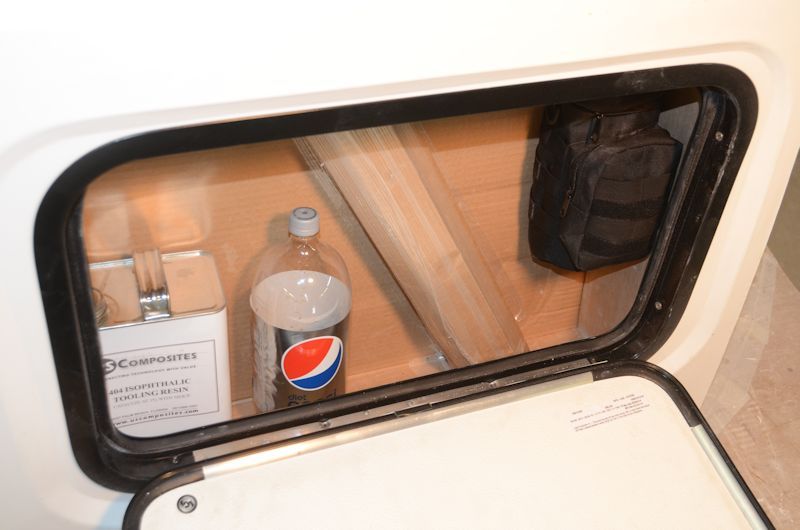
Then I swapped on the cargo hatch side panel:
Opening down for use as a table/work surface:
The roll bar is inconveniently placed, but I accounted for that a while back when I made a cardboard mockup of the inner compartment. The inner compartment is wider and deeper than the window opening, so there's more room in there than you might think.
Opening down for use as a table/work surface:
The roll bar is inconveniently placed, but I accounted for that a while back when I made a cardboard mockup of the inner compartment. The inner compartment is wider and deeper than the window opening, so there's more room in there than you might think.
08-27-2015 | 12:33 PM
#528
Thread Starter
JK Super Freak
Joined: Jul 2012
Posts: 1,556
Likes: 37
From: Elmira, NY
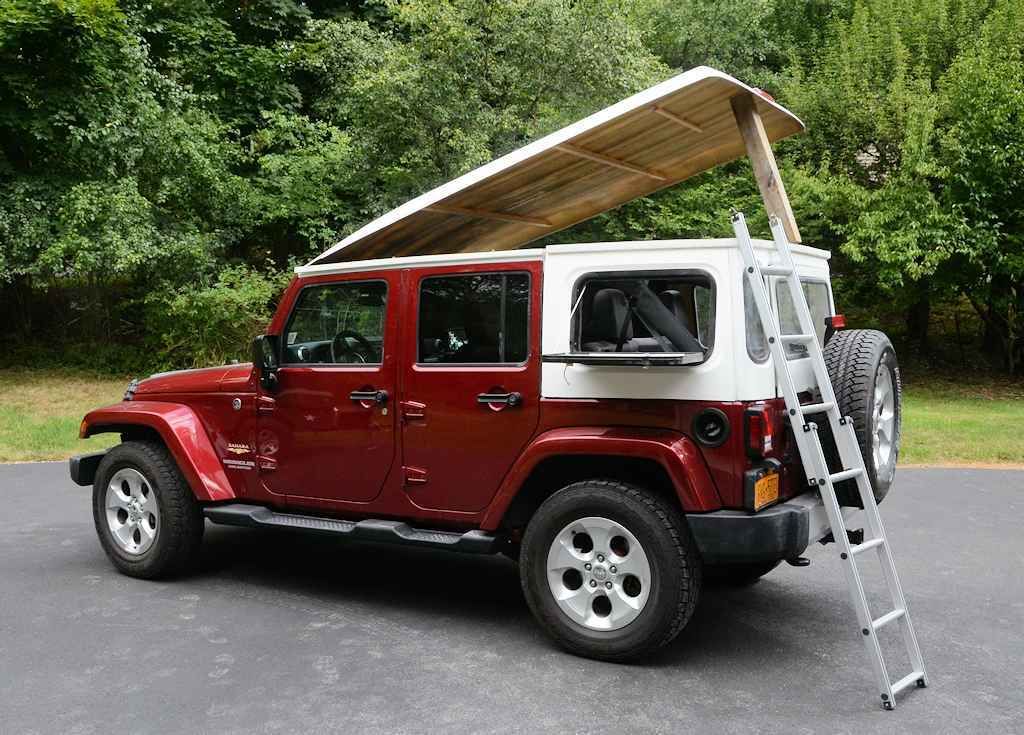
The cargo hatch side would be great on an overlanding/camping Jeep, so I popped the top. It's just propped up with a board right now, but it could make a pretty decent camper, there's room for 2 to sleep above the roll bars.
 08-30-2015 | 11:35 AM
#530
Thread Starter
JK Super Freak
Joined: Jul 2012
Posts: 1,556
Likes: 37
From: Elmira, NY
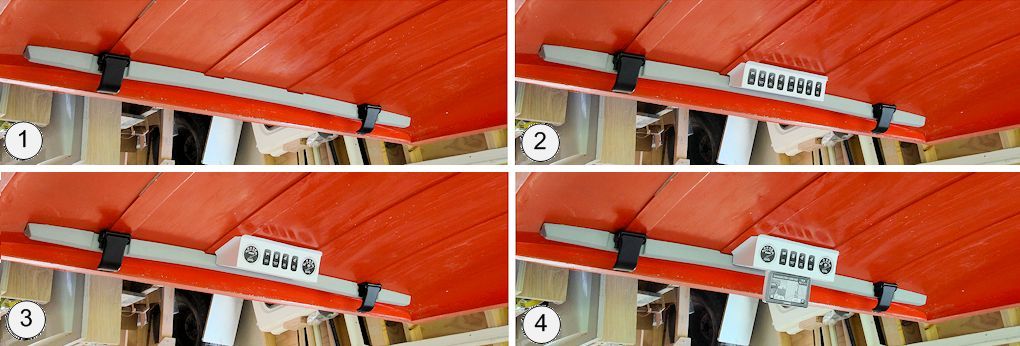
I'm working on the mold for the windshield header, which is the last piece I need to mold before I can start final assembly. This next photo shows the header master sitting inside the roof mold (I've flipped these photos upside down so it appears the roof is on top). When I make the header mold, I'll do it in the roof mold like this, so the flanges on the header are an exact match for the profile of the roof. Two TJ latches are sitting in place. Photo 1 shows the basic header.
My plan is to mold the switch/gauge console as a separate part, so a Safari Cab could be assembled with or without one as needed.
I'm considering two options. The first is a panel for switches only (photo 2), and the second one is a little larger and could hold a combination of switches and gauges (photo 3). There should also be room to hang a GPS from beneath either panel (photo 4).