
Custom modular JK hardtop
 08-16-2017 | 06:46 AM
#1761

Thread Starter
JK Super Freak
Joined: Jul 2012
Posts: 1,556
Likes: 37
From: Elmira, NY
A quick video showing how the DIY awning stows. Deployment is the reverse of stowing and takes about the same amount of time.
http://www.youtube.com/watch?v=Kjw0g0CP7Hk
http://www.youtube.com/watch?v=Kjw0g0CP7Hk
08-16-2017 | 03:11 PM
#1762
Thread Starter
JK Super Freak
Joined: Jul 2012
Posts: 1,556
Likes: 37
From: Elmira, NY
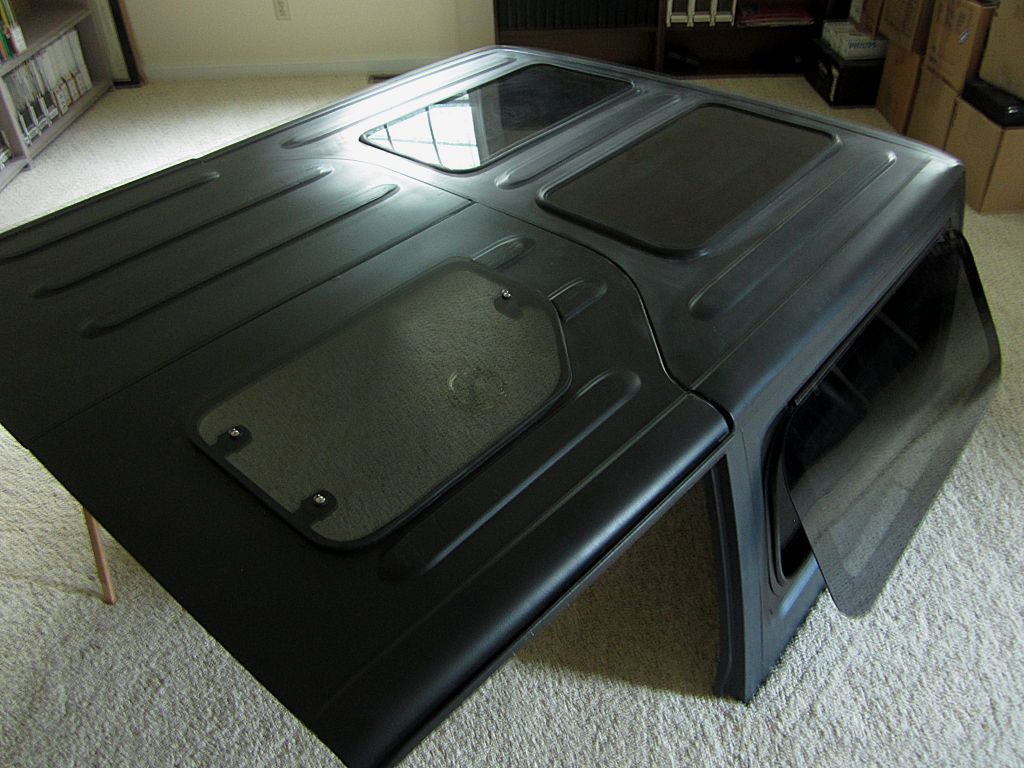
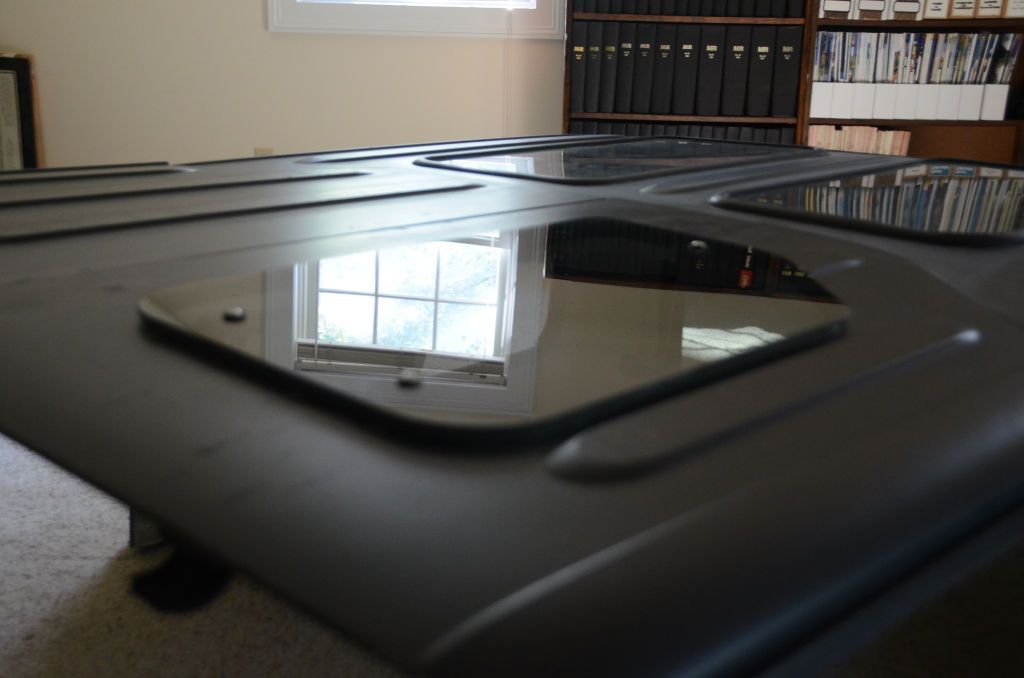
In the same box that came yesterday with the 2-dr preproduction slider windows were two preproduction Freedom Panel skylights. I installed one of them in a test Freedom Panel today. The tint isn't final, the glass company made the samples with whatever glass they were running when these samples came up; the final tint will be fairly dark.
Last edited by jscherb; 08-16-2017 at 03:14 PM.
08-18-2017 | 05:09 AM
#1764
Thread Starter
JK Super Freak
Joined: Jul 2012
Posts: 1,556
Likes: 37
From: Elmira, NY
As for the awning, you can build one yourself... if people are interested I can post construction details for the project.
08-18-2017 | 06:19 AM
#1766
Thread Starter
JK Super Freak
Joined: Jul 2012
Posts: 1,556
Likes: 37
From: Elmira, NY
OK, here you go, it'll take a few posts...
The idea started last week when I was walking through an Ikea store - I spied their "Busktoffel" blind (BUSKTOFFEL Roller blind - 48x76 � " - IKEA) and the "rattan look fabric" struck me as a really nice match for the Spice color of my Safari Cab hardtop. This blind also has a very nice full length aluminum frame; it's 48" wide, and only $26.99. The project idea was immediately hatched and I bought a blind. I spent the next few days coming up with a design that would turn this home window blind into a useful Jeep accessory and Monday and Tuesday I spent a few hours implementing the design.

First I built a shell to mount and house the blind. I used some steel angle from a cheap bed frame I picked up in the trash; I welded two pieces together to form a "u" channel and then welded ends on the channel. The shell provides a rigid mounting for the shade, it provides a way to mount the assembly to the Jeep and it provides a place to mount the support rods. This doesn't have to be metal, if you don't have welding capability the shell could be built from 1/2" plywood.
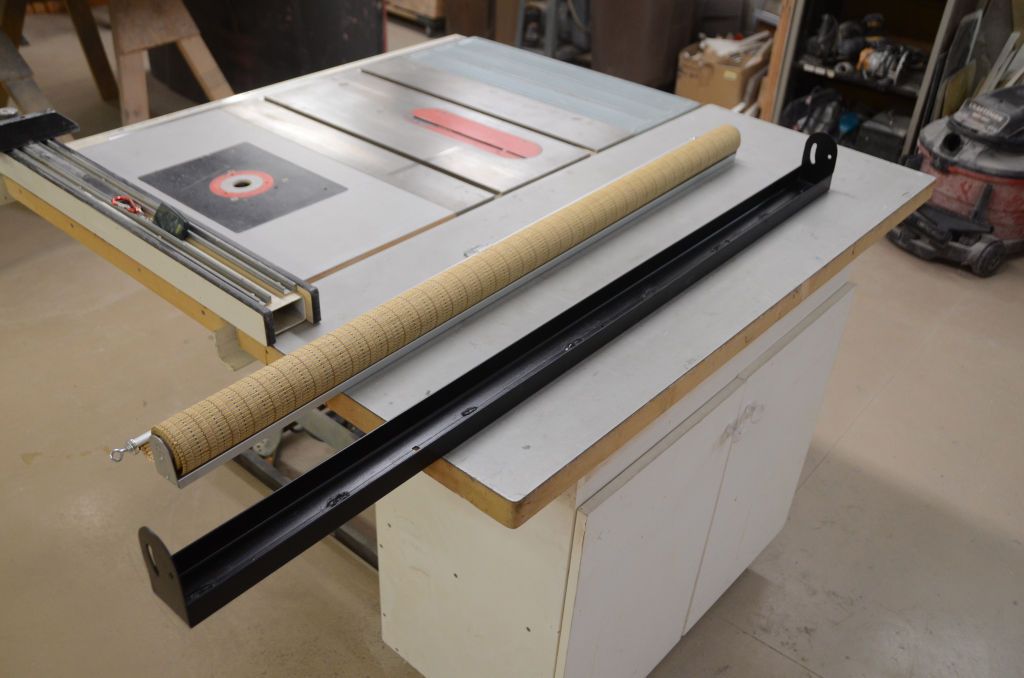
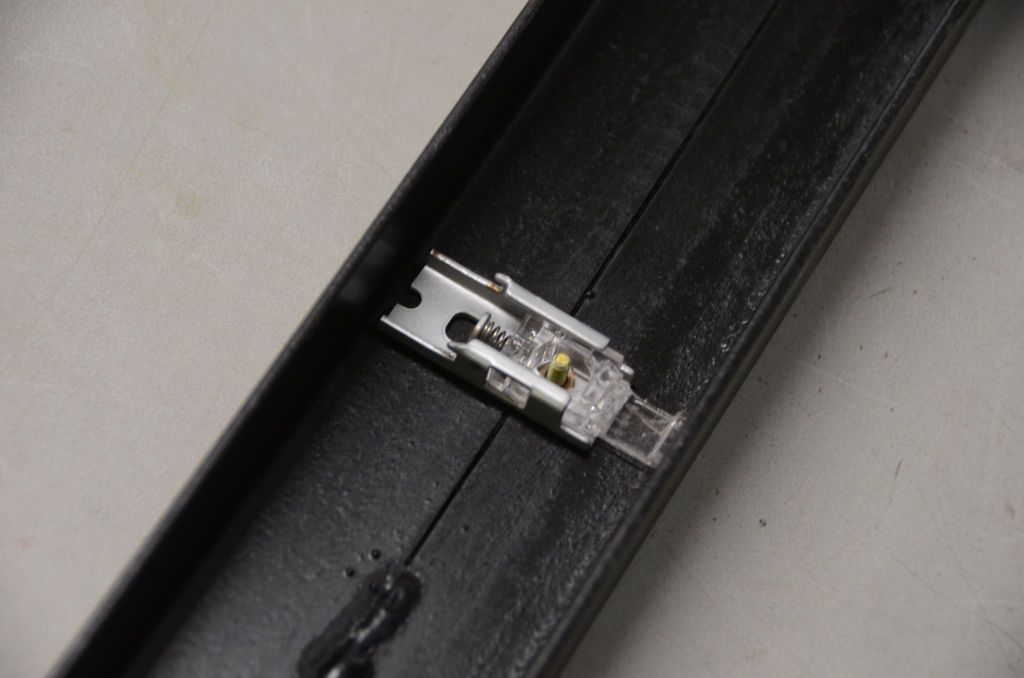
The Ikea blind comes with mounting brackets that are spring loaded and allow the blind to be easily installed and removed. I bolted all three of them to the inside of the shell. As they come from the factory they're "L" shaped; I cut one leg of the L off to fit them in the shell.
The idea started last week when I was walking through an Ikea store - I spied their "Busktoffel" blind (BUSKTOFFEL Roller blind - 48x76 � " - IKEA) and the "rattan look fabric" struck me as a really nice match for the Spice color of my Safari Cab hardtop. This blind also has a very nice full length aluminum frame; it's 48" wide, and only $26.99. The project idea was immediately hatched and I bought a blind. I spent the next few days coming up with a design that would turn this home window blind into a useful Jeep accessory and Monday and Tuesday I spent a few hours implementing the design.
First I built a shell to mount and house the blind. I used some steel angle from a cheap bed frame I picked up in the trash; I welded two pieces together to form a "u" channel and then welded ends on the channel. The shell provides a rigid mounting for the shade, it provides a way to mount the assembly to the Jeep and it provides a place to mount the support rods. This doesn't have to be metal, if you don't have welding capability the shell could be built from 1/2" plywood.
The Ikea blind comes with mounting brackets that are spring loaded and allow the blind to be easily installed and removed. I bolted all three of them to the inside of the shell. As they come from the factory they're "L" shaped; I cut one leg of the L off to fit them in the shell.
08-18-2017 | 06:20 AM
#1767
Thread Starter
JK Super Freak
Joined: Jul 2012
Posts: 1,556
Likes: 37
From: Elmira, NY
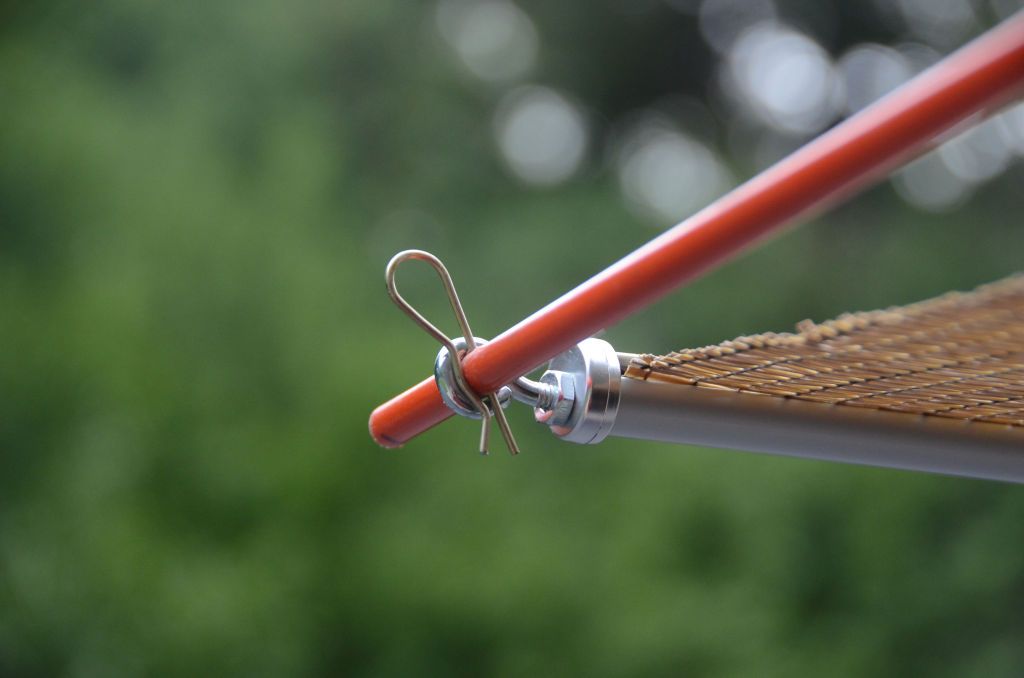
At each end of the shell I made an adjustable socket to hold the support rods. The rods are 5/16" fiberglass driveway marker poles I picked up at Lowes for $3.98 each; I welded a nut and a coupler nut to the bracket that the rod can slip into. The reason I used both is that if I needed to secure the rod in place I could put a hairpin clip through the rod between the two nuts and that would prevent the rod from moving in or out. So far I haven't found the need to do that but if I find it needs to be secured better in the wind I can add the clip later.
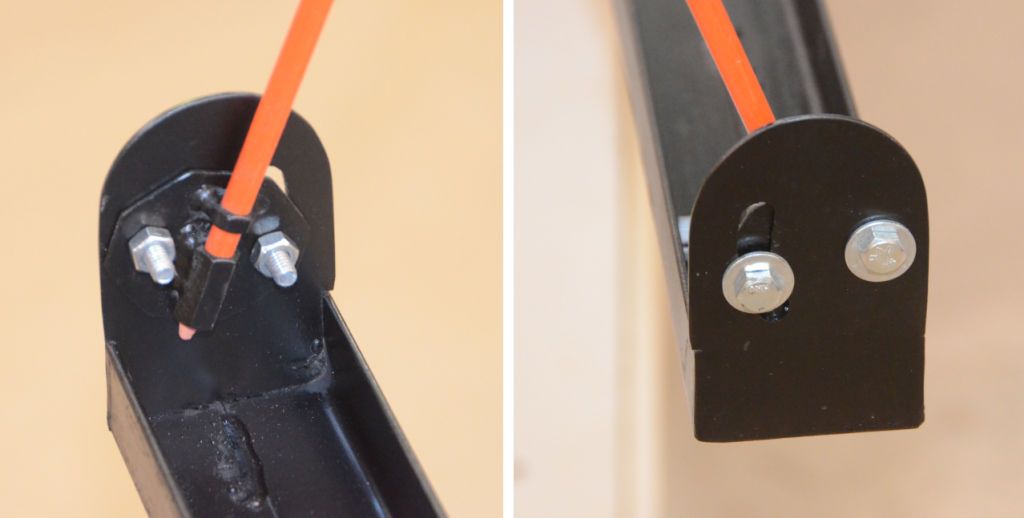
You don't need to be this elaborate with the mounting of the support rods; if you made the shell from wood the rods could slip into wooden blocks with holes in them. They really only need to be adjusted the first time you set up the awning so they don't have to be adjustable the way I did them, if you made them from wood blocks you could just use wood screws to attach them to the shell at the proper angle that first time. They do need to be at an angle because the fiberglass rods flex a bit - if the holes for the rods re horizontal the awning will droop down.
To protect the awning assembly from the elements, I sewed a cover out of tan color coated Cordura fabric. I sewed in a full-length zipper. Coated Cordura fabric is available on eBay for about $6.00 per yard; I made the cover from a scrap I had left over from another project. You can use any fabric you want but it would be best if it were waterproof like the Cordura.
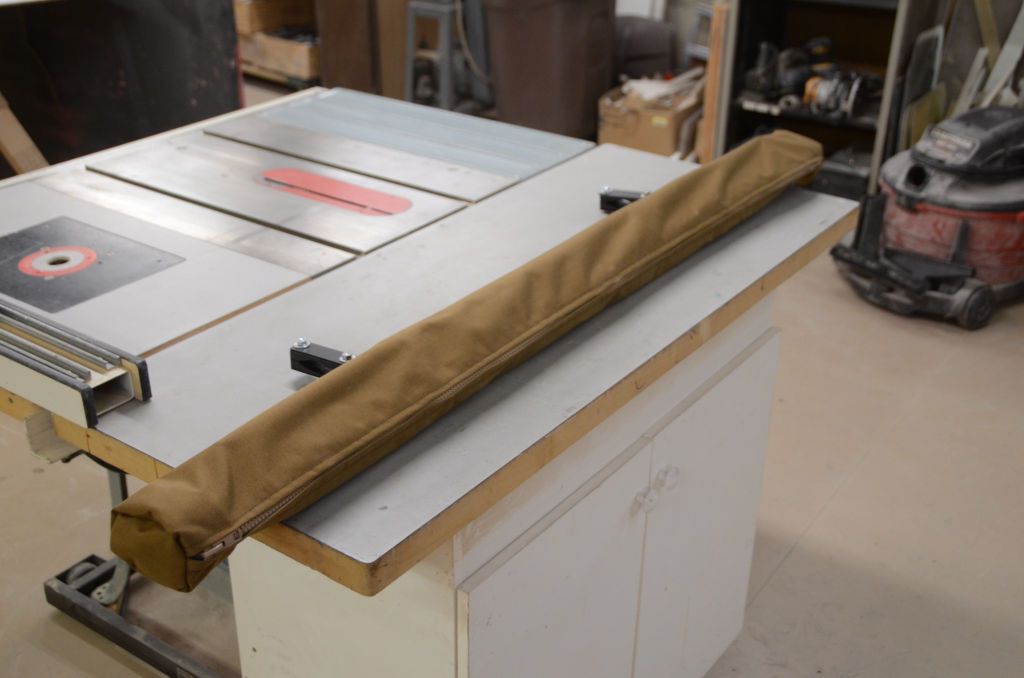
To mount the assembly to the Jeep I put two holes in the bottom of the shell for mounting bolts. I filed the holes square so they capture a carriage bolt, which makes it possible to put a nut on the bolt without a wrench on the inside. I made holes in the Cordura cover with a soldering iron; because the fabric is nylon the soldering iron melts a nice hole through that won't fray - the melting seals the edges of the hole.
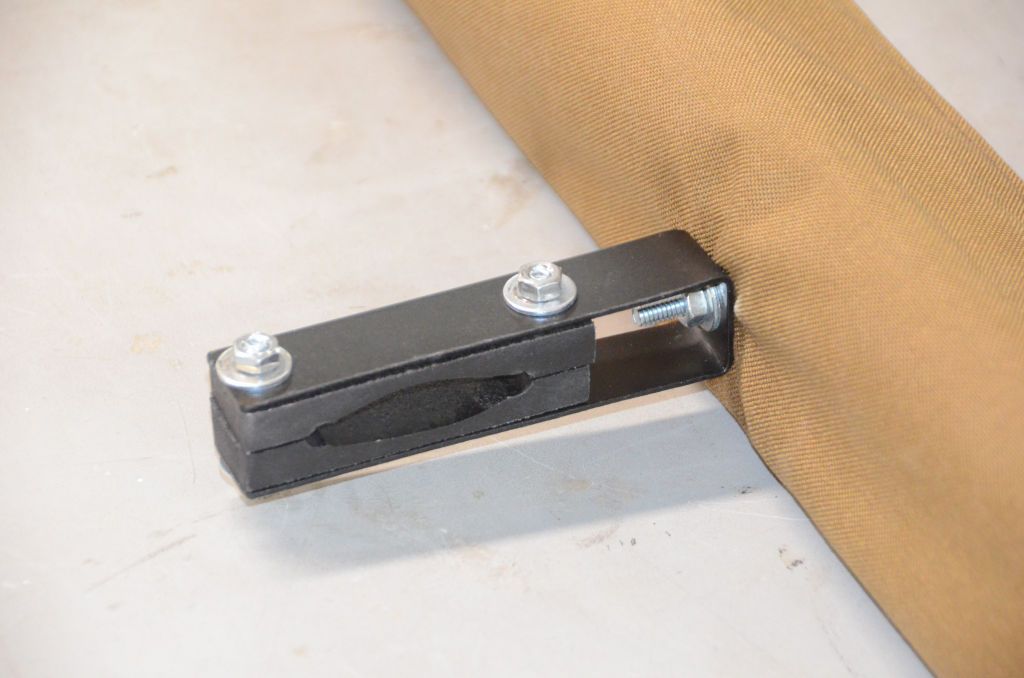
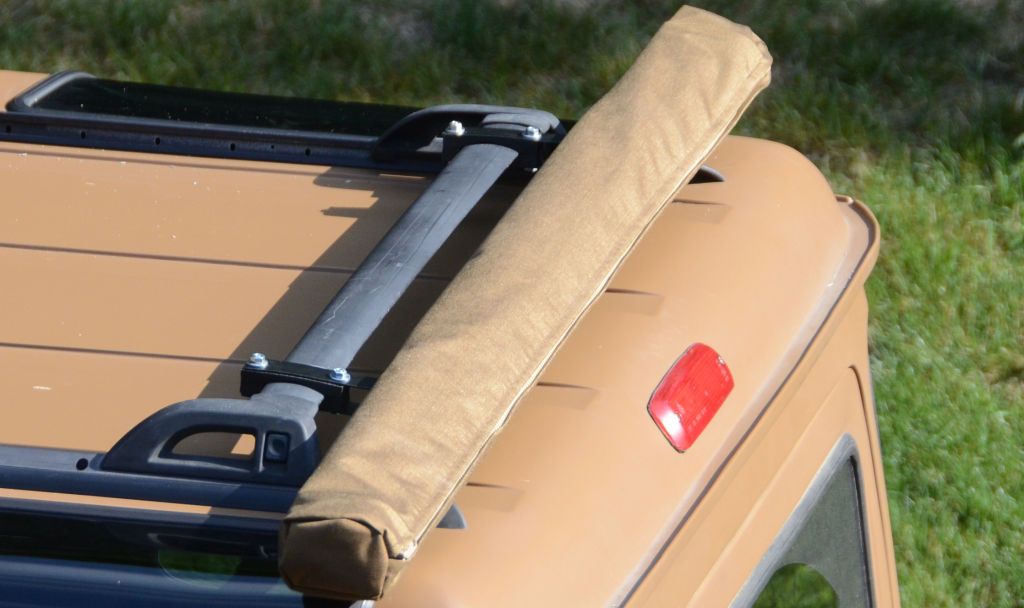
I mounted the awning to the Cherokee roof rack I've got on my Safari Cab so I made up a pair of mounting brackets that clamp around the oval crossbar. They consist of a piece of 1"-wide 14-gauge sheet metal bent in a long "U", two blocks made from a scrap of Trex plastic decking material with an oval shape cut out of them and two bolts to clamp around the roof rack crossbar. These are secured to the awning assembly with the carriage bolts. Depending on where you plan to mount the awning your mounting brackets will need to be different. I'm also going to mount it to the back of my Garvin Wilderness rack, I'll use different brackets for that and I can post photos of them when I do that.
You don't need to be this elaborate with the mounting of the support rods; if you made the shell from wood the rods could slip into wooden blocks with holes in them. They really only need to be adjusted the first time you set up the awning so they don't have to be adjustable the way I did them, if you made them from wood blocks you could just use wood screws to attach them to the shell at the proper angle that first time. They do need to be at an angle because the fiberglass rods flex a bit - if the holes for the rods re horizontal the awning will droop down.
To protect the awning assembly from the elements, I sewed a cover out of tan color coated Cordura fabric. I sewed in a full-length zipper. Coated Cordura fabric is available on eBay for about $6.00 per yard; I made the cover from a scrap I had left over from another project. You can use any fabric you want but it would be best if it were waterproof like the Cordura.
To mount the assembly to the Jeep I put two holes in the bottom of the shell for mounting bolts. I filed the holes square so they capture a carriage bolt, which makes it possible to put a nut on the bolt without a wrench on the inside. I made holes in the Cordura cover with a soldering iron; because the fabric is nylon the soldering iron melts a nice hole through that won't fray - the melting seals the edges of the hole.
I mounted the awning to the Cherokee roof rack I've got on my Safari Cab so I made up a pair of mounting brackets that clamp around the oval crossbar. They consist of a piece of 1"-wide 14-gauge sheet metal bent in a long "U", two blocks made from a scrap of Trex plastic decking material with an oval shape cut out of them and two bolts to clamp around the roof rack crossbar. These are secured to the awning assembly with the carriage bolts. Depending on where you plan to mount the awning your mounting brackets will need to be different. I'm also going to mount it to the back of my Garvin Wilderness rack, I'll use different brackets for that and I can post photos of them when I do that.
08-18-2017 | 06:21 AM
#1768
Thread Starter
JK Super Freak
Joined: Jul 2012
Posts: 1,556
Likes: 37
From: Elmira, NY
One final detail is at the end of the shade - I drilled holes in the end bar of the shade and screwed eye bolts into the holes. The support rods go through the eye bolts, and hairpin clips go through small holes I drilled in the fiberglass support road to prevent the shade from sliding up the rods.
The Ikea shade I used wouldn't protect from rain; the fabric is porous and rain would leak through it - I chose it for the color and because I wanted this to be a sun shade. You could choose a shade with a different fabric if you wanted some rain protection, or you could use this same shade by replace the fabric with a water resistant fabric.
My costs for this project were:
Ikea blind - $26.99
Fiberglass driveway marker poles - 2 @ $3.98 each
Zipper for the cover - about $10
Hairpin clips from Tractor Supply - $1.29
All of the other materials were leftover scraps from other projects and most of the metal for the shell was from a discarded bed frame.
That's all there is to it and I think I've shown enough detail to build one. And as I said you don't have to make the shell out of metal or make the support rod sockets adjustable like I did, everything could be made from wood and it would work just as well.
08-18-2017 | 06:37 AM
#1769
JK Super Freak
Joined: Sep 2010
Posts: 1,103
Likes: 3
From: Central Ny
Thank you ! I'm thinking of using a piece of PVC pipe for the rolled up shade housing, since I neither sew, nor have a sewing machine, but have pipe, cutting discs. The tube would mount to my DIY Thule rear roof rack very nicely.
Again, thank you !
Great idea, and execution !
Again, thank you !
Great idea, and execution !
08-19-2017 | 03:06 AM
#1770
Thread Starter
JK Super Freak
Joined: Jul 2012
Posts: 1,556
Likes: 37
From: Elmira, NY
Thank you ! I'm thinking of using a piece of PVC pipe for the rolled up shade housing, since I neither sew, nor have a sewing machine, but have pipe, cutting discs. The tube would mount to my DIY Thule rear roof rack very nicely.
Again, thank you !
Great idea, and execution !
Again, thank you !
Great idea, and execution !