
Custom modular JK hardtop
 04-28-2017 | 03:02 PM
#1531

Thread Starter
JK Super Freak
Joined: Jul 2012
Posts: 1,556
Likes: 37
From: Elmira, NY
A few days ago I posted about the box of pre-production MultiPod LED mounts that arrived. Today I installed all of them to verify the fit and details. Mostly they're very good, but I'll ask for a few tweaks and adjustments before they go to production. Here's what they look like.
JK A-Pillar mount:
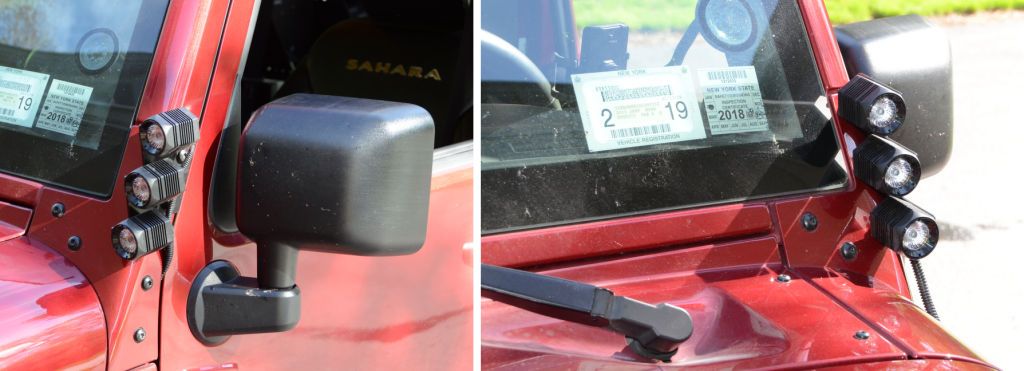
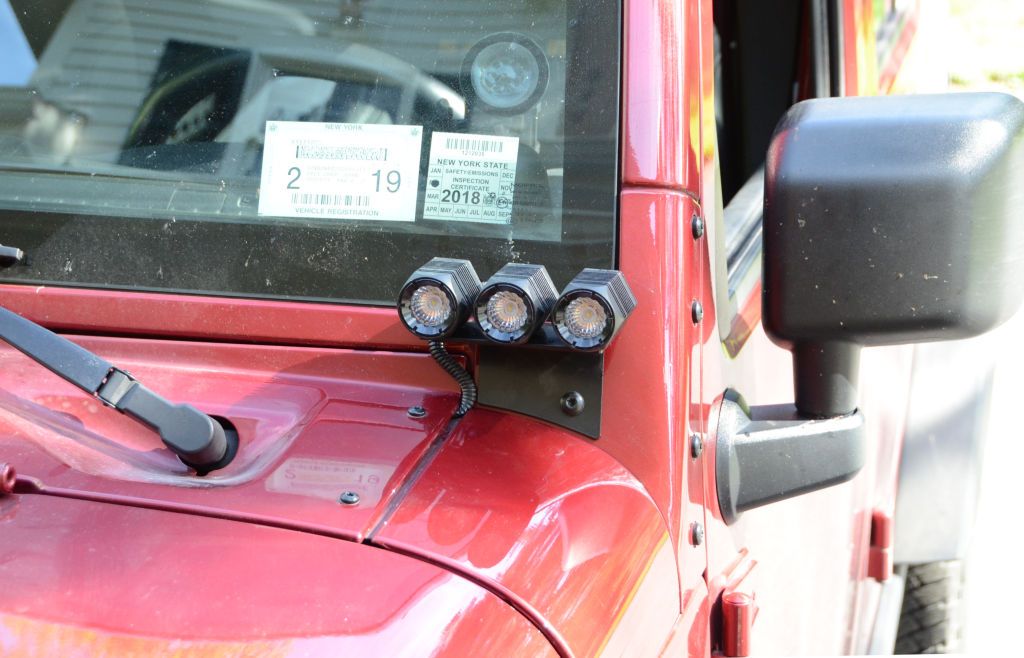
JK Windshield Mount:
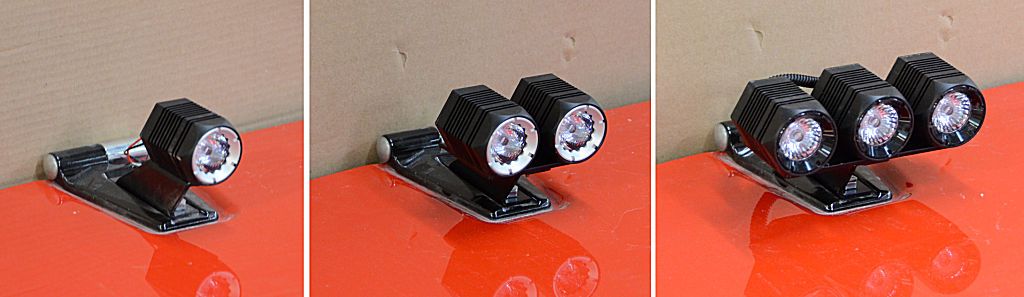
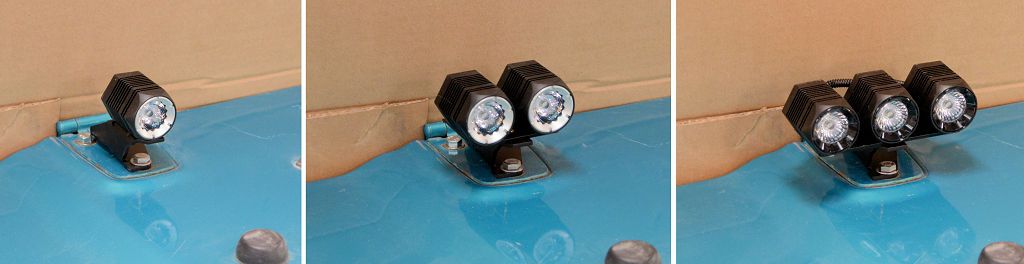
JK Hood Hinge Mount; one, two and three pod options:
TJ Windshield Mount:
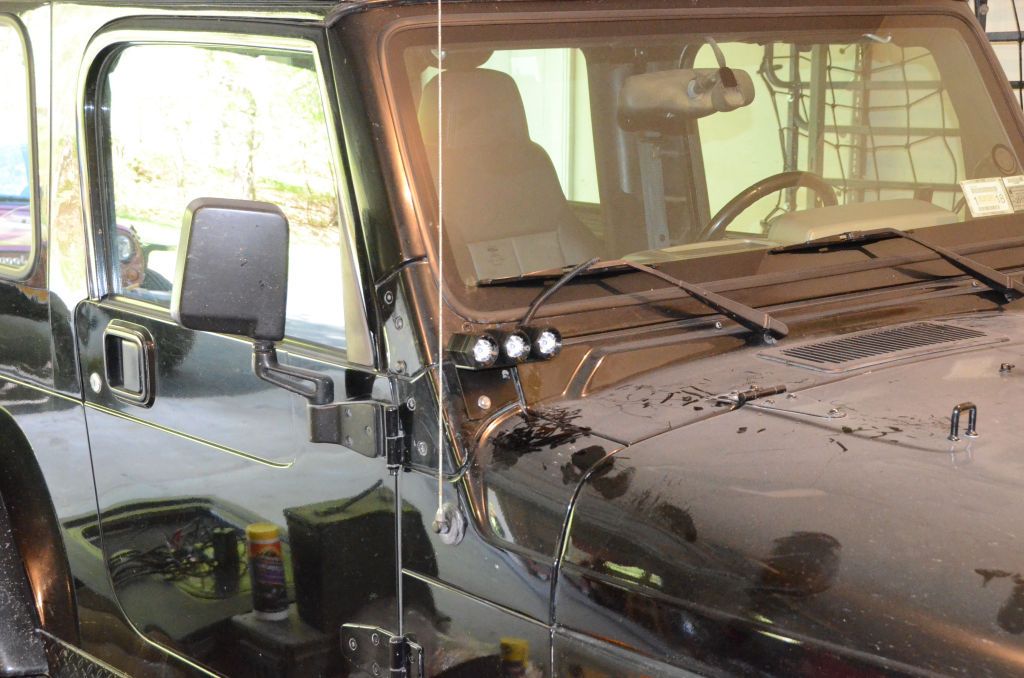
TJ A-Pillar Mount:
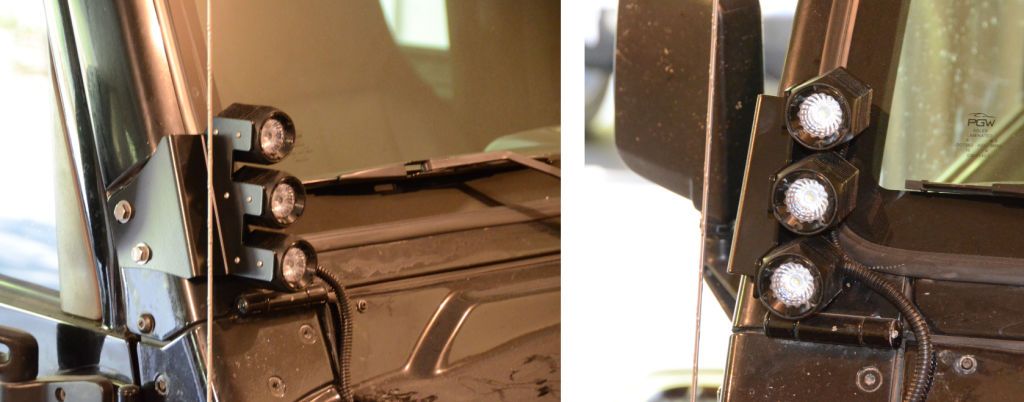
TJ Hood Hinge Mount; one, two and three pod options:
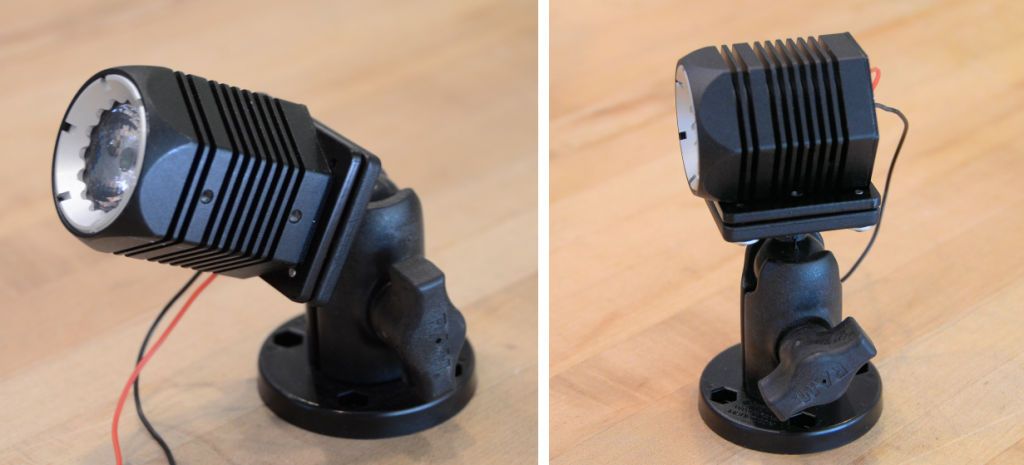
AMPS adapter - enables an LED pod to mount to any industry-standard AMPS mount, such as the ball mount shown:
I also received pricing from the hardware company and I think these mounts can retail for very reasonable prices.
JK A-Pillar mount:
JK Windshield Mount:
JK Hood Hinge Mount; one, two and three pod options:
TJ Windshield Mount:
TJ A-Pillar Mount:
TJ Hood Hinge Mount; one, two and three pod options:
AMPS adapter - enables an LED pod to mount to any industry-standard AMPS mount, such as the ball mount shown:
I also received pricing from the hardware company and I think these mounts can retail for very reasonable prices.
04-29-2017 | 12:04 PM
#1533
Thread Starter
JK Super Freak
Joined: Jul 2012
Posts: 1,556
Likes: 37
From: Elmira, NY
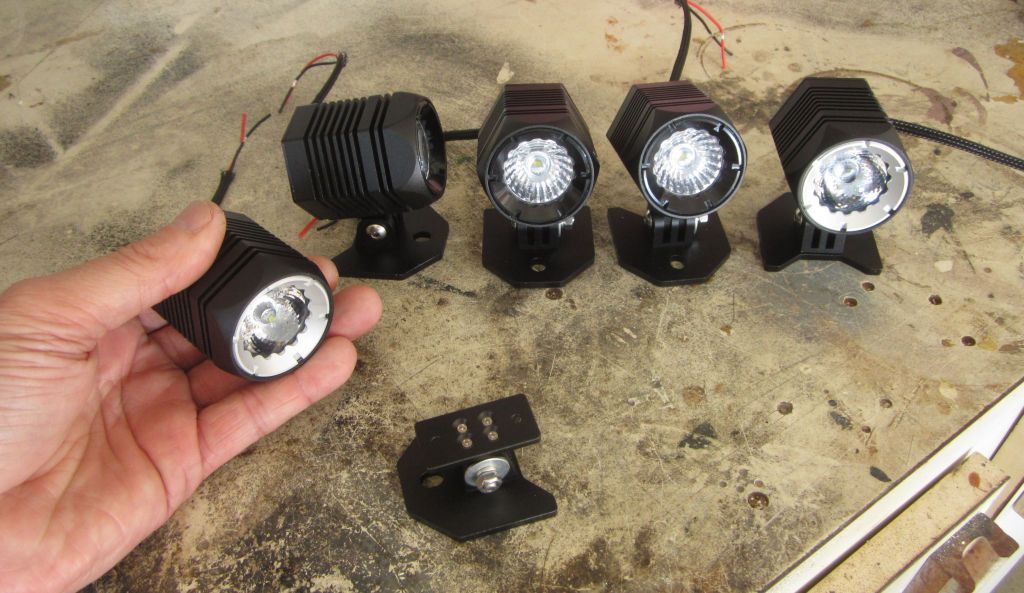
I'm guessing many people who want to mount LEDs in the back will be able to use the mounting bracket that comes with the LED pod (shown in this photo), but for special situations or places where swivel or quick disconnect is desirable, the AMPS adapter shown in my post yesterday with an appropriate AMPS-compatible mount will do the trick.
 .
.
 04-30-2017 | 01:37 AM
#1536
Thread Starter
JK Super Freak
Joined: Jul 2012
Posts: 1,556
Likes: 37
From: Elmira, NY
The company posted a video of the new slider window kit yesterday...
http://www.youtube.com/watch?v=LrkVfr4QSIc
http://www.youtube.com/watch?v=LrkVfr4QSIc
04-30-2017 | 01:49 AM
#1537
Thread Starter
JK Super Freak
Joined: Jul 2012
Posts: 1,556
Likes: 37
From: Elmira, NY
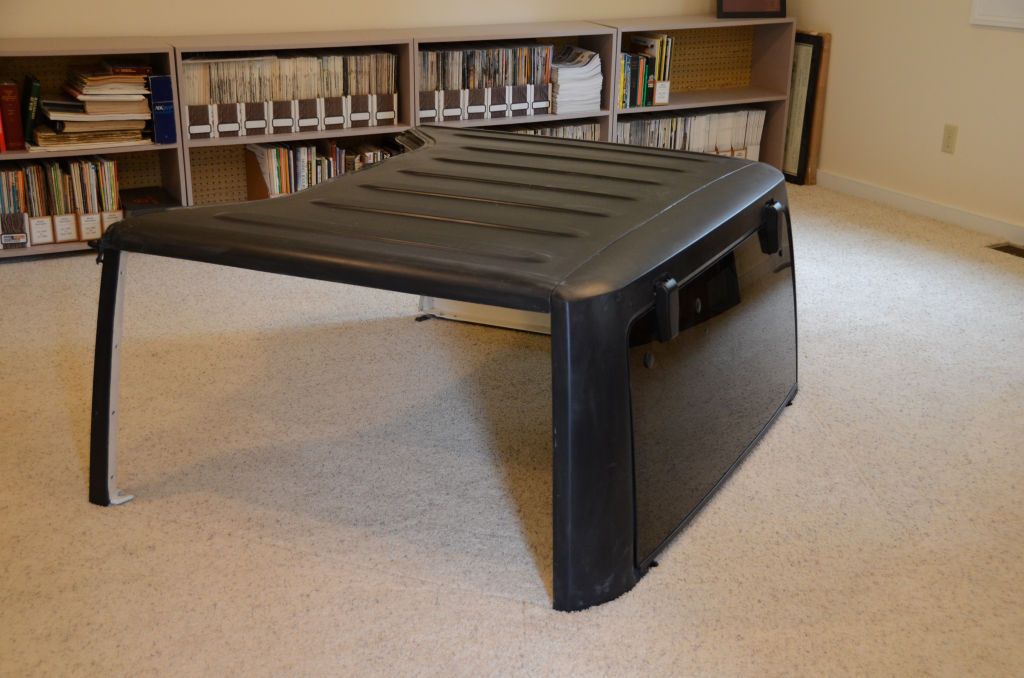
Back in the fall I picked up another 2dr hardtop very cheaply that had been in an accident. Mostly I bought it for the Freedom Panels, which I used to make the prototype pop-up skylights. As soon as I brought it home I cut it in pieces to make it easier to store until i decided what to do with it:
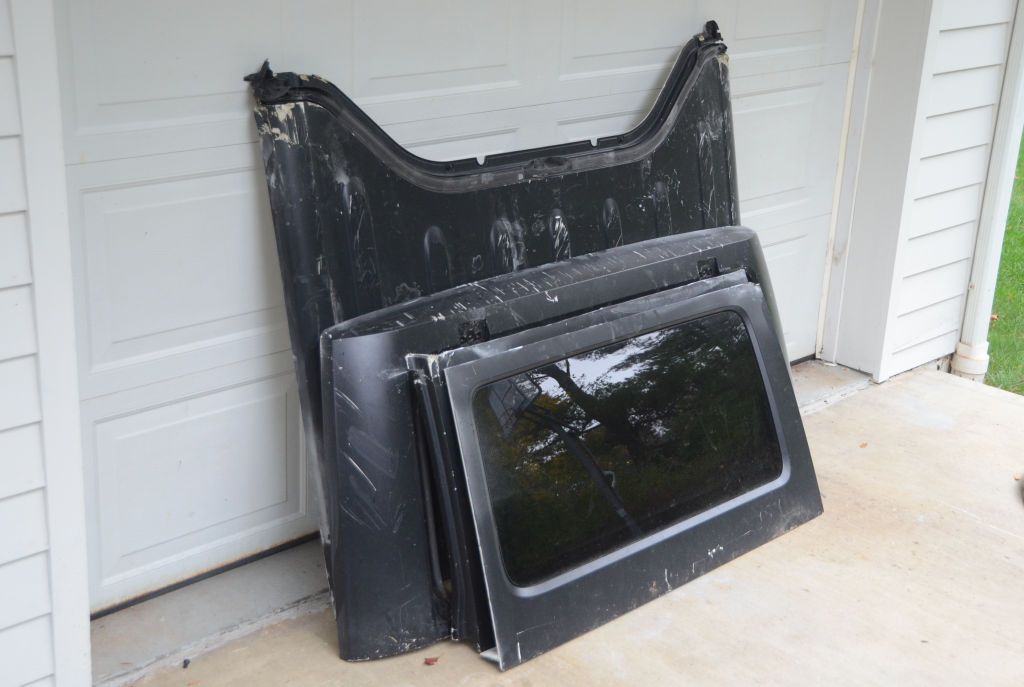
I don't have any plans so far for the roof panel or the rear panel, but I decided to add flanges to the side panels so they can be used with the modular hardtop conversion I did last year. Over the last week I modified the cut side panels to have bolt flanges so they can be used with the modular hardtop and I finished the project yesterday.
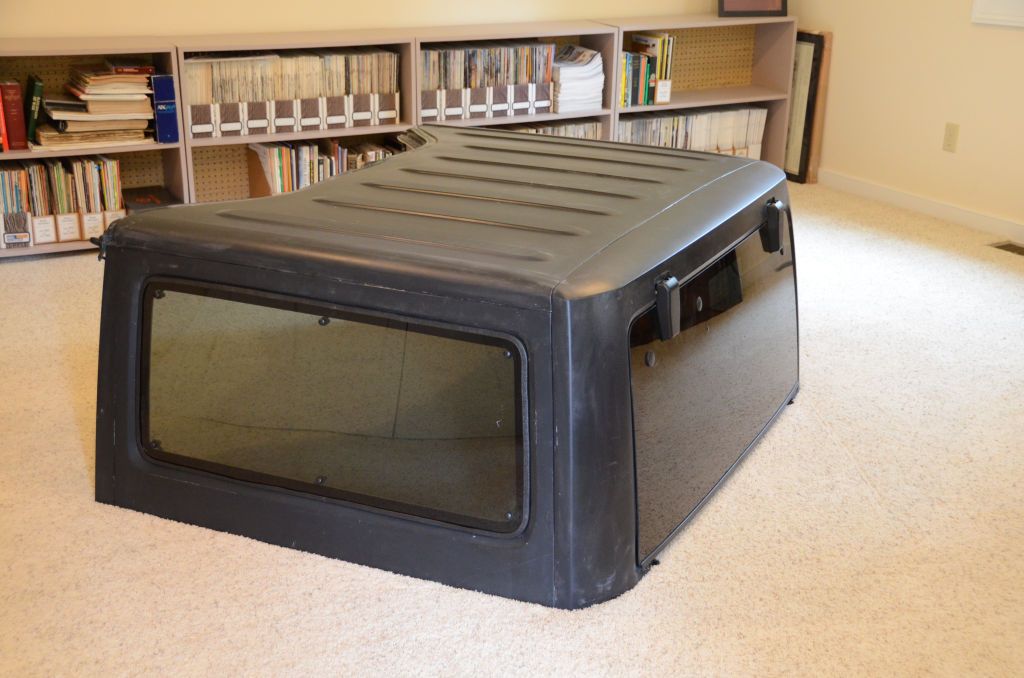
The parts of the modular hardtop. Laying on the floor are the two side panels I just converted. In the background is a quick-release window side panel and the Freedom Panels, one of which has been converted to a pop-up sunroof.
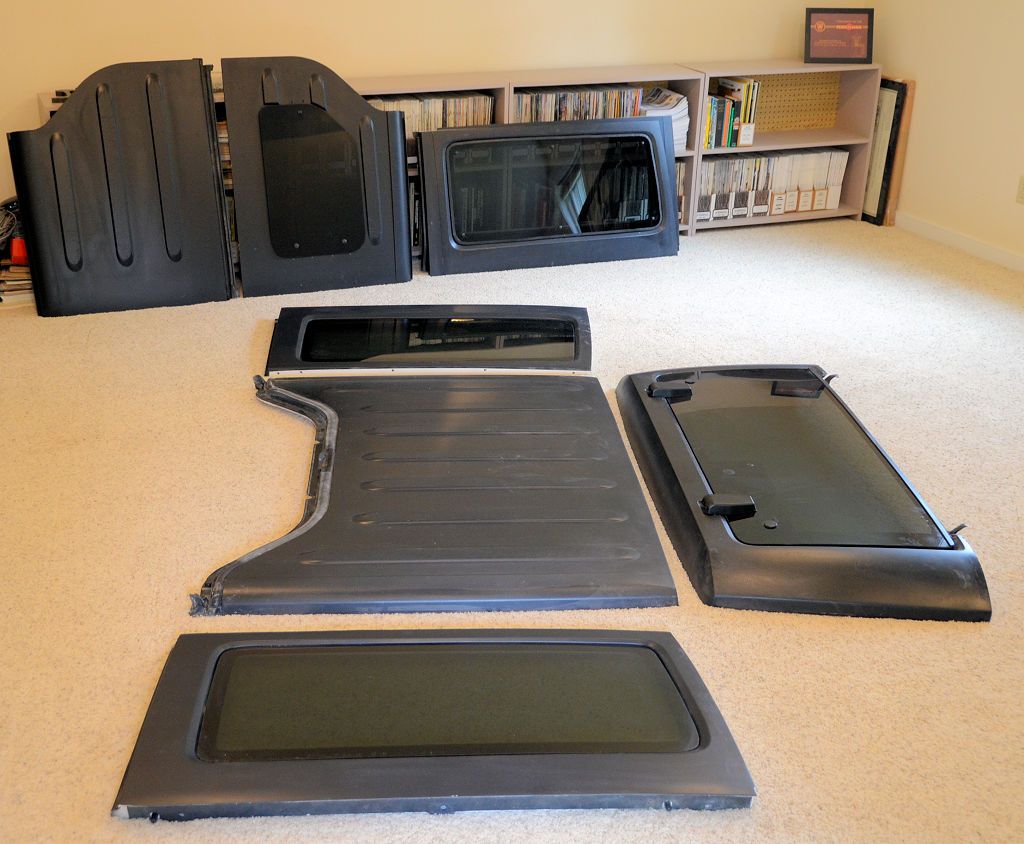
The parts bolted together:
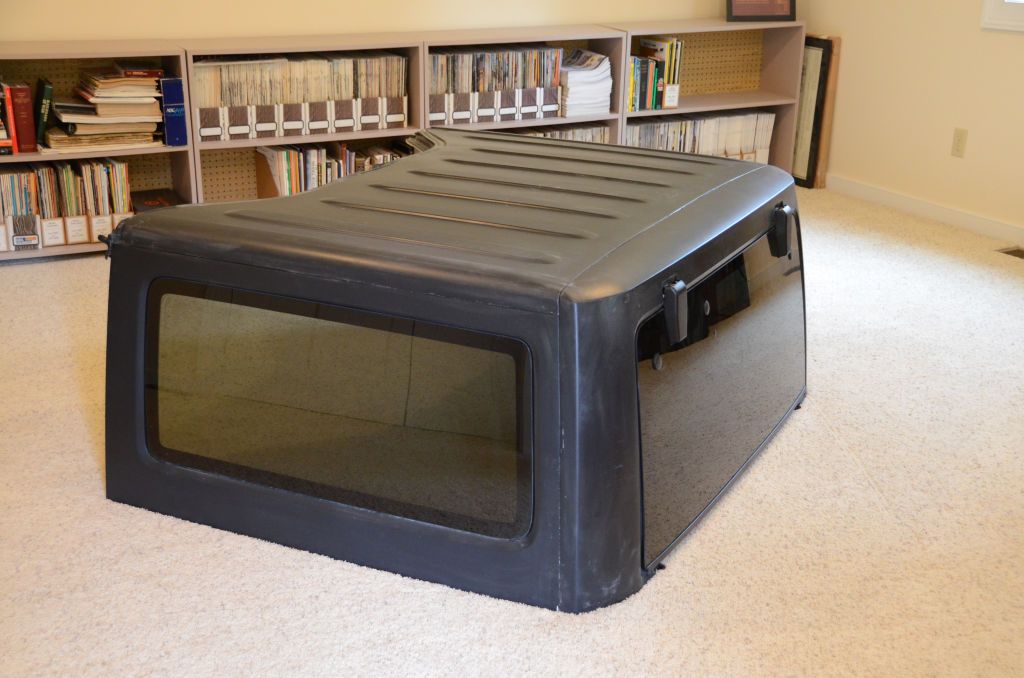
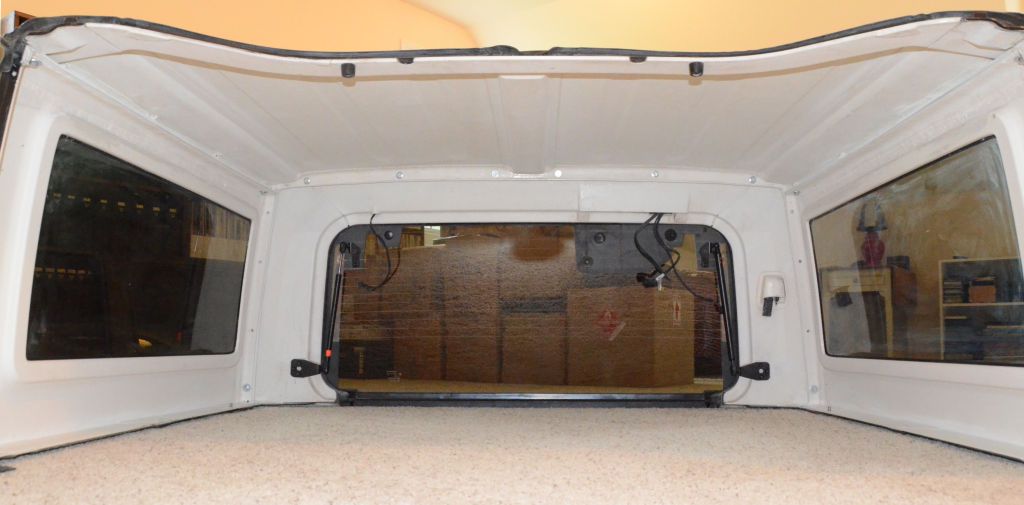
Inside. For the purposes of these photos, I've only used a few bolts to hold everything together so you'll notice some bolts missing.
The side panels above from a late model hardtop with the larger windows; here are some of the other side panels I've done for the modular project...
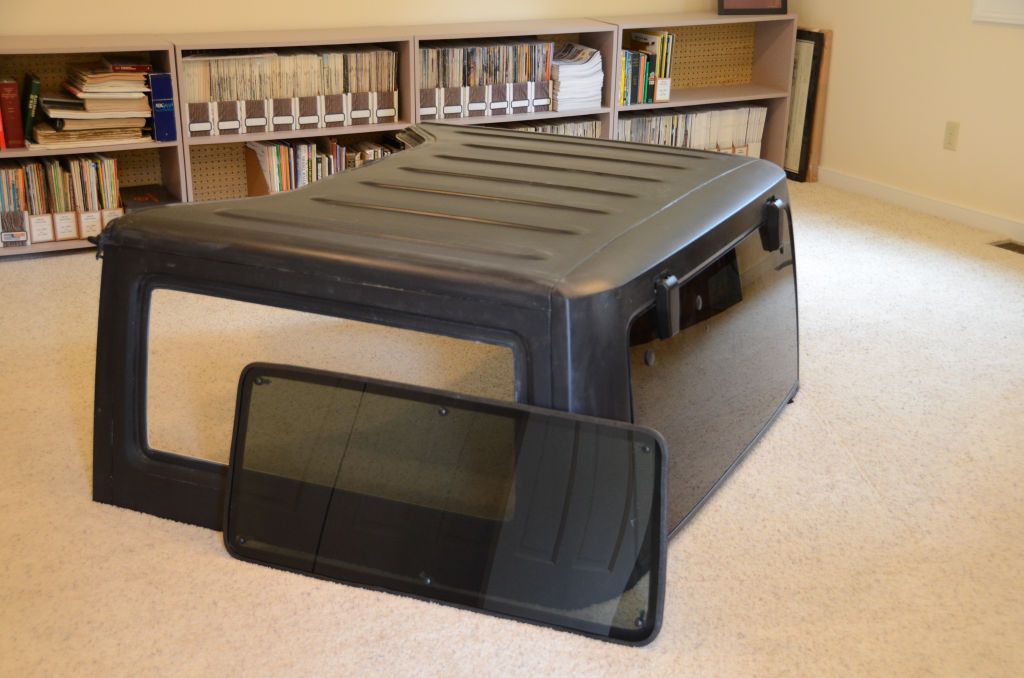
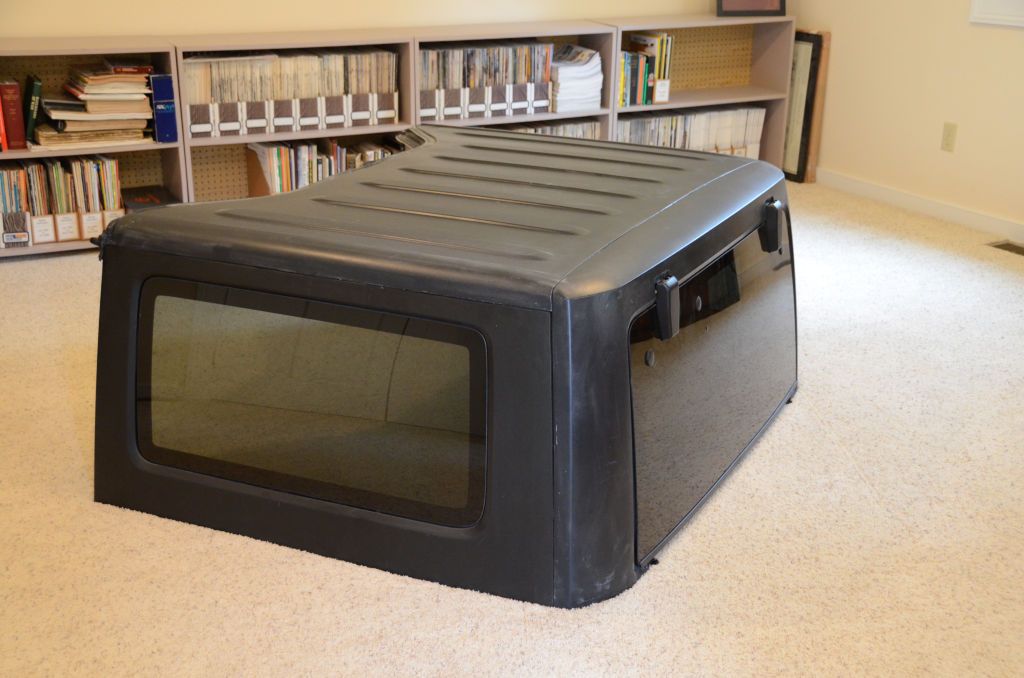
Late Model Quick Release window (window in place):
Late Model Quick Release window (window removed):
Early model window side (smaller window):
B Pillar for roll-up soft sides:
Cargo hatch side:

The conversion of the latest side panels starts here: Converting a factory JK/JKU hardtop to modular - Page 27 - Expedition Portal. The entire modular conversion is covered in step-by-step detail in that thread for anyone who wants to do the conversion themselves.
I don't have any plans so far for the roof panel or the rear panel, but I decided to add flanges to the side panels so they can be used with the modular hardtop conversion I did last year. Over the last week I modified the cut side panels to have bolt flanges so they can be used with the modular hardtop and I finished the project yesterday.
The parts of the modular hardtop. Laying on the floor are the two side panels I just converted. In the background is a quick-release window side panel and the Freedom Panels, one of which has been converted to a pop-up sunroof.
The parts bolted together:
Inside. For the purposes of these photos, I've only used a few bolts to hold everything together so you'll notice some bolts missing.
The side panels above from a late model hardtop with the larger windows; here are some of the other side panels I've done for the modular project...
Late Model Quick Release window (window in place):
Late Model Quick Release window (window removed):
Early model window side (smaller window):
B Pillar for roll-up soft sides:
Cargo hatch side:
The conversion of the latest side panels starts here: Converting a factory JK/JKU hardtop to modular - Page 27 - Expedition Portal. The entire modular conversion is covered in step-by-step detail in that thread for anyone who wants to do the conversion themselves.
04-30-2017 | 02:24 AM
#1538
Thread Starter
JK Super Freak
Joined: Jul 2012
Posts: 1,556
Likes: 37
From: Elmira, NY
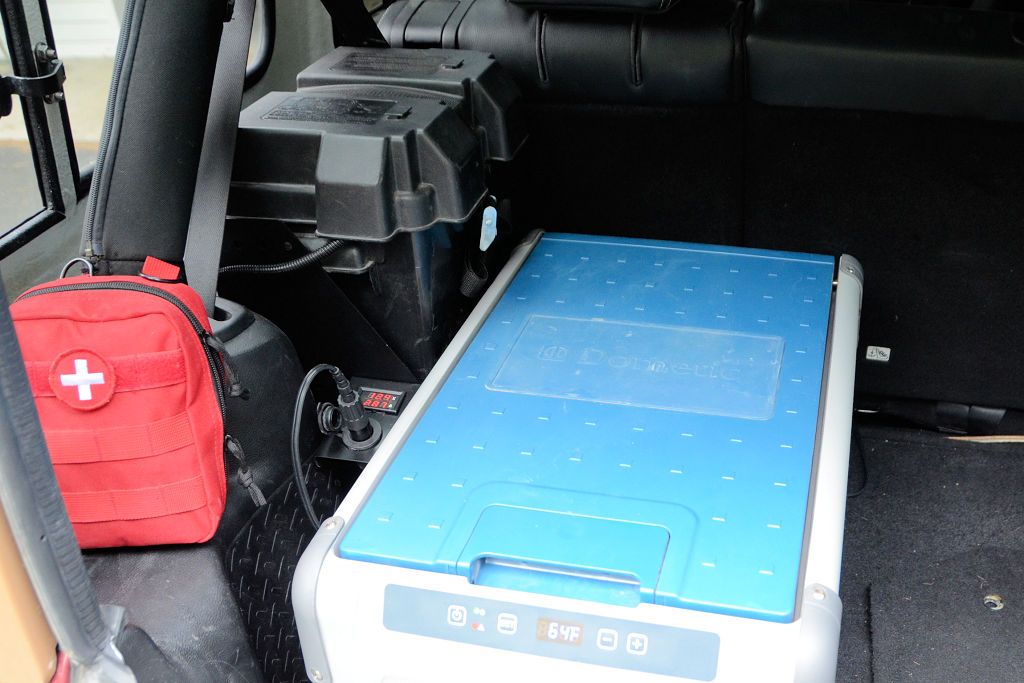
The volt/amp meter arrived so I connected it and did my first test of the fridge running on battery. This photo was taken in the late afternoon just after I had powered up the fridge. The temp in the fridge is 67, it's just starting to cool to the 20 degrees I've set it for. When running, the meter shows 11.9 volts and about 3.5 amps. When not running and with the battery almost fully charged the meter showed 12.5 volts last night.
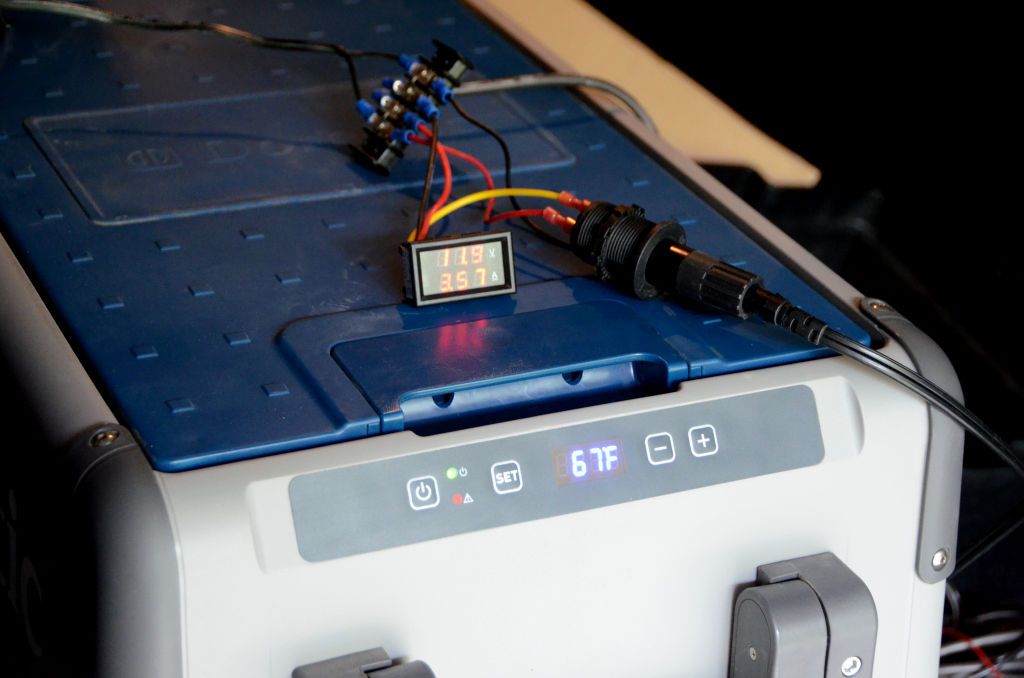
It didn't take too long to get down to 20 degrees inside the fridge, and I left it all night to cycle on and off to maintain that temp. When I first checked it this morning, it was showing 23 degrees and it was running, so it had apparently just cycled on to cool back to 20. I don't know exactly at what temp it cycles on, but I think it may be at 5 degrees above the set temp because I did catch the display at 25 one time last night when I when checked it. When the fridge is cycled off, the voltage meter shows 12.5 volts at full charge and about 0.1 amps.
When running this morning, the meter showed 11.9 volts (same as last night when running) and about 3.5 amps. I waited until cycled off at 20 degrees and the meter showed 12.2 volts - a drop of only 0.3 volts after running for more than 12 hours.
Next I'll complete the wiring harness so the fridge battery can charge from the rear power outlet of the Jeep. Should be that recharging from 12.2 volts won't take long - I'd guess a quick errand or two in the Jeep and it'll be back to full voltage, but I'll be testing that as soon as I complete the rest of the wiring.
05-01-2017 | 04:09 AM
#1539
Thread Starter
JK Super Freak
Joined: Jul 2012
Posts: 1,556
Likes: 37
From: Elmira, NY
Fridge update: 24 hours after starting the fridge on the aux battery, that battery showed 12.1 volts when the fridge cycled off, and 11.8 volts when it cycled on. The temperature has been set at 20 degrees, and varies from 20-25 while it cycles on and off. I'm impressed with how little the battery has been drained to keep the fridge below freezing for 24 hours.
The wiring harness:
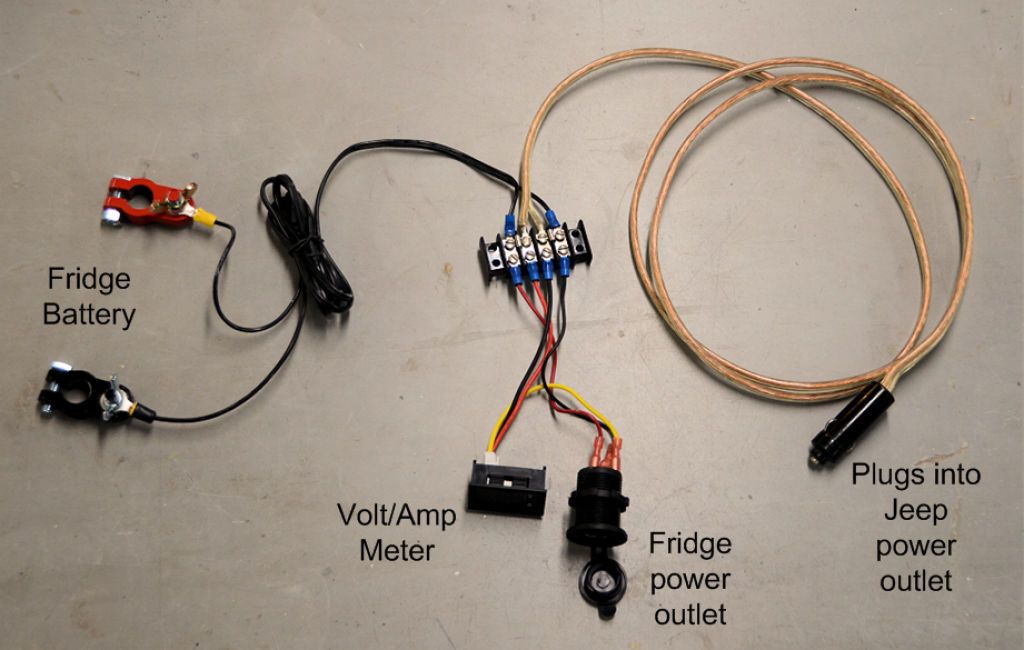
The fridge runs off the aux battery when the Jeep isn't running; when the Jeep is running the fridge runs off both the Jeep power and the aux battery in parallel and the aux battery gets charged. The volt/amp meter shows the voltage going to the fridge and the current the fridge is drawing.
Next I need to find a box to install the meter, fridge outlet and terminal strip in.
The wiring harness:
The fridge runs off the aux battery when the Jeep isn't running; when the Jeep is running the fridge runs off both the Jeep power and the aux battery in parallel and the aux battery gets charged. The volt/amp meter shows the voltage going to the fridge and the current the fridge is drawing.
Next I need to find a box to install the meter, fridge outlet and terminal strip in.
05-03-2017 | 03:48 AM
#1540
Thread Starter
JK Super Freak
Joined: Jul 2012
Posts: 1,556
Likes: 37
From: Elmira, NY
I made up a panel to mount the volt/amp meter and fridge outlet. It bolts to existing holes in the ammo can holder I'm using for the battery.
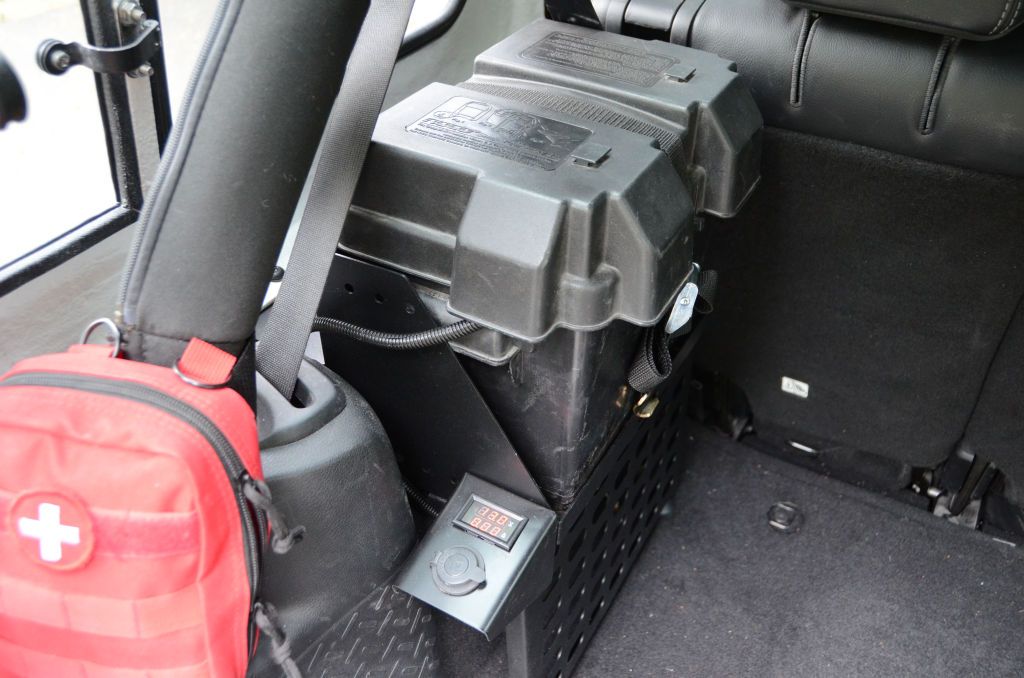
I should have the correct slide soon, I'll install it as soon as it arrives and then I'll try out some new slide/table ideas I'm working on.
I should have the correct slide soon, I'll install it as soon as it arrives and then I'll try out some new slide/table ideas I'm working on.