
Custom modular JK hardtop
 12-12-2016 | 01:03 PM
#1161

Thread Starter
JK Super Freak
Joined: Jul 2012
Posts: 1,556
Likes: 37
From: Elmira, NY
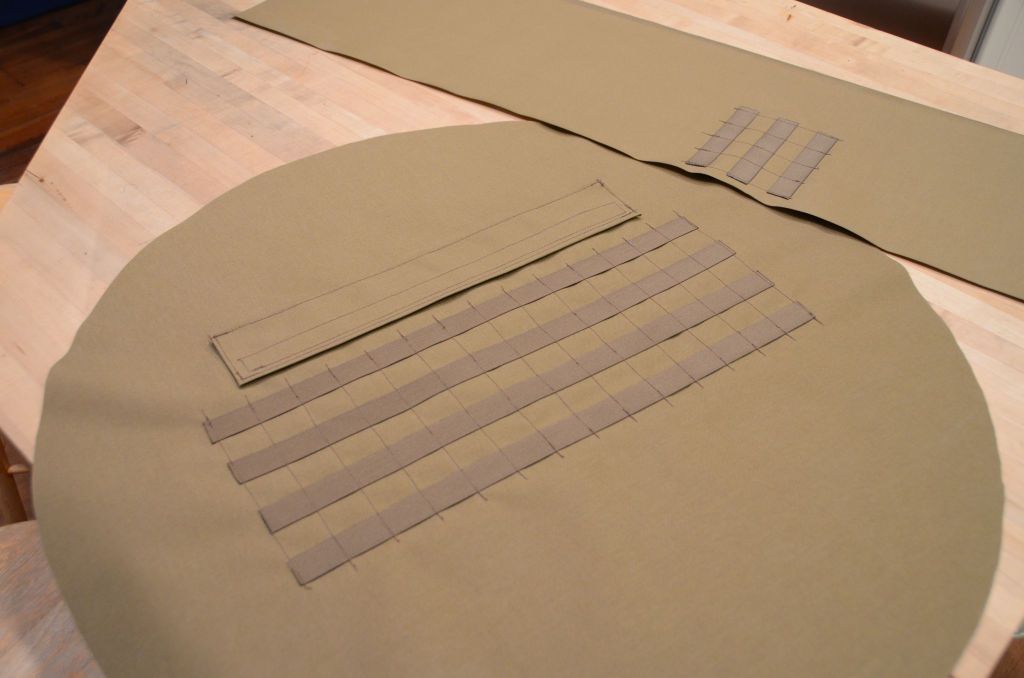
I did get the Coyote webbing today, but not the bungee cord, so I couldn't finish sewing the Coyote cover. Hopefully tomorrow. In the meantime, here's a work-in-progress shot.
12-12-2016 | 01:04 PM
#1162
Thread Starter
JK Super Freak
Joined: Jul 2012
Posts: 1,556
Likes: 37
From: Elmira, NY
12-13-2016 | 12:16 PM
#1163
Thread Starter
JK Super Freak
Joined: Jul 2012
Posts: 1,556
Likes: 37
From: Elmira, NY
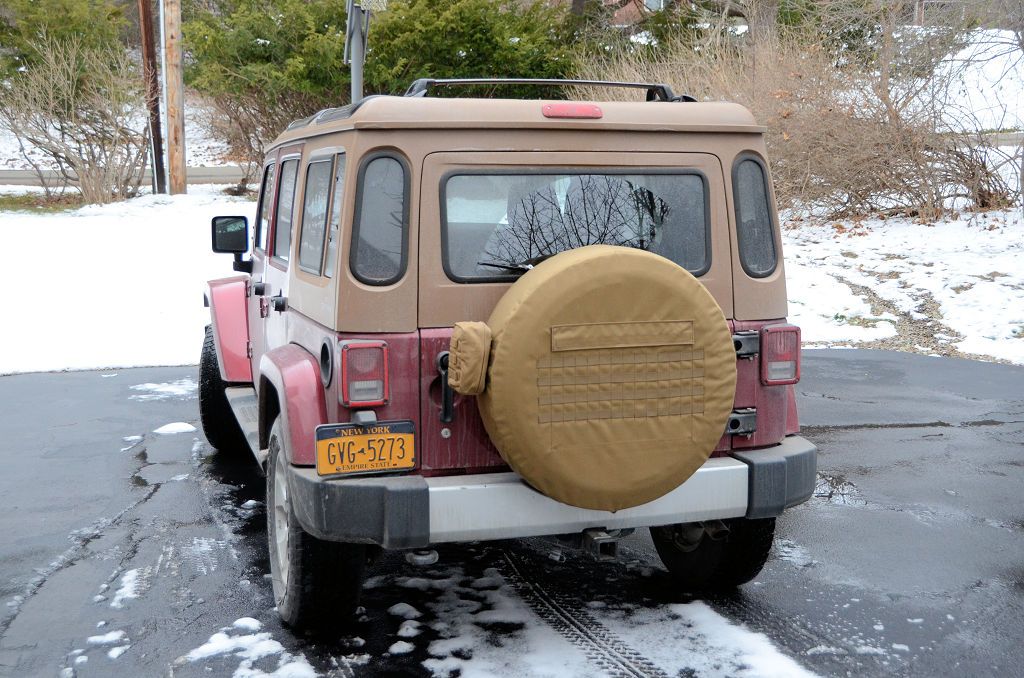
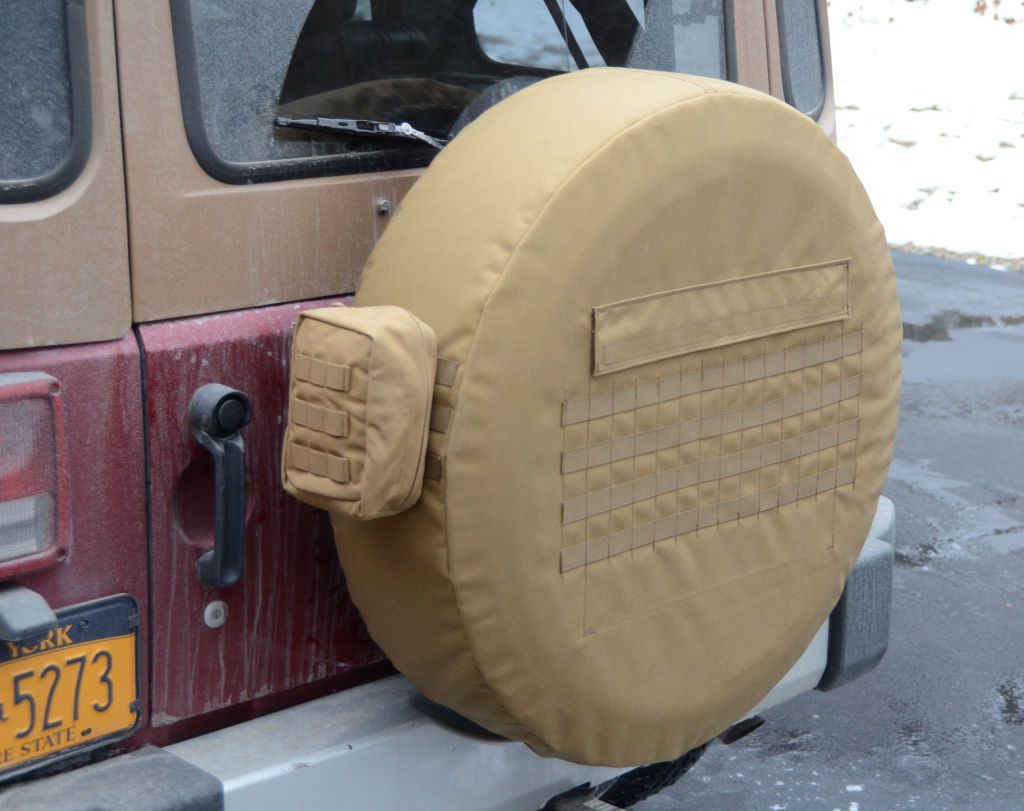
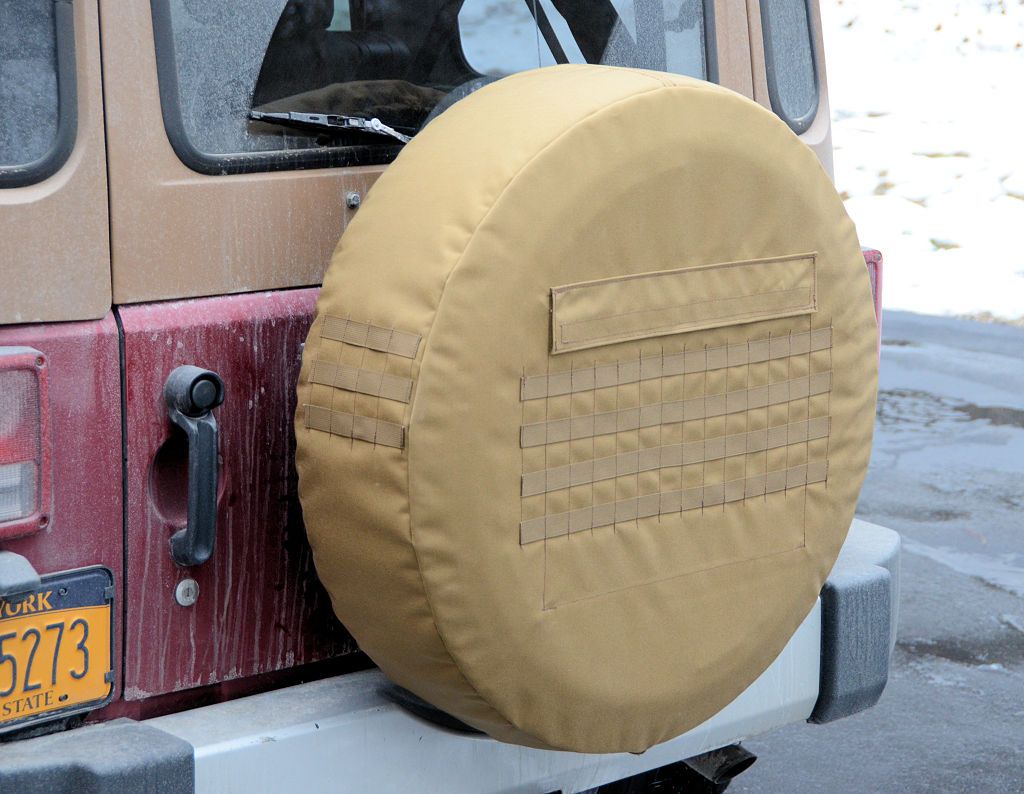
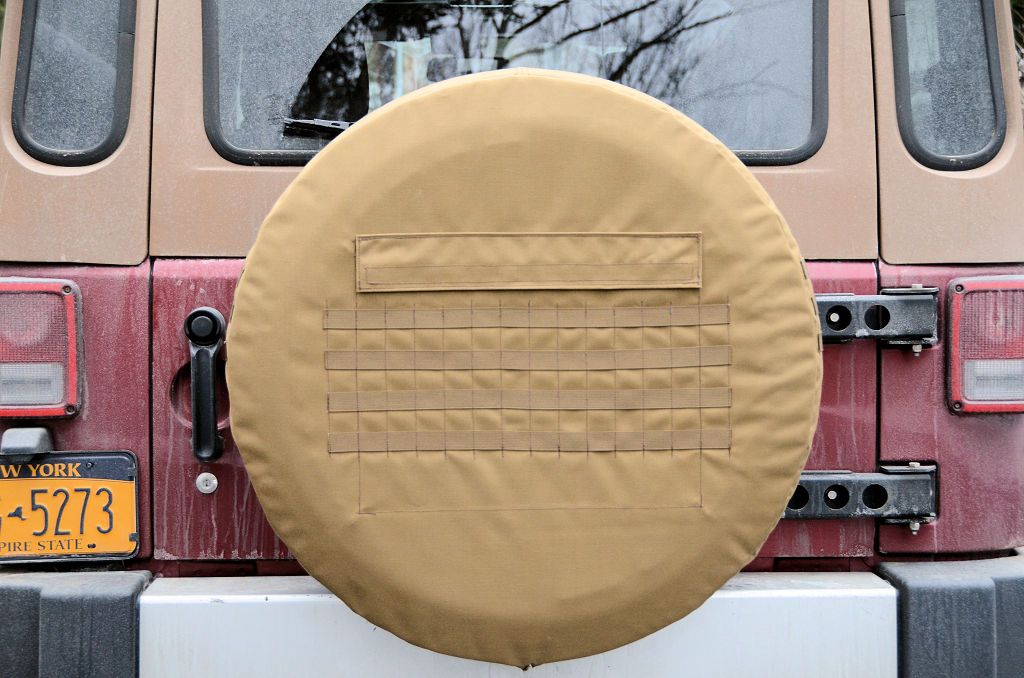
The bungee cord arrived in today's mail so I was able to finish sewing the Coyote prototype Tactical Spare Cover. I've only got one Molle pouch in Coyote so that's all I attached for the photos.

 12-14-2016 | 03:45 AM
#1165
Thread Starter
JK Super Freak
Joined: Jul 2012
Posts: 1,556
Likes: 37
From: Elmira, NY
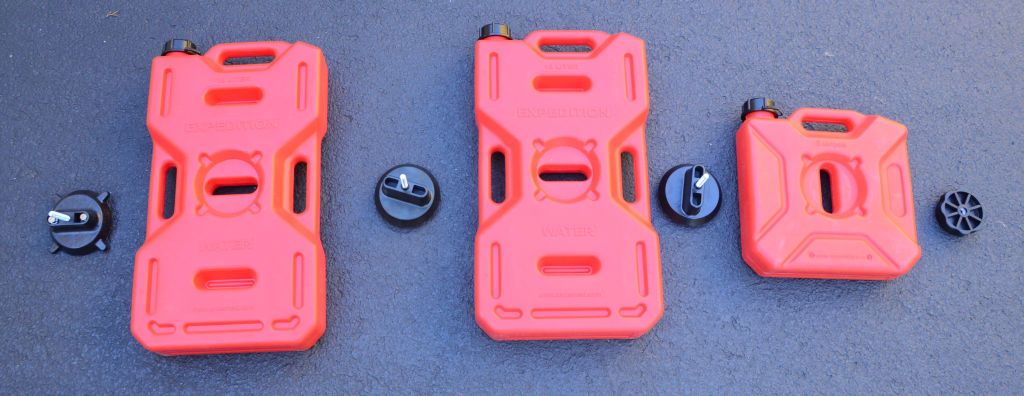
Last month at the SEMA Show I found some new liquid containers that mount similarly to the Rotopax and Kolpin style containers. They're not generally available in the US yet, but the manufacturer gave me several samples to test - two 10 liter (2.5 gallon) and one 5 liter (1.25 gallon), plus a mount and several extensions.
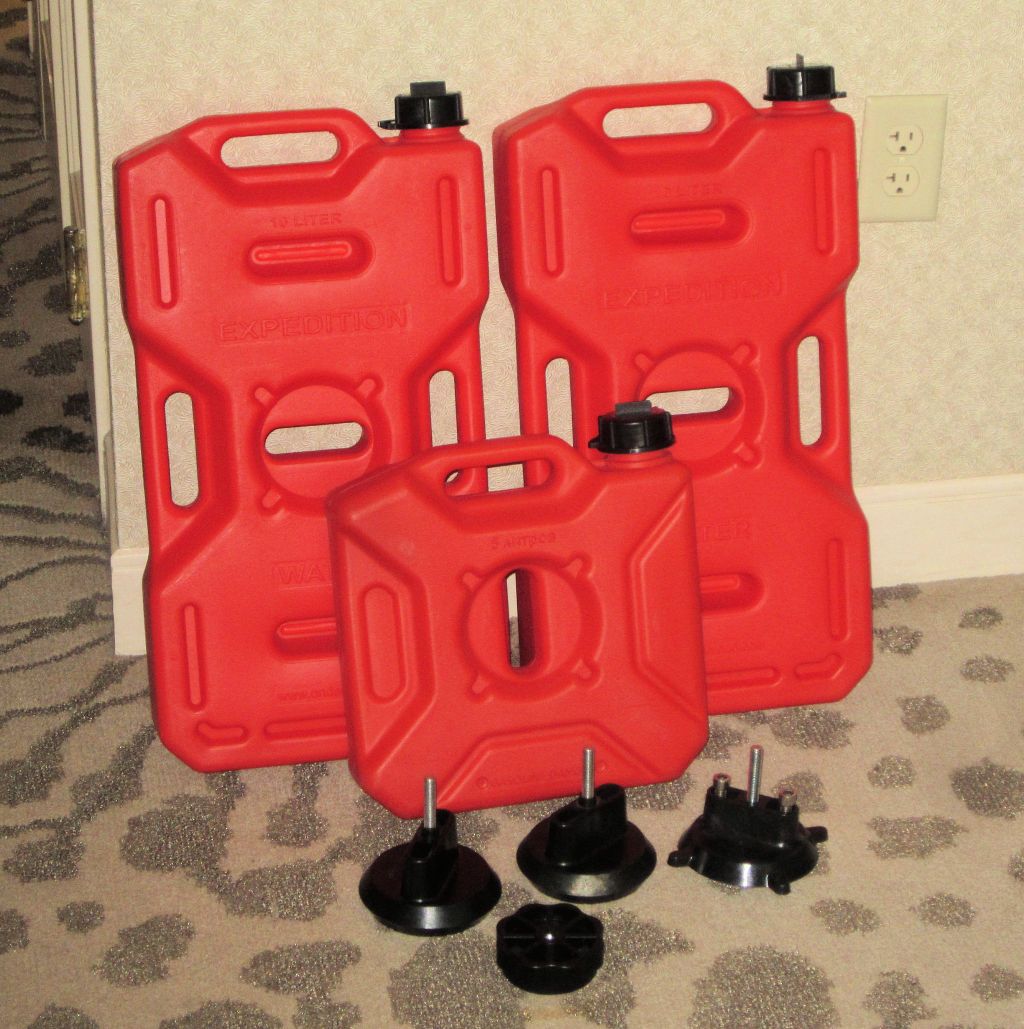
They've got a very nice stacking mount - the base mount bolts to whatever surface you're mounting to, and as you need to stack more containers on the mount you add an extension when needed - the extensions just spin in place on top of the previous container (the Rotopax system requires that the extensions be bolted in place prior to putting the containers on).
In this photo I've stacked all three using the mounting system:
I tried the new containers on the JK side mount:
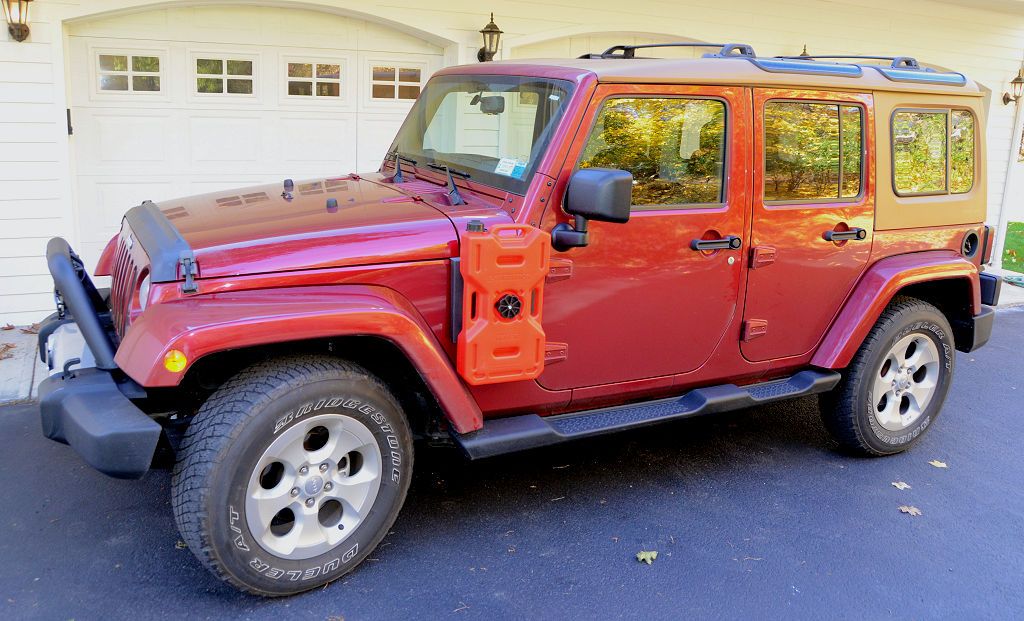
Left to right in this photo - one 5 liter, two 10 liters, a 10 and a 5, and a front view showing the depth on one container.
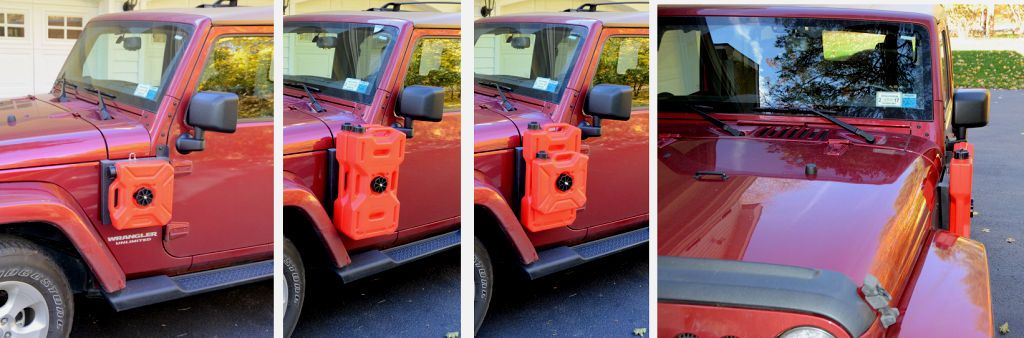
No drilling was required, the container stud bolts right up to the JK side mount.
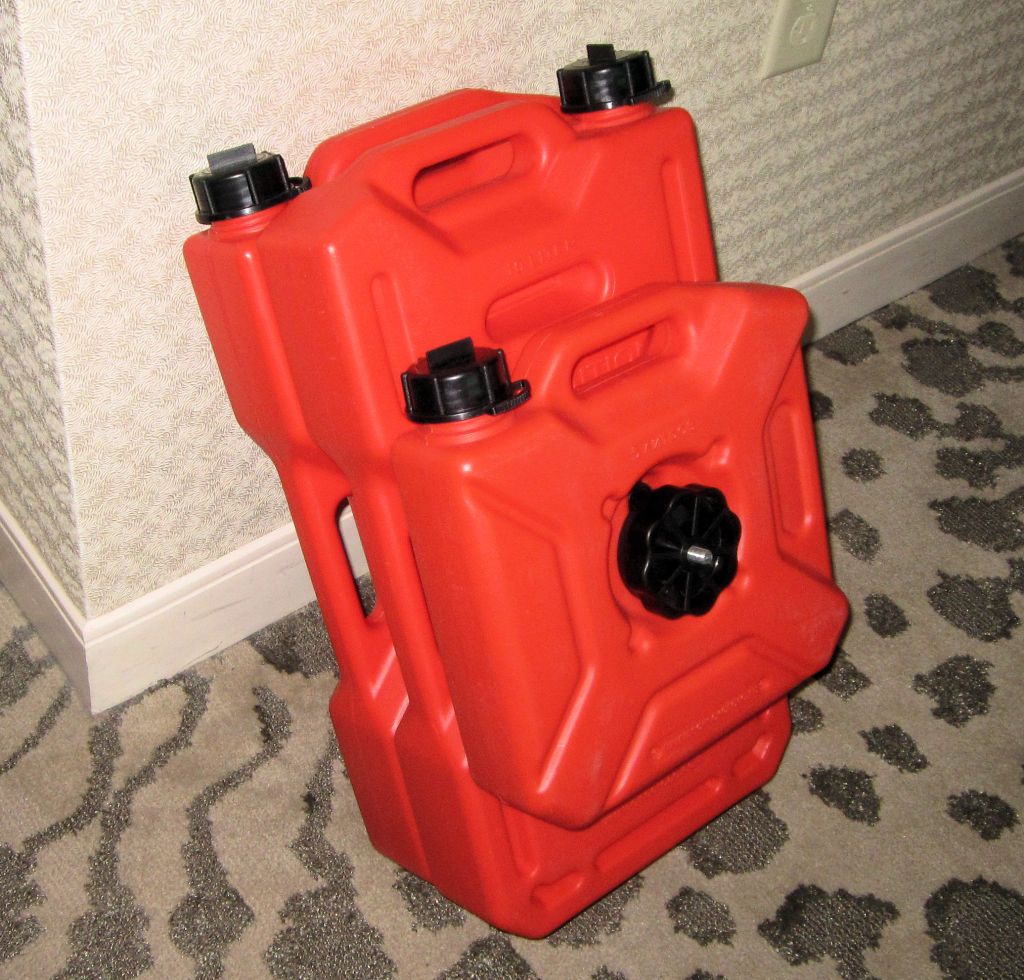
Also tried them on the hinge mount on my LJ (they'd work the same on the JK hinge mount). In this first photo, I've got a 10 liter and a 5 liter container mounted:
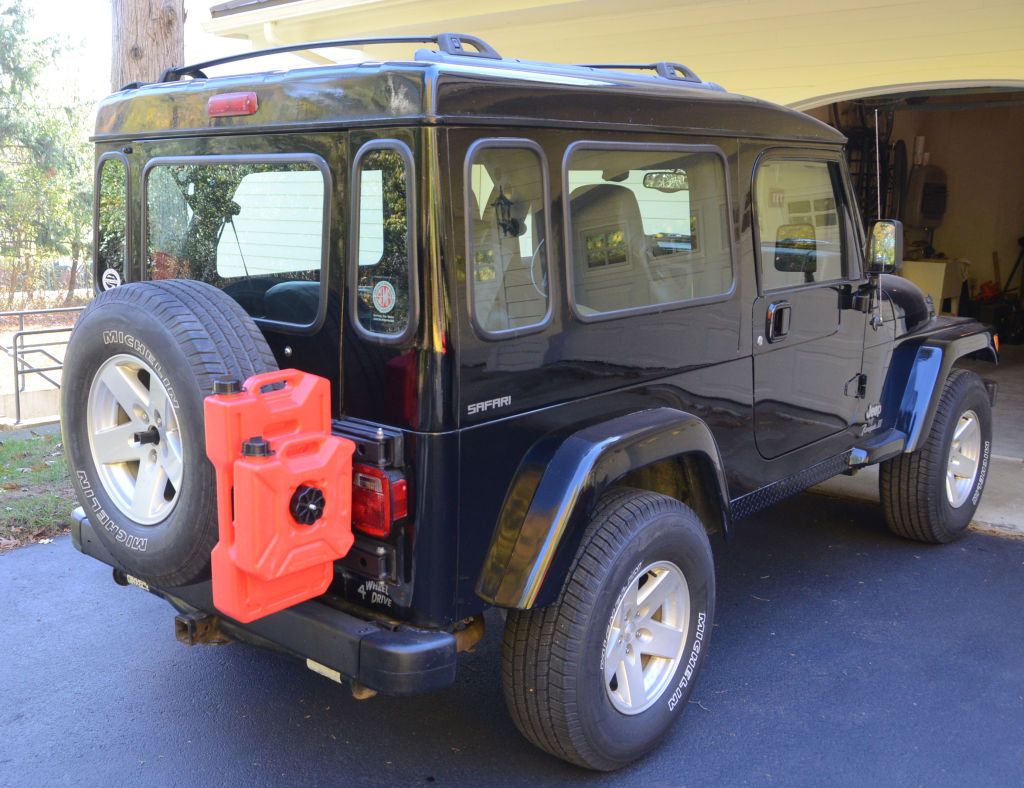
In these photo, two 10 liters, one ten liter, and one 5 liter left to right:
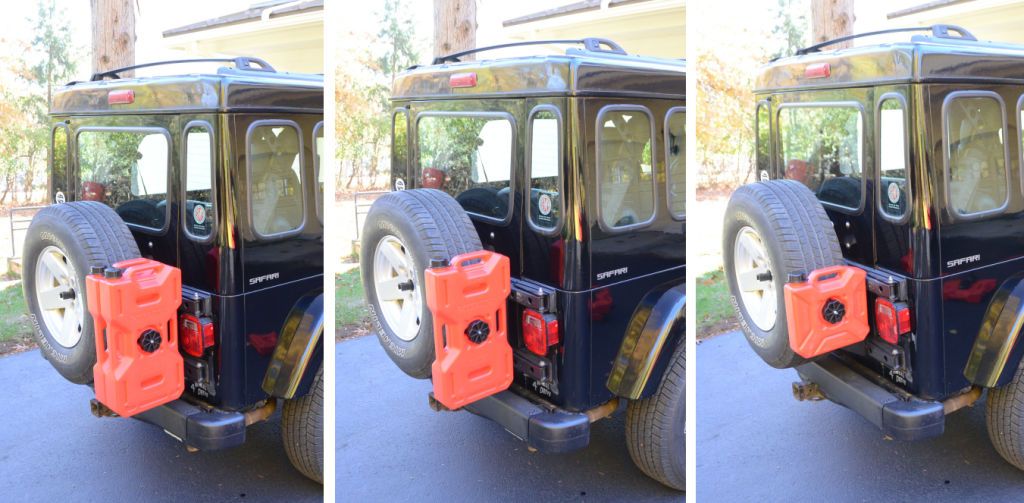
A look at the mounting system. On the left is the mount that bolts to wherever you want to mount the system. It bolted right up to my MORryde hinge-mount Rotopax bracket, no drilling. Once that's in place, you put a container on the stud, and either secure it with the knob (far right), or secure it with a second can holder and second can and then the knob, and so on.
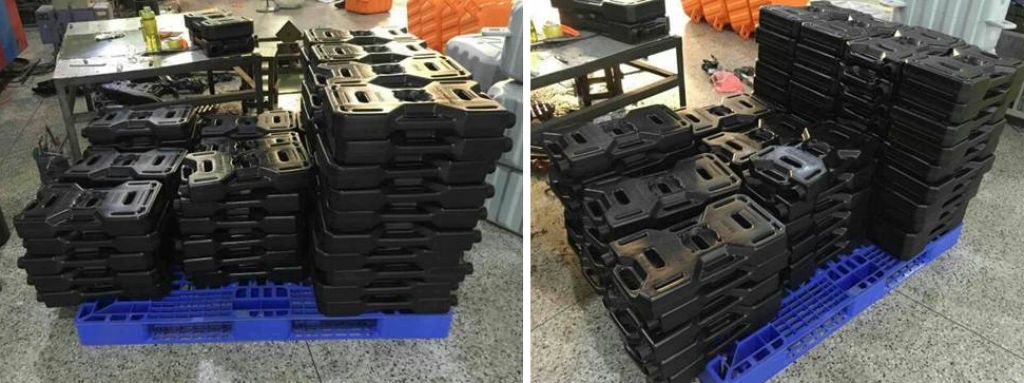
After trying them out I was favorably impressed, so I put a Jeep accessories company in touch with the manufacturer. The company liked them enough to add them to their catalog, so they'll be available soon from that company. They sent me these photos today of part of their first shipment ready to leave the manufacturer. I expect them to retail for less than other containers on the market.
They've got a very nice stacking mount - the base mount bolts to whatever surface you're mounting to, and as you need to stack more containers on the mount you add an extension when needed - the extensions just spin in place on top of the previous container (the Rotopax system requires that the extensions be bolted in place prior to putting the containers on).
In this photo I've stacked all three using the mounting system:
I tried the new containers on the JK side mount:
Left to right in this photo - one 5 liter, two 10 liters, a 10 and a 5, and a front view showing the depth on one container.
No drilling was required, the container stud bolts right up to the JK side mount.
Also tried them on the hinge mount on my LJ (they'd work the same on the JK hinge mount). In this first photo, I've got a 10 liter and a 5 liter container mounted:
In these photo, two 10 liters, one ten liter, and one 5 liter left to right:
A look at the mounting system. On the left is the mount that bolts to wherever you want to mount the system. It bolted right up to my MORryde hinge-mount Rotopax bracket, no drilling. Once that's in place, you put a container on the stud, and either secure it with the knob (far right), or secure it with a second can holder and second can and then the knob, and so on.
After trying them out I was favorably impressed, so I put a Jeep accessories company in touch with the manufacturer. The company liked them enough to add them to their catalog, so they'll be available soon from that company. They sent me these photos today of part of their first shipment ready to leave the manufacturer. I expect them to retail for less than other containers on the market.
12-16-2016 | 05:48 AM
#1168
Thread Starter
JK Super Freak
Joined: Jul 2012
Posts: 1,556
Likes: 37
From: Elmira, NY
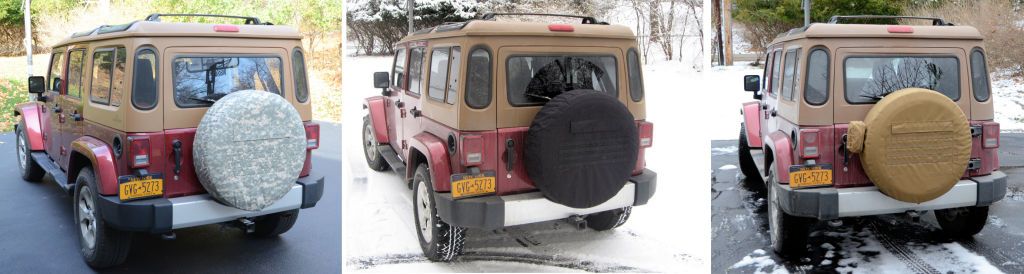
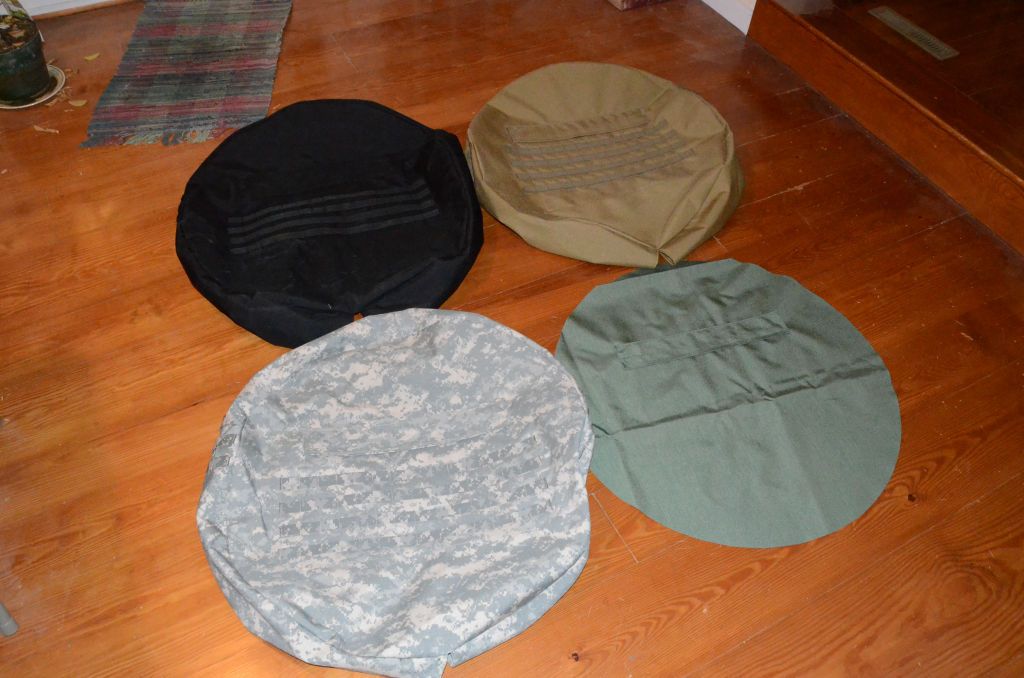
This is a work-in-progress photo of the O.D. Green cover along with the other colors done so far, I'm waiting for O.D. webbing and velcro to arrive so I can complete the sewing.
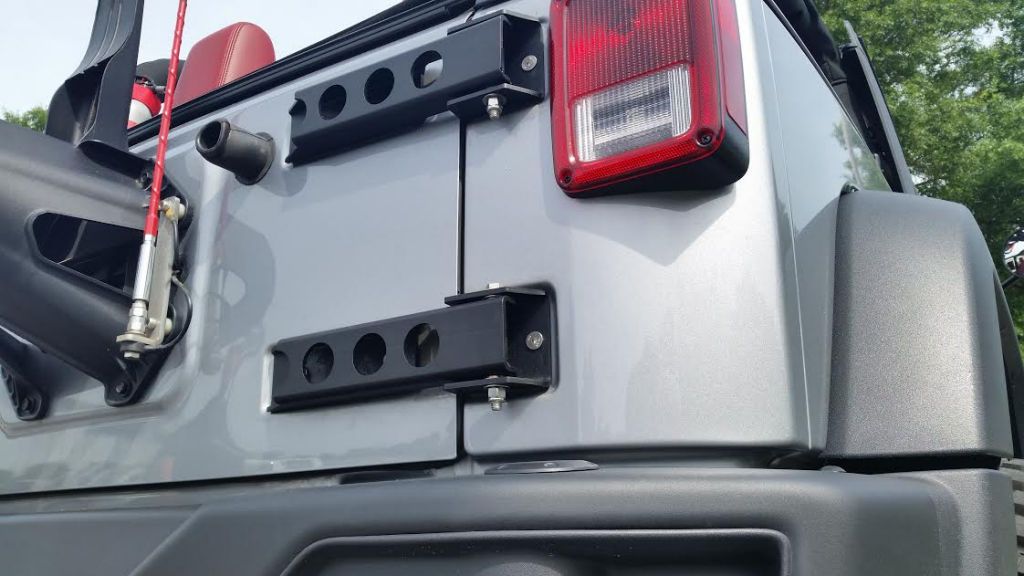
BTW Gr8Tops (GR8TOPS) sent out a marketing email this morning - they're offering the HD hinges at $30 off until the end of the year. This is the photo that was in their email:
 12-16-2016 | 07:15 AM
#1169

JK Newbie
Joined: Jan 2016
Posts: 66
Likes: 1
From: Palm Bay, FL
The only concern or question I ever had about the HD hinges is wether the problem with the heavier tire / and additional accessories , like the gas can, Hi lift jack etc causes the hinges to bend or actually the tail gate itself.
12-16-2016 | 09:29 AM
#1170
Thread Starter
JK Super Freak
Joined: Jul 2012
Posts: 1,556
Likes: 37
From: Elmira, NY
The hinges are a solution for only some of the problems of the factory tailgate design. They alone won't solve all of the problems that occur with very large/very heavy tires or heavy tailgate-mounted gear. I'll explain the whole system...
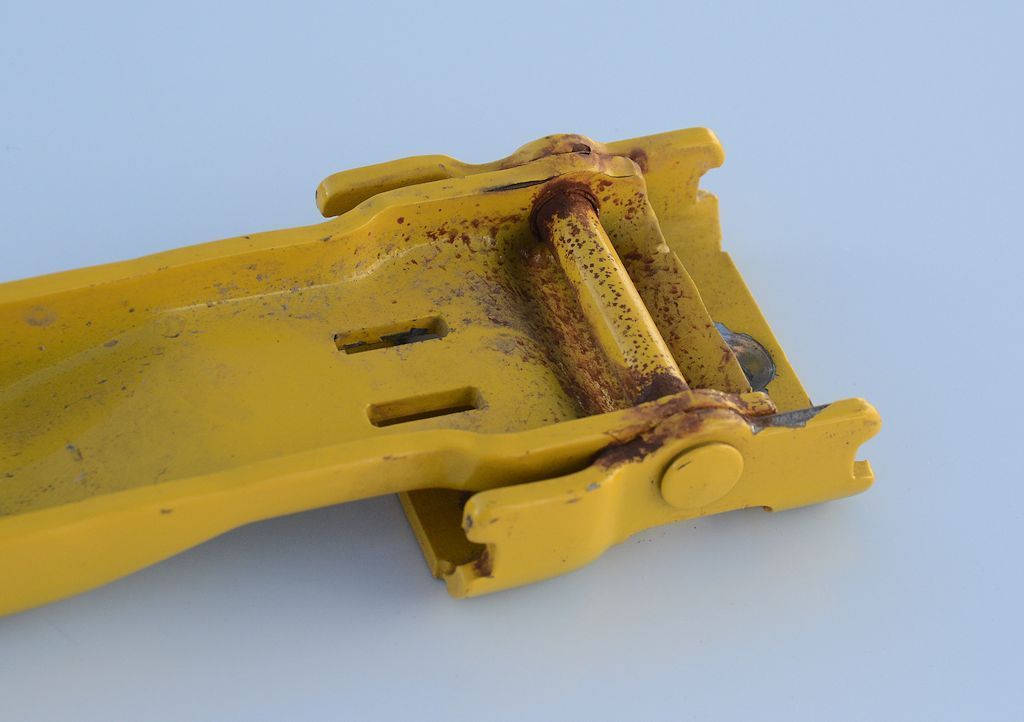
1. HD Hinges. The factory hinges are barely adequate for the task of supporting the tailgate and factory spare. They have very narrow 3/16"-wide steel-on-steel hinge bushings, which begin to wear and rust the day the Jeep goes into service. Over time they will loosen, which leads to the tailgate rattling and sagging, and also can allow the tailgate to flex. A factory hinge with the hinge pin bushings worn and rusty:
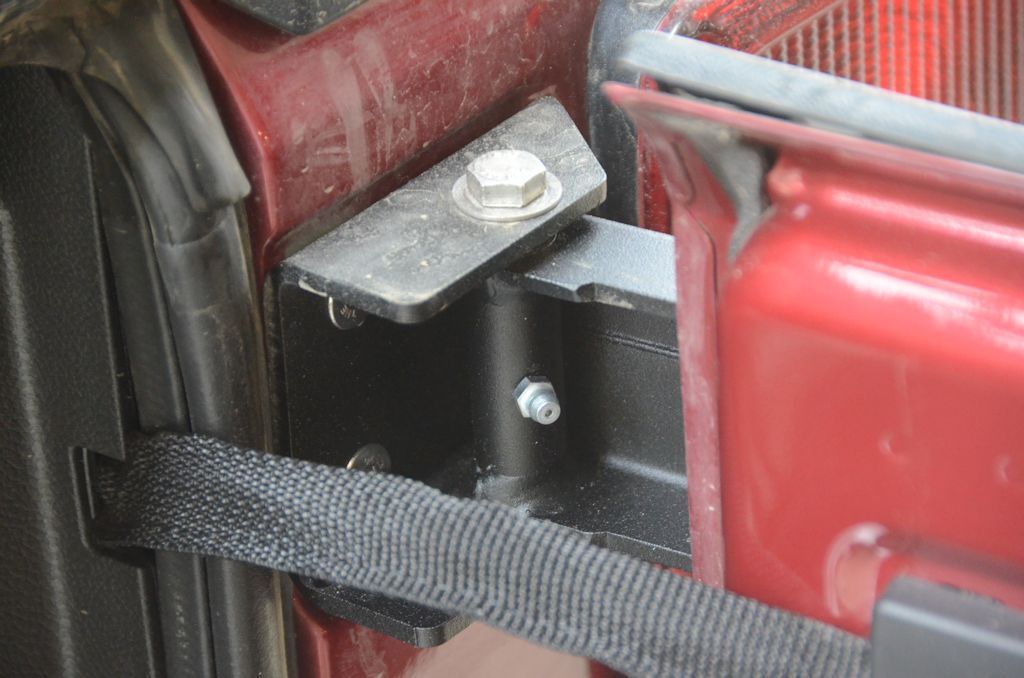
The HD hinges won't wear like the factory hinges because they swing on 2"-wide bronze bushings. The hinge pin is stainless steel, and a zerk fitting is provided for greasing the hinges; there's no provision for lubrication on the factory hinge.
The HD hinges are also much stronger than the factory hinges, resisting flex better. And they're more functional than the factory hinges, providing easy mounting for accessories like HiLift jacks and Rotopax mounts.
2. When you start adding weight to the tailgate is when the next part of the system is worth installing - the tailgate reinforcement. Designed to work with the HD hinges and bolt to factory bolt holes in the tailgate, the reinforcement prevents flex of the tailgate. Tailgate flex is what can destroy a tailgate over time - the spot welds holding the sheet metal parts of the tailgate will break with too much flex, it's very common. So once you get more than 20-30 pounds over the weight of the factory spare, it's a good idea to install the tailgate reinforcement. This enables the tailgate to easily hold 37" and larger tires and/or full 5-gallon jerry cans without flex,.
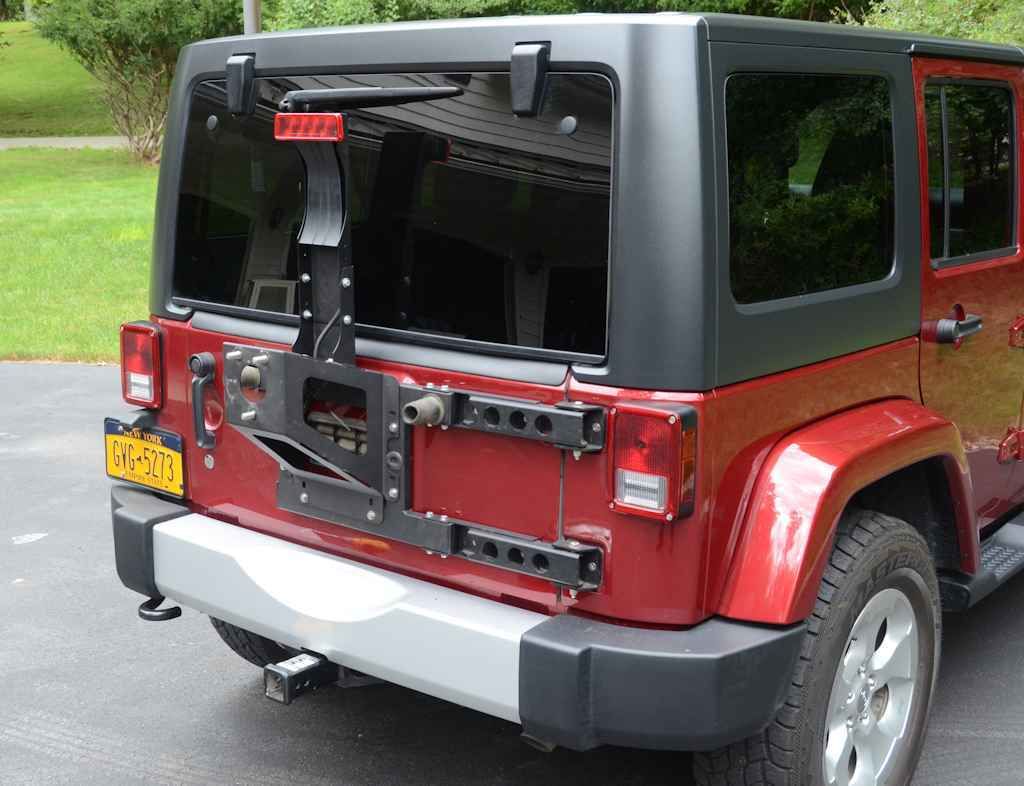
3. And if you're running a large spare then you'll probably also need to upgrade the spare carrier to raise the tire higher to clear the bumper and to provide more strength for supporting the tire. The factory cast magnesium spare carrier is a great part, and very strong, but its failure mode is catastrophic - once it cracks from too much stress it's likely it'll fail completely and you'll lose the spare on the trail or worse, on the highway. The HD/Large Spare Carrier is also installed in the photo above.
Any one of these components can be installed individually, but they're designed to work together and to provide an upgrade path that's affordable. Since the hinges will begin to wear day 1, they could be replaced right away and the original factory hinges sold on eBay while they're still good to recover a good part of the cost of the new hinges. Then when you start adding weight due to larger tires or other gear hanging on the tailgate you can add the reinforcement, that bolts right on along with the hinges you would already have installed. And if you need a large/stronger spare carrier that bolts on as well.
4. Along with all of the above, there's a range of accessory mounts designed to work as part of the system - hinge-mount HiLift carrier and Rotopax carrier, and spare-mount jerry can/ammo can carrier, and more to come.
The hinges alone are not intended to be a solution for all tailgate issues, they're part of a system which can grow as needs dictate.
Sorry for the long answer.
The following users liked this post:
FarFromStock (01-05-2018)