
Custom modular JK hardtop
 09-13-2016 | 01:20 PM
#1051

Thread Starter
JK Super Freak
Joined: Jul 2012
Posts: 1,556
Likes: 37
From: Elmira, NY
I'm not sure if I'm going to make up a prototype of the swing-up window or not, but today I did move the project along a little bit - I picked up two sets of hinges that should be perfect for this application... cost me 12 bucks for all four. They're a perfect size and fairly low profile so I think they could look give a factory look to this idea...
09-15-2016 | 01:30 PM
#1052
Thread Starter
JK Super Freak
Joined: Jul 2012
Posts: 1,556
Likes: 37
From: Elmira, NY
I'm in the process of sewing a final soft barn door skin in Spice; the prototype was a camo print using fabric I just happened to have on hand. I posted a few photos of the sewing of the prototype, but now I'll post a little more detail because some people have expressed interest in making their own soft barn door. If what I post over the next few days still leaves anyone with questions about building your own, just ask questions and I'll try to provide more detail.
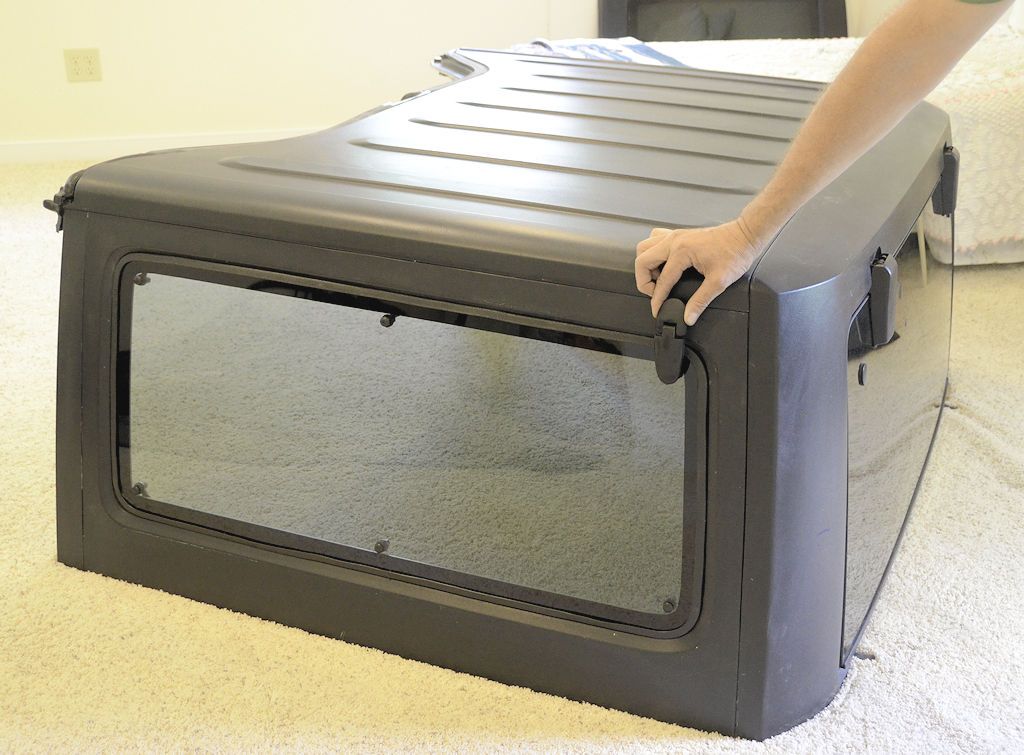
I made the frame back when I did the prototype, but here's a little more detail about it. The frame is mbade from 3/8" steel rod, which is the same thing most aftermarket half door upper frames are made from. There's a little bit of welding involved, but not too much. This photo is from when I made the prototype, comparing the frame to the hard barn door:

The frame should be sized and shaped to follow the center of the weatherstrip around the hatch opening as can be seen in this next photo:

It's also got to be curved in both directions in order to seal well, because the factory hatch opening is curved in both dimensions. In this photo the curves can be seen; the top curve is more gentle than the side curves but it's critical that both match the curve of the hardtop opening.

About the weatherstrip - a barn door won't seal properly against the factory weatherstrip, I wrote about it here: Barn Door for JK factory hardtops - Page 121 - Expedition Portal If you're doing a barn door you'll need to do something similar to what I did with the weatherstrip.
I made the frame back when I did the prototype, but here's a little more detail about it. The frame is mbade from 3/8" steel rod, which is the same thing most aftermarket half door upper frames are made from. There's a little bit of welding involved, but not too much. This photo is from when I made the prototype, comparing the frame to the hard barn door:
The frame should be sized and shaped to follow the center of the weatherstrip around the hatch opening as can be seen in this next photo:
It's also got to be curved in both directions in order to seal well, because the factory hatch opening is curved in both dimensions. In this photo the curves can be seen; the top curve is more gentle than the side curves but it's critical that both match the curve of the hardtop opening.
About the weatherstrip - a barn door won't seal properly against the factory weatherstrip, I wrote about it here: Barn Door for JK factory hardtops - Page 121 - Expedition Portal If you're doing a barn door you'll need to do something similar to what I did with the weatherstrip.
09-16-2016 | 06:38 AM
#1053
Thread Starter
JK Super Freak
Joined: Jul 2012
Posts: 1,556
Likes: 37
From: Elmira, NY
I mounted the barn door upper to the tailgate using the same mounting "stakes" that the hard barn door uses. These are made from 1 1/2" x 3/4" rectangular tubing. There are two tabs welded to each stake, these are used to bolt the stakes to the tailgate. The bolts are pretty simple - they're longer bolts in 4 of the spare tire carrier bolt holes. I removed 4 of the factory spare carrier bolts, drilled through the inside sheet metal of the tailgate with a drill inserted in the hole from the outside, and then ran longer 8mm bolts through the holes. The ends of the bolts protrude a bit through the tailgate and serve as studs to attach the stakes. Then I cut a factory plastic wiring cover to fit between the stakes, and I made clearance holes in the cover for the bolts/nuts.

There are other ways the upper might be mounted to the tailgate, but this seemed like an easy way to do it with minimal modification to the tailgate. An important thing about the mounting is that it must be stiff enough so that the upper exerts pressure on the liftgate seal, so if you decide on a different mounting method, make sure it's stiff enough so the upper applies enough pressure to seal well.
http://www.youtube.com/watch?v=3ZwQ8gV_Q4A
Next: sewing the skin.
09-16-2016 | 01:49 PM
#1054
Thread Starter
JK Super Freak
Joined: Jul 2012
Posts: 1,556
Likes: 37
From: Elmira, NY
A while back I picked up barely used Bestop Pavement Ends bikini top in Spice for about $30; it'll provide more than enough fabric for the barn door plus some other accessory...
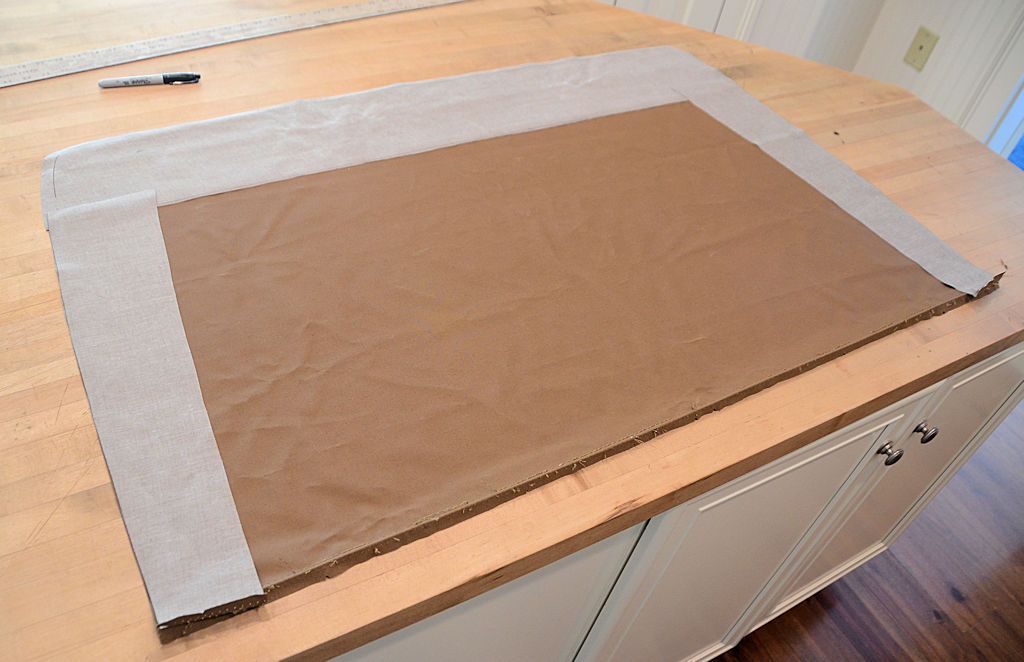
To make the main skin, I made a pattern by tracing the frame on poster board. The pattern is longer on the bottom than the barn door is tall because the bottom of the skin will wrap around the bottom of the frame. Also, the curve of the weatherstrip at the top corners is a more gradual curve than the liftgate opening, so I extended the corners of the pattern to match the sharper corners of the opening - the extended top corners are visible in this photo of the pattern.
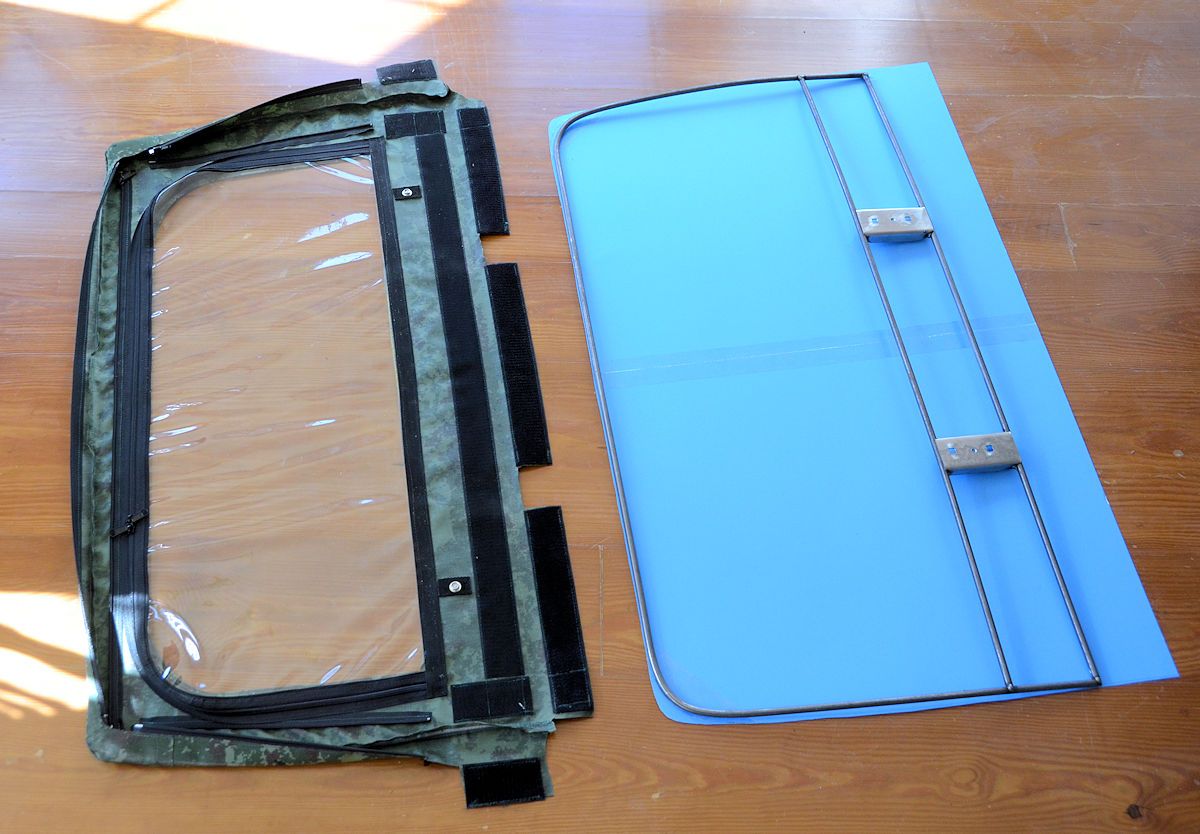
The main skin will be sewn inside-out and reversed after sewing. I did this so the seam between the outside and inside is exactly along the sides of the frame. When I cut the main skin out I'll leave a 3/8" seam allowance all around.
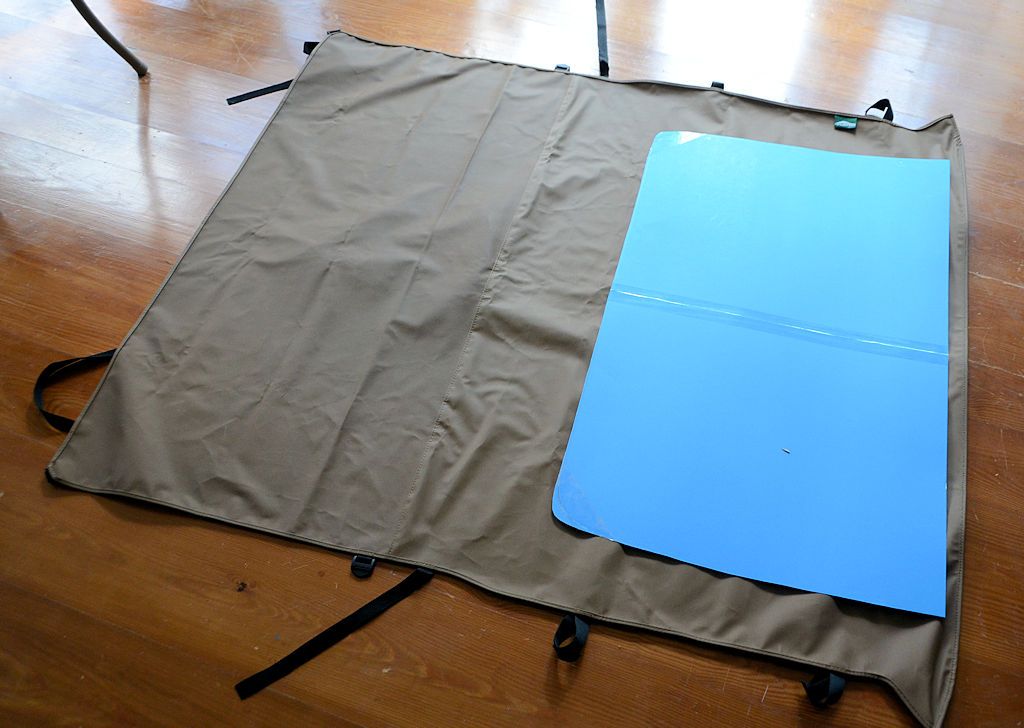
The outside skin is a single full piece, but the inside is made from 3 narrower pieces. You could start with a full piece on the inside, but since only the edges are needed, it's a waste of expensive fabric to do it that way. It's best to start with an outside skin that's one piece though, that help keeps the shape until the window is sewn in and helps avoid wrinkles in the final product. Here are the 4 parts, they're inside out in this photo. First I'll sew the three inside pieces together, then I'll sew the inside and outside together.
Once it's sewn, it's reversed and tried on for size:
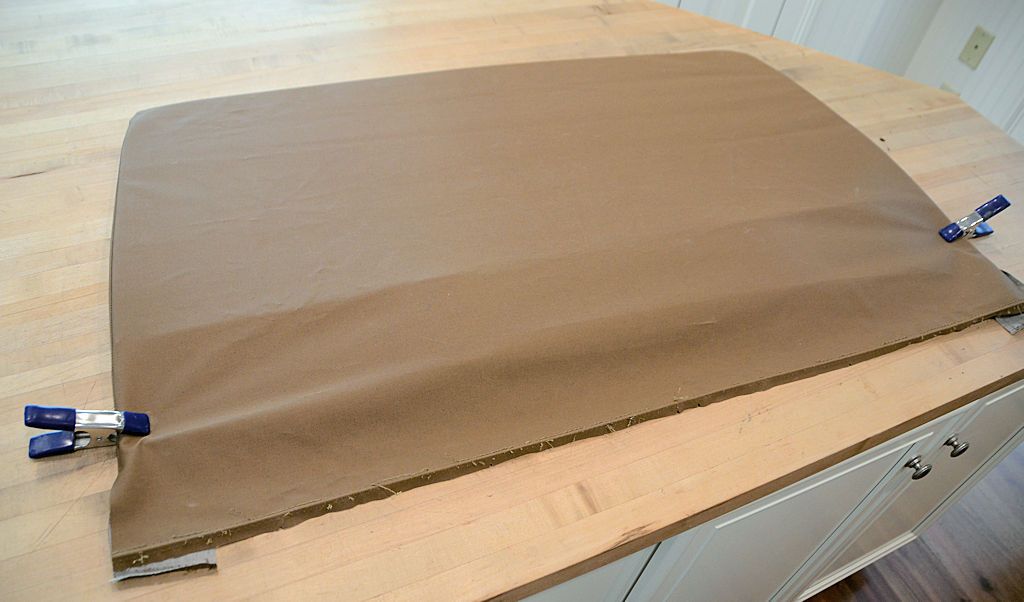
It fits nicely, so on to the next step. If it turned out to be a little loose, the fix is simple - turn it inside out again and run a new line of stitches along the seam but perhaps 1/8" inboard, which will tighten it up when reversed.
Next: Velcro and zippers to secure it to the frame.
To make the main skin, I made a pattern by tracing the frame on poster board. The pattern is longer on the bottom than the barn door is tall because the bottom of the skin will wrap around the bottom of the frame. Also, the curve of the weatherstrip at the top corners is a more gradual curve than the liftgate opening, so I extended the corners of the pattern to match the sharper corners of the opening - the extended top corners are visible in this photo of the pattern.
The main skin will be sewn inside-out and reversed after sewing. I did this so the seam between the outside and inside is exactly along the sides of the frame. When I cut the main skin out I'll leave a 3/8" seam allowance all around.
The outside skin is a single full piece, but the inside is made from 3 narrower pieces. You could start with a full piece on the inside, but since only the edges are needed, it's a waste of expensive fabric to do it that way. It's best to start with an outside skin that's one piece though, that help keeps the shape until the window is sewn in and helps avoid wrinkles in the final product. Here are the 4 parts, they're inside out in this photo. First I'll sew the three inside pieces together, then I'll sew the inside and outside together.
Once it's sewn, it's reversed and tried on for size:
It fits nicely, so on to the next step. If it turned out to be a little loose, the fix is simple - turn it inside out again and run a new line of stitches along the seam but perhaps 1/8" inboard, which will tighten it up when reversed.
Next: Velcro and zippers to secure it to the frame.
09-17-2016 | 12:51 PM
#1055
Thread Starter
JK Super Freak
Joined: Jul 2012
Posts: 1,556
Likes: 37
From: Elmira, NY
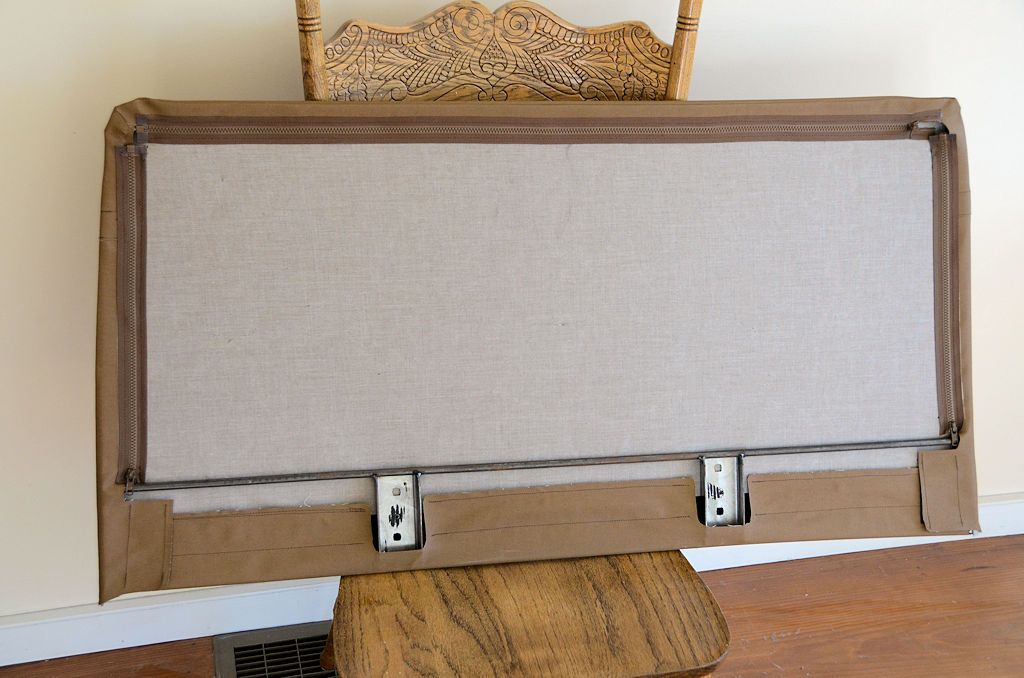
The next step was to attach Velcro and zippers to secure it to the frame. I used 2"-wide Velcro along the bottom, and I did the Velcro first so the Velcro can hold the skin tightly in place for fitting the zippers.
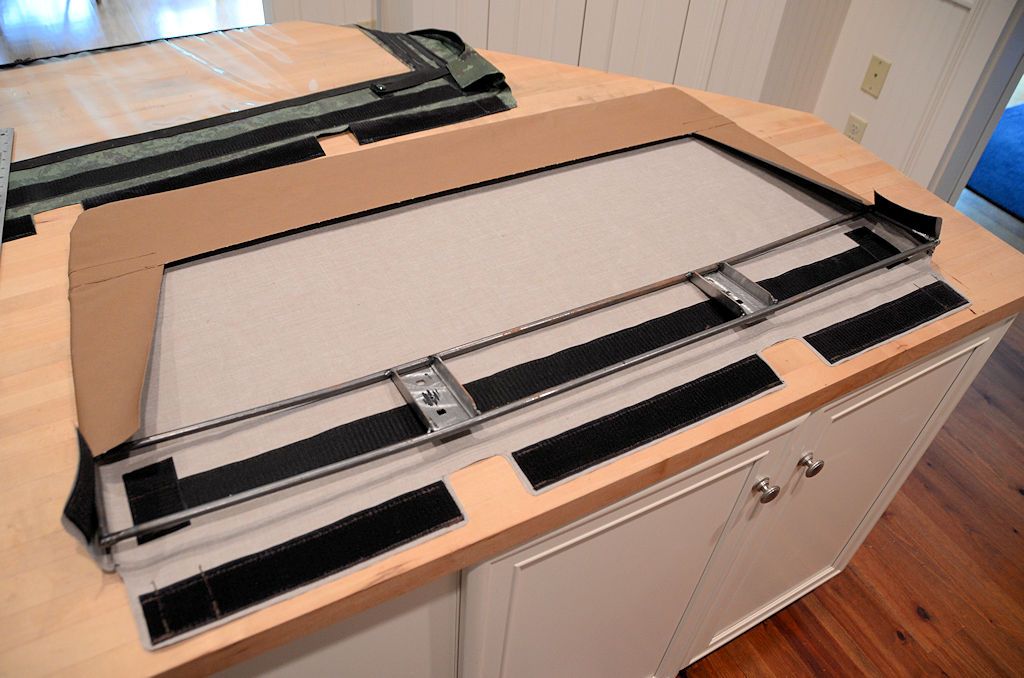
Closed up:
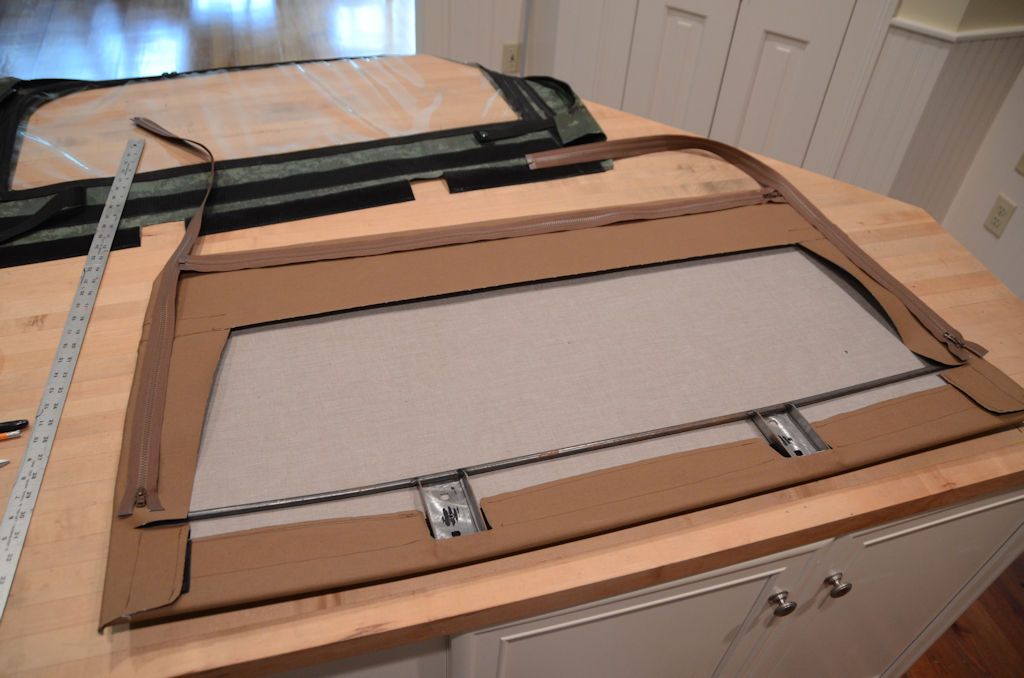
Next I'll finish up the closures on the top and sides with zippers, the zippers are setting in place in this photo:
Closed up:
Next I'll finish up the closures on the top and sides with zippers, the zippers are setting in place in this photo:
09-17-2016 | 12:55 PM
#1056
Thread Starter
JK Super Freak
Joined: Jul 2012
Posts: 1,556
Likes: 37
From: Elmira, NY
I used Velcro on the bottom of the barn door because I've got plenty of room there to use 2" wide Velcro - 2" will fasten very securely. Around the top of the barn door I want to reserve as much of the space for the window, so 2" Velcro will be too wide - zippers will provide a very secure closure and use a minimum of space.
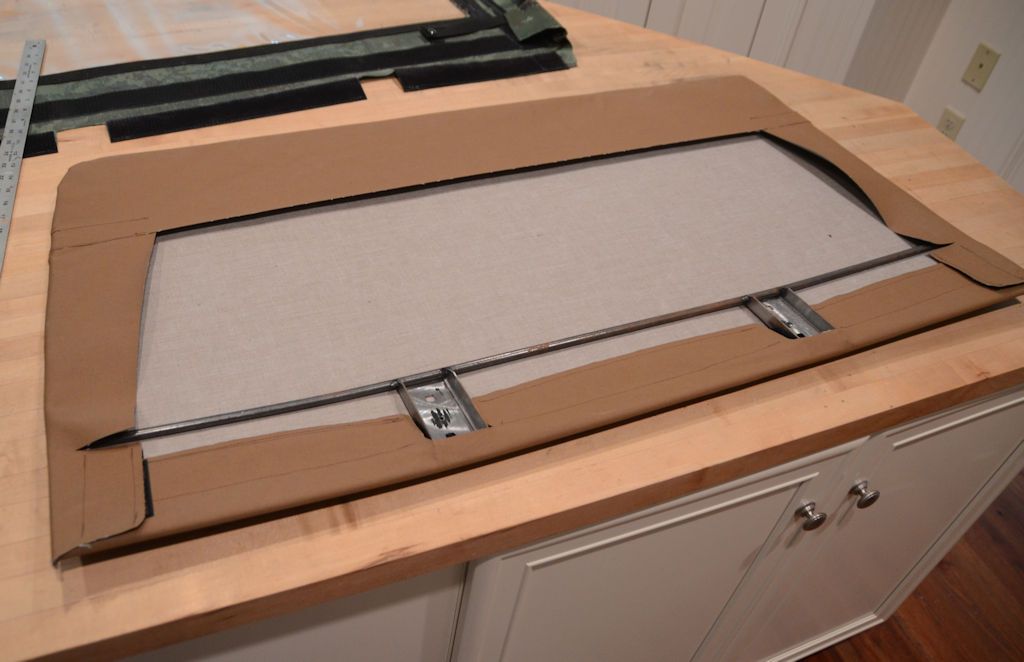
The inside top and side flaps hadn't been trimmed up to this point in the project; they get trimmed to just wider than the width of one side of the zipper. The zipper is sewn to the flap, then the flap is pulled tight and the other side of the zipper gets sewn to the inside of the main panel. The results:
One thing left to do is to stuff the upper corners with foam - as I mentioned a few days ago the corners are sharper than the radius of the weatherstrip, so they stick out a bit. Stuffing them will smooth out the wrinkles in the corners, smooth the curves and help with sealing.
The way the zippers are installed there's room for a pretty large window, the dashed line shows how big the window could be.
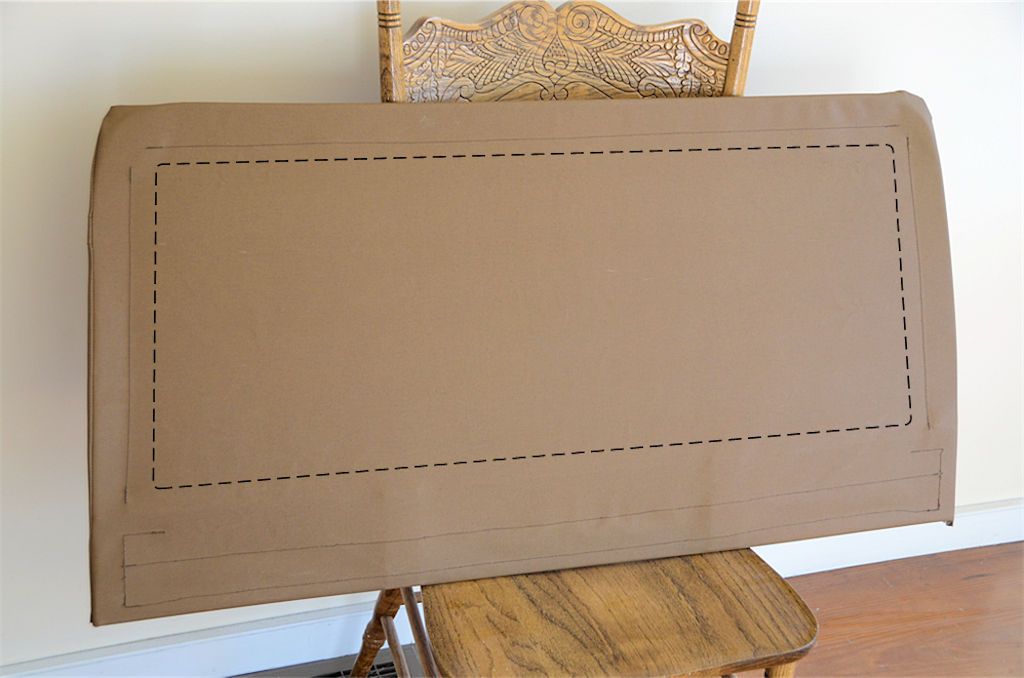
Installing the window is next.
The inside top and side flaps hadn't been trimmed up to this point in the project; they get trimmed to just wider than the width of one side of the zipper. The zipper is sewn to the flap, then the flap is pulled tight and the other side of the zipper gets sewn to the inside of the main panel. The results:
One thing left to do is to stuff the upper corners with foam - as I mentioned a few days ago the corners are sharper than the radius of the weatherstrip, so they stick out a bit. Stuffing them will smooth out the wrinkles in the corners, smooth the curves and help with sealing.
The way the zippers are installed there's room for a pretty large window, the dashed line shows how big the window could be.
Installing the window is next.
09-17-2016 | 04:44 PM
#1058
Thread Starter
JK Super Freak
Joined: Jul 2012
Posts: 1,556
Likes: 37
From: Elmira, NY

But no big surprise, that's not what I'm doing, I'll be sewing in a tinted vinyl window, more about that tomorrow.
09-18-2016 | 08:45 AM
#1059
Thread Starter
JK Super Freak
Joined: Jul 2012
Posts: 1,556
Likes: 37
From: Elmira, NY
In the prototype soft barn door skin I installed the window with a zipper so the window could be opened/rolled down for airflow. For this barn door skin I've decided to do a fixed window - since it's so easy to remove the barn door upper and store it above the roll bars in the Safari Cab, I'll just do that rather than have the window roll down. Also as I've been driving with the Safari Cab for a while now, I find that the power vent windows provide plenty of flow-through ventilation and they open/close at the flick of a switch so they're a lot easier than getting out and unzipping/rolling the back window.
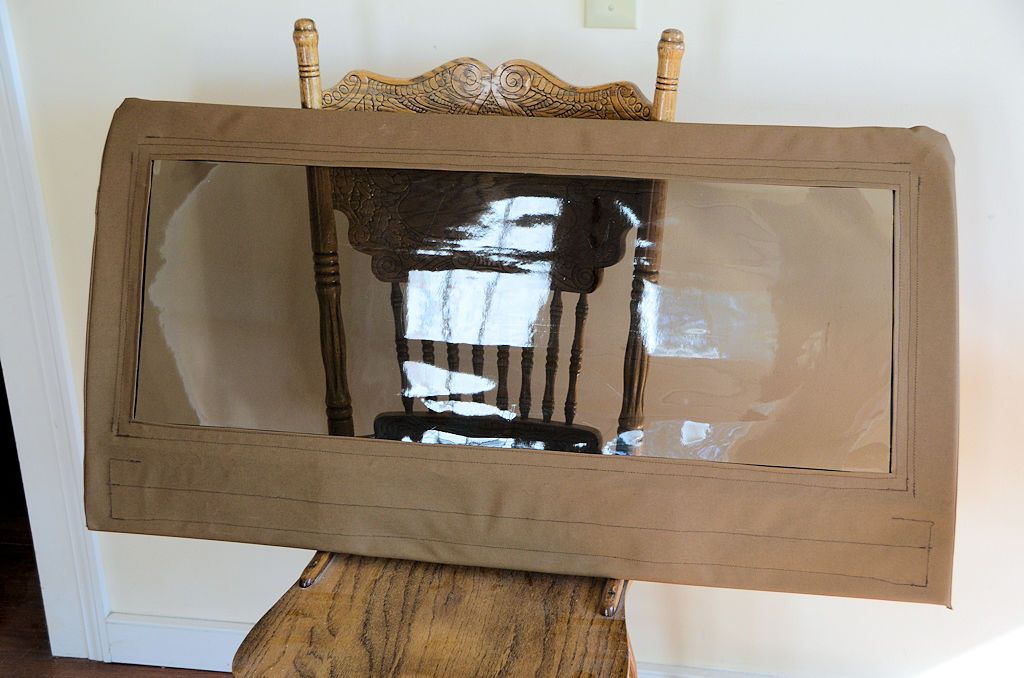
The technique I use for installing a vinyl window in a canvas panel is in this excellent video by Sailrite:
https://www.youtube.com/watch?v=aF7i-iAgzZc The window installed:
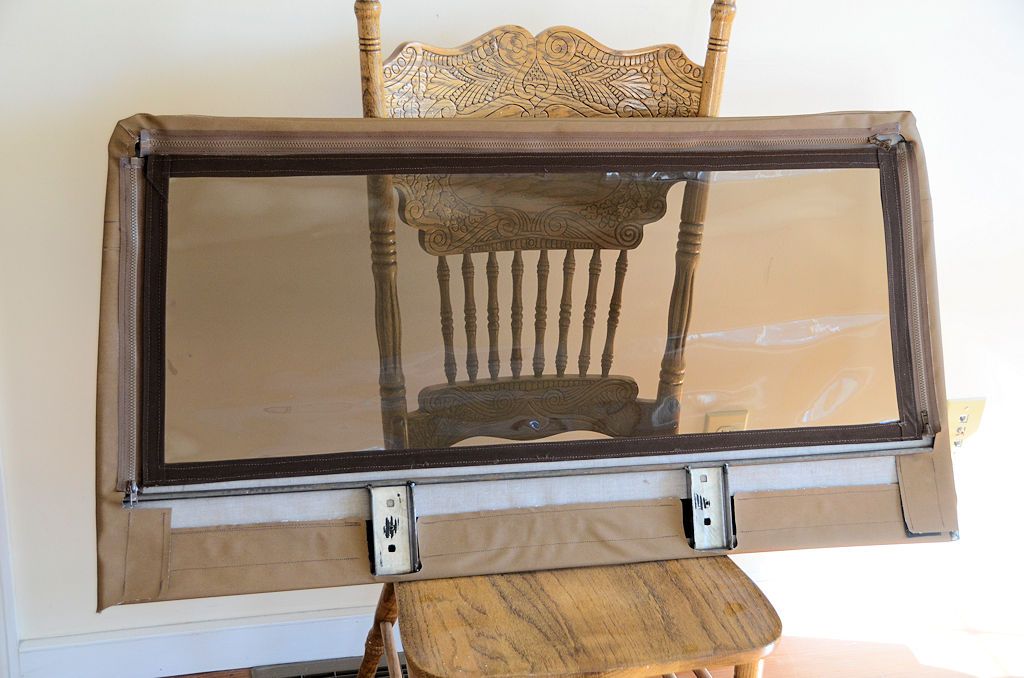
Now it's time to install the barn door on the Jeep.
The technique I use for installing a vinyl window in a canvas panel is in this excellent video by Sailrite:
https://www.youtube.com/watch?v=aF7i-iAgzZc The window installed:
Now it's time to install the barn door on the Jeep.
09-18-2016 | 12:06 PM
#1060
Thread Starter
JK Super Freak
Joined: Jul 2012
Posts: 1,556
Likes: 37
From: Elmira, NY
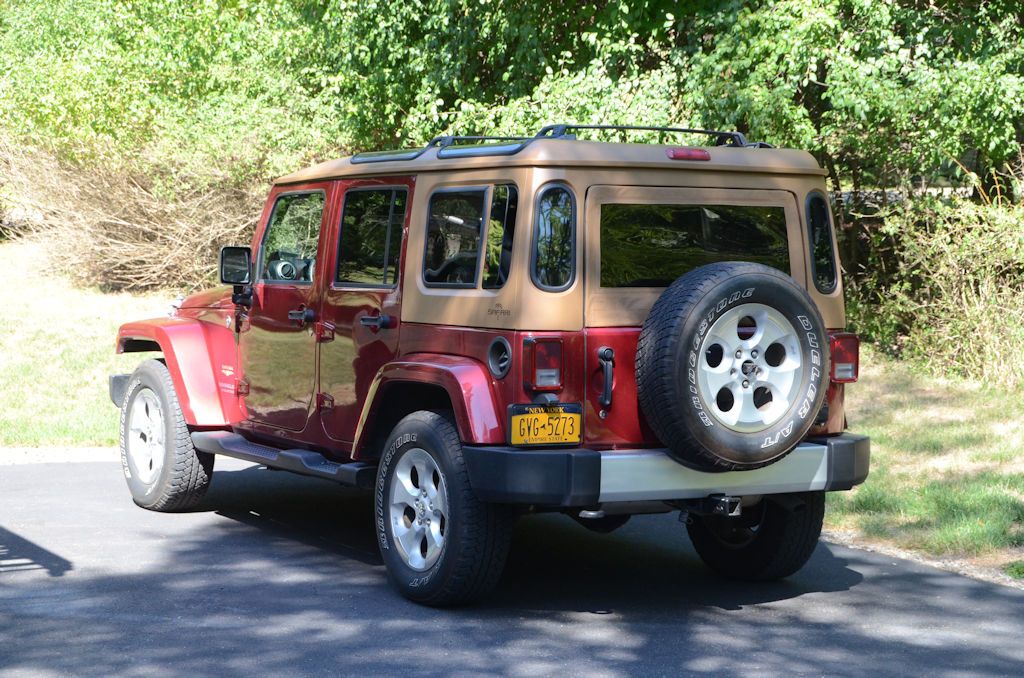
The soft barn door installed on the Jeep.

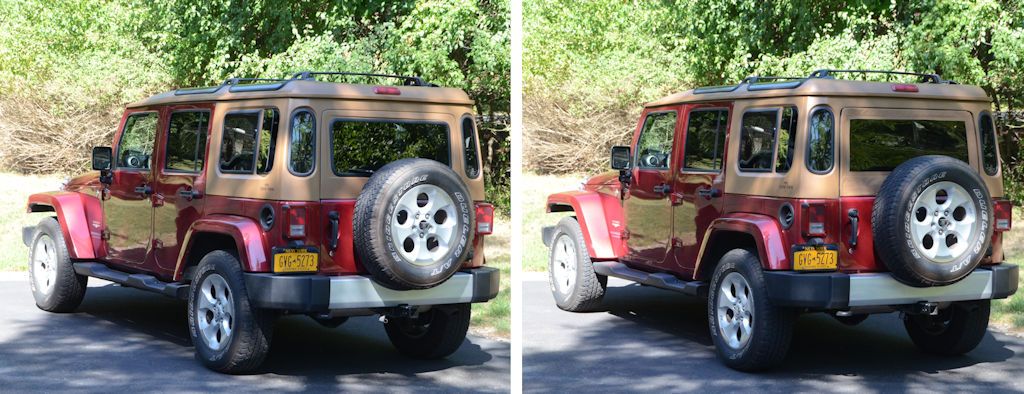
Compared to the hard barn door:
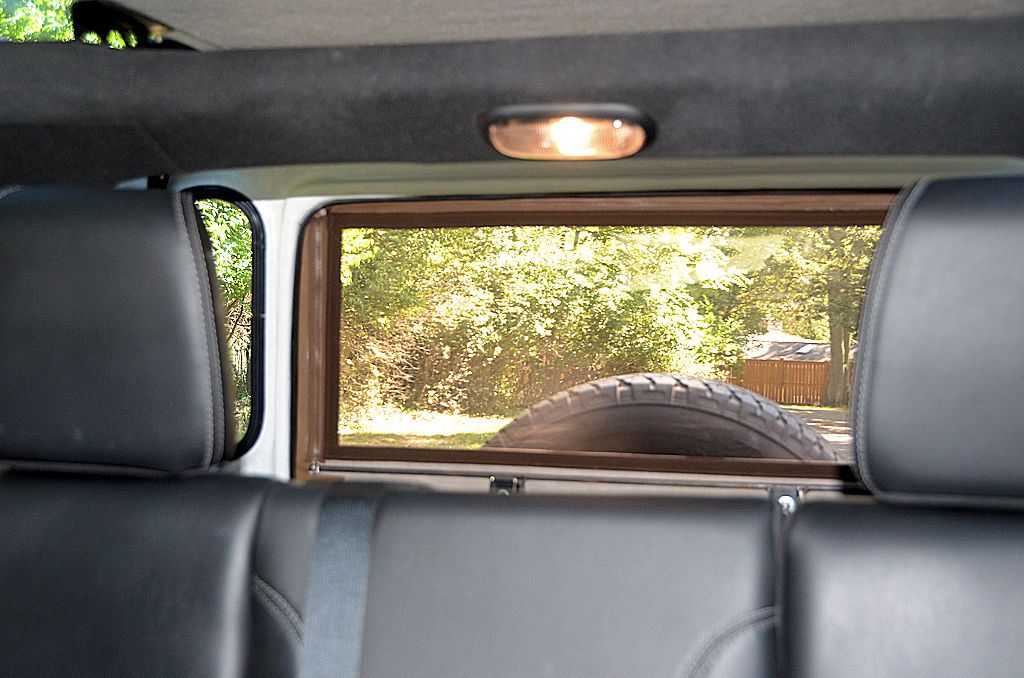
The view over the shoulder from the driver's seat:
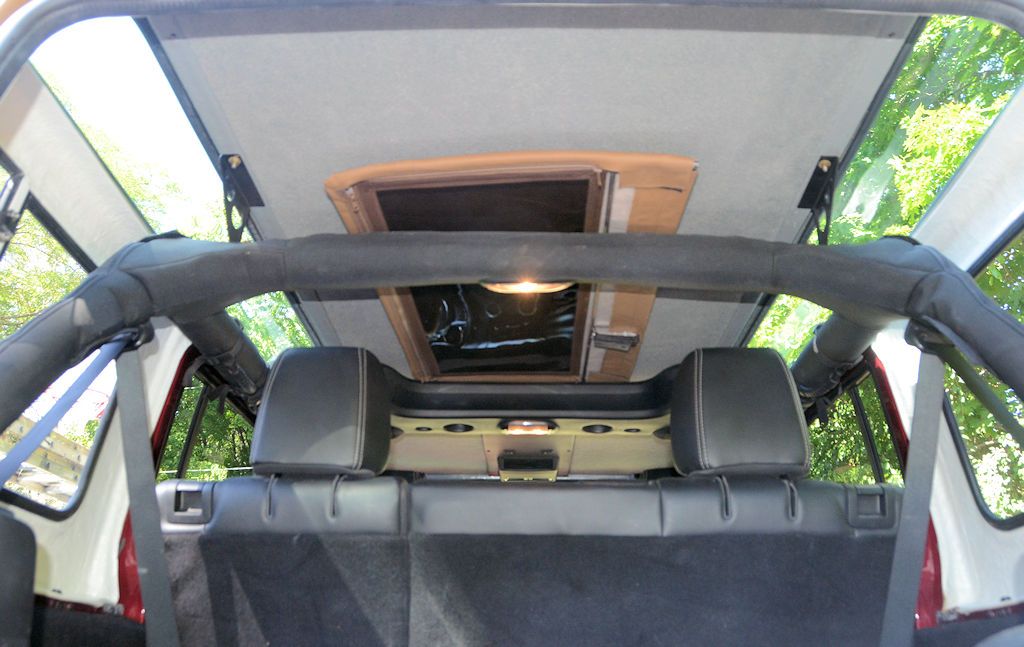
The barn door comes off in less than a minute, just 4 wing nuts to take it off and then it can be stored above the roll bars:
In action:
https://www.youtube.com/watch?v=1_Cj8Q-FTWc
Compared to the hard barn door:
The view over the shoulder from the driver's seat:
The barn door comes off in less than a minute, just 4 wing nuts to take it off and then it can be stored above the roll bars:
In action:
https://www.youtube.com/watch?v=1_Cj8Q-FTWc