Build Thread: Sierra Nevada Edition


 04-03-2013, 08:12 PM
#12
JK Newbie
Thread Starter
Join Date: Mar 2013
Location: Fresno, CA
Posts: 36
Likes: 0
Received 0 Likes
on
0 Posts
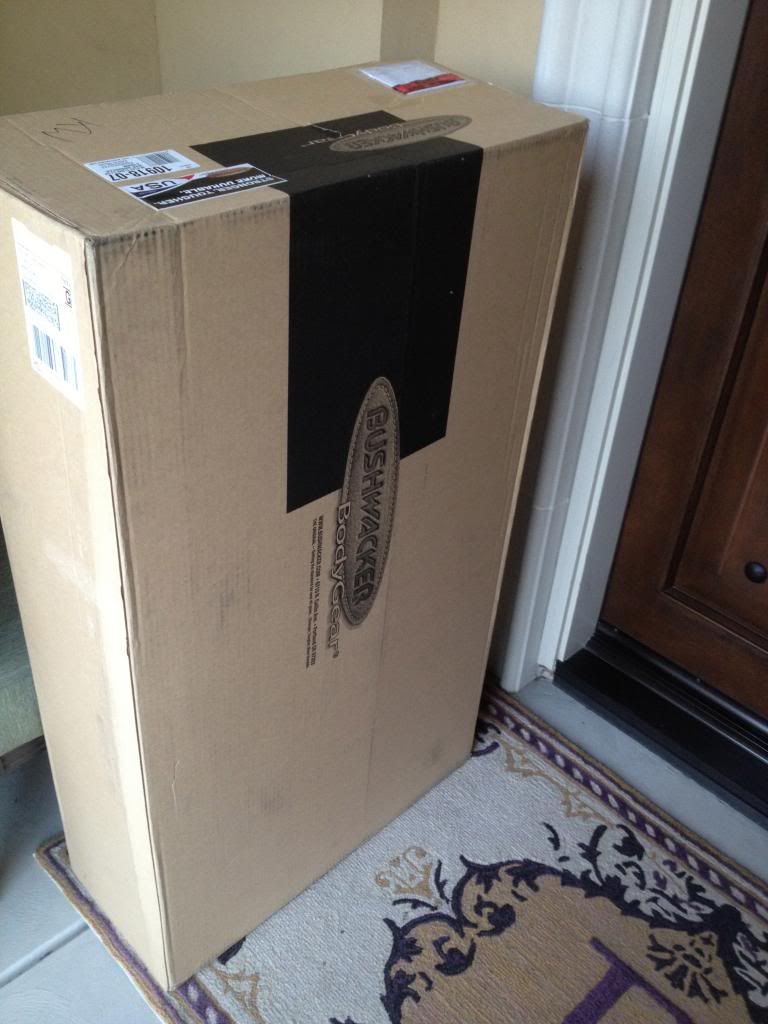
Found this at the front door tonight. Now I have something to do this weekend.
Last edited by inksterJK; 04-03-2013 at 08:27 PM. Reason: add title
 04-04-2013, 02:57 PM
#14
JK Enthusiast

Join Date: Dec 2011
Location: Merced, CA/Los Angeles, CA
Posts: 143
Likes: 0
Received 0 Likes
on
0 Posts
welcome to the forum! I'm about an hour north of you in merced! If you're up for wheeling one of these weekends just let all of us Central cali people know
04-04-2013, 09:07 PM
#15
JK Newbie
Thread Starter
Join Date: Mar 2013
Location: Fresno, CA
Posts: 36
Likes: 0
Received 0 Likes
on
0 Posts
I've got tires and wheels on order - just waiting for them. Lift is the big one that I need to figure out.
 04-07-2013, 06:54 PM
#16
JK Newbie
Thread Starter
Join Date: Mar 2013
Location: Fresno, CA
Posts: 36
Likes: 0
Received 0 Likes
on
0 Posts
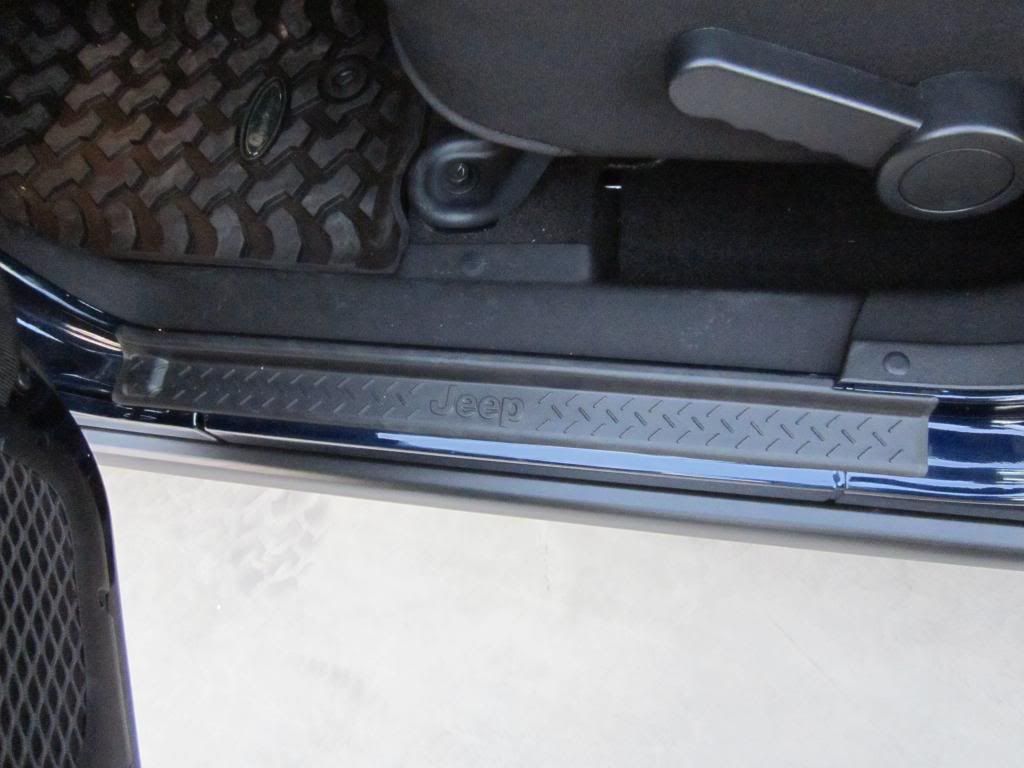
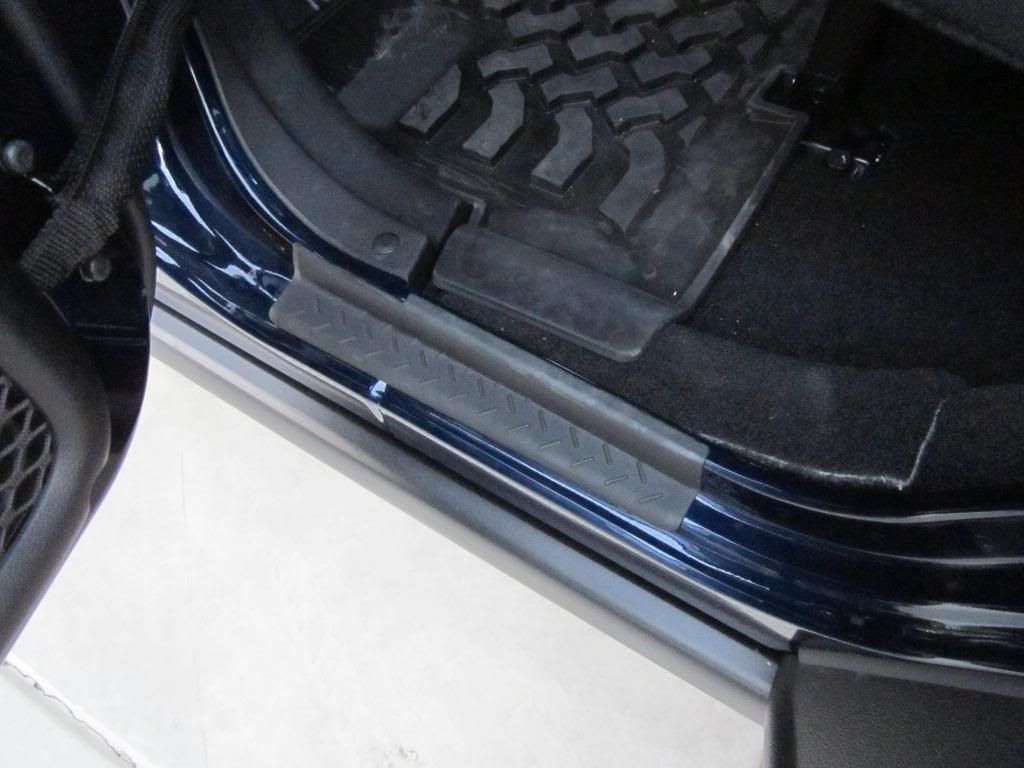
Got the Bushwacker fenders on today. The install was pretty easy and straight forward, the first one I did (the drive side front) took me 2hrs to do. I did everything one step at a time and triple check each step. It was scary to be cutting and ripping parts off a brand new car (I only have 47mi on it), but the other 3 fenders took another 2.5hrs to do (4.5hrs total).
Here is the finished product.
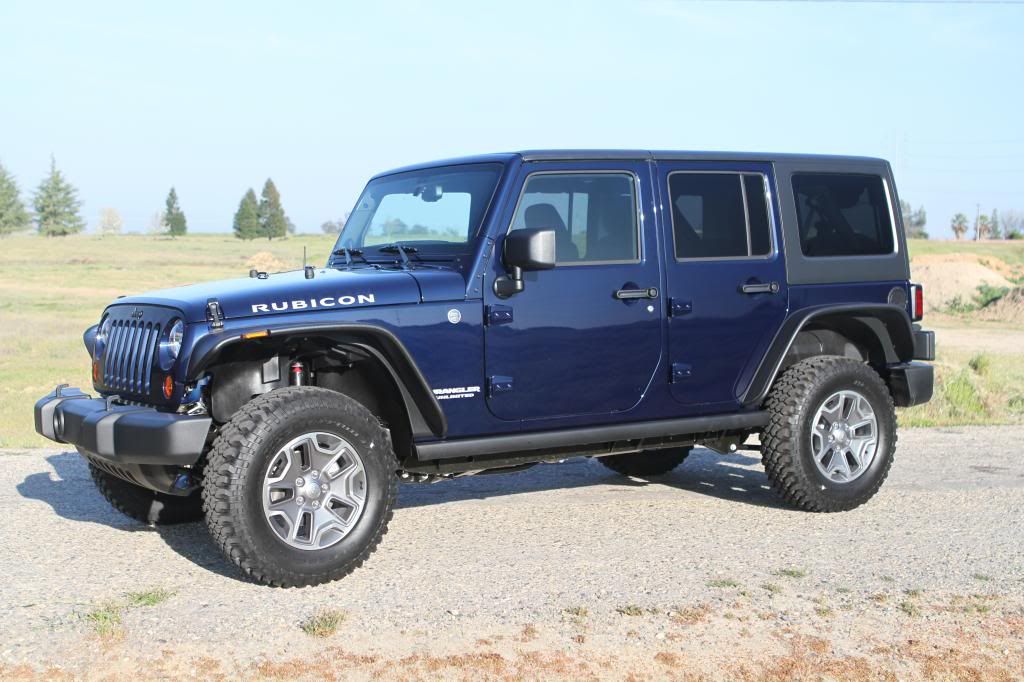

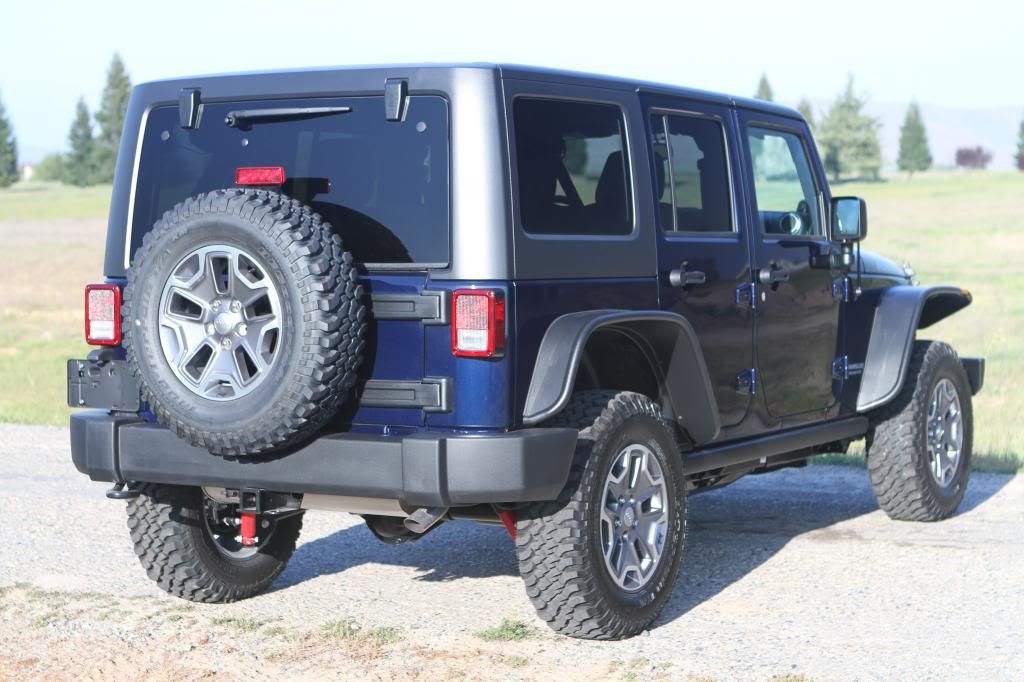
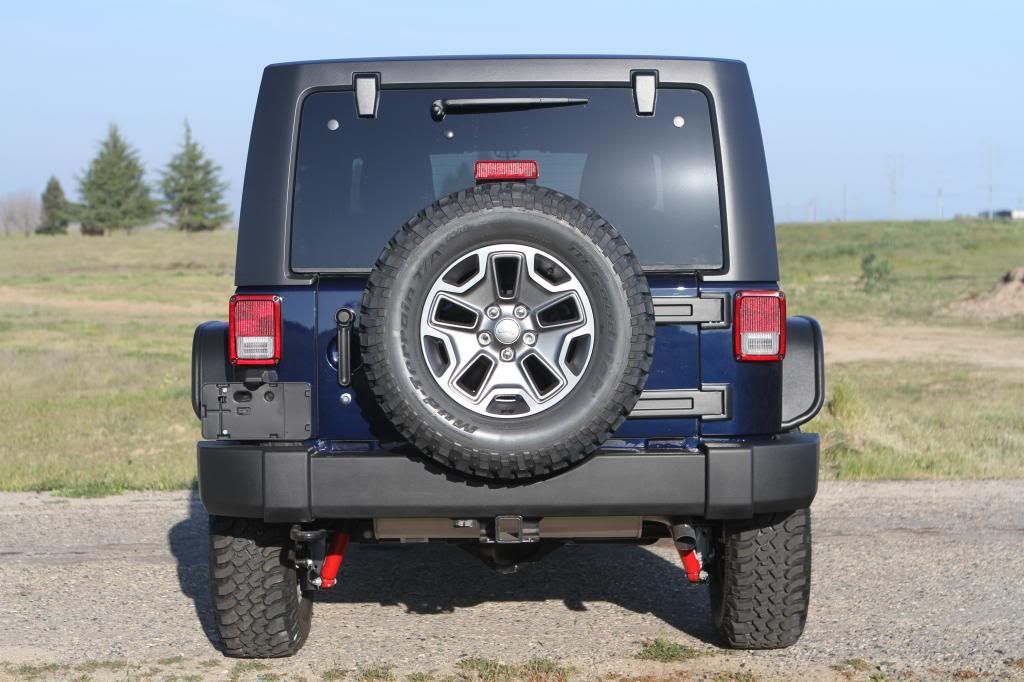
Here is the finished product.
04-07-2013, 07:33 PM
#17
JK Newbie
Thread Starter
Join Date: Mar 2013
Location: Fresno, CA
Posts: 36
Likes: 0
Received 0 Likes
on
0 Posts
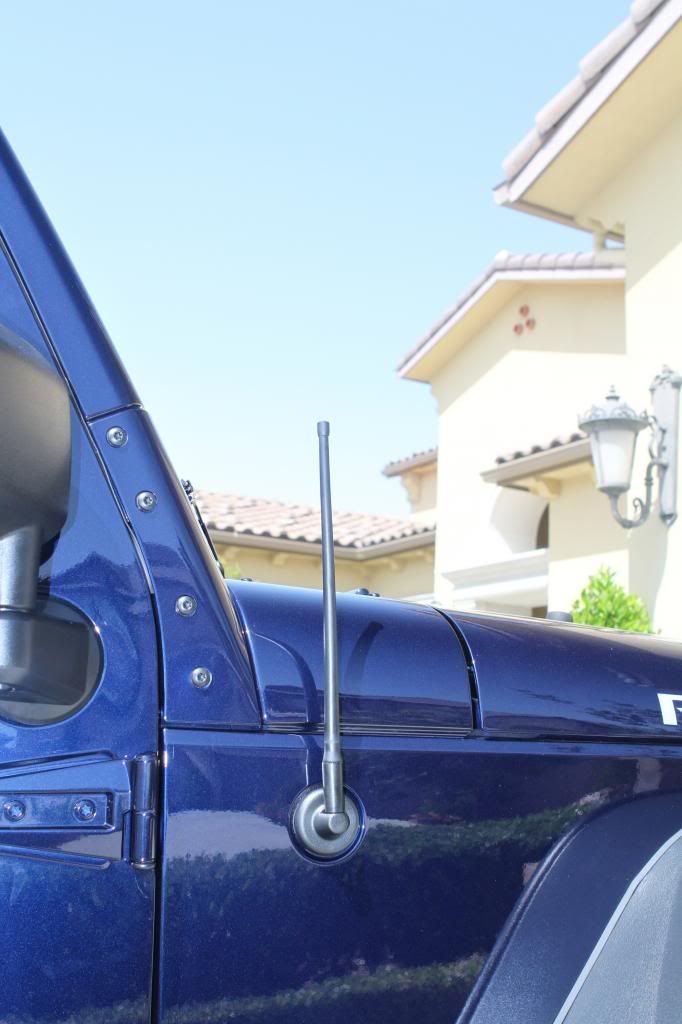
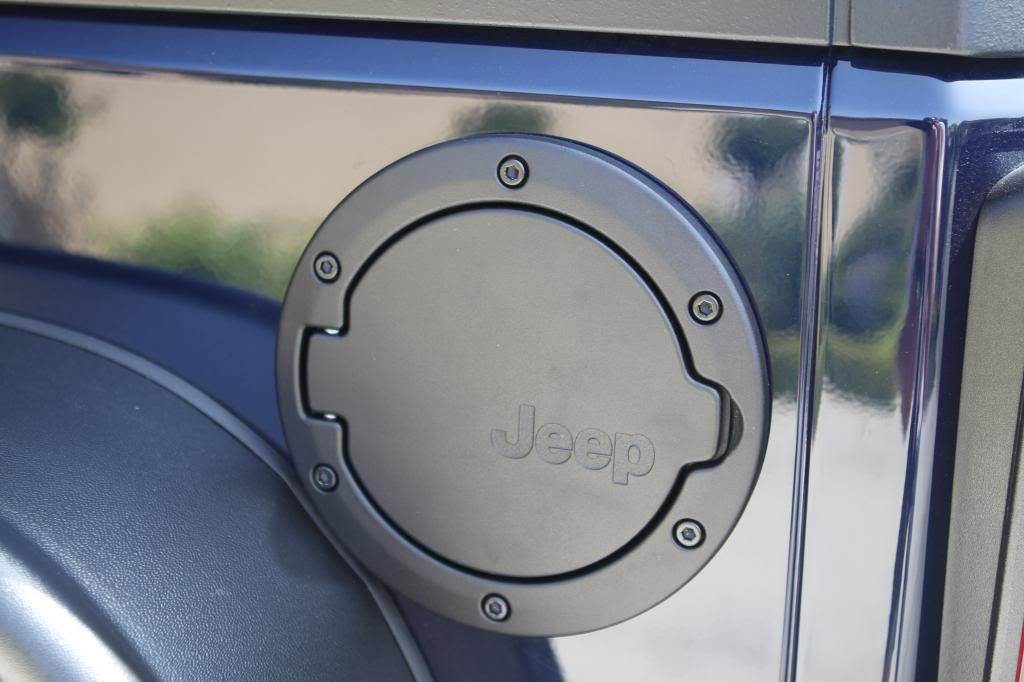
Also installed antennaX shorty and the Mopar fuel door.
I've been looking for bumpers and sliders for awhile now, so I stepped up and ordered the LoD - Armor Lite Mid-Width front, LoD - Signature Series 4-Door Rock Sliders and the LoD - Signature Series Shorty Rear Bumper w/Tire Carrier. Should be here in 4-6 weeks.
I've been looking for bumpers and sliders for awhile now, so I stepped up and ordered the LoD - Armor Lite Mid-Width front, LoD - Signature Series 4-Door Rock Sliders and the LoD - Signature Series Shorty Rear Bumper w/Tire Carrier. Should be here in 4-6 weeks.
 04-27-2013, 07:20 PM
#19
JK Newbie
Thread Starter
Join Date: Mar 2013
Location: Fresno, CA
Posts: 36
Likes: 0
Received 0 Likes
on
0 Posts
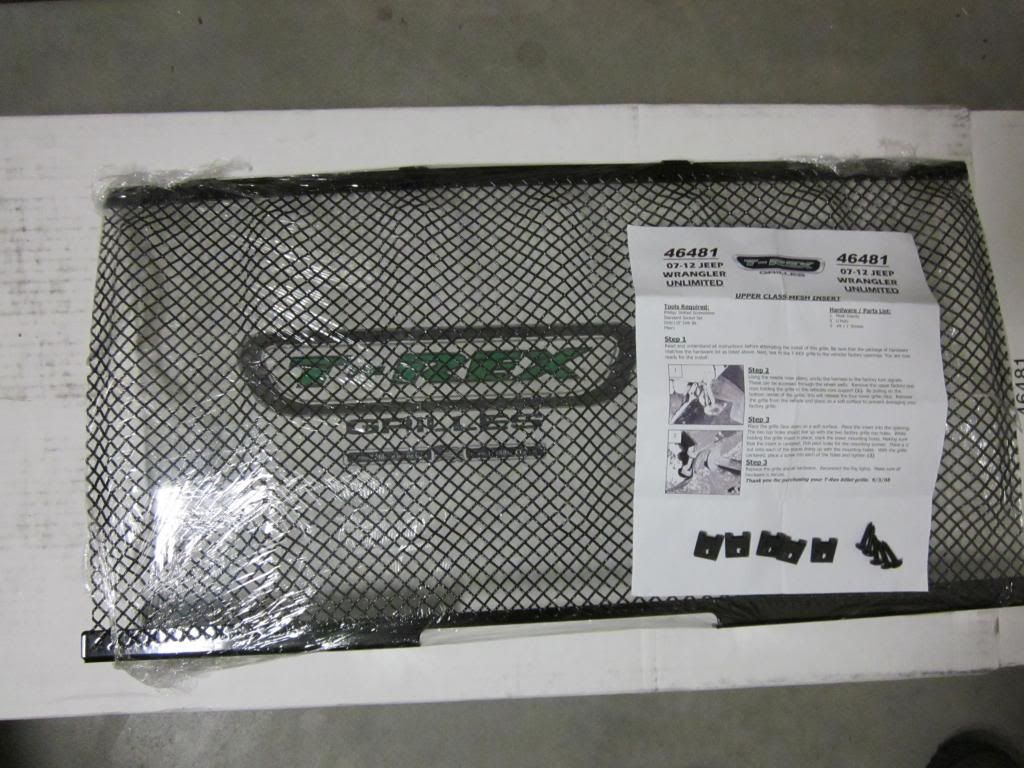
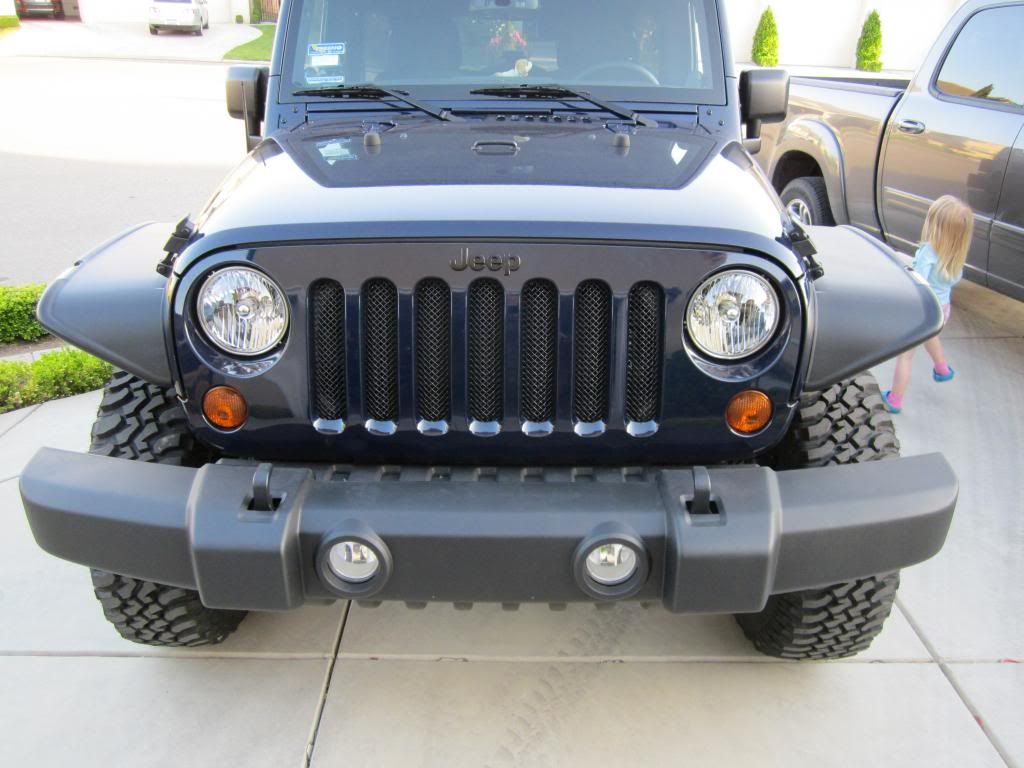
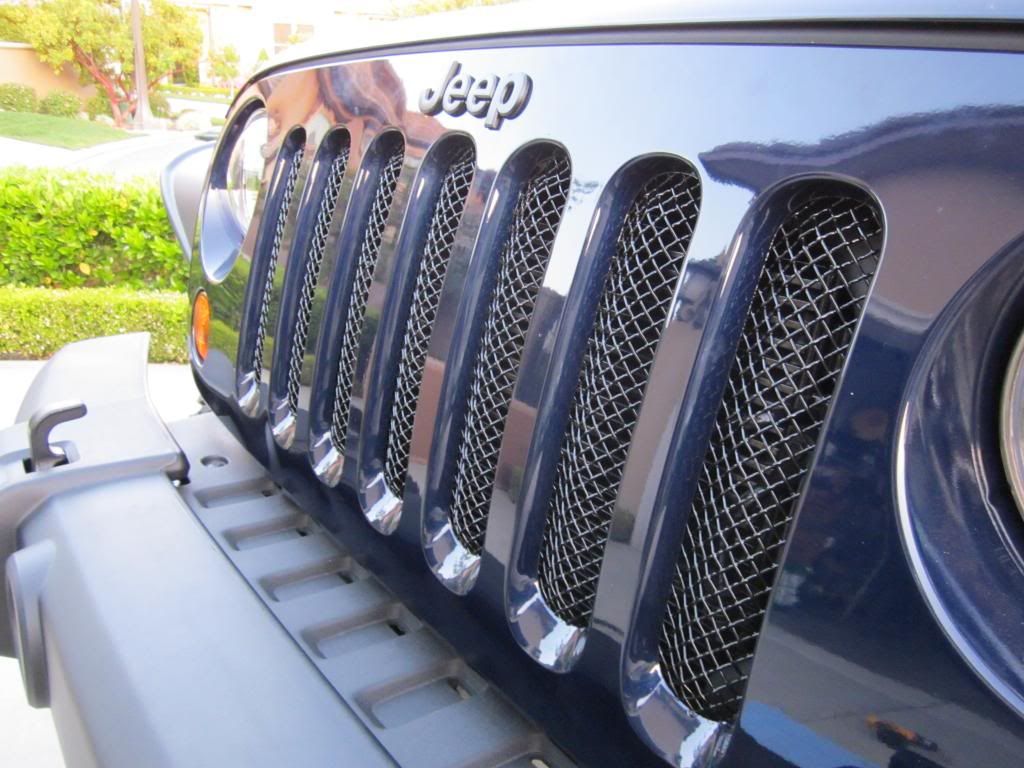
I got a chance to install the T-REX grill today after finishing some honey-do's. The install was pretty much straight forward and only took me about 30min to do. The kit comes with the stainless steel mesh grill powder coated black and all the hardware needed for installation (speed clips and screws).
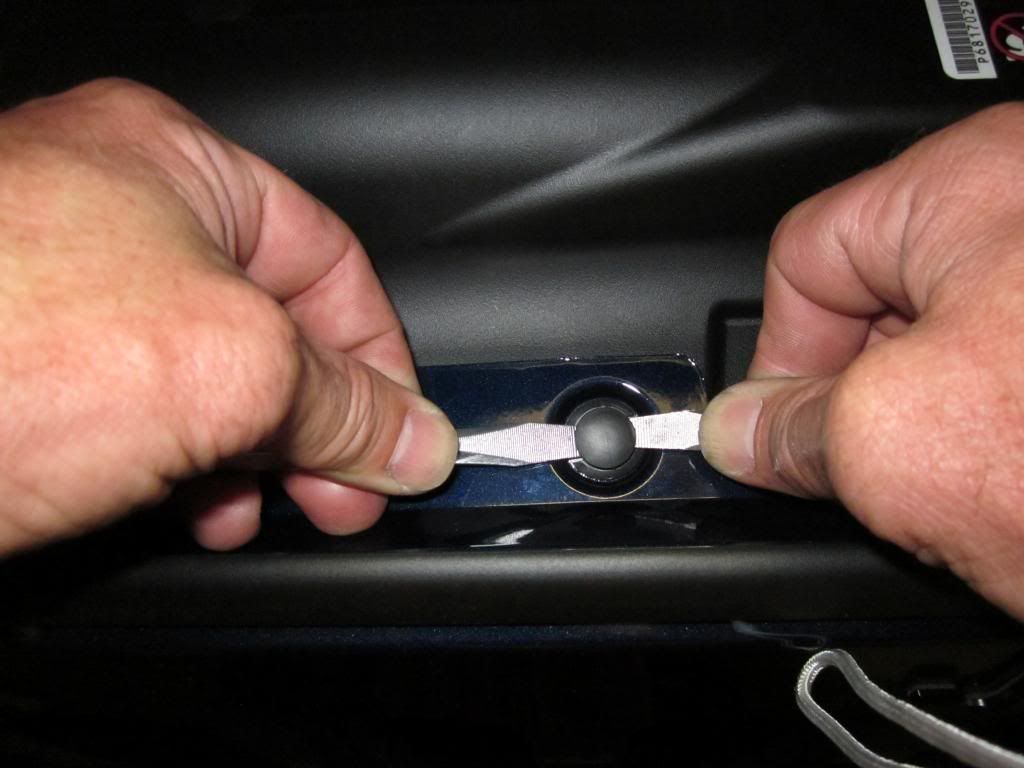
First step was to remove the stock grill. After removing the wiring from the turn signals. I used two flathead screwdrivers to lift and remove the factory (pop up) clips.
Then I just pulled the bottom center of the grill and popped off the grill (just give it a quick firm tug). I laid the grill face down on a thick beach towel and test fit the grill to see how things lined up and to see where the holes (4) had to be drilled. I found that it was better to place the speed clips on and then mark the mounting holes, as the clips can only be placed in curtain places because of the limited space and the width of the clips.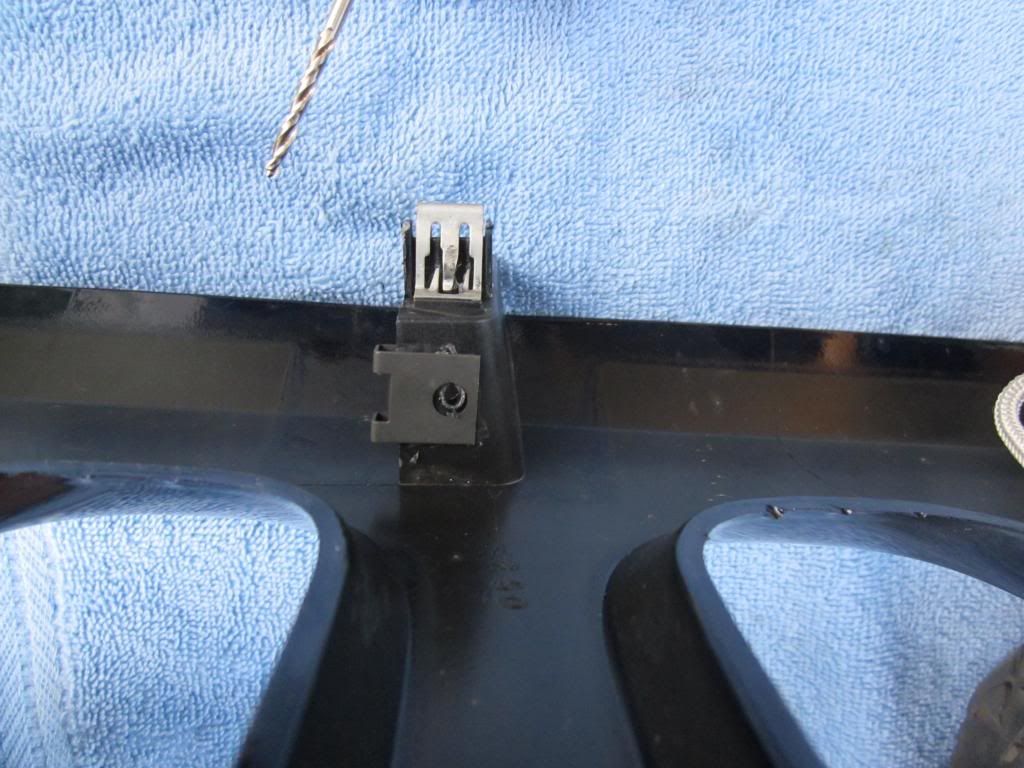
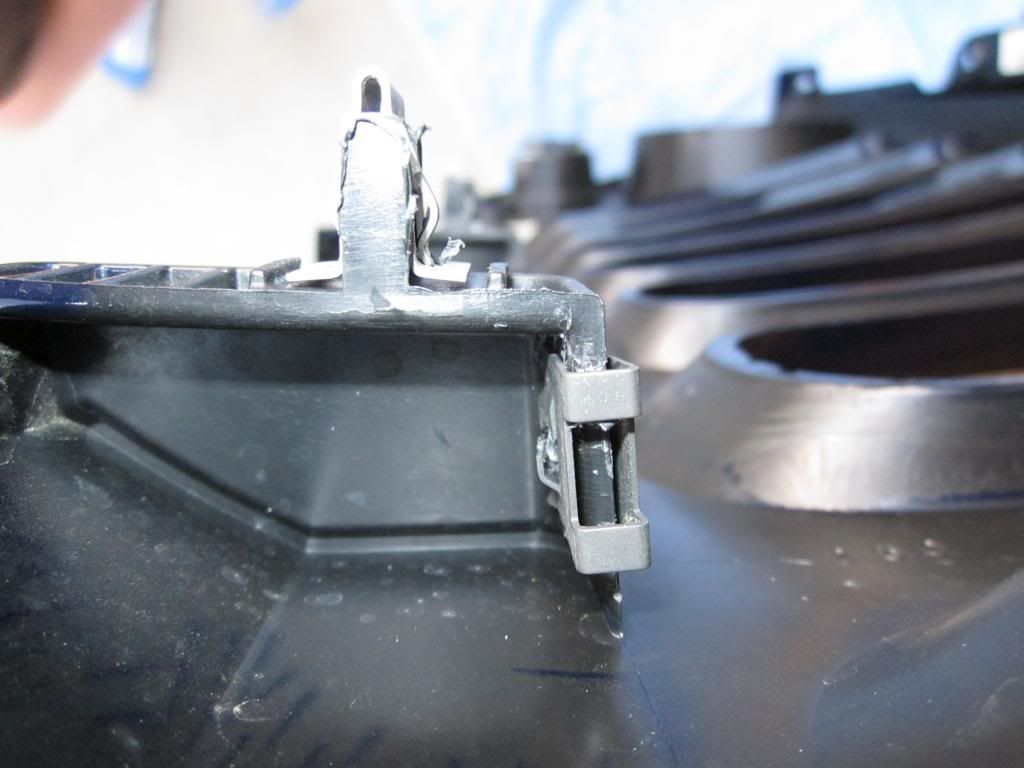
Once all the holes were drilled, I replaced the clips and tightened the screws. Then lined up the bottom of the grill and snapped the bottom half in (don't forget the snaps above the turn signals). Lined up the holes on top of the grill and replaced the 6 pop up clips and that's it. Very easy and quick. I'm very happy with how easy the install was and the quality of the grill seems to be top notch.
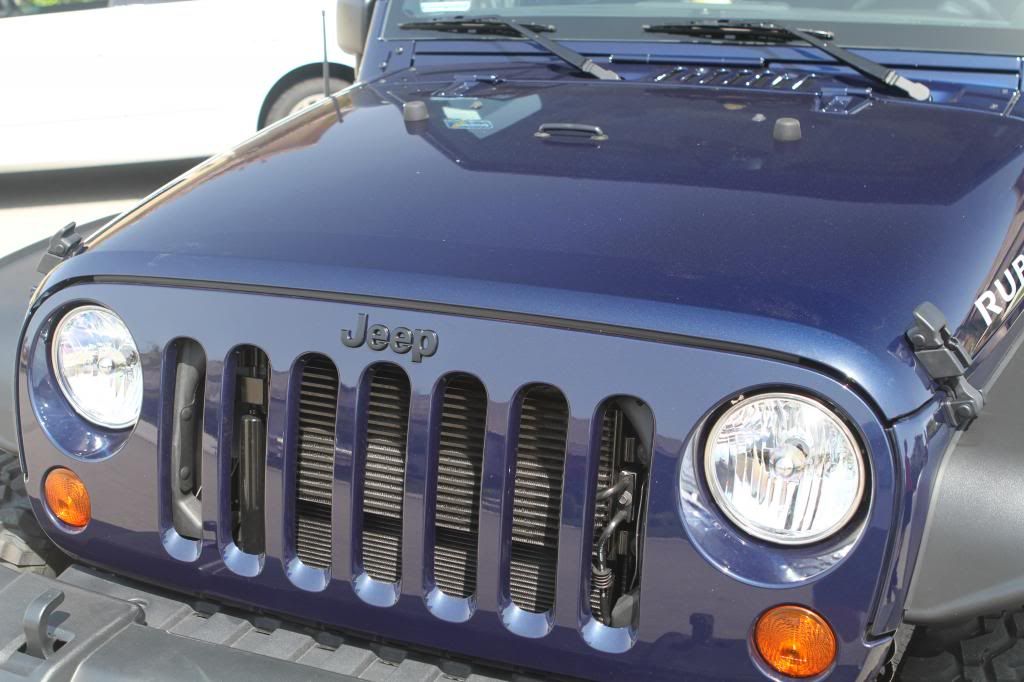
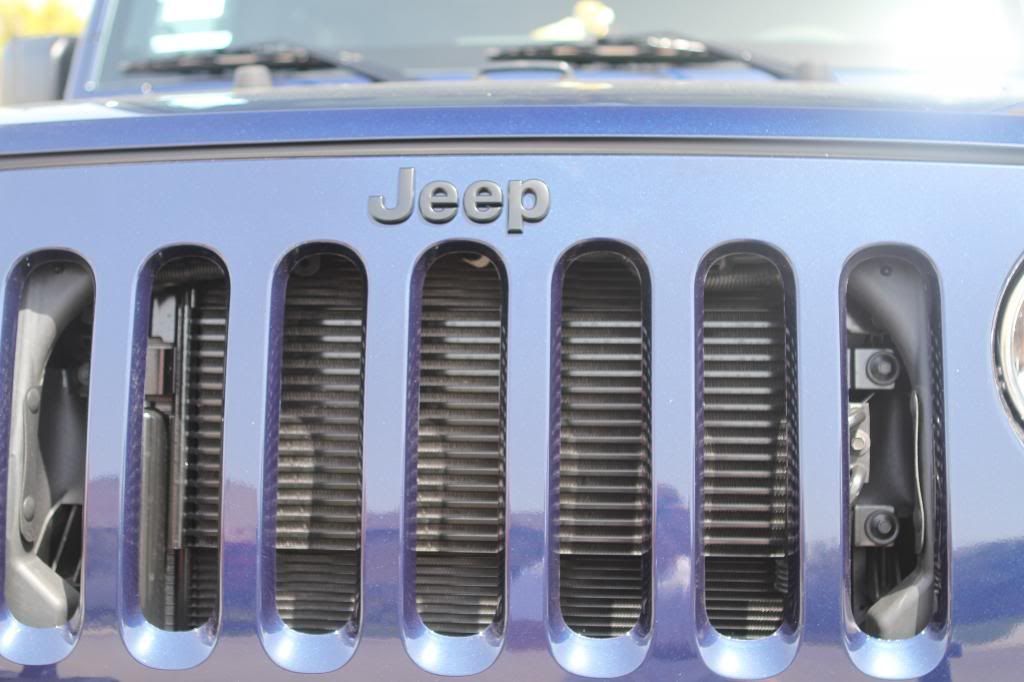
Before:
After:
First step was to remove the stock grill. After removing the wiring from the turn signals. I used two flathead screwdrivers to lift and remove the factory (pop up) clips.
Then I just pulled the bottom center of the grill and popped off the grill (just give it a quick firm tug). I laid the grill face down on a thick beach towel and test fit the grill to see how things lined up and to see where the holes (4) had to be drilled. I found that it was better to place the speed clips on and then mark the mounting holes, as the clips can only be placed in curtain places because of the limited space and the width of the clips.
Once all the holes were drilled, I replaced the clips and tightened the screws. Then lined up the bottom of the grill and snapped the bottom half in (don't forget the snaps above the turn signals). Lined up the holes on top of the grill and replaced the 6 pop up clips and that's it. Very easy and quick. I'm very happy with how easy the install was and the quality of the grill seems to be top notch.
Before:
After: