
08 2dr Rubicon Expedition Build
 10-02-2010, 08:40 PM
#1
JK Newbie
Thread Starter

Join Date: Nov 2008
Location: San Diego, CA
Posts: 24
Likes: 0
Received 0 Likes
on
0 Posts
Well, I've been lurking on this forum for about two years now and I figured it was time I gave something back. I've gotten a lot of good ideas from here that I've tweaked and made fit my application. But most of all I've learned an immense amount and I wanted to share some of what I've done with ya'll. So here goes!
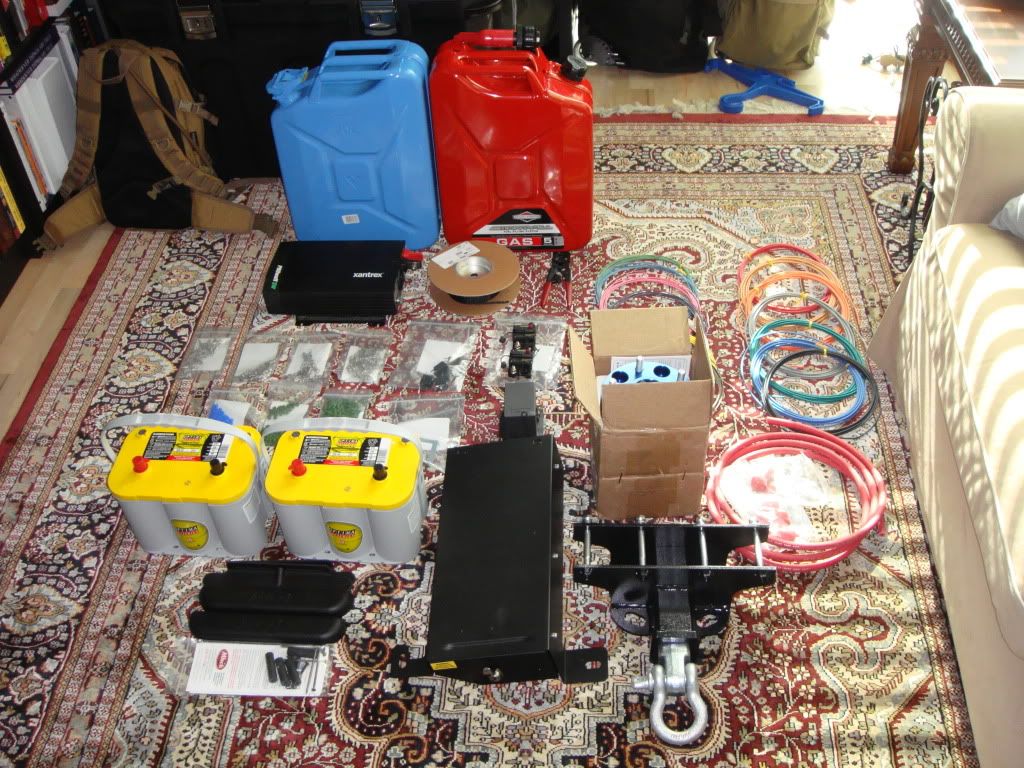
First off here's a little pic of what I ordered during my last deployment and came home to. It was like Christmas in August.
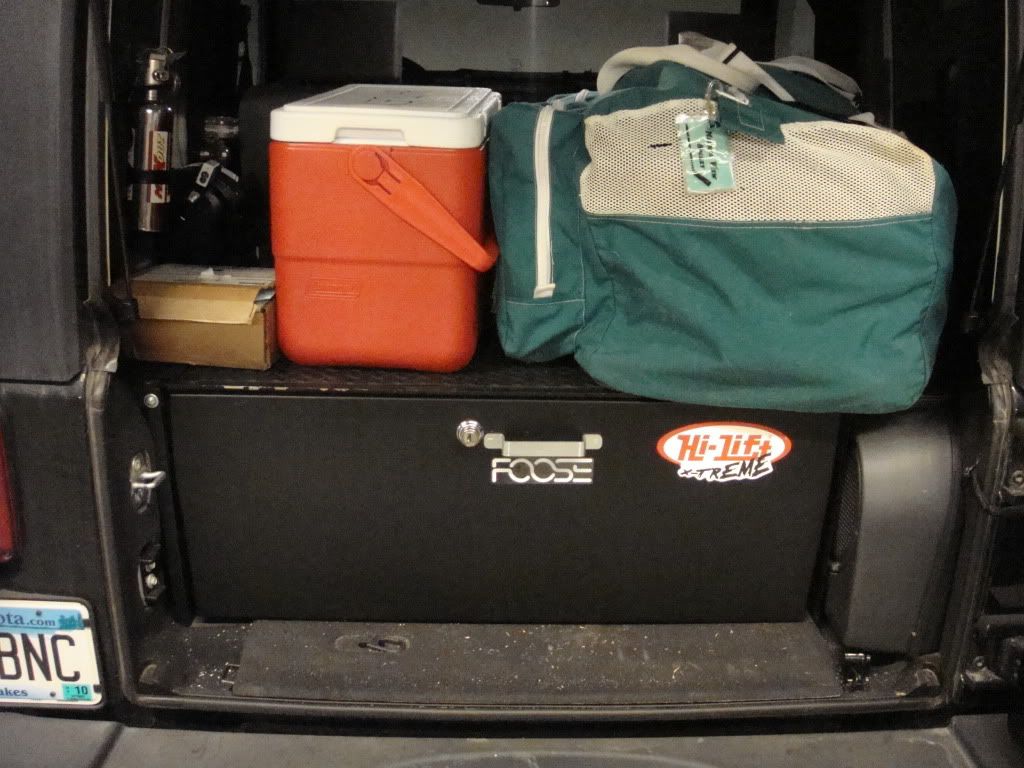
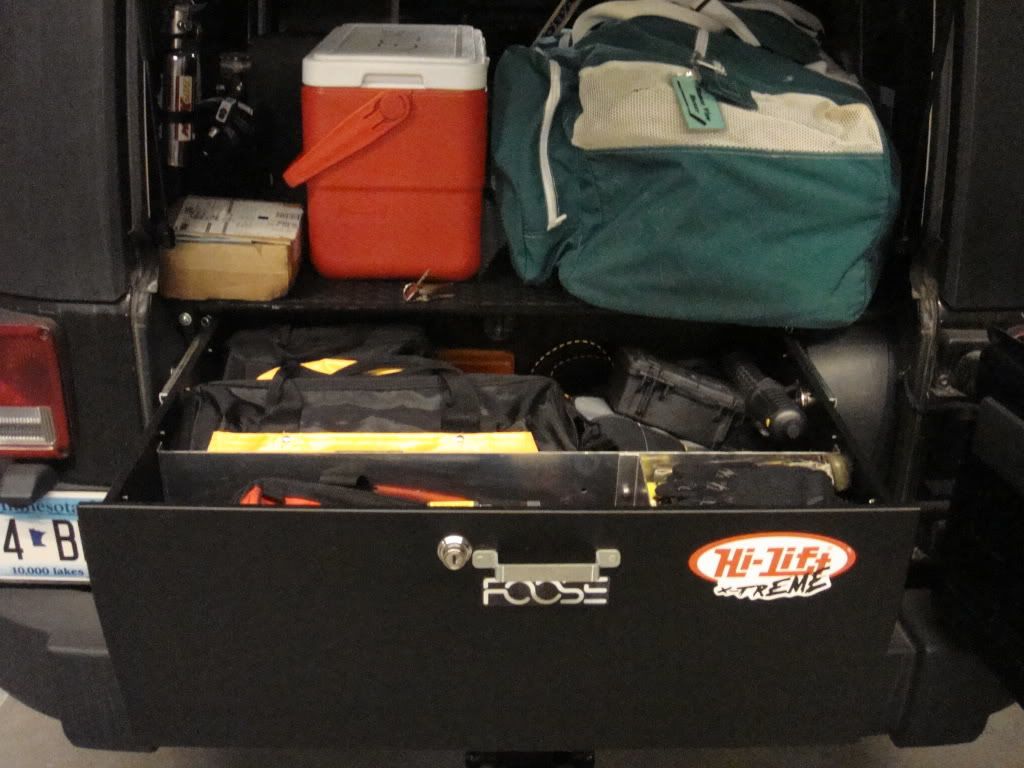
I'm gonna start with the "trunk" I went with the Tuffy Security Box. Works really well and keeps everything nice and organized. Lots of space for all my tools. And it results in more usable space on top of it. Right now I have in it:
1) 154 Piece Craftsman socket/wrench set
2) High-lift handle all which has an ax a sledge and a shovel, on top of that the handle doubles as a cheater bar
3) ARB Tire Puncture Kit
4) Jumper Cables
5) Random other tools
6) Random consumable (duct-tape, bailing wire, electrical tape and wire fuses, etc)
7) High Lift Off-road base
8) High Lift Off-road winch kit
9) High Lift Lift Mate (so i can lift the wheel directly and not have to worry about suspension droop
10)Random oils
11) First aid kit
12) MRE
13) Tow Strap
14) Chain
14) 2" Tubular webbing and some rope for tying up what ever needs tying\
15) And a host of other stuff i'm sure i'm forgetting right now
Note: I also have the Conceal and Carry drawer under the drivers side seat but forgot to take a pic you can see it in the top picture. Works well, safe out of sight storage for my more expensive stuff like electronics and what not.
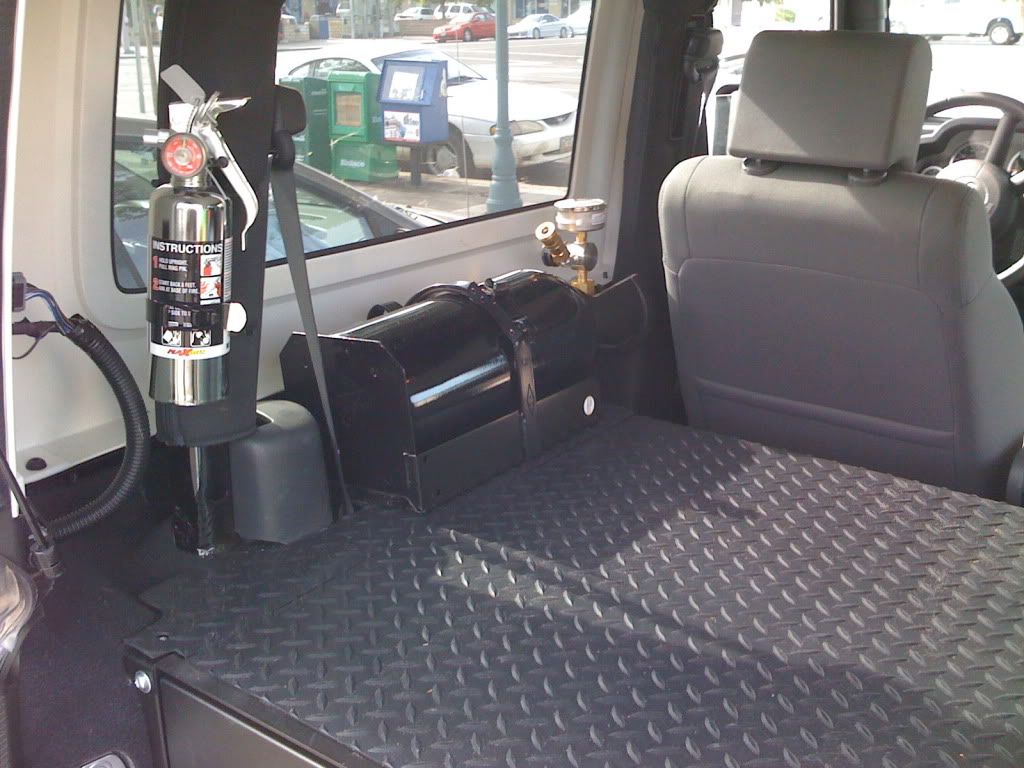
On top of my Tuffy Box i mounted my CO2 tank. While I enjoy the on tap pressure it delivers I think i'm going to switch to a VIAIR set up with brackets from Jeepswag.com to move everything under the hood (thereby giving me more precious space inside). The problem i have with CO2 is while it last for decent amount of time it is finite in it's volume.
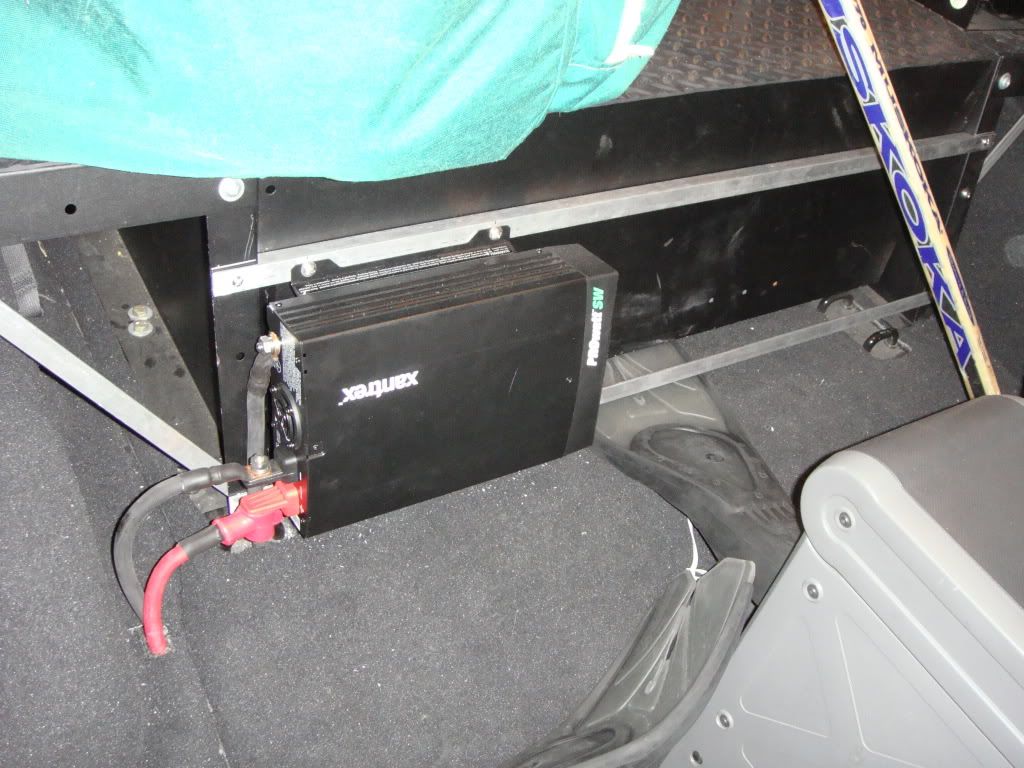
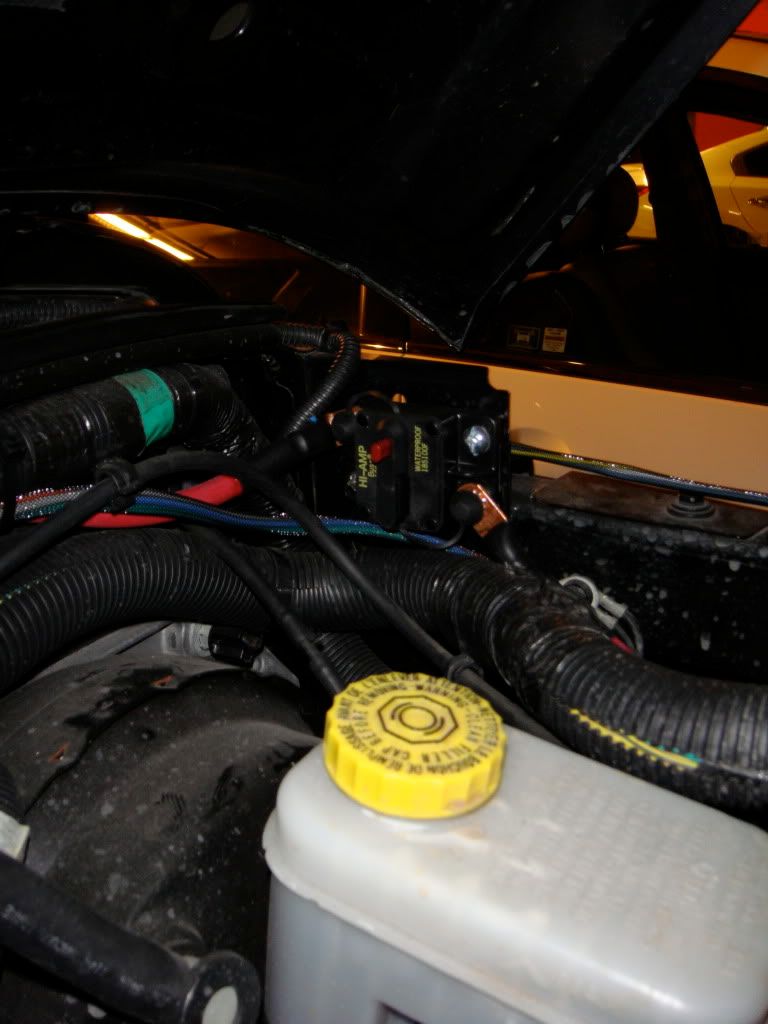
On the front of the Tuffy box (between the seats and the front of the box) i mounted some aluminum angle iron and mounted my 1000W inverter to it. I had thought about mounting it under the passenger seat like I have seen many of you guys do. My only worry with that is if I end up fording a river I don't want to short it out and ruin the sucker. I ended up using 0/1 cable for the pos and neg and grd runs from the inverter to my aux battery and chassis ground (picture of the battery set up below). I had to use 0/1 to minimize line loss because of the length of the run from the inverter to the battery. I also have a waterproof circuit breaker in line rather than a fuse so i can disconnect the inverter and so I won't have to replace huge fuses in the event one blows.
Now in that open space next to the inverter i'm going to mount a rack for 8qts of random fluids like motor oil, diff fluid, ATF etc.
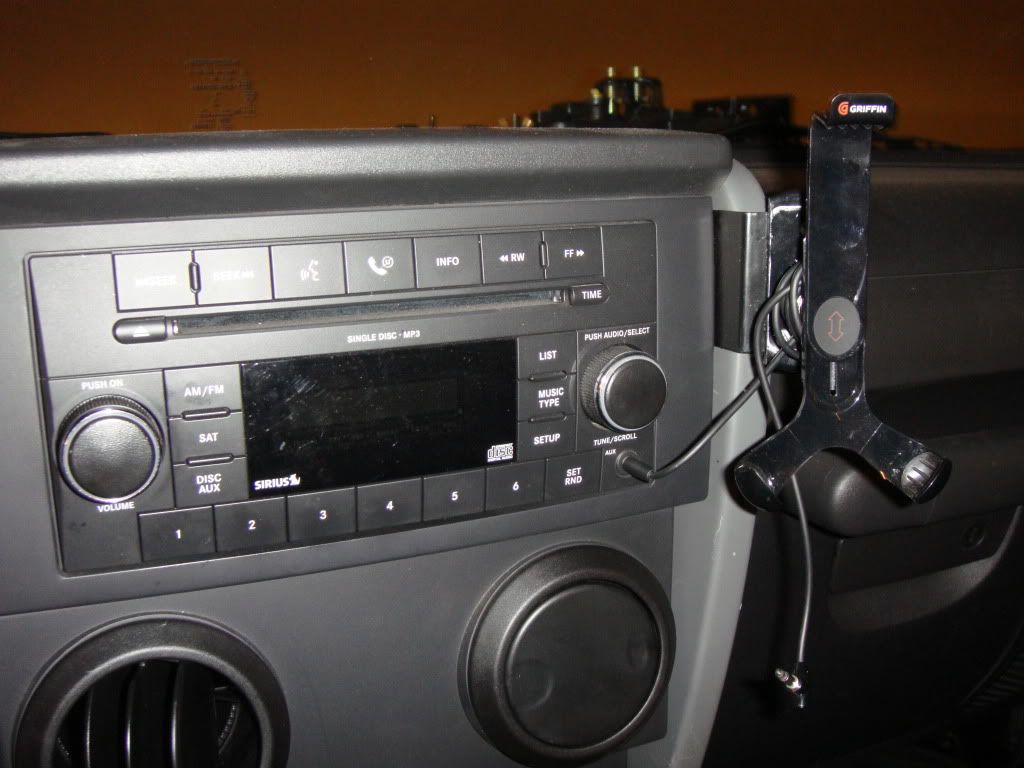
Moving forward inside I got this iPhone mount from the apple store and did a bit of plastic welding to adapt it to a cooltech versa mount. It works great keeps the phone close to the radio so I can use NAVIGON (a GPS app) and have it plugged into the radio.
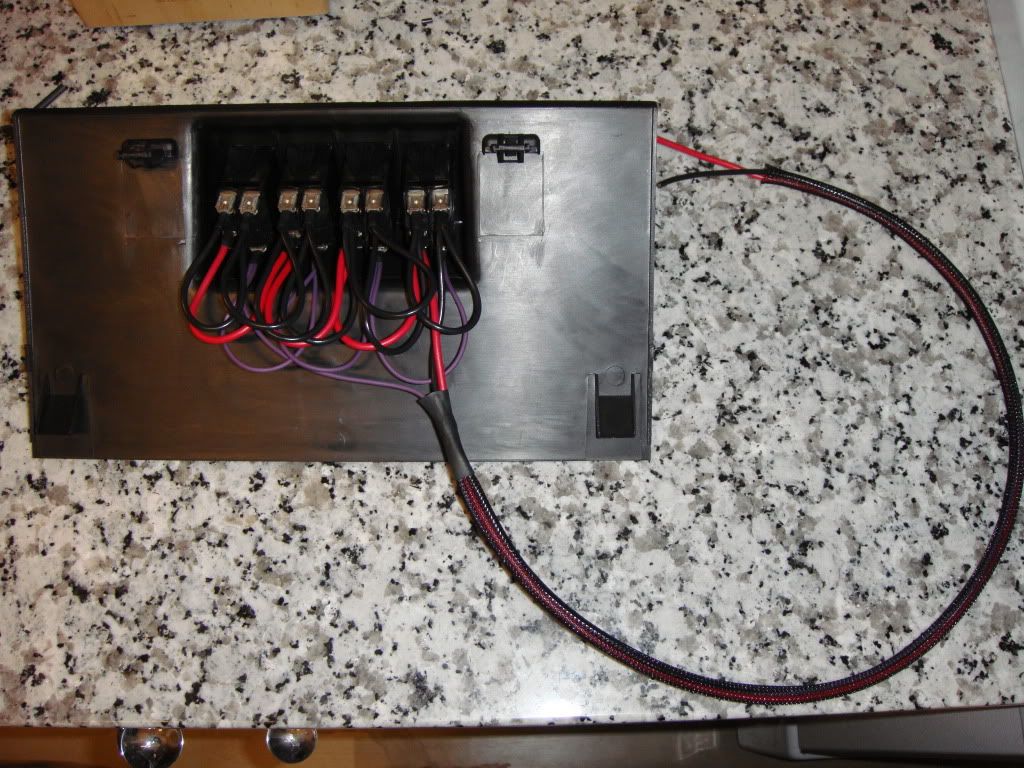
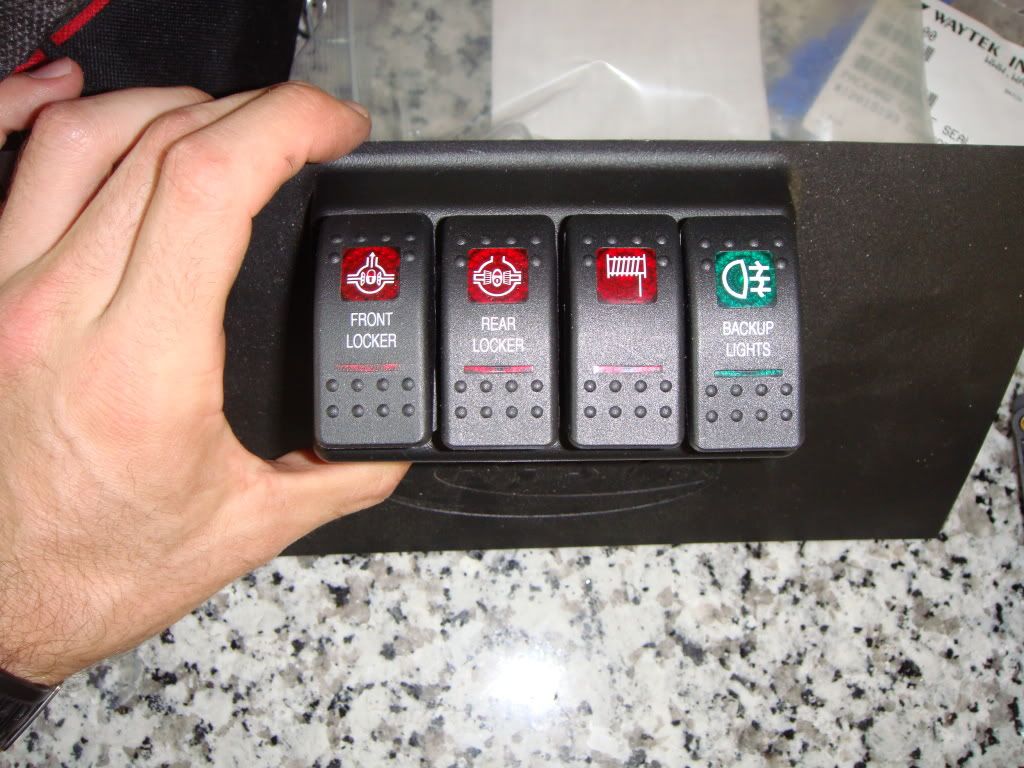
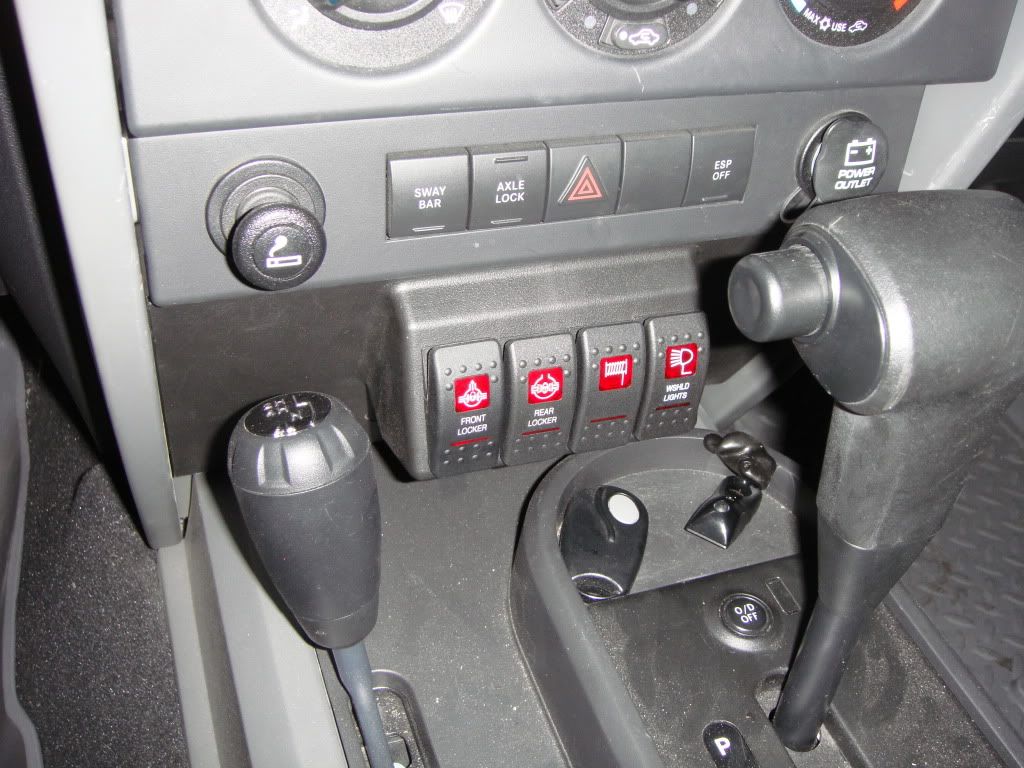
Moving south on the dash this is a daystar switch panel that I've wired up with Contura rocker switches for my hood lights and front and rear electronic lockers. I wired it into the cigarette lighter for switched 12v signal power along with the environmental controls for dim-able power that comes on when the headlights are on just like the rest of the dash.
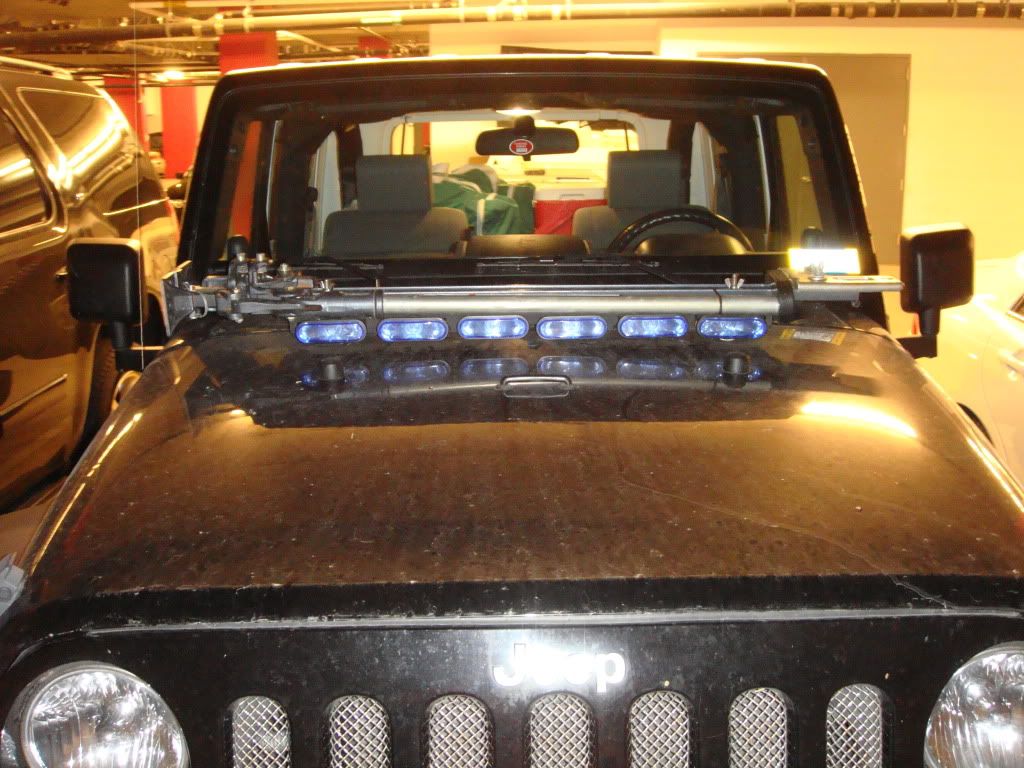
Moving to the outside of the car we have my hoodlights and high-lift mount. I did a bit of creative wiring and used a lot of expanding mesh loom in order to keep the mess to a minimum.
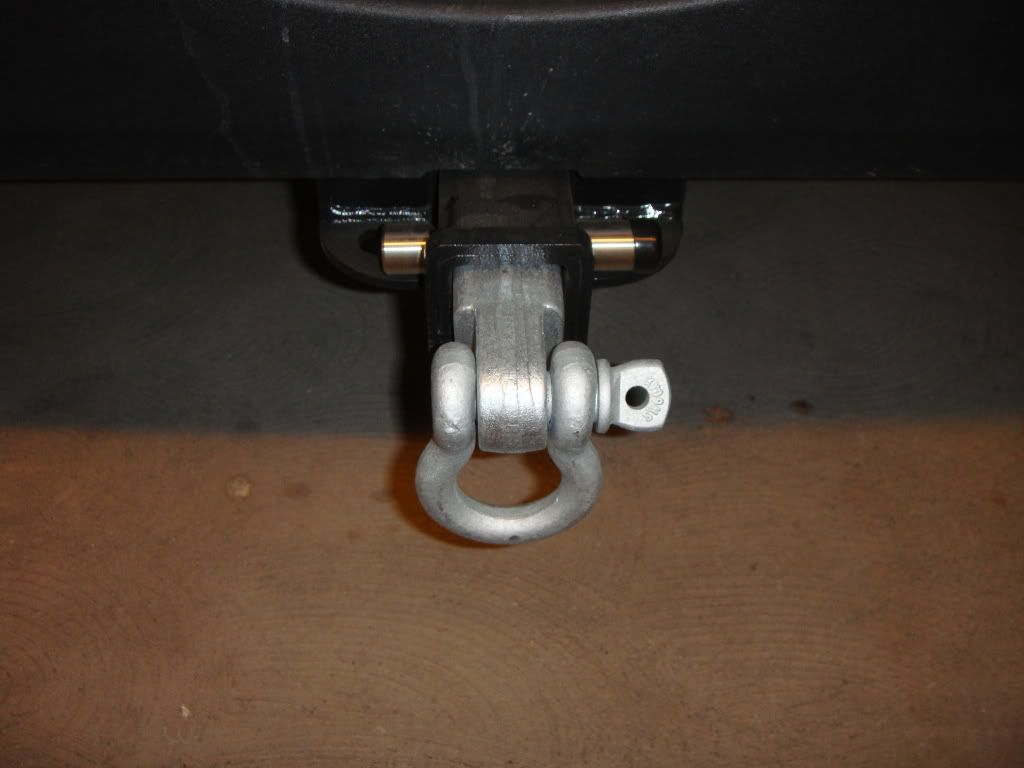
Outback I got a rugged ridge receiver to replace the tow hook. This way I can mount a mountain bike rack or tow a trailer. And obviously it's important to have a rear retrieval point so i got a shackle for the receiver.
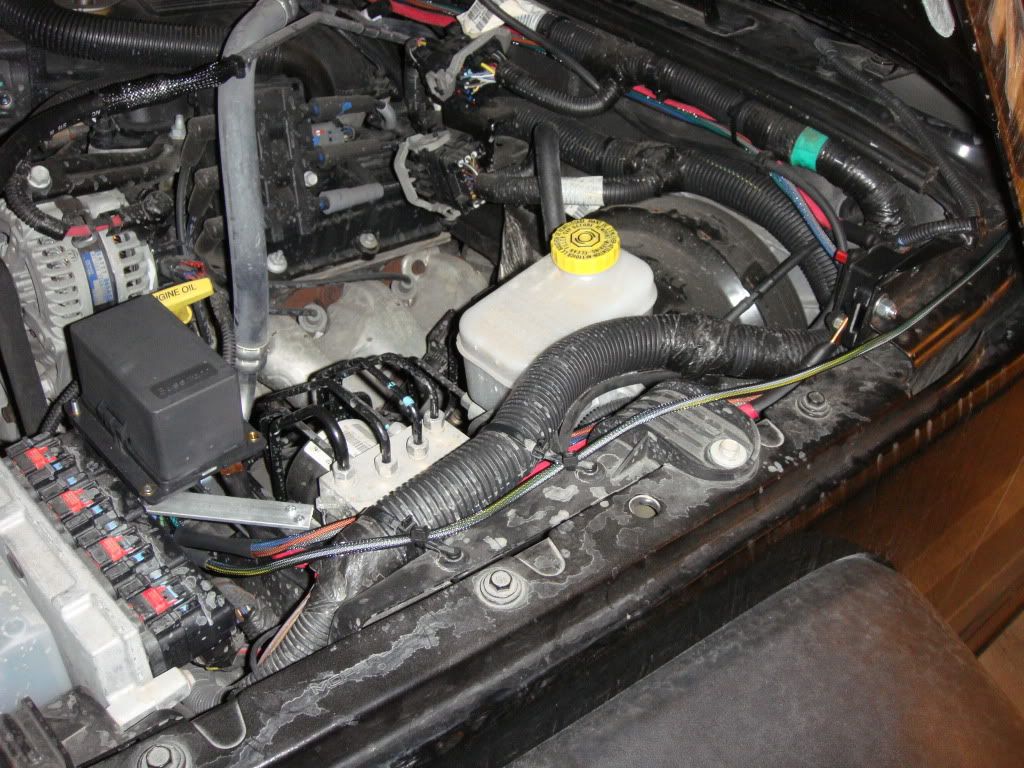
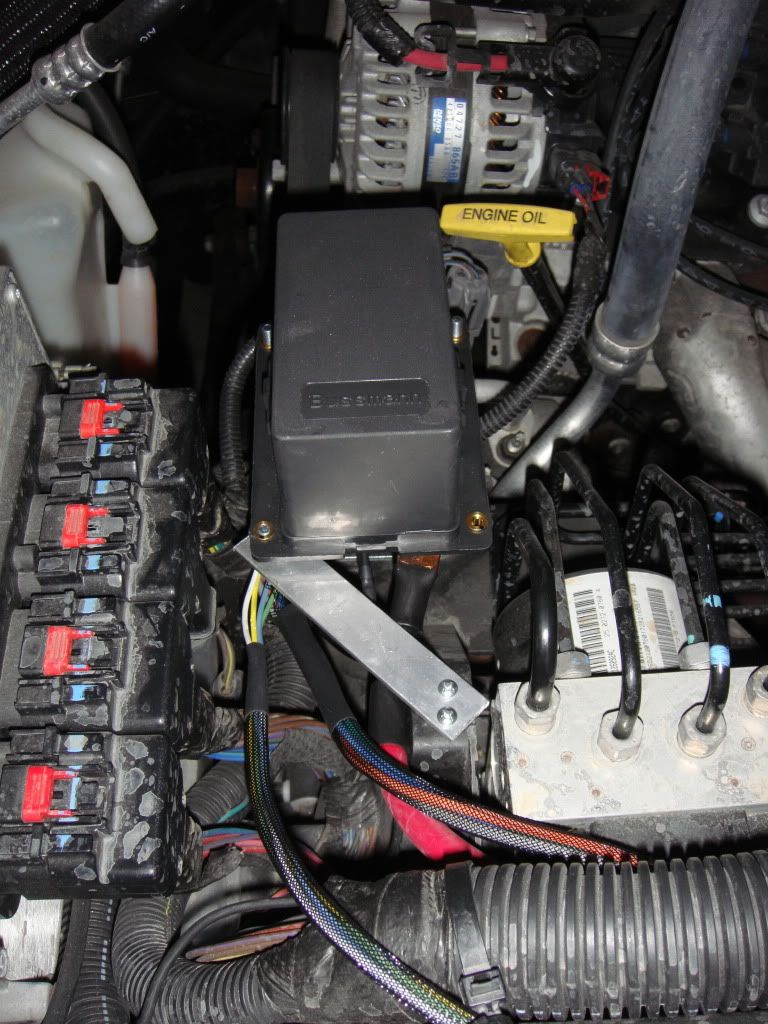
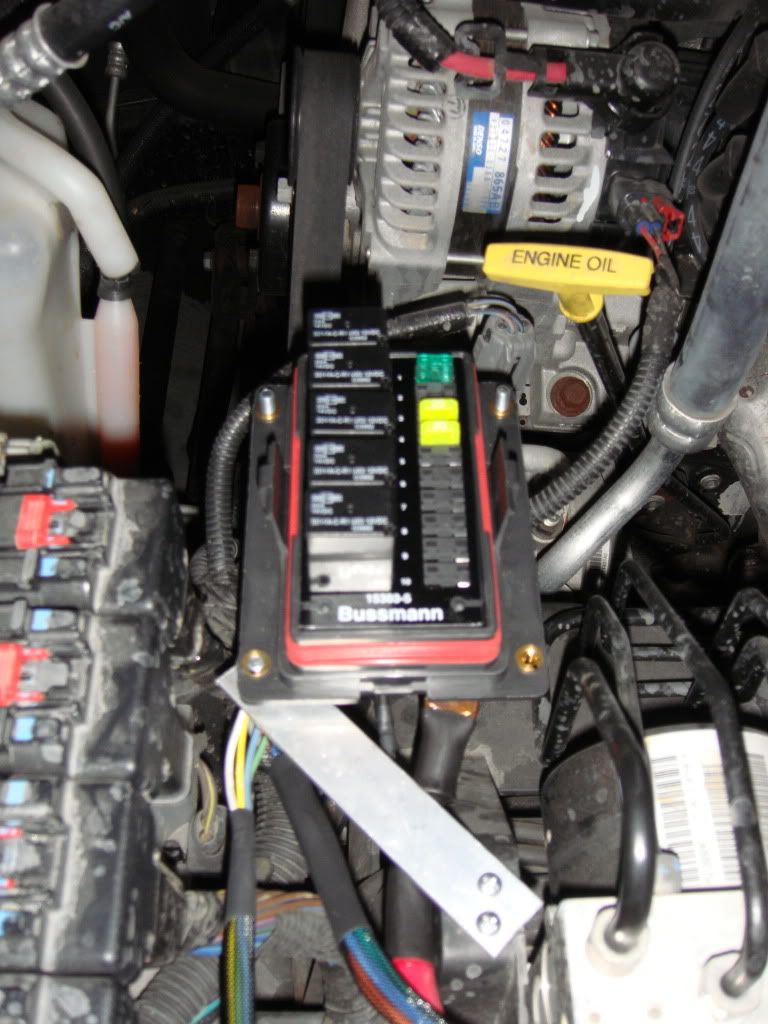
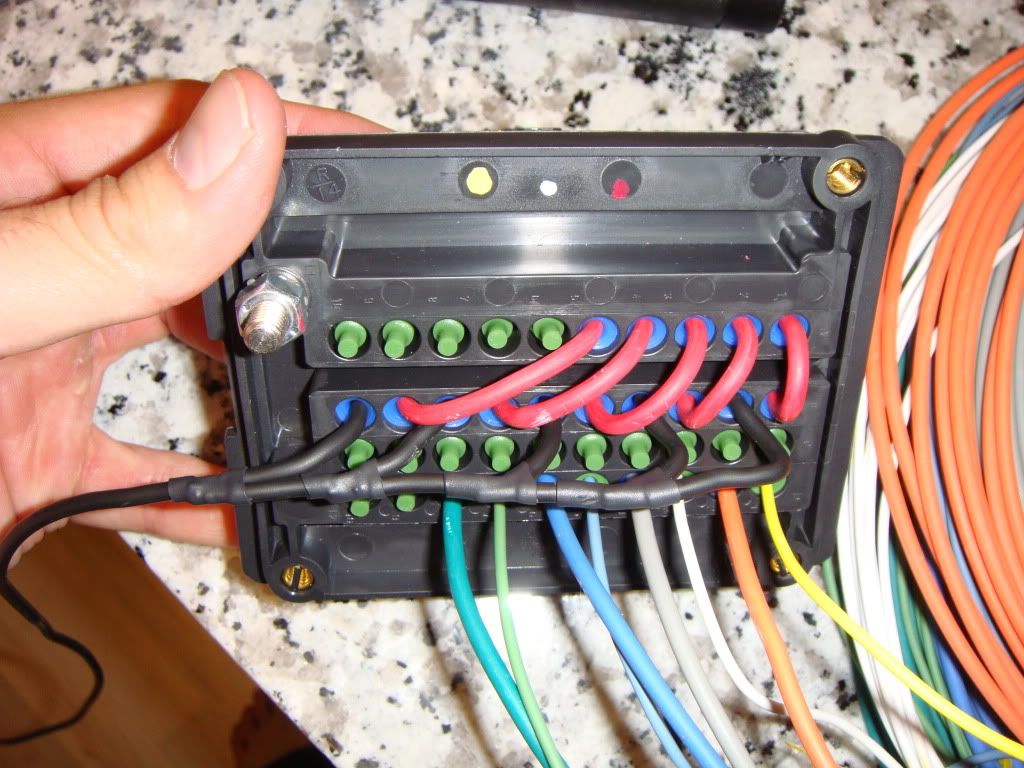
Moving under the hood I wired up a Bussman panel with 5 micro relays and fuses to power all my extras like hood lights ECU bypass for the lockers so I can lock them when I think it's appropriate. Not when some stupid computer does and for a winch in the future. As with the inverter I wired in a 100amp circuit breaker between the aux battery and the panel so I don't have to worry about carrying spare fuses.
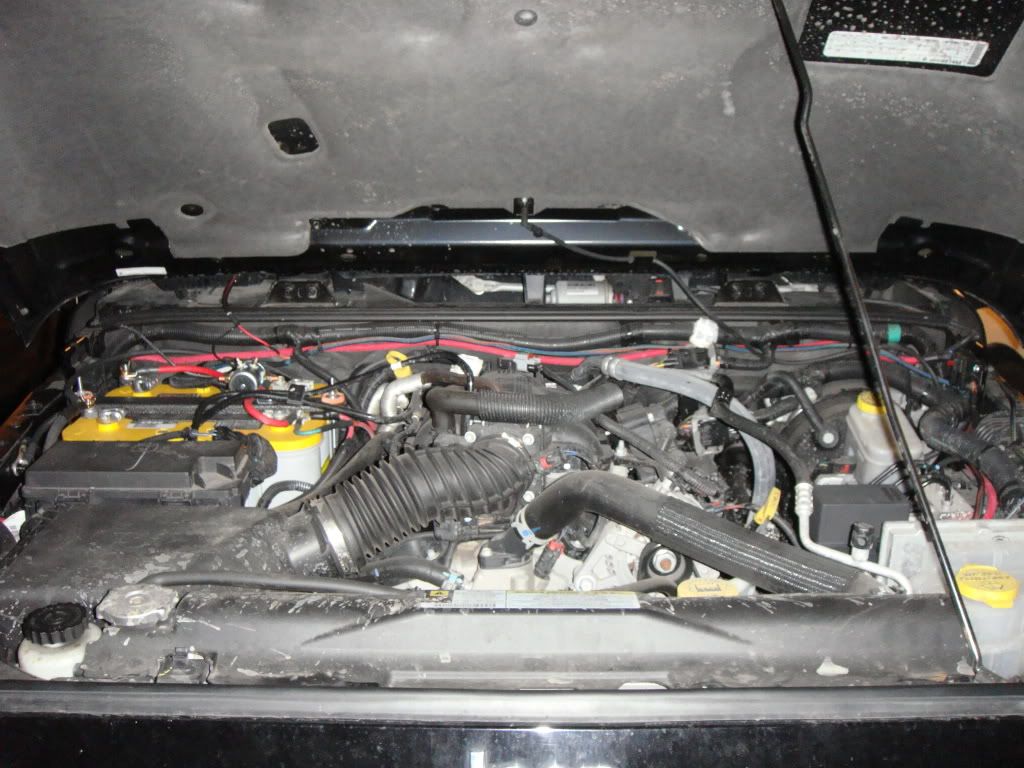
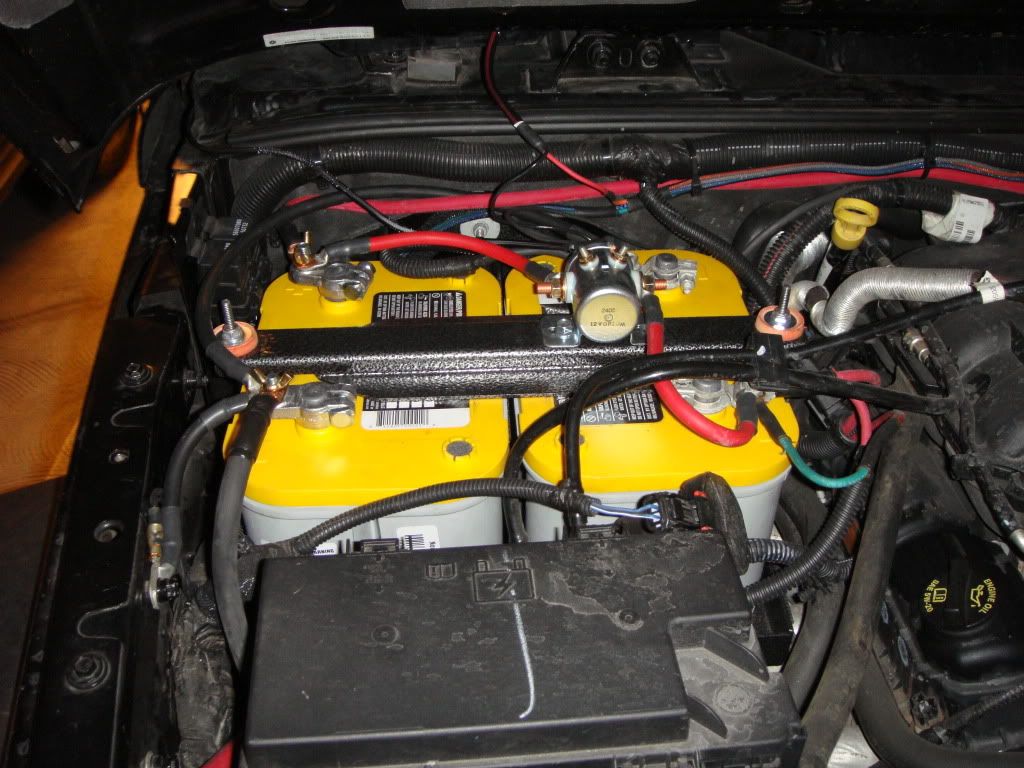
Moving over to the aux battery set up. I went with the Benchmark dual battery set up and it's quite the stout set up. I have the relay wired into the cigarette lighter as well to seperate the aux battery from the main one when the ignition is off to avoid draining the main battery. But when the ignition is on both batteries are connected and charging.
Anther thing not shown is my spidertracks 1.5" spacers. This will allow me to run 33" tires in the future with out rubbing. One unforseen up side is that with the stock tires it makes the jeep look like it should. It should have come like this from factory. The tires just fill the wheel well better. That's the main reason why i'm not rushing out to replace the stock 32s until they wear out.
Finally I have two jerry cans for fuel and water.
Well there ya have it. I jokingly call it my Zombie-apocalypse-mobile. My goal with it is to have a fairly mundane looking two door that can do just about anything. And carry any and all tools and gear i could ever need. For future upgrades my plans are:
VIAIR Heavy duty set up w/ Jeepswag.com brackets
Shrockworks Midwidth front bumper
Shrockworks tire carrier rear bumper with all jerry can holders and racks
Xenon Flat fender flares
ARB recovery kit w/ snatch strap, tree saver, shackles etc
Superwinch winch w/ syn line
MBRP roof rack w/ basket
33"x12.5" Tires either BFG KM2 M/T T/A or Toyo Open Country M/T
Zarges Aluminum cases for camping gear. They're rain proof so I can put them on the roof rack with out worries.
Well I'm sorry this was so long but if anyone has any questions recommendations etc please lemme know. I can give you a more detail background on how or why I did stuff the way I did. My overarching goal with it is to make efficient use of what little space I have in a 2dr and bring along what tools I need to keep this sucker running no matter what.
P.S. Sorry for the huge pictures forgot to resize them.
First off here's a little pic of what I ordered during my last deployment and came home to. It was like Christmas in August.
I'm gonna start with the "trunk" I went with the Tuffy Security Box. Works really well and keeps everything nice and organized. Lots of space for all my tools. And it results in more usable space on top of it. Right now I have in it:
1) 154 Piece Craftsman socket/wrench set
2) High-lift handle all which has an ax a sledge and a shovel, on top of that the handle doubles as a cheater bar
3) ARB Tire Puncture Kit
4) Jumper Cables
5) Random other tools
6) Random consumable (duct-tape, bailing wire, electrical tape and wire fuses, etc)
7) High Lift Off-road base
8) High Lift Off-road winch kit
9) High Lift Lift Mate (so i can lift the wheel directly and not have to worry about suspension droop
10)Random oils
11) First aid kit
12) MRE
13) Tow Strap
14) Chain
14) 2" Tubular webbing and some rope for tying up what ever needs tying\
15) And a host of other stuff i'm sure i'm forgetting right now
Note: I also have the Conceal and Carry drawer under the drivers side seat but forgot to take a pic you can see it in the top picture. Works well, safe out of sight storage for my more expensive stuff like electronics and what not.
On top of my Tuffy Box i mounted my CO2 tank. While I enjoy the on tap pressure it delivers I think i'm going to switch to a VIAIR set up with brackets from Jeepswag.com to move everything under the hood (thereby giving me more precious space inside). The problem i have with CO2 is while it last for decent amount of time it is finite in it's volume.
On the front of the Tuffy box (between the seats and the front of the box) i mounted some aluminum angle iron and mounted my 1000W inverter to it. I had thought about mounting it under the passenger seat like I have seen many of you guys do. My only worry with that is if I end up fording a river I don't want to short it out and ruin the sucker. I ended up using 0/1 cable for the pos and neg and grd runs from the inverter to my aux battery and chassis ground (picture of the battery set up below). I had to use 0/1 to minimize line loss because of the length of the run from the inverter to the battery. I also have a waterproof circuit breaker in line rather than a fuse so i can disconnect the inverter and so I won't have to replace huge fuses in the event one blows.
Now in that open space next to the inverter i'm going to mount a rack for 8qts of random fluids like motor oil, diff fluid, ATF etc.
Moving forward inside I got this iPhone mount from the apple store and did a bit of plastic welding to adapt it to a cooltech versa mount. It works great keeps the phone close to the radio so I can use NAVIGON (a GPS app) and have it plugged into the radio.
Moving south on the dash this is a daystar switch panel that I've wired up with Contura rocker switches for my hood lights and front and rear electronic lockers. I wired it into the cigarette lighter for switched 12v signal power along with the environmental controls for dim-able power that comes on when the headlights are on just like the rest of the dash.
Moving to the outside of the car we have my hoodlights and high-lift mount. I did a bit of creative wiring and used a lot of expanding mesh loom in order to keep the mess to a minimum.
Outback I got a rugged ridge receiver to replace the tow hook. This way I can mount a mountain bike rack or tow a trailer. And obviously it's important to have a rear retrieval point so i got a shackle for the receiver.
Moving under the hood I wired up a Bussman panel with 5 micro relays and fuses to power all my extras like hood lights ECU bypass for the lockers so I can lock them when I think it's appropriate. Not when some stupid computer does and for a winch in the future. As with the inverter I wired in a 100amp circuit breaker between the aux battery and the panel so I don't have to worry about carrying spare fuses.
Moving over to the aux battery set up. I went with the Benchmark dual battery set up and it's quite the stout set up. I have the relay wired into the cigarette lighter as well to seperate the aux battery from the main one when the ignition is off to avoid draining the main battery. But when the ignition is on both batteries are connected and charging.
Anther thing not shown is my spidertracks 1.5" spacers. This will allow me to run 33" tires in the future with out rubbing. One unforseen up side is that with the stock tires it makes the jeep look like it should. It should have come like this from factory. The tires just fill the wheel well better. That's the main reason why i'm not rushing out to replace the stock 32s until they wear out.
Finally I have two jerry cans for fuel and water.
Well there ya have it. I jokingly call it my Zombie-apocalypse-mobile. My goal with it is to have a fairly mundane looking two door that can do just about anything. And carry any and all tools and gear i could ever need. For future upgrades my plans are:
VIAIR Heavy duty set up w/ Jeepswag.com brackets
Shrockworks Midwidth front bumper
Shrockworks tire carrier rear bumper with all jerry can holders and racks
Xenon Flat fender flares
ARB recovery kit w/ snatch strap, tree saver, shackles etc
Superwinch winch w/ syn line
MBRP roof rack w/ basket
33"x12.5" Tires either BFG KM2 M/T T/A or Toyo Open Country M/T
Zarges Aluminum cases for camping gear. They're rain proof so I can put them on the roof rack with out worries.
Well I'm sorry this was so long but if anyone has any questions recommendations etc please lemme know. I can give you a more detail background on how or why I did stuff the way I did. My overarching goal with it is to make efficient use of what little space I have in a 2dr and bring along what tools I need to keep this sucker running no matter what.
P.S. Sorry for the huge pictures forgot to resize them.
 10-02-2010, 09:34 PM
#2
JK Newbie
Thread Starter
Join Date: Nov 2008
Location: San Diego, CA
Posts: 24
Likes: 0
Received 0 Likes
on
0 Posts
Ha my apologies JEEP. I honestly don't really know. I enjoy the challenge of trying to fit stuff in as little space as possible. Other than that I use it for offroading and camping, along with daily driving.
10-02-2010, 09:56 PM
#3
JK Enthusiast
Join Date: Jun 2010
Location: San Antonio, Tx
Posts: 216
Likes: 0
Received 0 Likes
on
0 Posts
That poor kitten, lol...
But dude really that is awesome... Me and my friend are always talking about how we need to get my Jeep ready for the zombie apocalypse. This seems like the perfect setup, especially with the 33's and no lift, i love that look... Also really like that Tuffy security box, BUT i have people in my back seats pretty often so i cant really afford to take them out. I guess that leaves me with basically no inside room, but a roof rack could fix that... But yea anyways awesome set up...
But dude really that is awesome... Me and my friend are always talking about how we need to get my Jeep ready for the zombie apocalypse. This seems like the perfect setup, especially with the 33's and no lift, i love that look... Also really like that Tuffy security box, BUT i have people in my back seats pretty often so i cant really afford to take them out. I guess that leaves me with basically no inside room, but a roof rack could fix that... But yea anyways awesome set up...

Trending Topics

 03-28-2012, 03:35 PM
#9
JK Newbie
Join Date: May 2011
Location: Denver CO
Posts: 43
Likes: 0
Received 0 Likes
on
0 Posts
Did you add the deck plate to the top of the turfy box? I love this and would like it for mine, but I don't really want to have a gap on the right side (I have a sport so no sub enclosure...)
03-23-2013, 02:21 PM
#10
JK Newbie

Join Date: Oct 2010
Location: Calgary, Alberta
Posts: 3
Likes: 0
Received 0 Likes
on
0 Posts
I know it's been a while since you put up this thread, but just wondering if you've got wiring diagrams for the electrical additions you made?
Thanks!
Thanks!