When you click on links to various merchants on this site and make a purchase, this can result in this site earning a commission. Affiliate programs and affiliations include, but are not limited to, the eBay Partner Network.
JK Member Write-UpsConsolidation of all current information from 'Member Writeups which includes JK Garage - Member Builds, Jeeping Lifestyle, JK Write-Ups)
Not sure how many of you have this going on, but pretty sure it will happen sooner or later. I went to use my sun visor the other day only to have the rubber where it catches in the clip crumble apart, which made my sun visor begin to flop about like a dying fish. You can find used ones from scrap yards or online sellers, but those may end up suffering the same fate, and new ones will cost you at least $100 per side. This fix allowed me to put new rubber on both visors for about $12-$15 bucks, so I thought I would share for those in need.
Step 1:
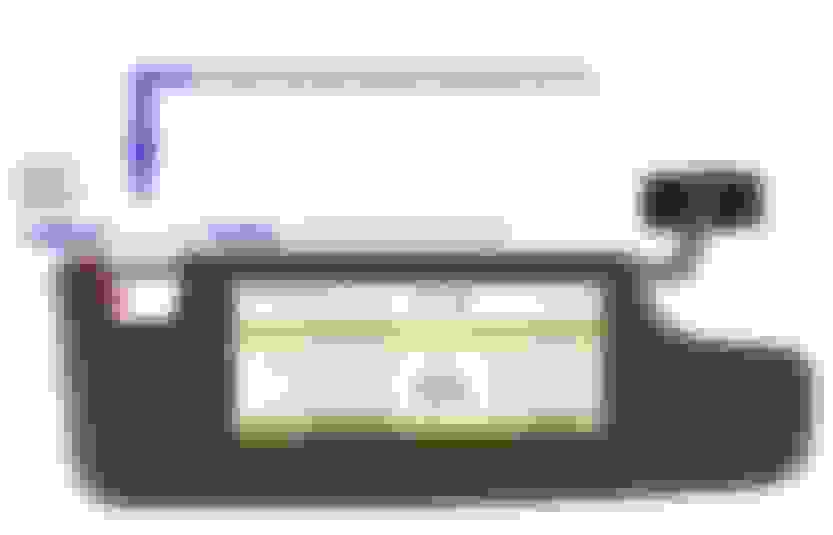
There is no need to remove the visor from the vehicle, I just used a pair of vise-grips on the bare metal rod shown below. (photo 1) By gripping the rod with the vise-grips and carefully pulling the plastic housing in the opposite direction of the vise-grips, I was able to get the metal rod out to begin work. I do recommend pivoting the visor away from the windshield to prevent any potential damage. photo 1
Step 2:
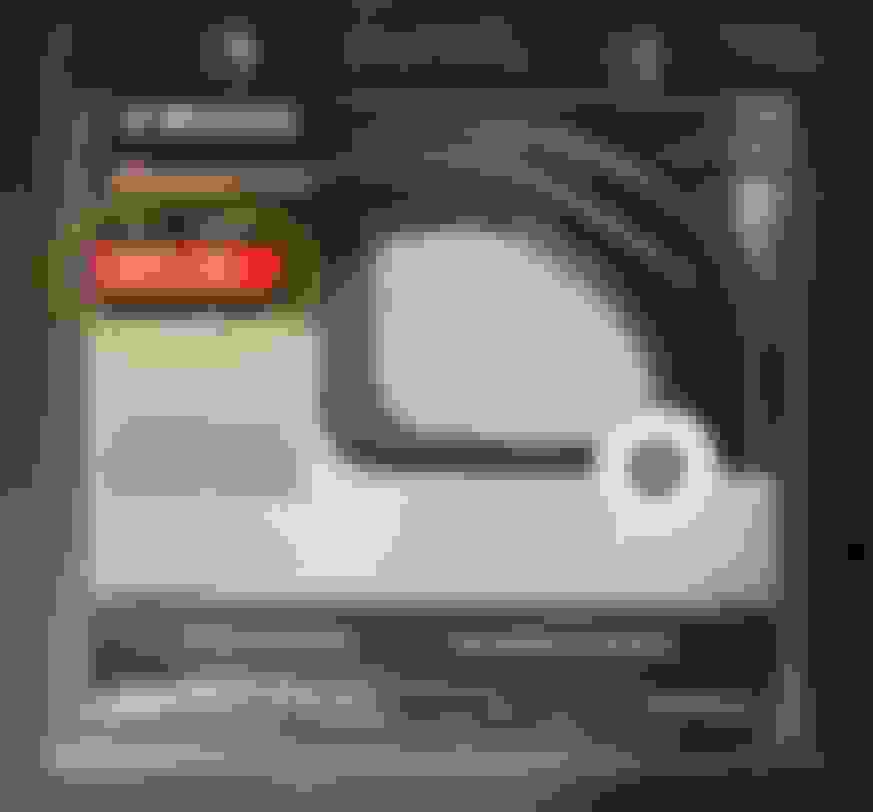
After the metal rod is removed from the visor, and all the remaining old rubber is removed, I used 2 layers of heat shrink tubing to fill in (make the rod a little thicker) the gap between the rod and the new rubber I used to surround it. (photo 2) You can usually find a variety pack of heat shrink at auto parts stores, or hardware stores pretty cheap. I think I paid about $5 bucks. First I used one of the smallest diameter heat shrinks, followed by the next size up. I used a pair of pliers to hold the end of the metal rod, since it will get hot to the touch, and a grill lighter to shrink the heat shrink onto the rod. (shrink them one at a time, don't try to shrink them both together or it will wrinkle and not work well) Make sure to leave a little bit of bare metal on each end of the rod exposed, otherwise it will not fit back into the visor correctly. I left about 3/16th of an inch.
photo 2
Step 3:
Once the rod has 2 layers of heat shrink, cut some vacuum tubing to length. Remember to make sure to leave some bare metal exposed on each end. I used 5/32" vacuum tubing I found at an auto parts store (photo 3) and paid about $5 bucks. Slide the tubing onto the rod over the heat shrink. Do NOT heat the vacuum tubing!
photo 3
Step 4:
Adjust the vise-grips to have a firm, but not damaging hold on the covered rod so the outer vacuum tubing doesn't slide off the metal rod and carefully re-insert the rod into the visor. You will have to gently pull the housing shown in photo 1 apart to slot the metal rod back into the holes it came out of.
It may not be perfect (you can still see a sliver of exposed metal rod on mine) (photo 4), but at less than $20 dollars to fix, it beats having to pay stupid money for new visors, IMO.
photo 4
I hope this helps anyone suffering from floppy/saggy visors!
Y, i had to do this in the past 6 months myself. i went with the $7 option off amazon for 4 pieces of rubber, which is probably about a 5000% profit margin for the seller, but whatever. Not something any of us should have to deal with IMO.
@resharp001
I agree that with something expected to move as often as these things do with intended usage for blocking the sun and having to shift them out of the way to remove/open tops, the rubber should be able to hold up much better. Or better yet make it a UV resistant plastic or something more durable altogether. But since that's not on the table, thought a cheap fix was definitely better than spending $100 on a replacement ($200 if you had to order both through Mopar). Glad you were also able to get yours done on the cheap!
Y, when I started down the path of research one thing became obvious to me......don't go the route of pre-split tube. I saw a ton of those options, and a ton of people going that route. I guess maybe not so obvious to some people that any tube that is pre-split is just going to eventually pull right back off as easily as it was put on. Have to put in the tiny bit of effort to get that pin out and do it right.

 09-03-2024, 06:18 AM