
The Re-Build

 09-01-2024, 12:23 PM
#42
Super Moderator

Thread Starter
I'm pretty happy with this.
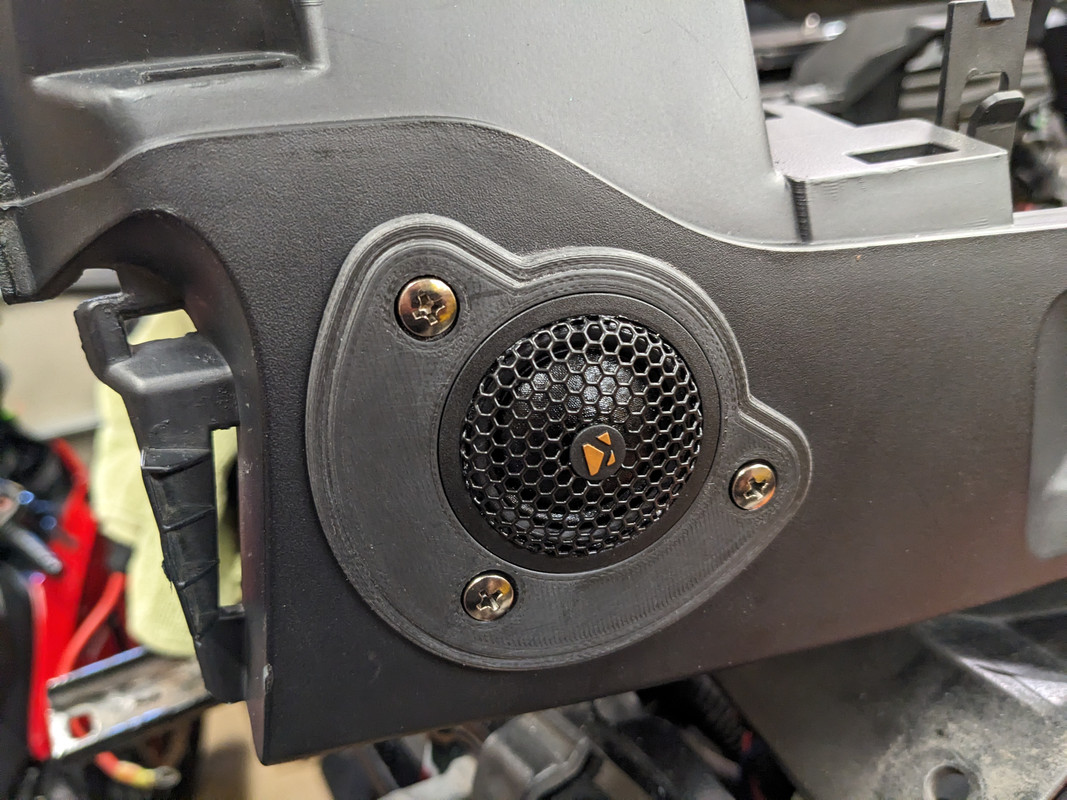
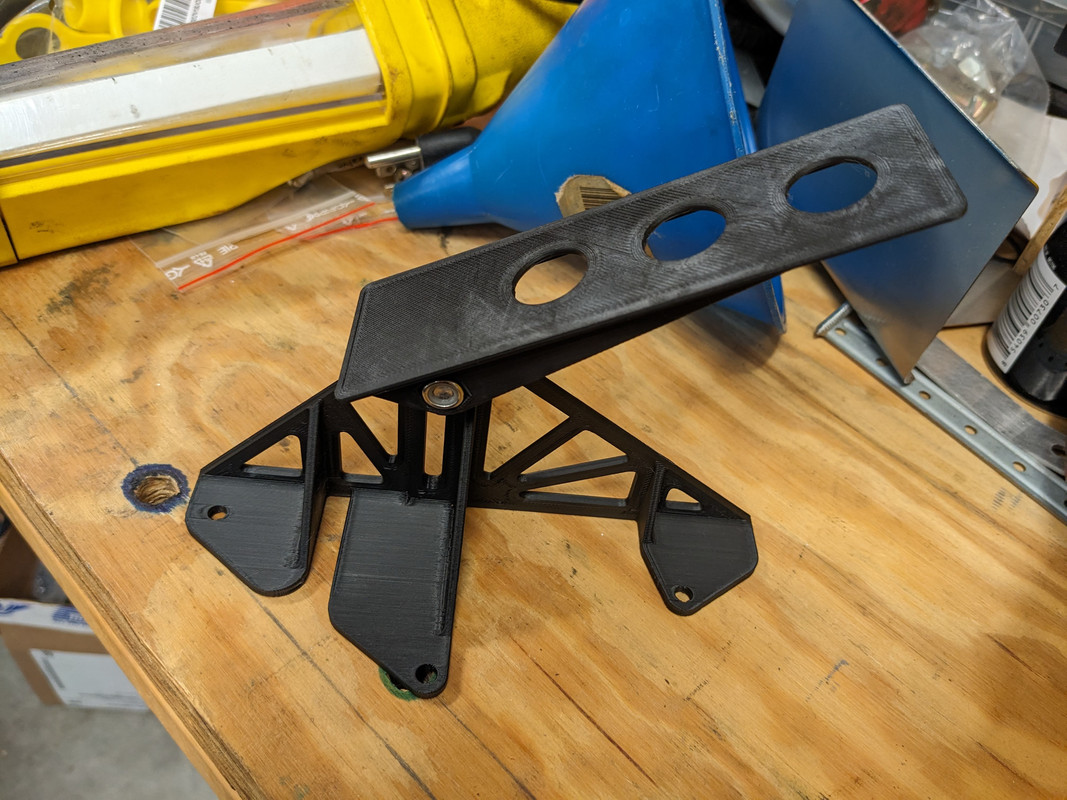
It sits flush around all the edges and I think it looks clean. Should fit any 1" tweeter, the file can be adjusted if need be for mounting. Here's the bracket in case anyone's curious:
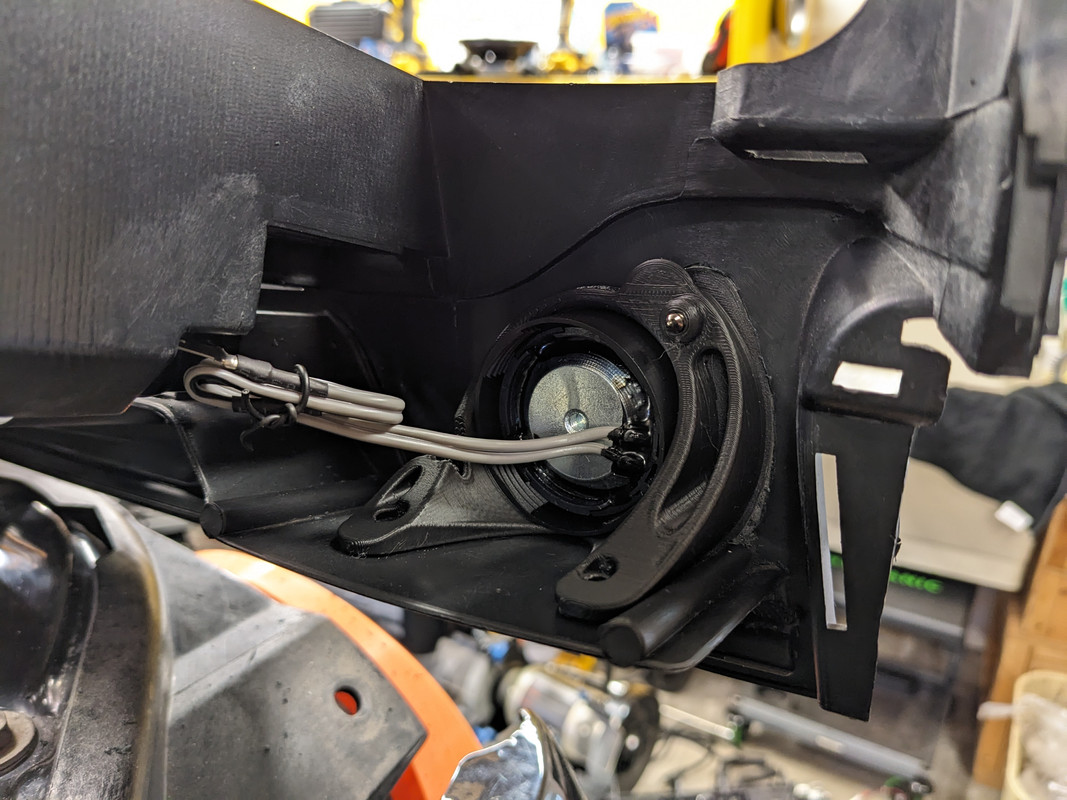
The legs get screwed into the dash plastic so the tweeter and trim can be removed from above.
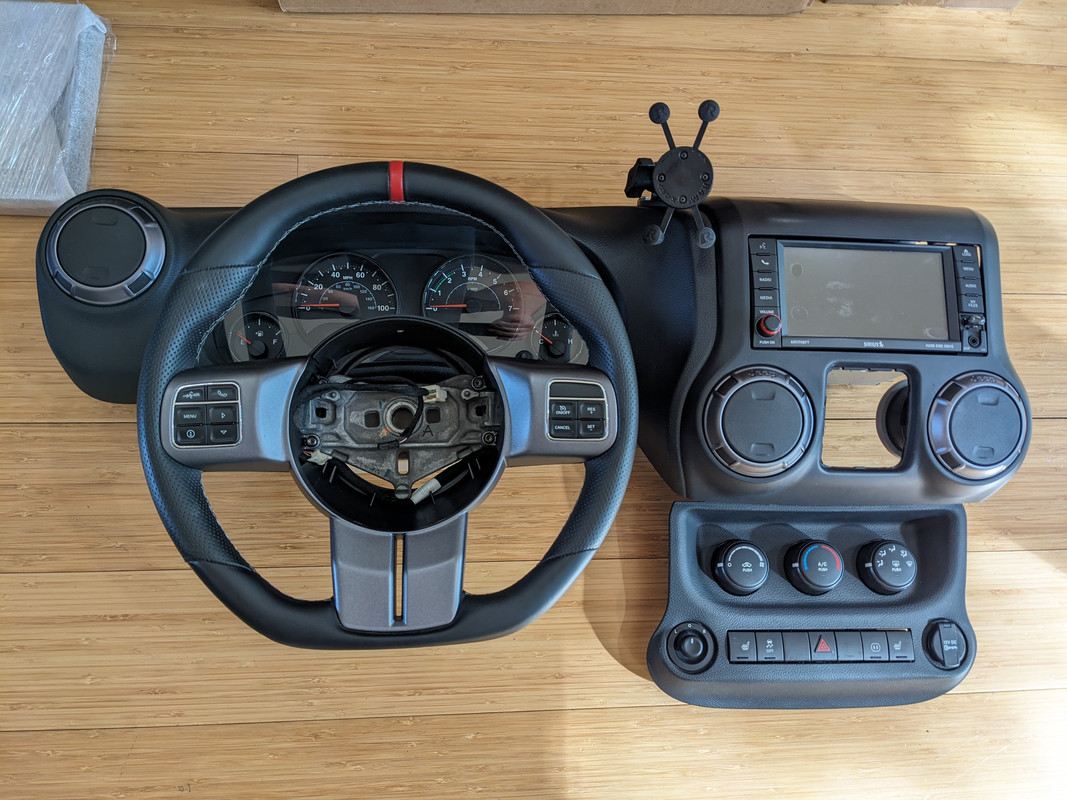
Now to cut out the other tombstone, print another bracket, and paint the trims. I mounted the evap core and blower motor so there are only plastics left to finish the dash. Oh! In my quest to rid the cabin of chrome I did some things. I pulled the steering wheel apart again to get at the button bezels. These are the same chrome that was on the HVAC knobs, impervious to everything I've thrown at it. Maybe they used a different application on surfaces that would be handled and something less robust/cheaper on those gauge rings? Either way, the button bezel chrome seems to be applied in place, and the housing wouldn't break down all the way so the buttons wouldn't come out. I considered hyper dipping them but for now I'm just going to let it ride. These are easy enough to remove and take some time with in the future if it ever matters to me again. Same story with the volume knob chrome, except the volume knob comes off. The knob assembly (knurled knob, chrome ring, smooth top) looks like it comes apart but I only fiddled with it so long. I scuffed the chrome, masked it, and painted it. I tried red just for a little pop of color to match the noon marker on the steering wheel, not sure if I like it. I'm also second guessing not painting the gauge rings, but it's all going in as-is because, again, these things are a cinch to revisit any time after the Jeep is running. I mocked it up for kicks, what do you think?
It sits flush around all the edges and I think it looks clean. Should fit any 1" tweeter, the file can be adjusted if need be for mounting. Here's the bracket in case anyone's curious:
The legs get screwed into the dash plastic so the tweeter and trim can be removed from above.
Now to cut out the other tombstone, print another bracket, and paint the trims. I mounted the evap core and blower motor so there are only plastics left to finish the dash. Oh! In my quest to rid the cabin of chrome I did some things. I pulled the steering wheel apart again to get at the button bezels. These are the same chrome that was on the HVAC knobs, impervious to everything I've thrown at it. Maybe they used a different application on surfaces that would be handled and something less robust/cheaper on those gauge rings? Either way, the button bezel chrome seems to be applied in place, and the housing wouldn't break down all the way so the buttons wouldn't come out. I considered hyper dipping them but for now I'm just going to let it ride. These are easy enough to remove and take some time with in the future if it ever matters to me again. Same story with the volume knob chrome, except the volume knob comes off. The knob assembly (knurled knob, chrome ring, smooth top) looks like it comes apart but I only fiddled with it so long. I scuffed the chrome, masked it, and painted it. I tried red just for a little pop of color to match the noon marker on the steering wheel, not sure if I like it. I'm also second guessing not painting the gauge rings, but it's all going in as-is because, again, these things are a cinch to revisit any time after the Jeep is running. I mocked it up for kicks, what do you think?
09-01-2024, 06:51 PM
#43
Super Moderator
Thread Starter
Finished the second tweeter. It went smoothly, seems to b a very repeatable process. Both trims are sanded and prepped for paint tomorrow. Getting to the end of this bit!
09-03-2024, 05:47 PM
#44
Super Moderator
Thread Starter
Well here we are
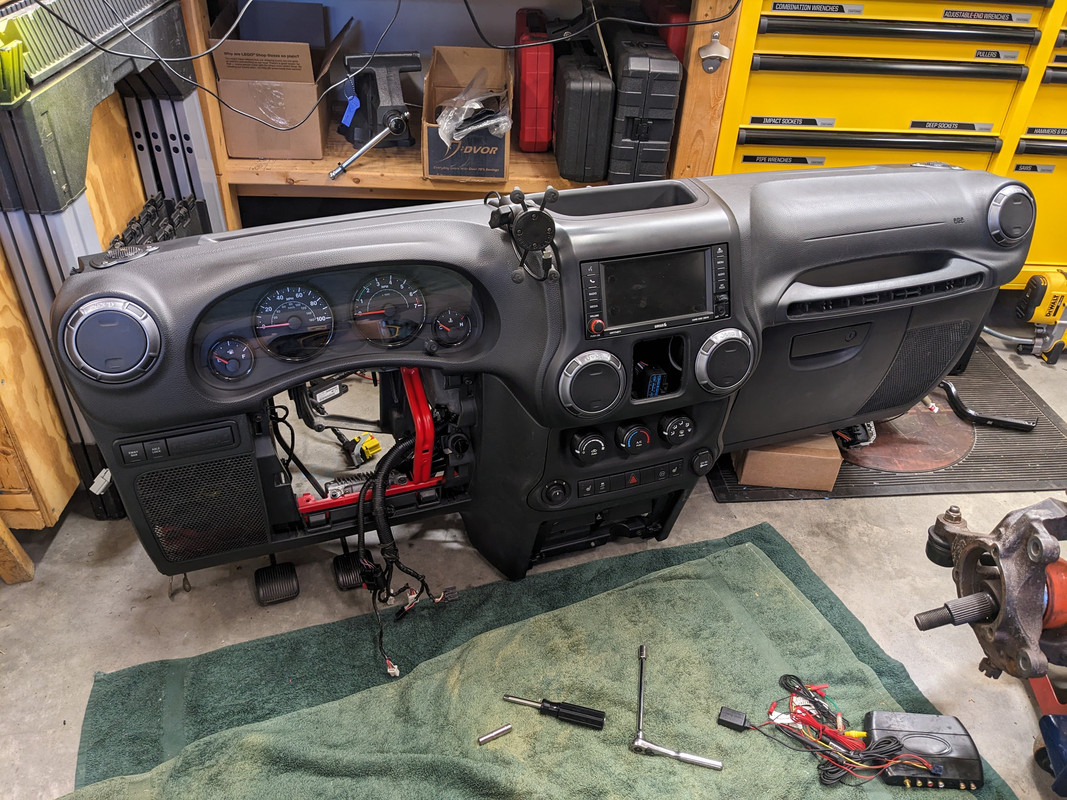
Tweeters are done, everything is mounted up and plugged in. Except for the Mygig Lockpick which I'm making a place for. I don't like the red on the radio knob. I pulled the old AC plumbing and cleaned up the interior. I think I'm gonna drill the three holes for the legs of the PSC trail cage while the dash is out, it stands to reason that I'd get more accurate holes if I drilled them from the inside. Which isn't possible with the dash in place. This way I can still put the cage in whenever I feel like it, but those holes will be done. It's nice to see the dash in one piece though.
Tweeters are done, everything is mounted up and plugged in. Except for the Mygig Lockpick which I'm making a place for. I don't like the red on the radio knob. I pulled the old AC plumbing and cleaned up the interior. I think I'm gonna drill the three holes for the legs of the PSC trail cage while the dash is out, it stands to reason that I'd get more accurate holes if I drilled them from the inside. Which isn't possible with the dash in place. This way I can still put the cage in whenever I feel like it, but those holes will be done. It's nice to see the dash in one piece though.
09-04-2024, 04:49 PM
#45
Super Moderator
Thread Starter
I'm trying to get those pre-dash install items done. I did the clutch master cylinder, the writeup here (and essentially everywhere) was super helpful. It's also way easier when there's nothing left in the Jeep but the clutch master cylinder.
I wanted to fit those trail cage legs and drill mounting holes, but I ran into a bit of a snag. About a hundred years ago (8 years) when I bought the cage and started to fit it, the two legs that sandwich the dash and mount to the floor were wrong. I called PSC and they sent me two new ones that were bent correctly. That means I had four legs sitting around here for the last 8 years. At some point I separated the bad ones from the rest of the cage pieces and I went to the parts tent today to grab one. I mistakenly brought in the passenger side so I went to get the other one. I came back with the passenger side. So I brought both in together and - you guessed it - both passenger sides. I scoured the parts tent but the driver sides aren't in there. I cleaned up the garage a while back to make room for this and other projects and now I'm more than a little concerned that I scrapped the two driver side parts by mistake. I honestly can't remember what I did with them. I have one more place to look and then it's probably going to be an embarrassing call to PSC to see if they'll make me just the one piece. Unbelievable.
I'm also not sure if I want to put the ARB engine bay mounted compressor back in. It ran ultra hot being under the hood and it was always soooo slow to fill tires. It's nice to have air, but I may go with a different solution.
09-06-2024, 05:21 PM
#46
Super Moderator
Thread Starter
I spoke with Poison Spyder about ordering that missing part. The guy on the phone was very pleasant and told me I was out of luck. He said PSC was 'on ice' currently. Not out of business, but not doing business. He recommended I have a fabricator make the part for me. That's a bummer. So I brought the parts to the machine shop and asked if they could make me one. They recommended I talk to PSC and see if I could snag the drawing file for that part so they didn't have to reverse engineer it. Then they could just send the file to their laser cutter, bend and weld up the flat stock, then just figure out the joints. I called PSC again today but no answer. It's Friday though so I'll let it slide.
09-10-2024, 12:18 PM
#47
Super Moderator
Thread Starter
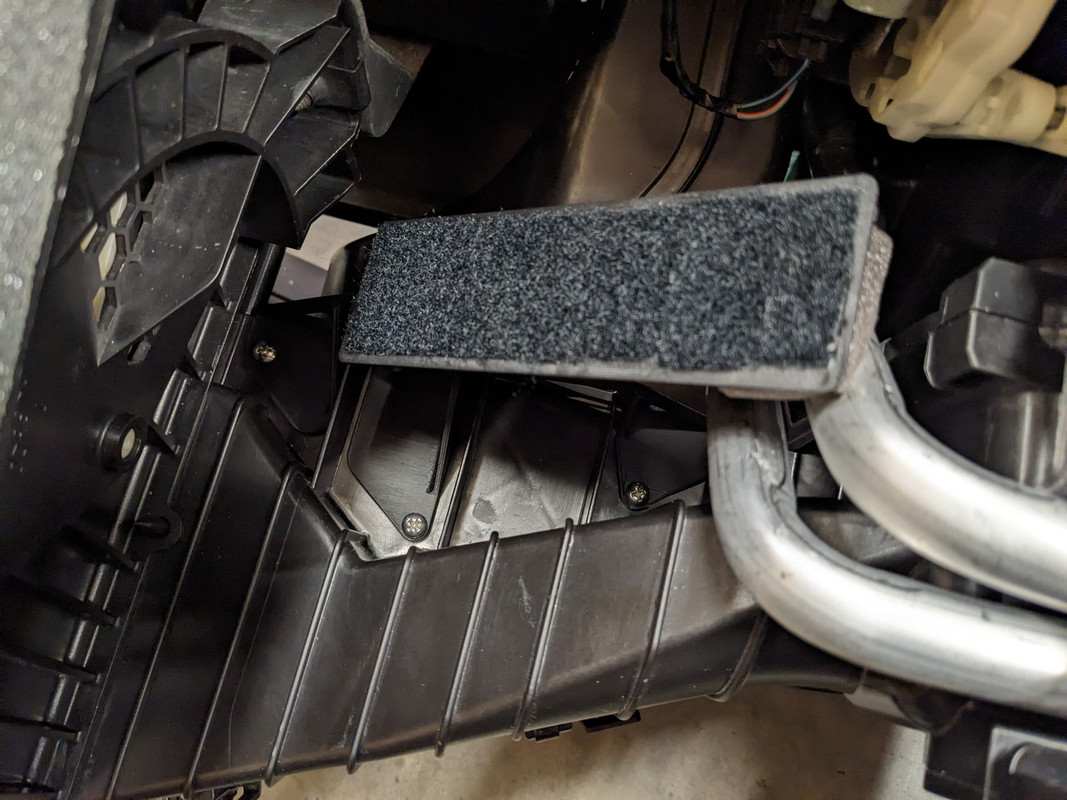
In the meantime I made a bracket for the ol' Lockpick and got it mounted up where I think it will be a. accessible, and b. not in the way of anything important.
The bracket (angle adjustable!)
Installed. It uses three screws that hold the blower housing together.
From the back.
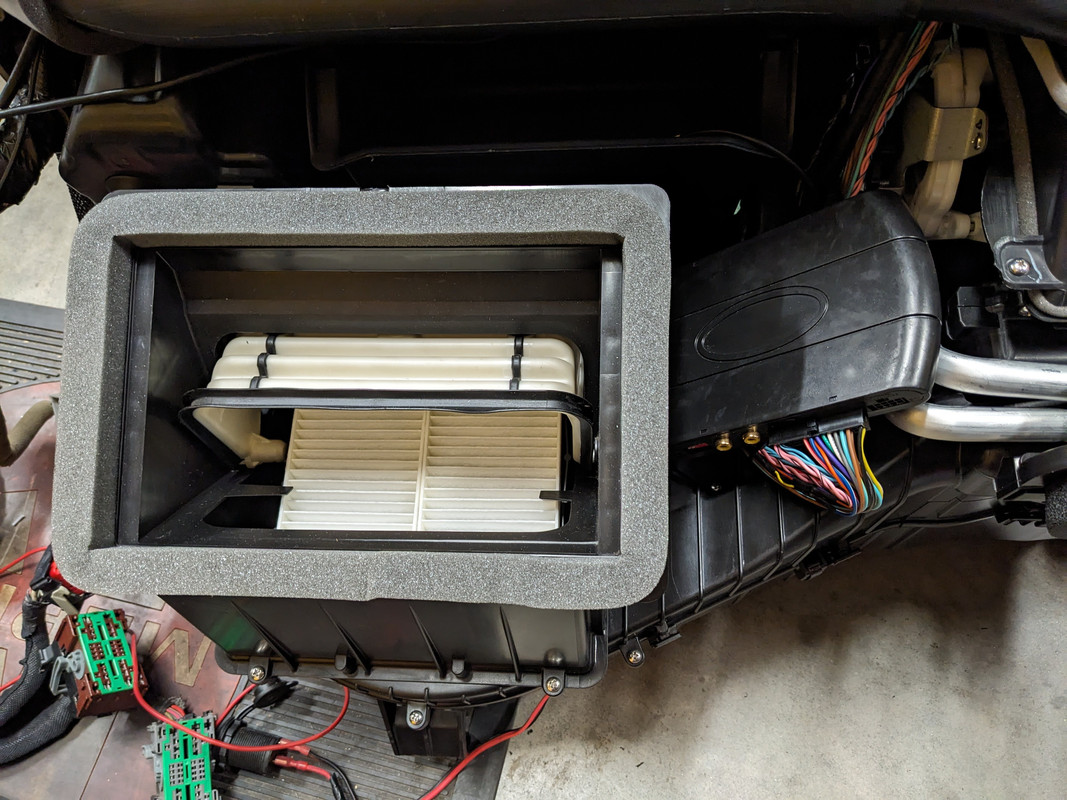
Access with the glove box removed.
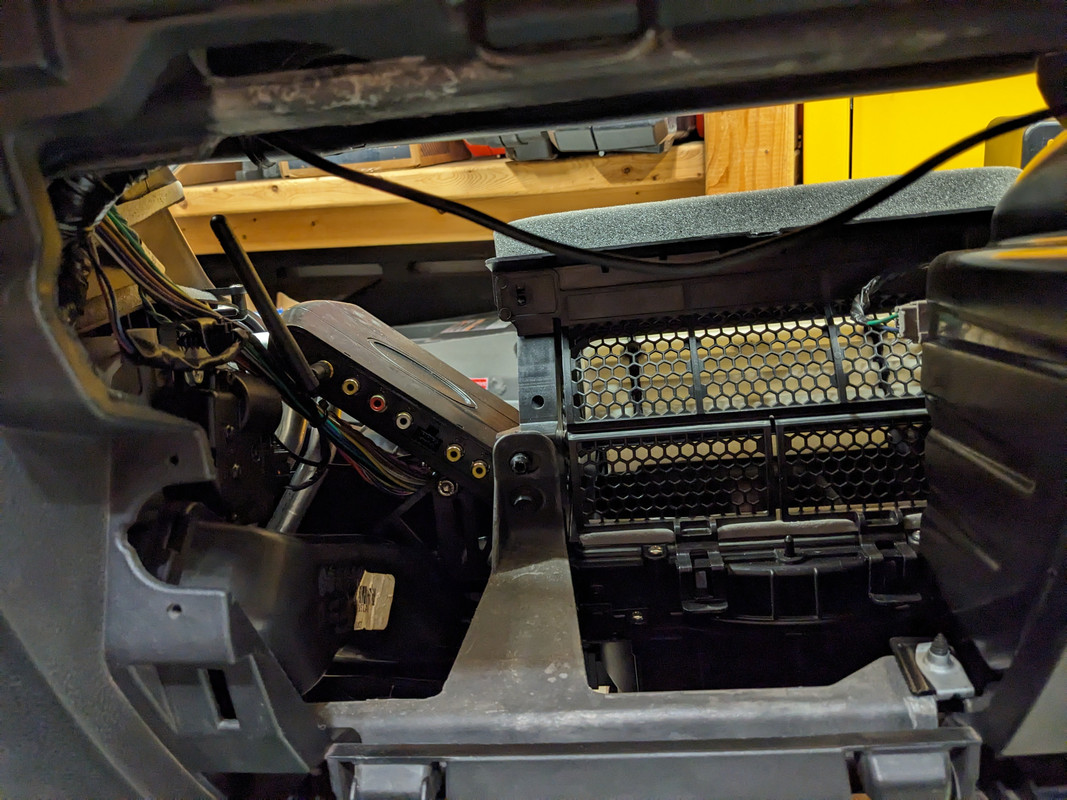
The top of the bracket can be removed with the dash in place (captive nut) to mount something else too. I don't want to pull the dash again anytime soon.
The bracket (angle adjustable!)
Installed. It uses three screws that hold the blower housing together.
From the back.
Access with the glove box removed.
The top of the bracket can be removed with the dash in place (captive nut) to mount something else too. I don't want to pull the dash again anytime soon.
09-11-2024, 06:17 PM
#48
Super Moderator
Thread Starter
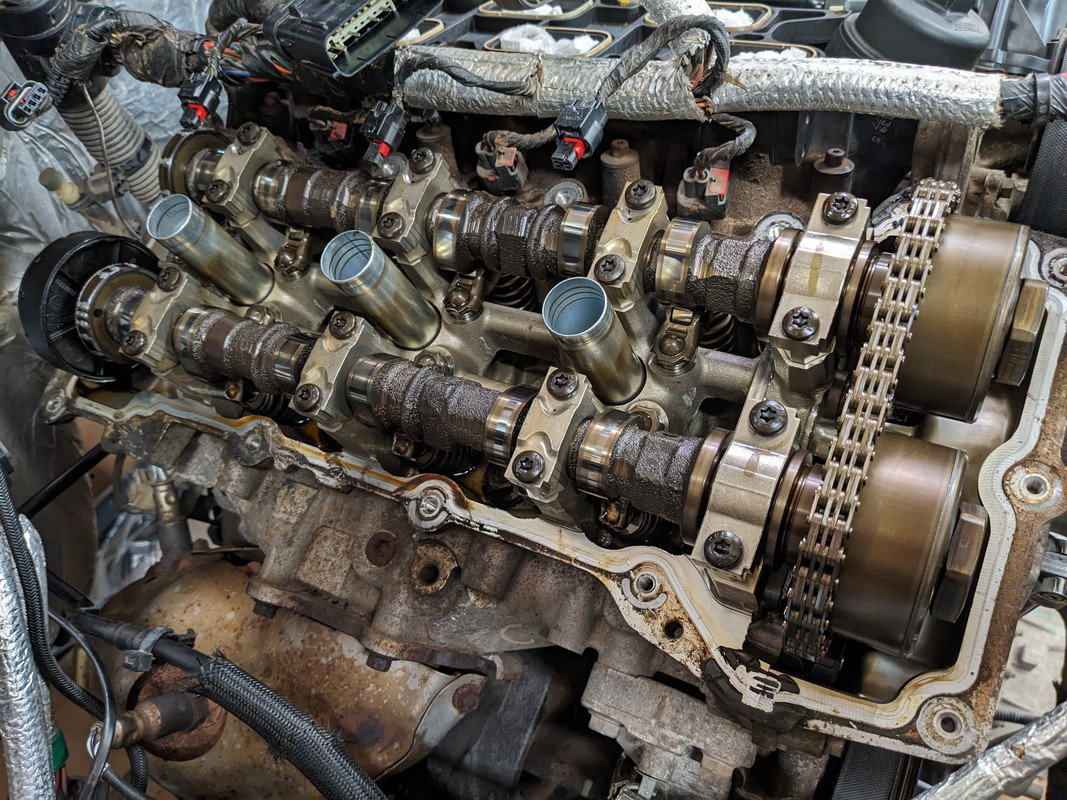
Switched gears today because the valve covers came in like lightning. Even with just about everything removed from the right side of the bay, that PCV was a PITA. One of the coil bolts broke in the cover, though it doesn't matter much since I planned to replace the cover already. I knew it was going to break as soon as I put a wrench on it, but I did my best. It broke anyway. Inside I think the cams looked pretty solid. the lobes were all flat from edge to edge and nicely polished down the middles.
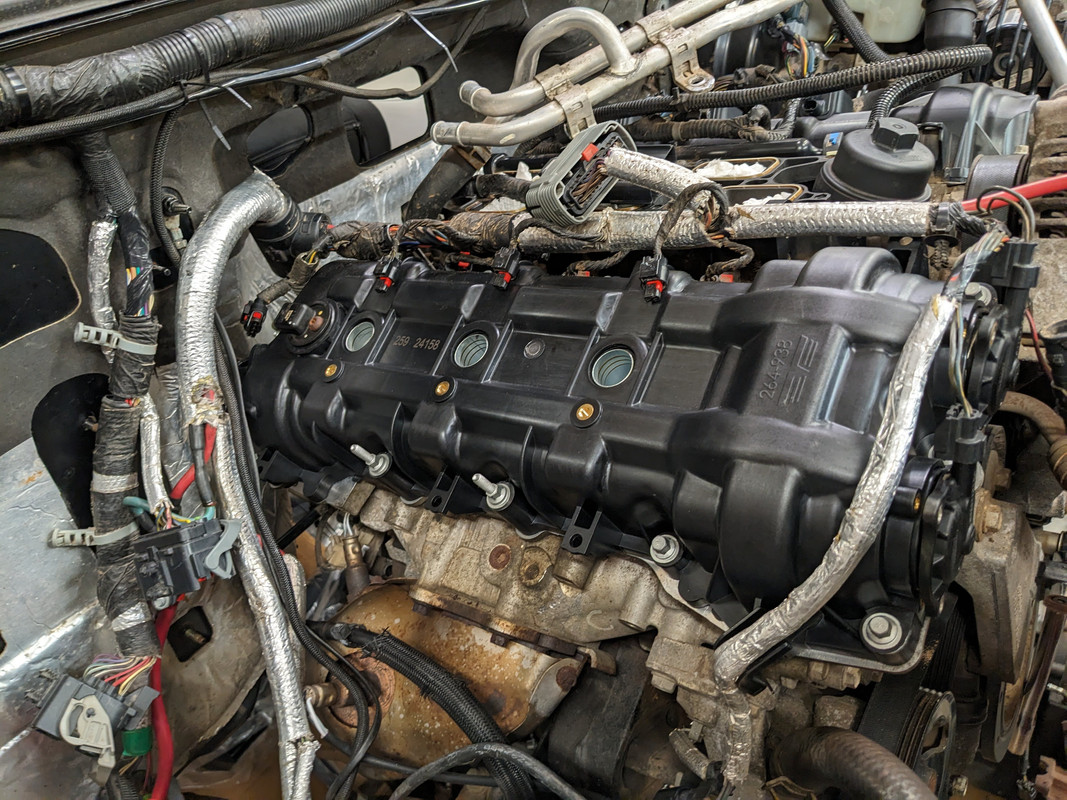
And the new cover in place.
I have hardware coming in tomorrow to finish that up. Ordering one bolt isn't really a thing so I ordered a bunch to replace the old hardware just for kicks.
And the new cover in place.
I have hardware coming in tomorrow to finish that up. Ordering one bolt isn't really a thing so I ordered a bunch to replace the old hardware just for kicks.
Today, 05:16 AM
#49
Super Moderator
Thread Starter
I just swapped the oil filler tube over to the new driver side valve cover. It's just a twist-off with a little locking tab, but there are splines in the valve cover hole that threw me for a minute. So, next time you remove one, just lift the tab and twist.