
The Re-Build
 08-15-2024, 09:12 AM
#21
Super Moderator

Thread Starter
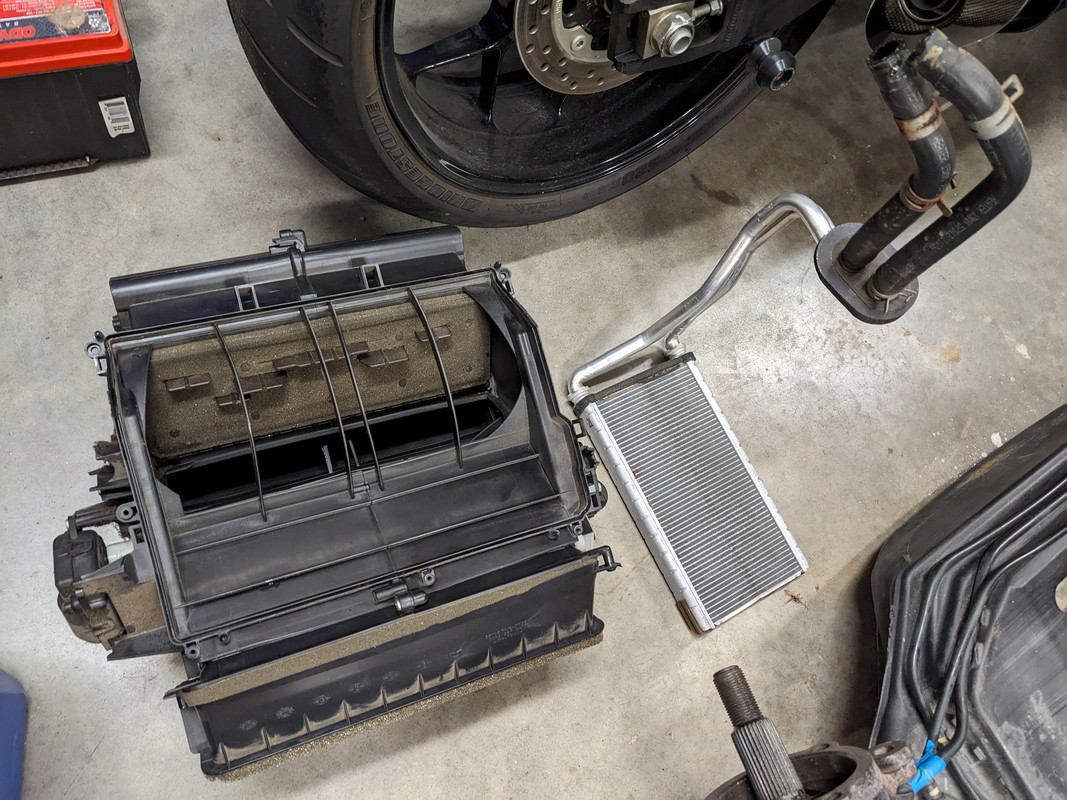
I ordered yet more parts for the dash portion of the job. More of those "while I'm in there' bits. I picked up the three blend door actuators, a blower fan and control, the sensor in front of the evap core, and the little AC expansion valve. None of these cost an arm and a leg and I'd rather not have to deal with any of them when the dash is installed. While those are in the mail I'm trying to get the heater core swapped out. In theory that's super simple. In the real world, that dash structure that everyone cuts out is just as in the way when the dash is removed. I'm not about to go this far and then do the quick fix, so I'm trying to figure out how far I have to go to make enough space to slide the core out. It looks like I have to pull the center dash trim because the heater box is bolted in from the front, which is kinda crappy since the dash is leaning on those panels now. I'm hoping that if I can get that big heater box loose, I can stretch it backward far enough to get the clearance. Otherwise I think all the ductwork has to go. We'll see. I haven't found a procedure for the heater core replacement without cutting the dash, but this seems to be it because there's no way that sucker is coming out in one piece without disassembling the dash from both sides.
 08-15-2024, 05:07 PM
#22
Super Moderator
Thread Starter
The heater core is out! It wasn't too bad. The left/center dash trim has to come out, and the HVAC panel and the lower net pocket panel. Then there are just four T-40 screws that hold the whole box in. The heater core slides out just like in the videos. There's hardly anything left of my dash and I'm thinking about just pulling the vents to clean them out as well. I took some photos but imgur is having issues so I'll post them next time. I'm going to redo all this ancient foam too. I gotta say, it feels like progress and I'm excited about it!
The following users liked this post:
pc1p (08-16-2024)
08-16-2024, 02:21 PM
#24
Super Moderator
Thread Starter
That's what's really exciting, after sitting for years I feel back on track. I'm right near 287/23 in Morris county. I'll definitely be keeping you posted! Another couple hours in already today..
08-17-2024, 03:54 PM
#25
Super Moderator
Thread Starter
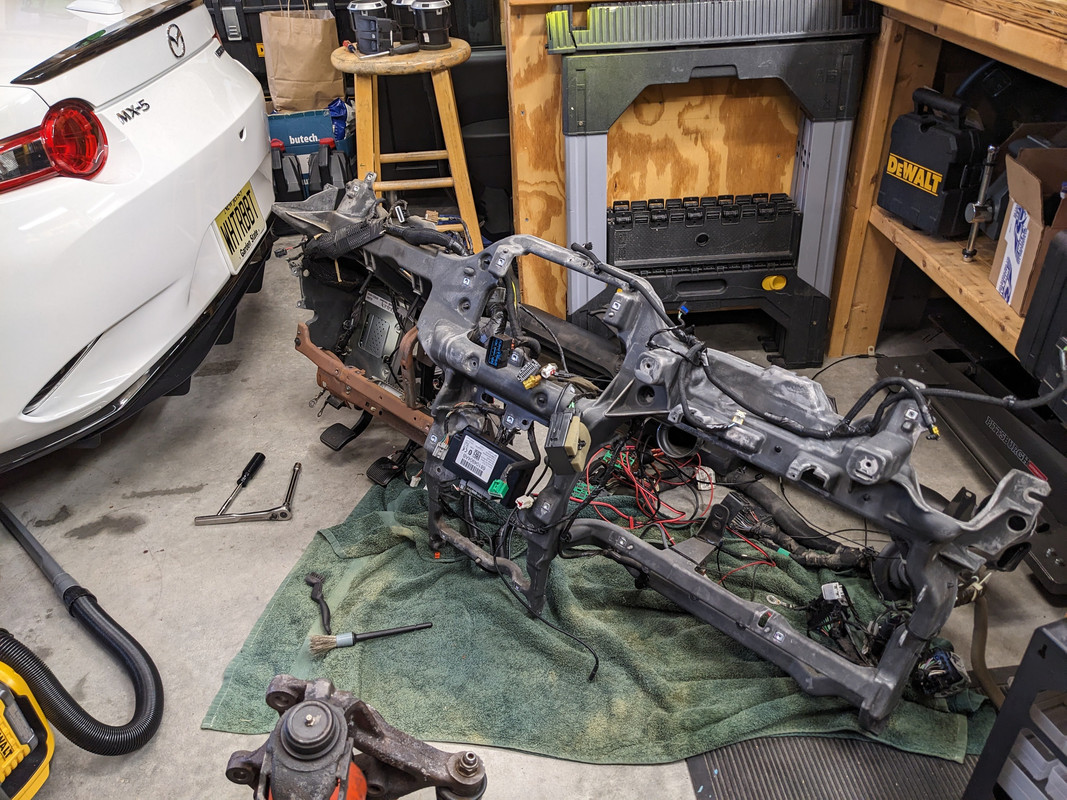
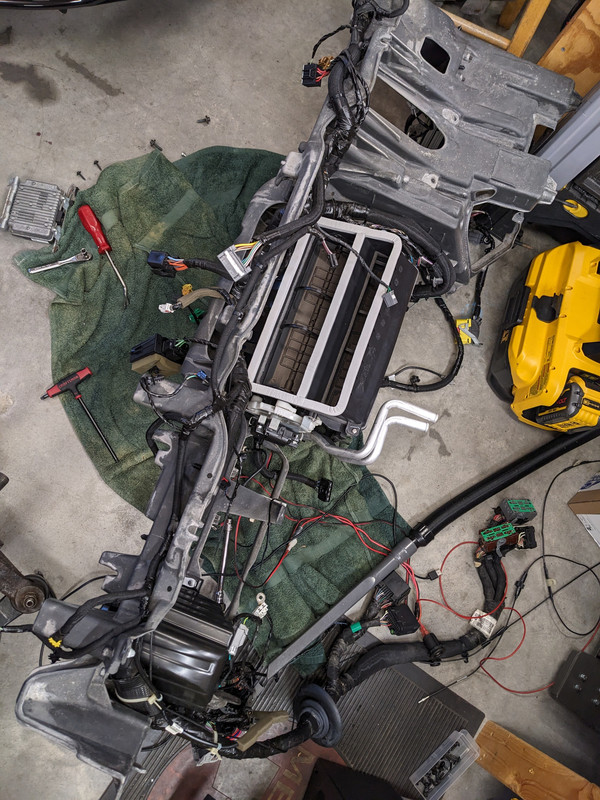
Ok! So progress today means more is out of the Jeep. It's a pain to work with the dash while it's sitting in the seats. I disconnected what was left (three whole connectors) and got a hand to pull it out.
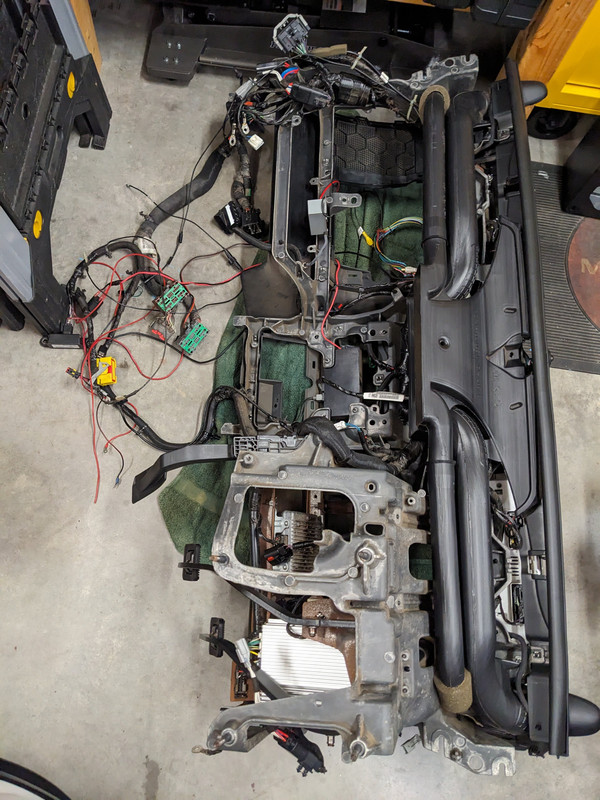
Trying new photo hosting today, lets see how that goes. Shout it out if you have any issues with the pics.
I took the 'Distribution Housing' apart and got to cleaning it. Even inside the vents and ducts it's really dirty. With all this accessible I might as well get the ten years of dust and funk out of there. One of the blend doors in the housing seems melted. I know it's not melted, it's degrading rubber, but part of the seal has turned into a sticky tar-like mess. I cleaned it the best I could but the whole seal is getting tacky so I know it's only a matter of time until it's just a pool of goop. Blend doors for this particular housing are not available individually. The housing (P/N 68089116AA) is $400+ from Jeep or about $280 from online retailers. While searching, I found another housing that's spec'd for the 2012 JK, P/N 68089117AA and lists online for $110. I went to the parts counter today to find out what the deal was and we figured out that the housing parts are different for auto and manual climate control vehicles. Mine was a loaded Rubicon when I bought it and it had the auto climate control. I didn't care for it and swapped to manual controls years ago. So I figure I can order the cheaper housing, use it if it's suitable, or steal the blend doors out of it and save myself $170. The shipping estimate is ten days from now so I'm trying to be ready for the dash reinstall by then. I also ordered the foam seal kit, mostly for the seals around the heater and evap lines. It comes with a bunch of other foam too. If it looks good I'll use it, if not maybe there's a better quality foam out there I can use.
I also swapped in more HVAC parts that arrived today. The blend door actuators come with big STOP stickers and the fine print reads that they need to be calibrated by a scan tool before use. I found a thread here with good info on that and I downloaded the JScan app. I already have a suitable OBD2 adapter so I should be good on that front.
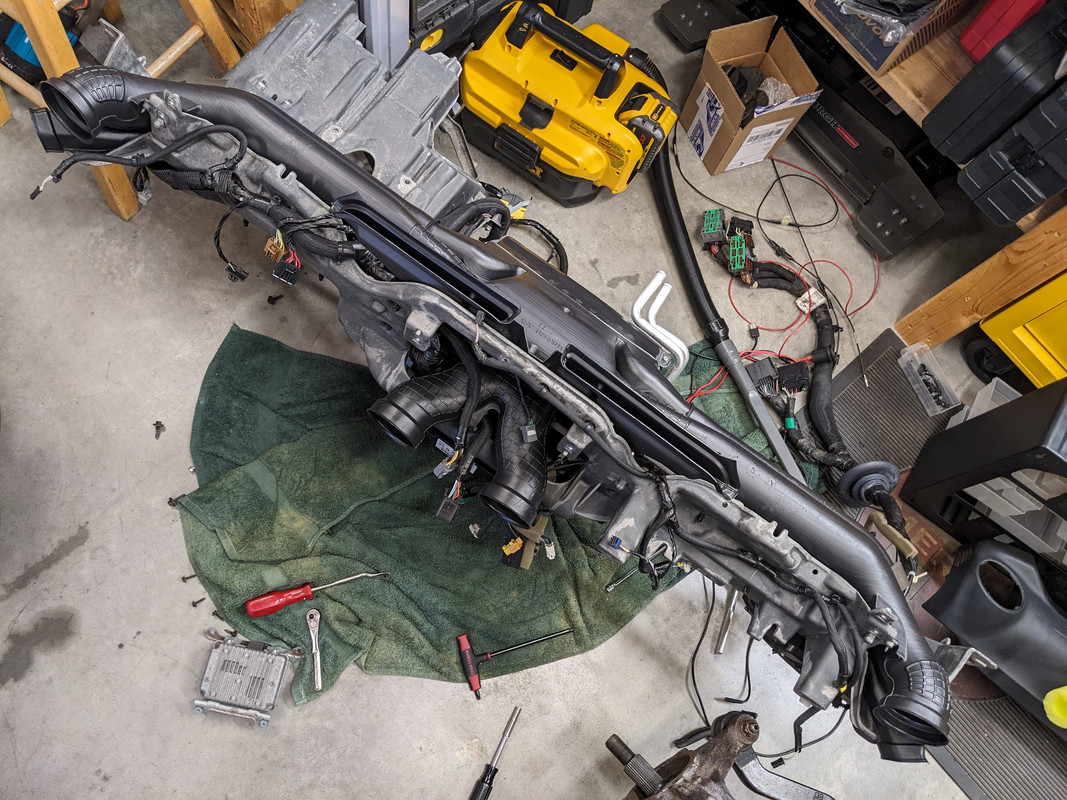
The Jeep looks so empty now, and feels very spacious with nothing left inside but seats.
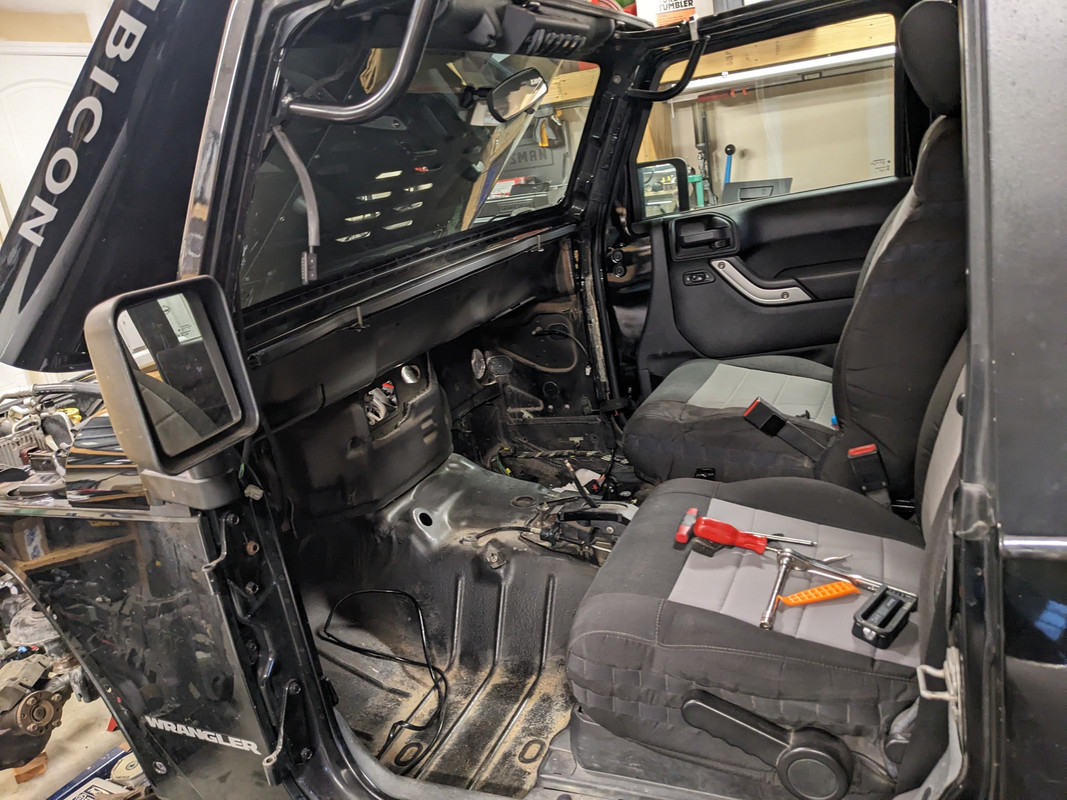
So now starts the race to clean out the bones of the dash and the vents. It will be much easier to do with easy access. I'm taking lots of pictures as I go, so if anyone needs a reference while all this is apart, put that request in and I'll get on it.
Trying new photo hosting today, lets see how that goes. Shout it out if you have any issues with the pics.
I took the 'Distribution Housing' apart and got to cleaning it. Even inside the vents and ducts it's really dirty. With all this accessible I might as well get the ten years of dust and funk out of there. One of the blend doors in the housing seems melted. I know it's not melted, it's degrading rubber, but part of the seal has turned into a sticky tar-like mess. I cleaned it the best I could but the whole seal is getting tacky so I know it's only a matter of time until it's just a pool of goop. Blend doors for this particular housing are not available individually. The housing (P/N 68089116AA) is $400+ from Jeep or about $280 from online retailers. While searching, I found another housing that's spec'd for the 2012 JK, P/N 68089117AA and lists online for $110. I went to the parts counter today to find out what the deal was and we figured out that the housing parts are different for auto and manual climate control vehicles. Mine was a loaded Rubicon when I bought it and it had the auto climate control. I didn't care for it and swapped to manual controls years ago. So I figure I can order the cheaper housing, use it if it's suitable, or steal the blend doors out of it and save myself $170. The shipping estimate is ten days from now so I'm trying to be ready for the dash reinstall by then. I also ordered the foam seal kit, mostly for the seals around the heater and evap lines. It comes with a bunch of other foam too. If it looks good I'll use it, if not maybe there's a better quality foam out there I can use.
I also swapped in more HVAC parts that arrived today. The blend door actuators come with big STOP stickers and the fine print reads that they need to be calibrated by a scan tool before use. I found a thread here with good info on that and I downloaded the JScan app. I already have a suitable OBD2 adapter so I should be good on that front.
The Jeep looks so empty now, and feels very spacious with nothing left inside but seats.
So now starts the race to clean out the bones of the dash and the vents. It will be much easier to do with easy access. I'm taking lots of pictures as I go, so if anyone needs a reference while all this is apart, put that request in and I'll get on it.

 08-18-2024, 12:27 PM
#27
Super Moderator
Thread Starter
Thanks! Having been left to my own devices all day, things have progressed.. in a direction? I'm not sure which, but I'm having a good time.
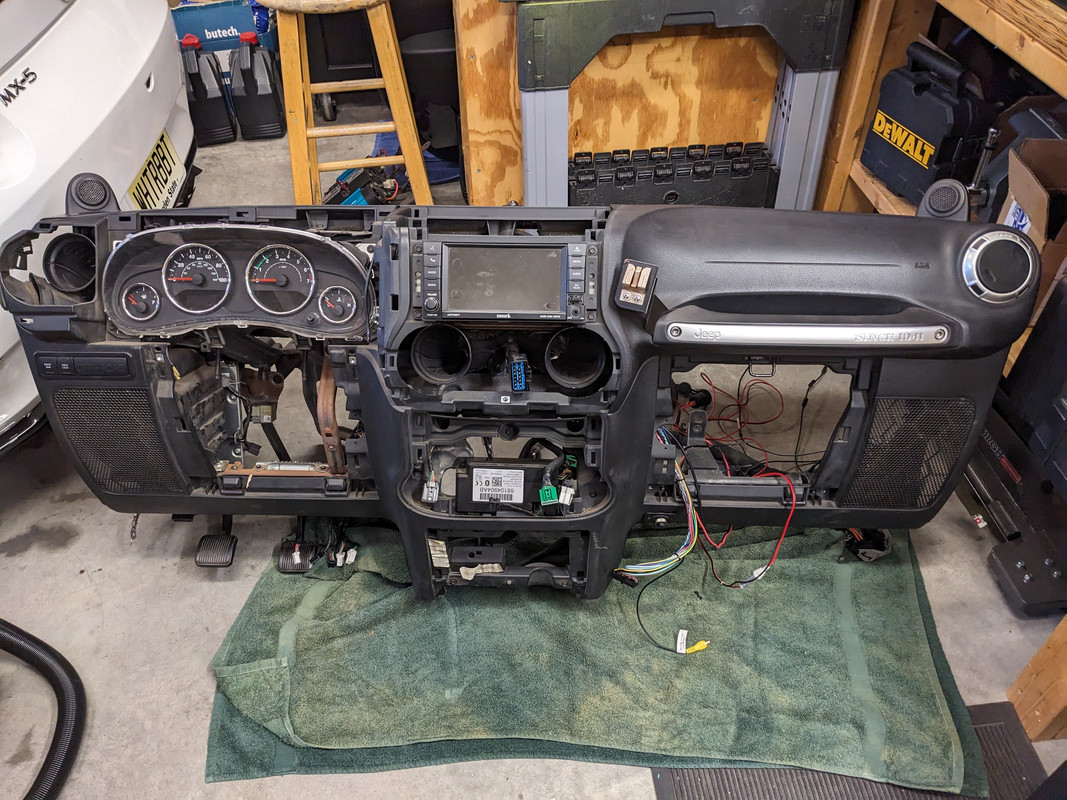
I was pretty sure the full dash trim had to come off to get the upper vents out, though the real hold up was the radio mounting bracket preventing the center vents from pulling out. I guess it doesn't really matter, at this point what's another bunch of screws?
So long to the passenger airbag, gauges, radio, and then the small matter of disconnecting the tweeters. The large dash trim is a matter of about 15 of those 7mm screws, actually very easy and straightforward to remove. I've cleaned off most of the aluminum structure but there's plenty to go. I have the passenger airbag recall to do, I'm thinking about bringing that piece of dash trim to the dealer to see if they will "install" it in that. I'm also thinking about replacing the dash speakers so I'll have to do some homework there. I don't want anything crazy, just maybe a quality replacement speaker. I'm also thinking about cleaning up the steel braces and painting them. I'm sure the surface rust is a nice protective layer, but I have nine more days to kill. I'm also going to re-run the wiring I added for power and the CB and a handful of other things I don't yet recognize so that it's a little neater. Oh and who at Jeep thought it would be a great idea to save $0.002 per vehicle to shorten the window switch wiring harness so you have to ram your fingers into the dash and make a blood sacrifice to the car gods to get the connector off?? Honestly!
I have a parts corner in the dining room now. Nine days to go..
Last edited by icrashbikes; 08-18-2024 at 12:30 PM.
08-21-2024, 12:09 PM
#28
Super Moderator
Thread Starter
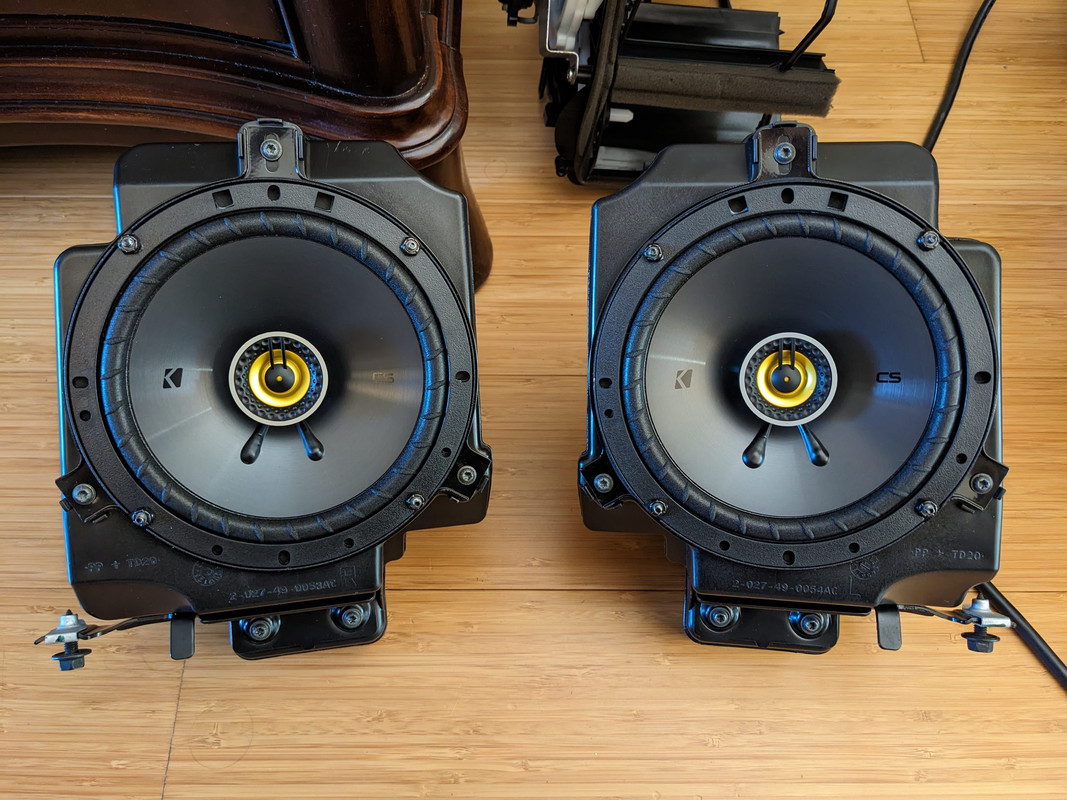
I ordered the 6.75" Kicker plug & play set for the dash and sound bar speakers. I'm not looking for anything more than OEM+ and minimal effort. That's certainly what this is so far, though the verdict will be out on sound quality for a while still. The brackets weren't a perfect fit, I either had to slice two locating tabs off the speaker pods or grind down two tabs on each speaker. Speakers come and go so they got a turn on the bench grinder. I stuffed the pods with polyfill and everything went together nicely. They sure look cool!
On my speaker list as well is a tweeter solution. I have a PSC trail cage kicking around that I'd like to put in and the dash bar sits pretty much right against the tweeter grilles. The 2015s and up have the tweeters mounted flat in the top of the dash, So I'm hoping to do something similar. Now is the best time I'll ever have to chop off the tombstones and make a mounting solution for flat tweeters. I have the 3D printer up and running which should be fine for any custom bracketry and grilles. The other minor dash project I've decided to go ahead with is painting the vent trim rings, the grab handle trim, and the door handle trims. I've never liked the bright silver. Stay tuned.
On my speaker list as well is a tweeter solution. I have a PSC trail cage kicking around that I'd like to put in and the dash bar sits pretty much right against the tweeter grilles. The 2015s and up have the tweeters mounted flat in the top of the dash, So I'm hoping to do something similar. Now is the best time I'll ever have to chop off the tombstones and make a mounting solution for flat tweeters. I have the 3D printer up and running which should be fine for any custom bracketry and grilles. The other minor dash project I've decided to go ahead with is painting the vent trim rings, the grab handle trim, and the door handle trims. I've never liked the bright silver. Stay tuned.
08-24-2024, 07:14 PM
#29
Super Moderator
Thread Starter
Lots done today.
The distribution housing came in. This is the manual HVAC control part number, costs less than half of the auto control version, and I can't find a difference physically between the two. They are marked with different die numbers, but it stands to reason that Jeep might have more than one.
The new unit came with one actuator bracket bent and the actuator at a bad angle:
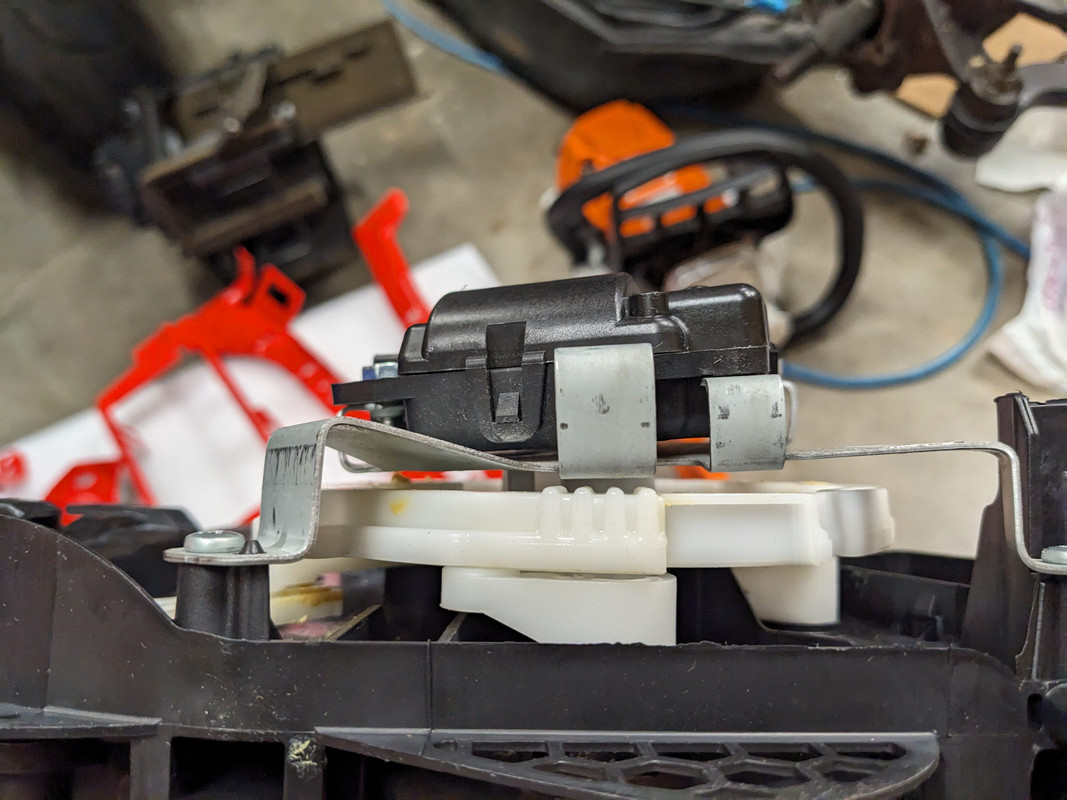
I'll bet it's been tossed around for a while since the JL came out. It came lubricated with way too much yellow mustard too. It also came with two actuators, of course after I already bought replacements. I'm going to use my housing, I like it better and I spent plenty of time cleaning it out. I'll snag the blend doors and actuators from the new one and then I don't know what I'll do with the leftovers. I ordered a seal kit with it which is a good thing because the new one didn't come with any foam gasketing, thought I guess that's moot since I'm not using the housing. I picked up various sticky foam weather stripping today too so I can replace everything around the vents and ducts that's not included in the seal kit.
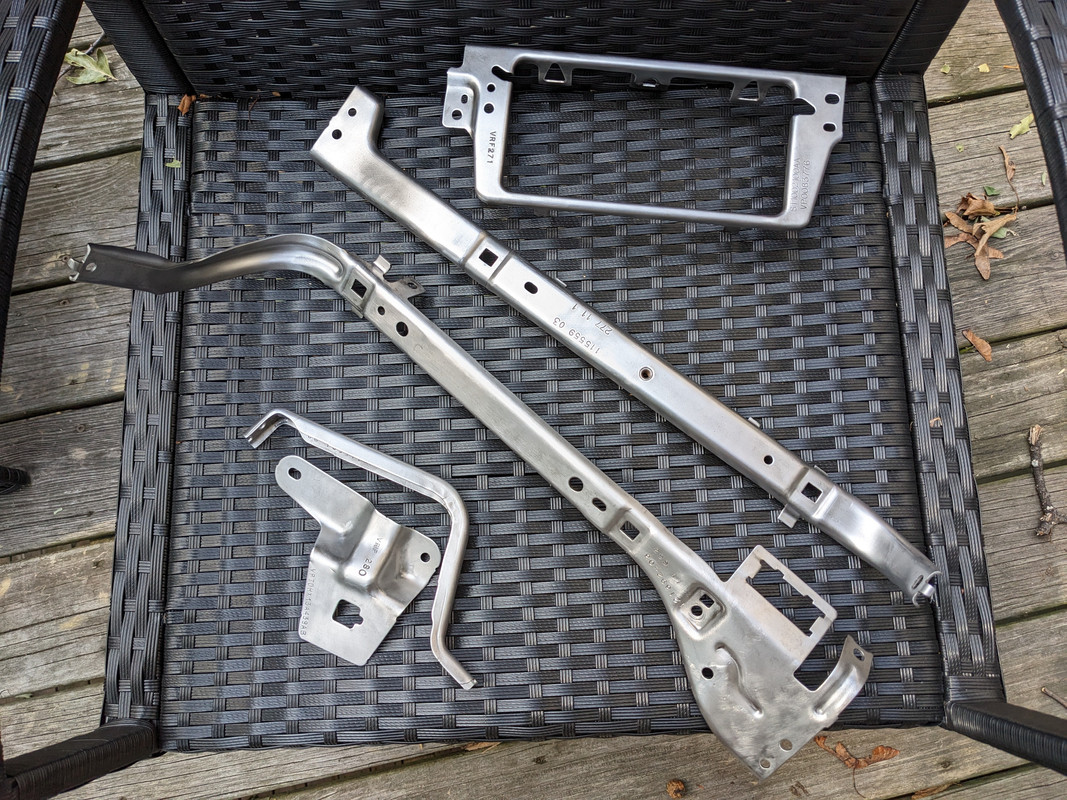
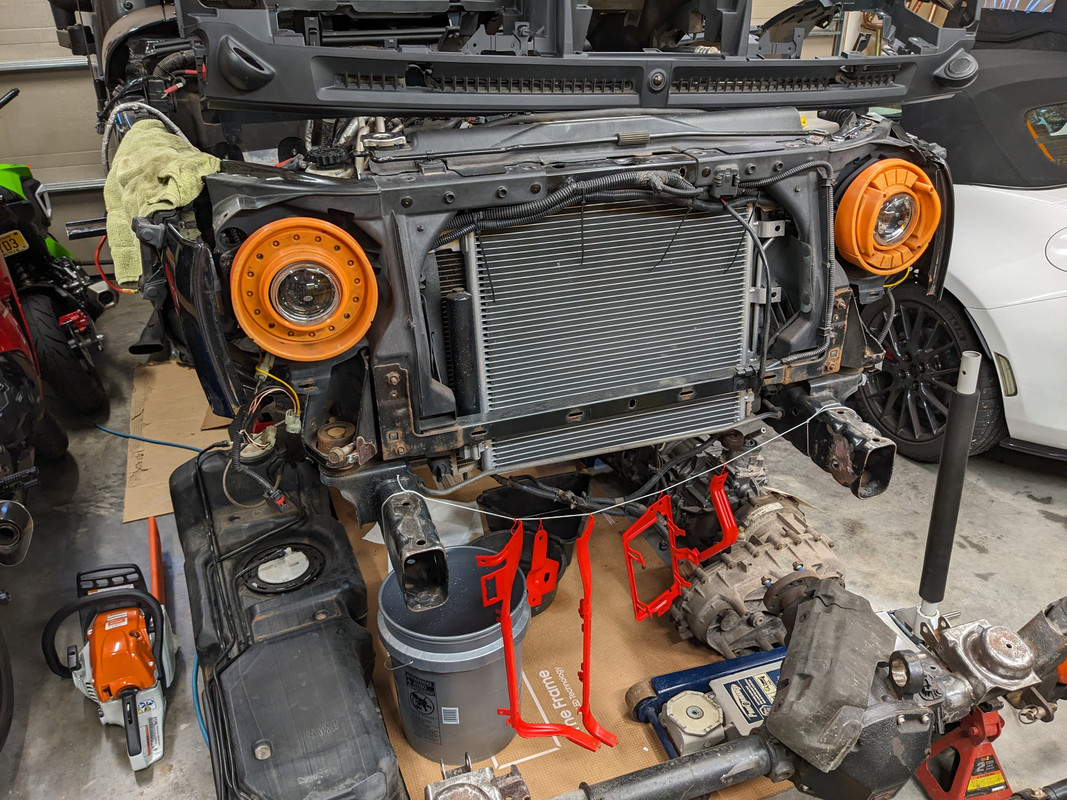
I caved and cleaned and painted the steel parts. It was fun.
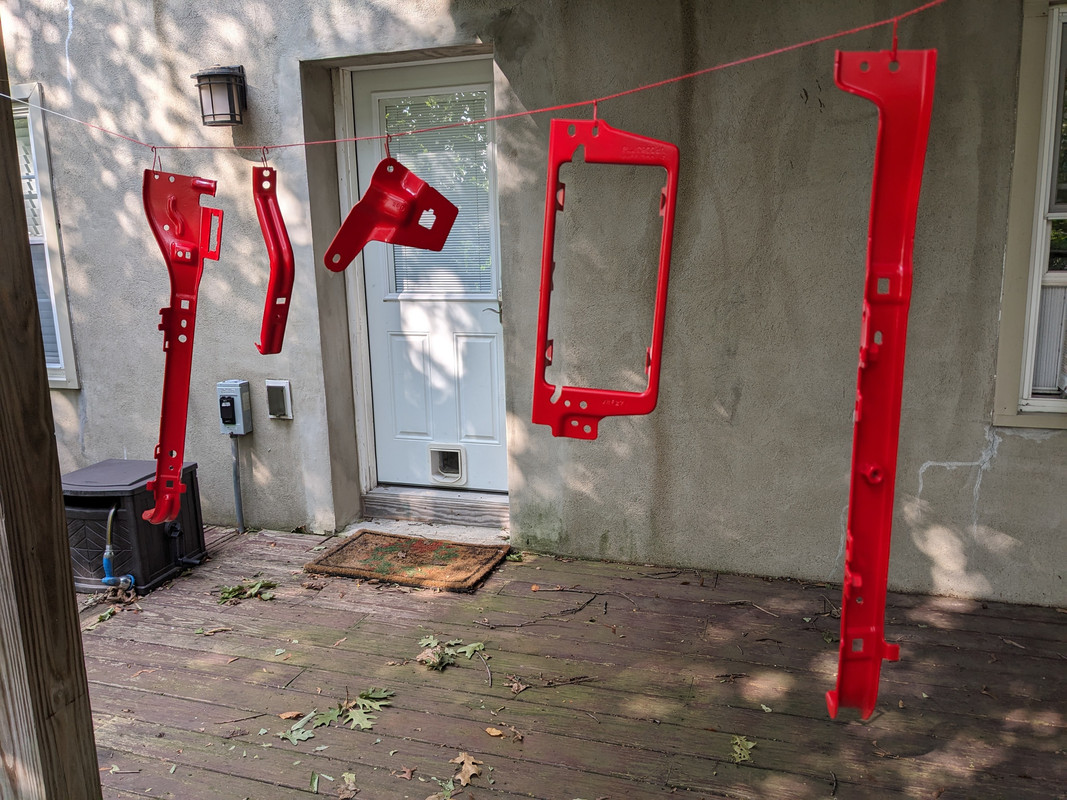
Isn't everything better in red? No one will ever see them but I like it.
I finished cleaning the aluminum dash structure and all the wiring harnesses and connectors. I did find one wire which had caught on something and torn the insulation so I wrapped that up to avoid problems down the road. Everything else in there looks good.
The tweeters came in. I stuck with Kicker and went with their 1" KS series. They come with a plethora of mounting options which is nice since I'm still working out how to mount them. There's plenty of room (I think, I have to test fit the ducts to be sure) so it's just a matter of coming up with a bracket to mount them flat and some kind of trim to cover the tombstone cutout. I have some ideas.
Tomorrow I'll finish the heater box and get all the foam seals done. Then I can put the new heater core in it and bolt it into the dash. I'm going to pick up paint for the vent rings and other interior trims and get those all cleaned and prepped. If the weather is as perfect as it was today, I'll paint them too. It just occurred to me that I can paint the tweeter trims to match, that will look nice and make it less obvious that they are 3D printed parts. I'm going to give the red parts a few days to fully cure, I'm notorious for being impatient and ruining young paint by installing things too quickly. If all goes well, I could put the dash back in next weekend and move on to bigger things.
The distribution housing came in. This is the manual HVAC control part number, costs less than half of the auto control version, and I can't find a difference physically between the two. They are marked with different die numbers, but it stands to reason that Jeep might have more than one.
The new unit came with one actuator bracket bent and the actuator at a bad angle:
I'll bet it's been tossed around for a while since the JL came out. It came lubricated with way too much yellow mustard too. It also came with two actuators, of course after I already bought replacements. I'm going to use my housing, I like it better and I spent plenty of time cleaning it out. I'll snag the blend doors and actuators from the new one and then I don't know what I'll do with the leftovers. I ordered a seal kit with it which is a good thing because the new one didn't come with any foam gasketing, thought I guess that's moot since I'm not using the housing. I picked up various sticky foam weather stripping today too so I can replace everything around the vents and ducts that's not included in the seal kit.
I caved and cleaned and painted the steel parts. It was fun.
Isn't everything better in red? No one will ever see them but I like it.
I finished cleaning the aluminum dash structure and all the wiring harnesses and connectors. I did find one wire which had caught on something and torn the insulation so I wrapped that up to avoid problems down the road. Everything else in there looks good.
The tweeters came in. I stuck with Kicker and went with their 1" KS series. They come with a plethora of mounting options which is nice since I'm still working out how to mount them. There's plenty of room (I think, I have to test fit the ducts to be sure) so it's just a matter of coming up with a bracket to mount them flat and some kind of trim to cover the tombstone cutout. I have some ideas.
Tomorrow I'll finish the heater box and get all the foam seals done. Then I can put the new heater core in it and bolt it into the dash. I'm going to pick up paint for the vent rings and other interior trims and get those all cleaned and prepped. If the weather is as perfect as it was today, I'll paint them too. It just occurred to me that I can paint the tweeter trims to match, that will look nice and make it less obvious that they are 3D printed parts. I'm going to give the red parts a few days to fully cure, I'm notorious for being impatient and ruining young paint by installing things too quickly. If all goes well, I could put the dash back in next weekend and move on to bigger things.
The following users liked this post:
pc1p (08-25-2024)
08-25-2024, 04:22 PM
#30
Super Moderator
Thread Starter
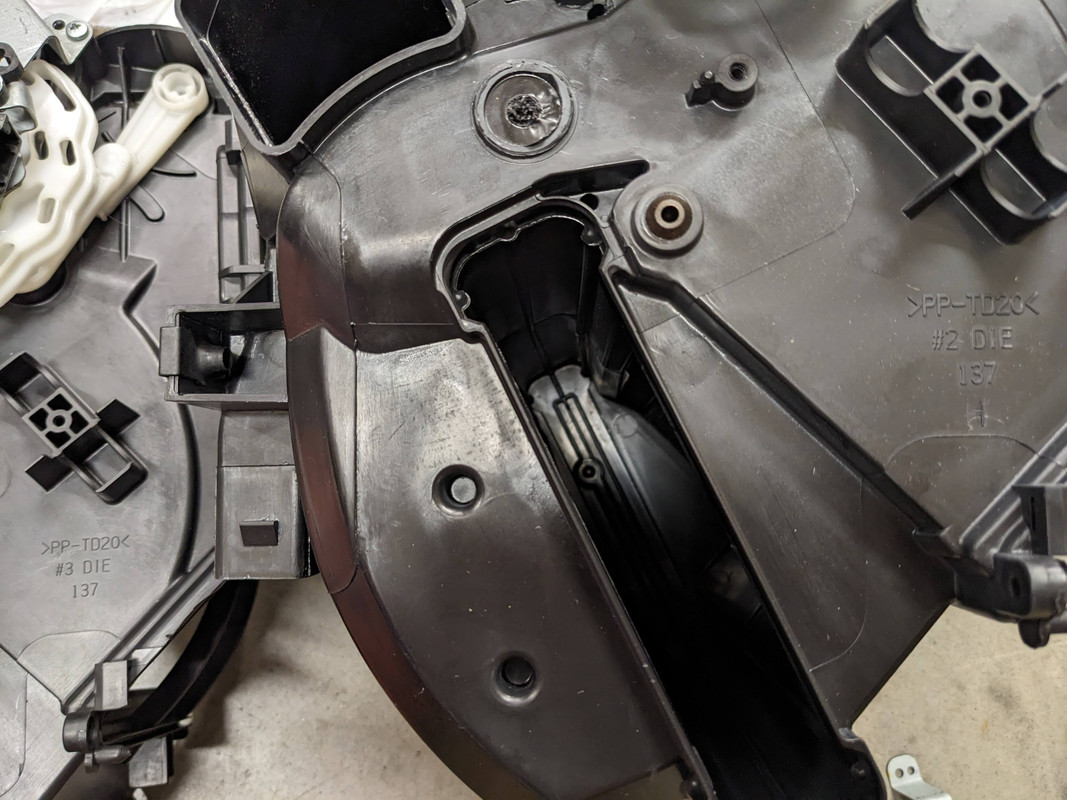
I found the difference in the heater boxes. I must have been blind.
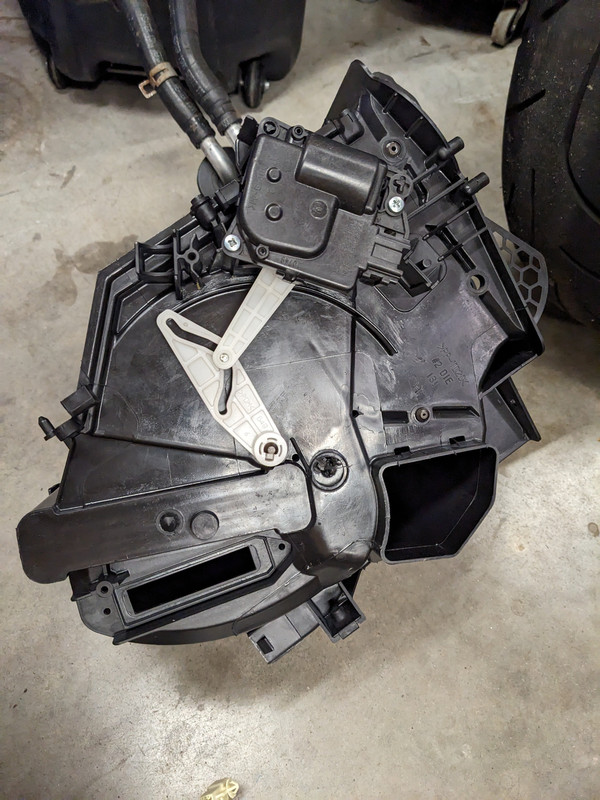
This cutout is in the MANUAL version. Mine, the AUTO climate control version is sealed. I don't know what's supposed to cover or plug in here, I don't have it. I'll take a look at the parts diagram.
I got the whole assembly put together with new foam sealant and installed.
Finished cleaning out the ducts. I used a rag and a long, flexible brush like a patch and a cleaning rod. Got them installed too.
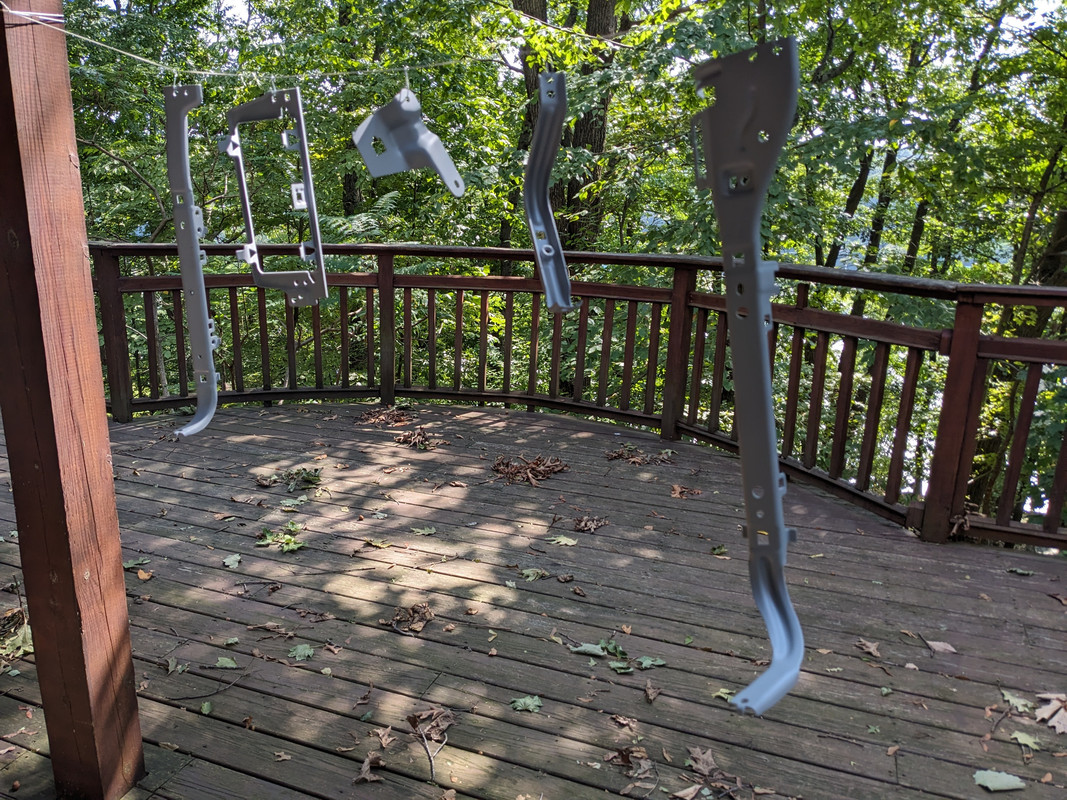
The steel bits are hanging off the frame rails like Christmas decorations. Maybe I'll put them in tomorrow. One of the braces that I took out early (to pull the steering column) was painted black and is in good shape. I was going to repaint it but laziness got the better of me and I'm just going to put it in as-is. There's no rust and it's not visible so it can be black. I started pulling the vents apart but I didn't get around to painting them today. It's a shame because the wind speed was zero and it was a perfect day to paint outside.
Happy holidays!
This cutout is in the MANUAL version. Mine, the AUTO climate control version is sealed. I don't know what's supposed to cover or plug in here, I don't have it. I'll take a look at the parts diagram.
I got the whole assembly put together with new foam sealant and installed.
Finished cleaning out the ducts. I used a rag and a long, flexible brush like a patch and a cleaning rod. Got them installed too.
The steel bits are hanging off the frame rails like Christmas decorations. Maybe I'll put them in tomorrow. One of the braces that I took out early (to pull the steering column) was painted black and is in good shape. I was going to repaint it but laziness got the better of me and I'm just going to put it in as-is. There's no rust and it's not visible so it can be black. I started pulling the vents apart but I didn't get around to painting them today. It's a shame because the wind speed was zero and it was a perfect day to paint outside.
Happy holidays!