
Pure Sine Wave 300w Inverter Install
 01-21-2009, 02:16 PM
#1
JK Enthusiast
Thread Starter
Join Date: Jul 2008
Location: Rohnert Park, CA
Posts: 458
Likes: 0
Received 0 Likes
on
0 Posts
Well I had some free time this week so I figured that I would do something a little productive. We purchased a new travel trailer a couple years ago and shortly there after I figured that I would put a decent inverter in it so in case we went out camping at the beach or somewhere that there were no hookups we would have a little electricity. Never happened lol. So I figured what the heck lets just put it in the jeep that way if we need electricity for what ever reason on a trip we will have it. So here goes.
Part 1;
Removed top screws on both face plates so that I could see what was inside.
Did not look too tough so removed the bottom two screws holding on face plate that holds the two outlets and the on/off switch. I then cut the wires that connected the outlets and the switches to the inverter.
I figured that I would use the faceplate as a template to cut holes in stock lower dash panel (I assumed wrong ) So I removed the plugs and switch from the face plate.
I went out and took lower dash cover off and went holy *^&%. There is no clearance behind here. So Back to the drawing boards. I started looking around on Quadratech for some ideas and came across the Daystar lower switch panel. I remembered seeing one at 4 Wheel Parts when I bought my upper panel, so I gave them a call to see if they still had it - They did!! So 40 mins later after running up to Santa Rosa I started again.
Using the face plate as a template I marked where I wanted the outlets and on/off switch to be and cut the holes accordingly.
After a little trimming of the face plate with my roto-zip, I installed the switch, outlets and face plate onto the trim panel and installed the panel.
Tomorrow morning I will continue with the install of the inverter itself which I think I will mount under the drivers seat, still deciding on that.
Part 1;
Removed top screws on both face plates so that I could see what was inside.
Did not look too tough so removed the bottom two screws holding on face plate that holds the two outlets and the on/off switch. I then cut the wires that connected the outlets and the switches to the inverter.
I figured that I would use the faceplate as a template to cut holes in stock lower dash panel (I assumed wrong
) So I removed the plugs and switch from the face plate.I went out and took lower dash cover off and went holy *^&%. There is no clearance behind here. So Back to the drawing boards. I started looking around on Quadratech for some ideas and came across the Daystar lower switch panel. I remembered seeing one at 4 Wheel Parts when I bought my upper panel, so I gave them a call to see if they still had it - They did!!
So 40 mins later after running up to Santa Rosa I started again. Using the face plate as a template I marked where I wanted the outlets and on/off switch to be and cut the holes accordingly.
After a little trimming of the face plate with my roto-zip, I installed the switch, outlets and face plate onto the trim panel and installed the panel.
Tomorrow morning I will continue with the install of the inverter itself which I think I will mount under the drivers seat, still deciding on that.
Last edited by FireRescue707; 01-21-2009 at 02:22 PM.
 01-21-2009, 02:33 PM
#2
JK Enthusiast
Thread Starter
Join Date: Jul 2008
Location: Rohnert Park, CA
Posts: 458
Likes: 0
Received 0 Likes
on
0 Posts
 01-21-2009, 02:50 PM
#3
JK Junkie
Join Date: Aug 2007
Location: Gilbert, AZ
Posts: 2,944
Likes: 0
Received 0 Likes
on
0 Posts
That's looks great, though I'd be careful placing it under the seat. If you ever go without top or doors and get a rain storm, under the seats is a collection point for water.
01-21-2009, 02:56 PM
#4
JK Enthusiast
Thread Starter
Join Date: Jul 2008
Location: Rohnert Park, CA
Posts: 458
Likes: 0
Received 0 Likes
on
0 Posts
01-21-2009, 03:13 PM
#5
JK Enthusiast
Join Date: Aug 2007
Location: Baton Rouge, LA
Posts: 335
Likes: 0
Received 0 Likes
on
0 Posts
I had the same idea awhile back, here is what I did. Click pictures for larger view.
You might not be able to put yours behind the glovebox like I did since your inverter looks lie it is larger.
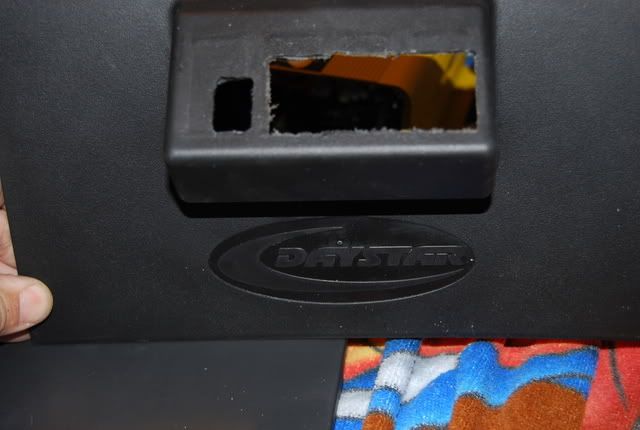
I added a small inverter to the dash using the daystar lower dash panel and remotely mounting it under the glove box.
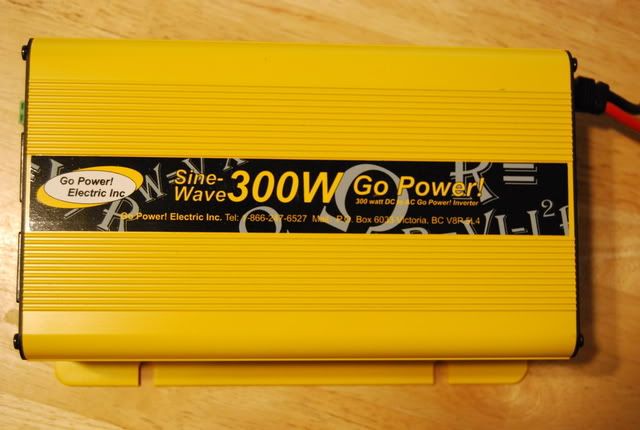
Here is the inverter I used

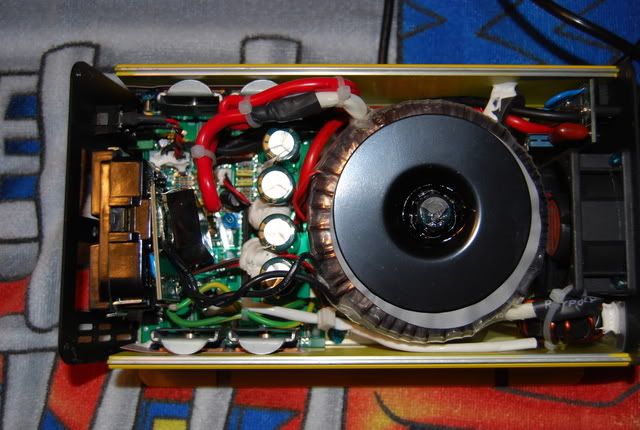
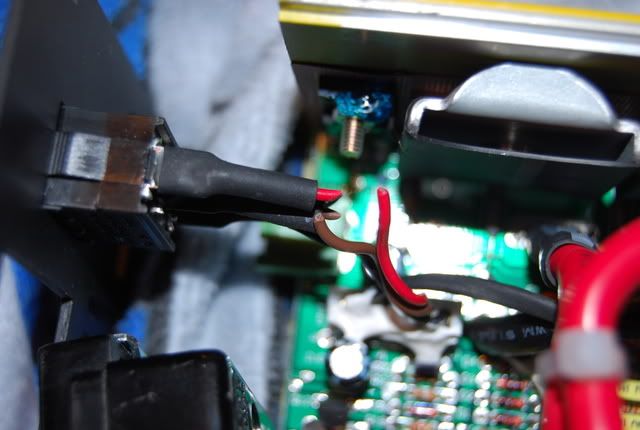
I removed the front panel to the inverter to access the wires to the outlets and power switch. (This inverter has two outlets but I decided to only remotely mount one.)

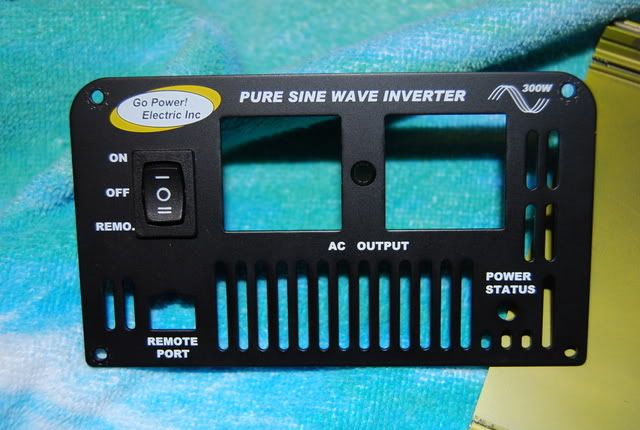
Here are the components removed from the inverter.

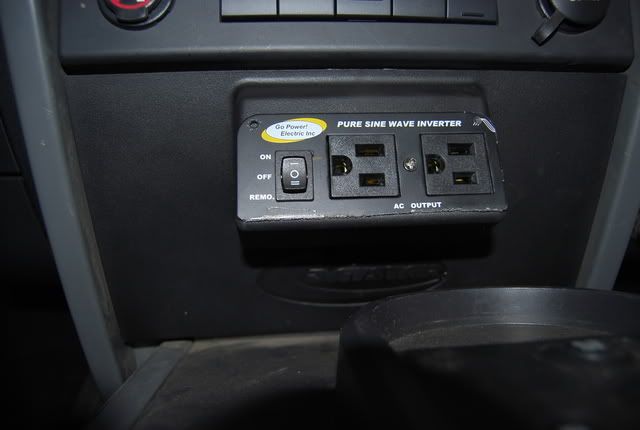
Finally, I traced the cutouts to fit the outlet and switch in the new lower panel. Wired it up directly to the battery (stole an idea I saw on here and ran wire by poking through foam in firewall in the passenger door frame.) It was kinda a pita to run the wires from where I mounted the inverter under the glove box to the new switch panel, but not that bad.

Finally here is the finished product. It works great for what I need it for, mostly charging my laptop or battery charger for the camera.

Im sure you could get more involved if you wanted and use both outlets and mount the LEDs above them as well but im lazy.....
Here is the inverter I used
I removed the front panel to the inverter to access the wires to the outlets and power switch. (This inverter has two outlets but I decided to only remotely mount one.)
Here are the components removed from the inverter.
Finally, I traced the cutouts to fit the outlet and switch in the new lower panel. Wired it up directly to the battery (stole an idea I saw on here and ran wire by poking through foam in firewall in the passenger door frame.) It was kinda a pita to run the wires from where I mounted the inverter under the glove box to the new switch panel, but not that bad.
Finally here is the finished product. It works great for what I need it for, mostly charging my laptop or battery charger for the camera.
Im sure you could get more involved if you wanted and use both outlets and mount the LEDs above them as well but im lazy.....
01-22-2009, 08:24 AM
#6
JK Enthusiast
Thread Starter
Join Date: Jul 2008
Location: Rohnert Park, CA
Posts: 458
Likes: 0
Received 0 Likes
on
0 Posts
Nope it wont fit there. And just realized that with the seat sensors it will not fit under seat either. So, What I have decided to do is to make it removable. I am going to get a 7 pin connector, like what is used on trailers and wire everything in. Then when I want to put it in I will just connect the plug and off we go. I will do more pics as I do the install though.
01-22-2009, 09:12 AM
#7
JK Junkie
Join Date: Aug 2007
Location: Gilbert, AZ
Posts: 2,944
Likes: 0
Received 0 Likes
on
0 Posts
This might be a crazy Idea and way off what you want to do, but what about attaching it to the back of the reat seat? There is a metal plate inder the fabric, so some self tapping screws should hold it tight, keeps it off the ground and prety much out of the way, even when the seat is dropped, it's flat, so really wont interfere. Don't know, just a thought
Trending Topics
01-22-2009, 09:35 AM
#8
JK Super Freak
Join Date: Jul 2007
Location: SoCal
Posts: 1,492
Likes: 0
Received 0 Likes
on
0 Posts
I never even thought about doing a permanent install of my inverter. What a great idea.  I think I'm going to do the same with mine now when I wire up my new lights. My CB is already under my glove box, so it may take a little creativity.
I think I'm going to do the same with mine now when I wire up my new lights. My CB is already under my glove box, so it may take a little creativity.